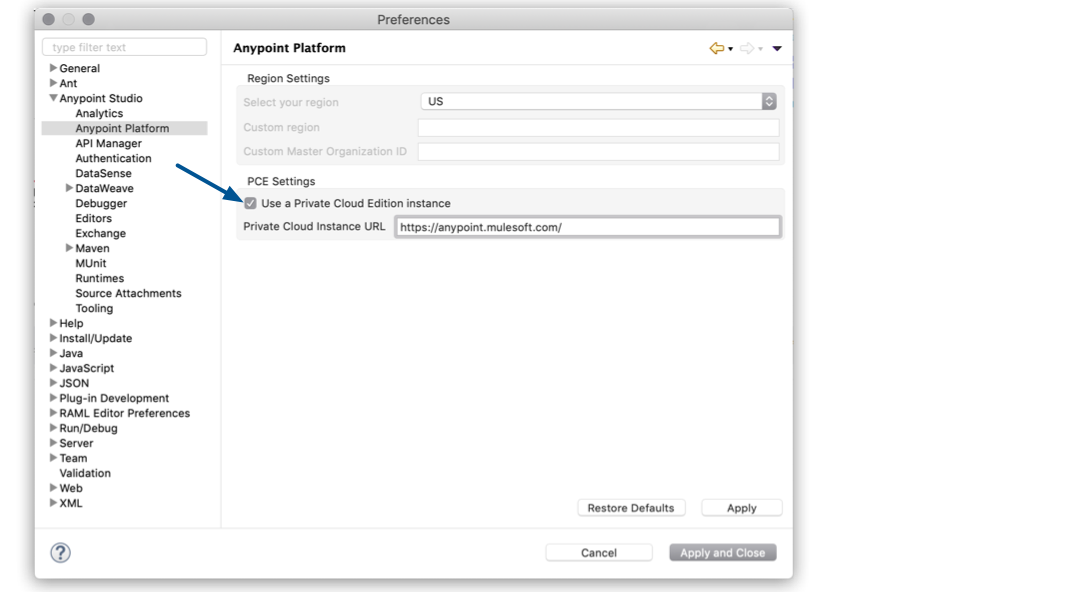
Configuring Anypoint Studio for Anypoint Platform PCE
Anypoint Studio 7.19 and later adds support for Anypoint Platform Private Cloud Edition (Anypoint Platform PCE) version 4.0.0.
Configure Your PCE Certificates into Studio
Integrate your Studio installation with the Anypoint Platform components in an Anypoint Platform PCE deployment.
Determine the Java Version and Location
-
In Studio, go to Anypoint Studio > Settings.
-
Select Java > Installed JRES.
-
Check the location of the JRE you use: Java 8 or Java 17.

Export the Certificate Using the Platform DNS
Run the following command by replacing <ANYPOINT_DNS> with your actual server URL:
keytool -printcert -sslserver <ANYPOINT_DNS>:443 -rfc > /tmp/PCE_Certificate.cer
For example:
keytool -printcert -sslserver $ANYPOINT_DNS:443 -rfc > /tmp/PCE_Certificate.cerStarting with Anypoint Studio 7.17, the default JDK version for Studio is Java 17. To ensure proper functionality, add the certificate to the default JDK version that Studio supports.
-
If you use an external JDK, add the certificate to the external JDK that you use with Studio.
-
If you use the default JDK Studio provides, add the certificate to the default JDK, regardless of the JDK version you use in your project. After installing the certificate, if you have Studio open, restart it.
Import the Certificate
Run the following command by replacing <JAVA_HOME> with the path to your embedded Java in Studio:
sudo keytool -import -trustcacerts -keystore <JAVA_HOME>/lib/security/cacerts -storepass changeit -file /tmp/PCE_Certificate.cer
For example, if you’re using the embedded Java 17 on macOS:
sudo keytool -import -trustcacerts -keystore /Applications/AnypointStudio.app/Contents/Eclipse/plugins/org.mule.tooling.jdk.macosx.x86_64_1.3.0/Contents/Home/jre/lib/security/cacerts -storepass changeit -file /tmp/PCE_Certificate.cer`For example, if you’re using the embedded Java 17 on Windows:
keytool -import -trustcacerts -keystore C:[...]\AnypointStudio\plugins\org.mule.tooling.jdk.win32.x86_64_1.3.3\lib\security\cacerts -storepass changeit -file /tmp/PCE_Certificate.cer (1)| 1 | The path changes with each Studio version because the JDK plugin version is included in the Windows path, and Studio includes a different JDK plugin version with each release. |

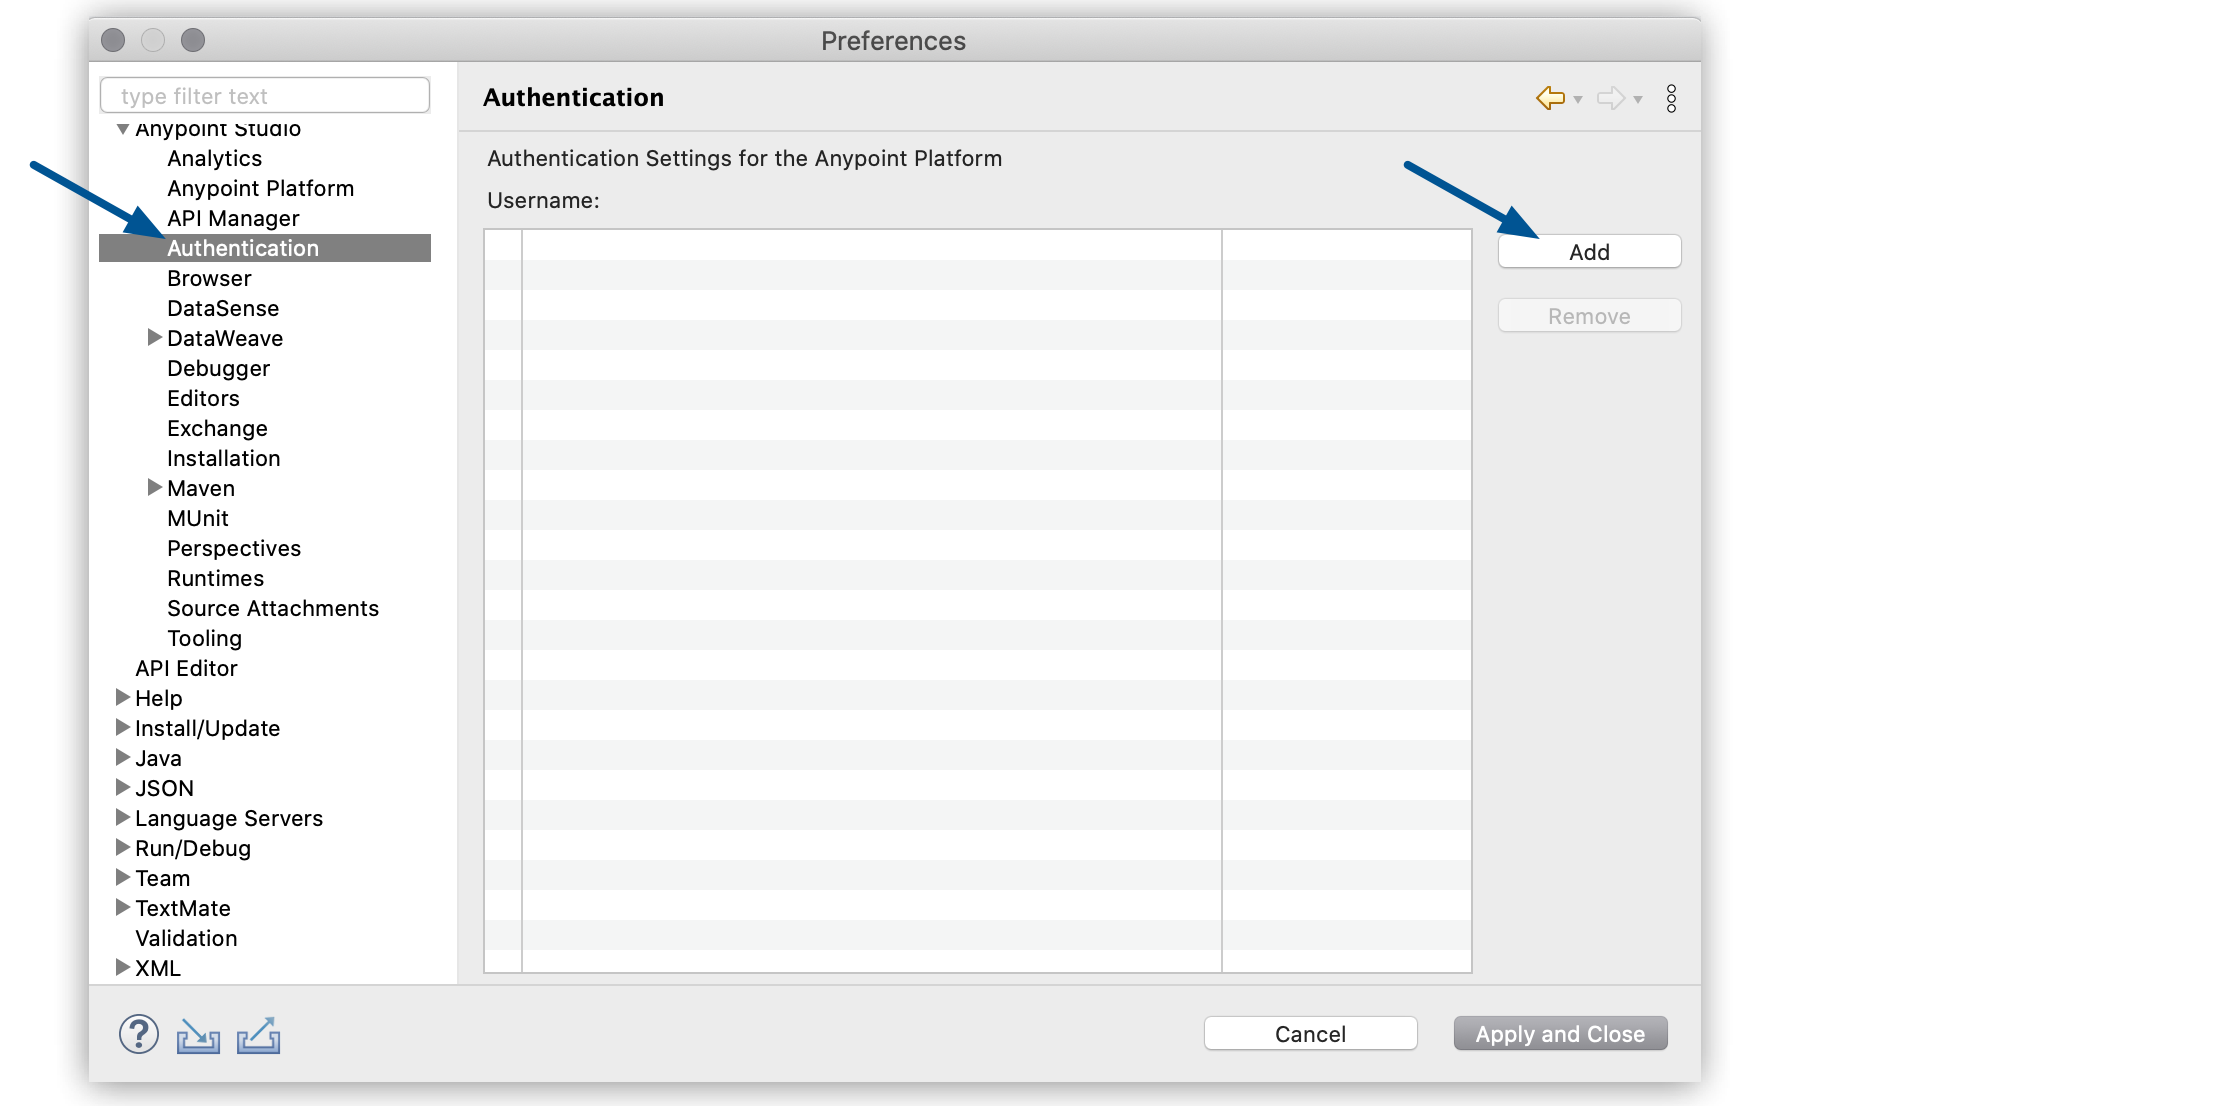
Configure your PCE User Login
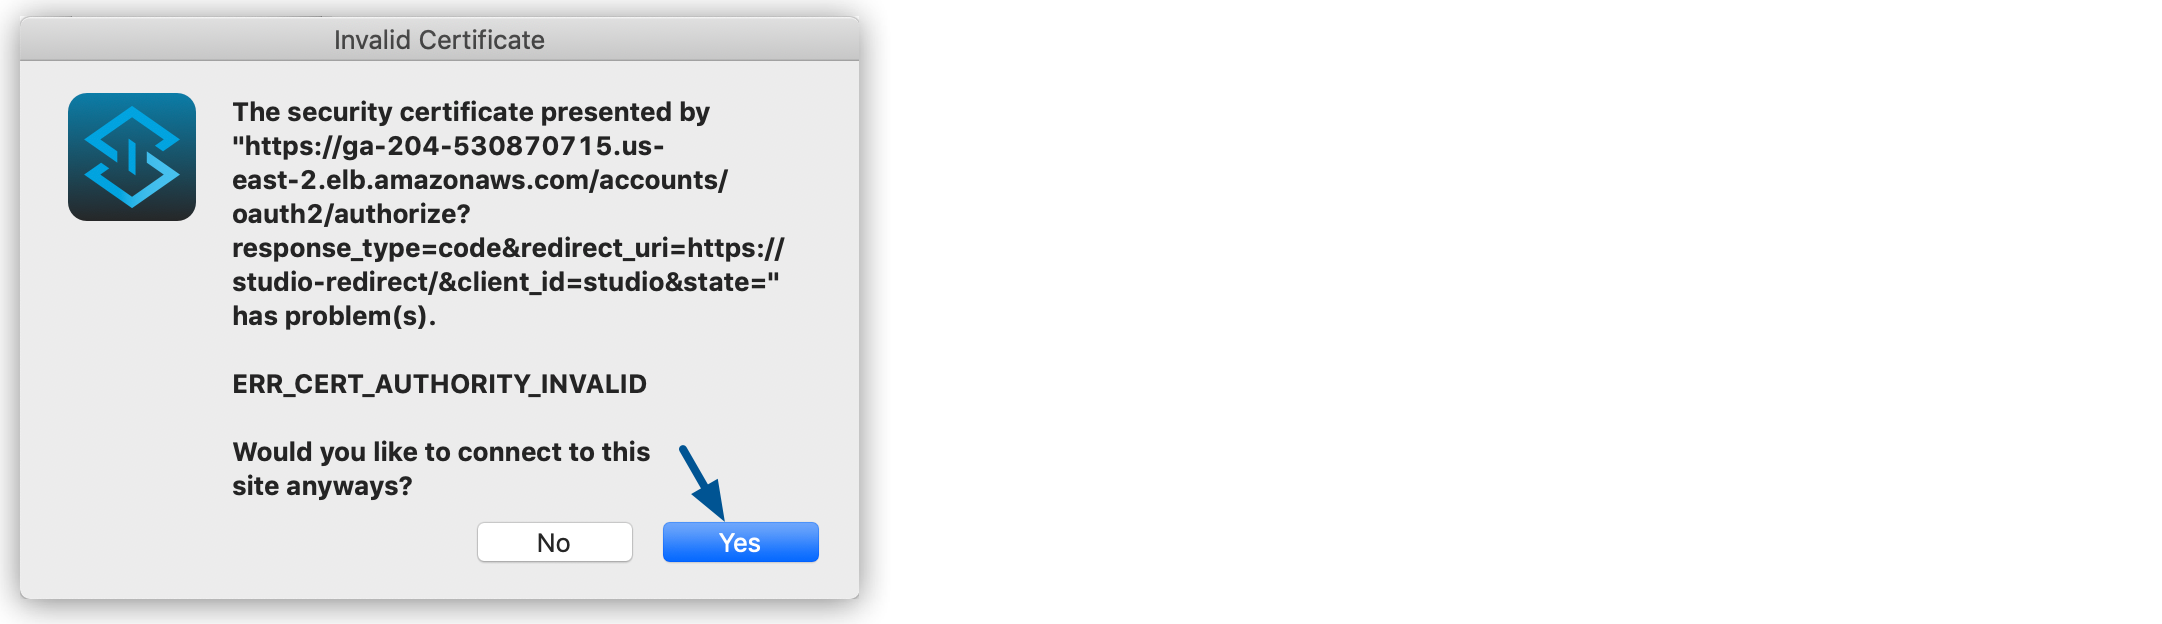
The first time you configure your user’s login, Studio asks you to confirm your PCE certificate:
-
Open the preferences view.
Either navigate to Anypoint Studio > Preferences… or presscmd + ,. -
Expand Anypoint Studio in the left navigation bar, select Authentication > Add.
-
Select Yes in the Invalid Certificate message that appears.
-
Add your PCE credentials and sign-in.
-
Select Apply and Close.
-
Restart Studio.