Configuring Connected Apps
The Connected Apps feature enables you to integrate external applications with Anypoint Platform by providing access to those applications without sharing your user credentials.
When you create a connected app, Access Management lists the ID and secret for the app. You use the ID and secret values when configuring Anypoint Connector for MQ (Anypoint MQ Connector) in a Mule app in Anypoint Studio.
To use connected apps with Anypoint MQ, you must use Anypoint MQ Connector 4.x for Mule 4. For information about upgrading, see Upgrading and Migrating Anypoint MQ Connector. If you are using Anypoint MQ Connector version 3.x or earlier, configure a client app instead. For information, see Configuring Client Apps.
For more information about connected apps, see Connected Apps in Anypoint Platform and Connected Apps for Developers.
Configure a Connected App in Access Management
To create a connected app with Anypoint MQ scopes:
-
In Anypoint Platform, go to Access Management.
-
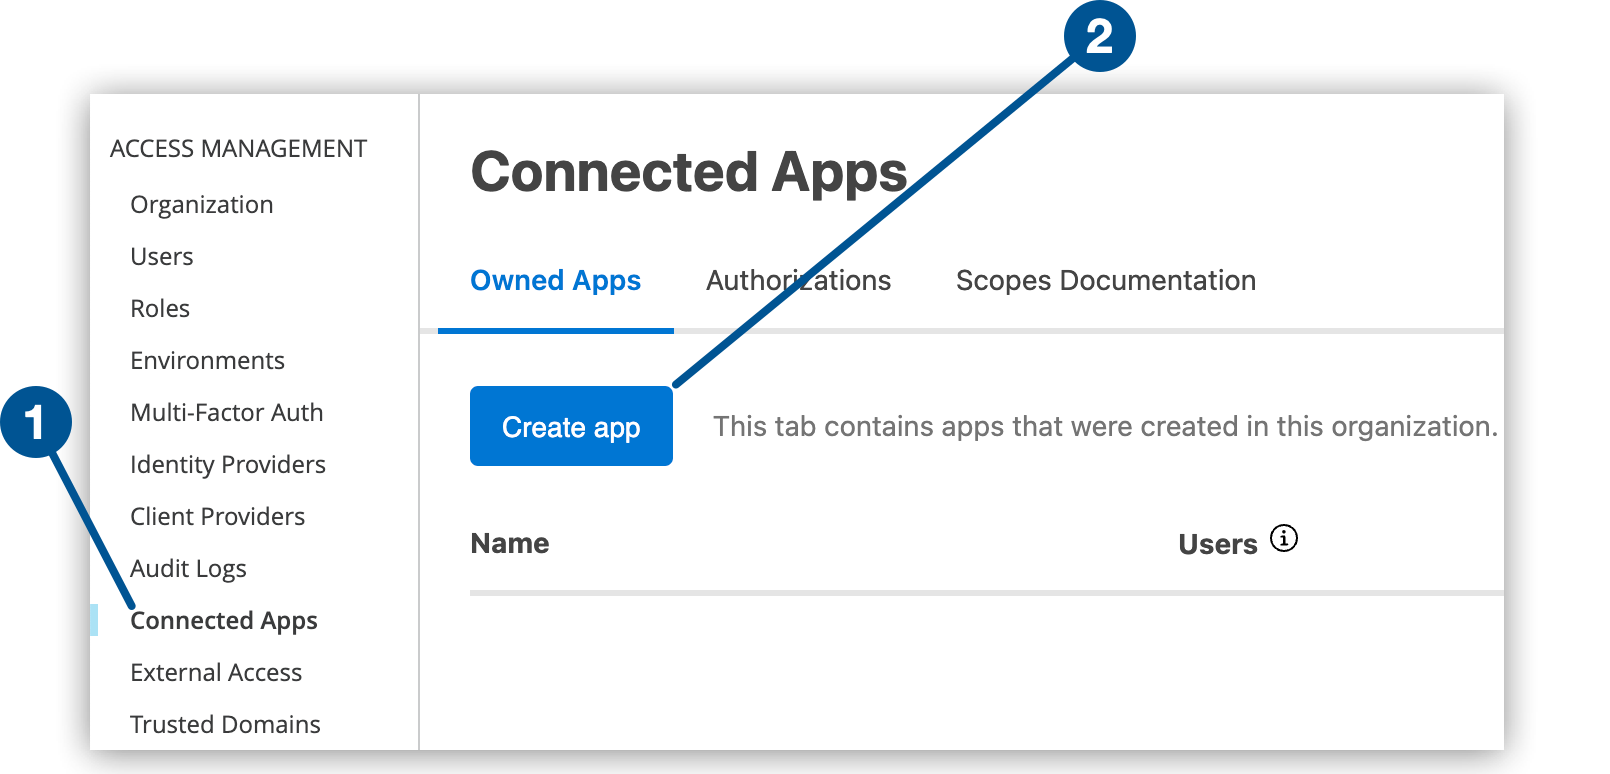
Click Connected Apps in the navigation pane.
-
Click Create app.

1 Connected Apps menu option displays and creates connected apps. 2 Create app button creates a connected app. -
Specify a name, such as
DemoApp1for the app. -
Select App acts on its own behalf (client credentials).
-
Click Add Scopes.
Scopes are roles with associated permissions, which determine which actions the app can perform within an organization and environment. See Anypoint MQ Scopes.

-
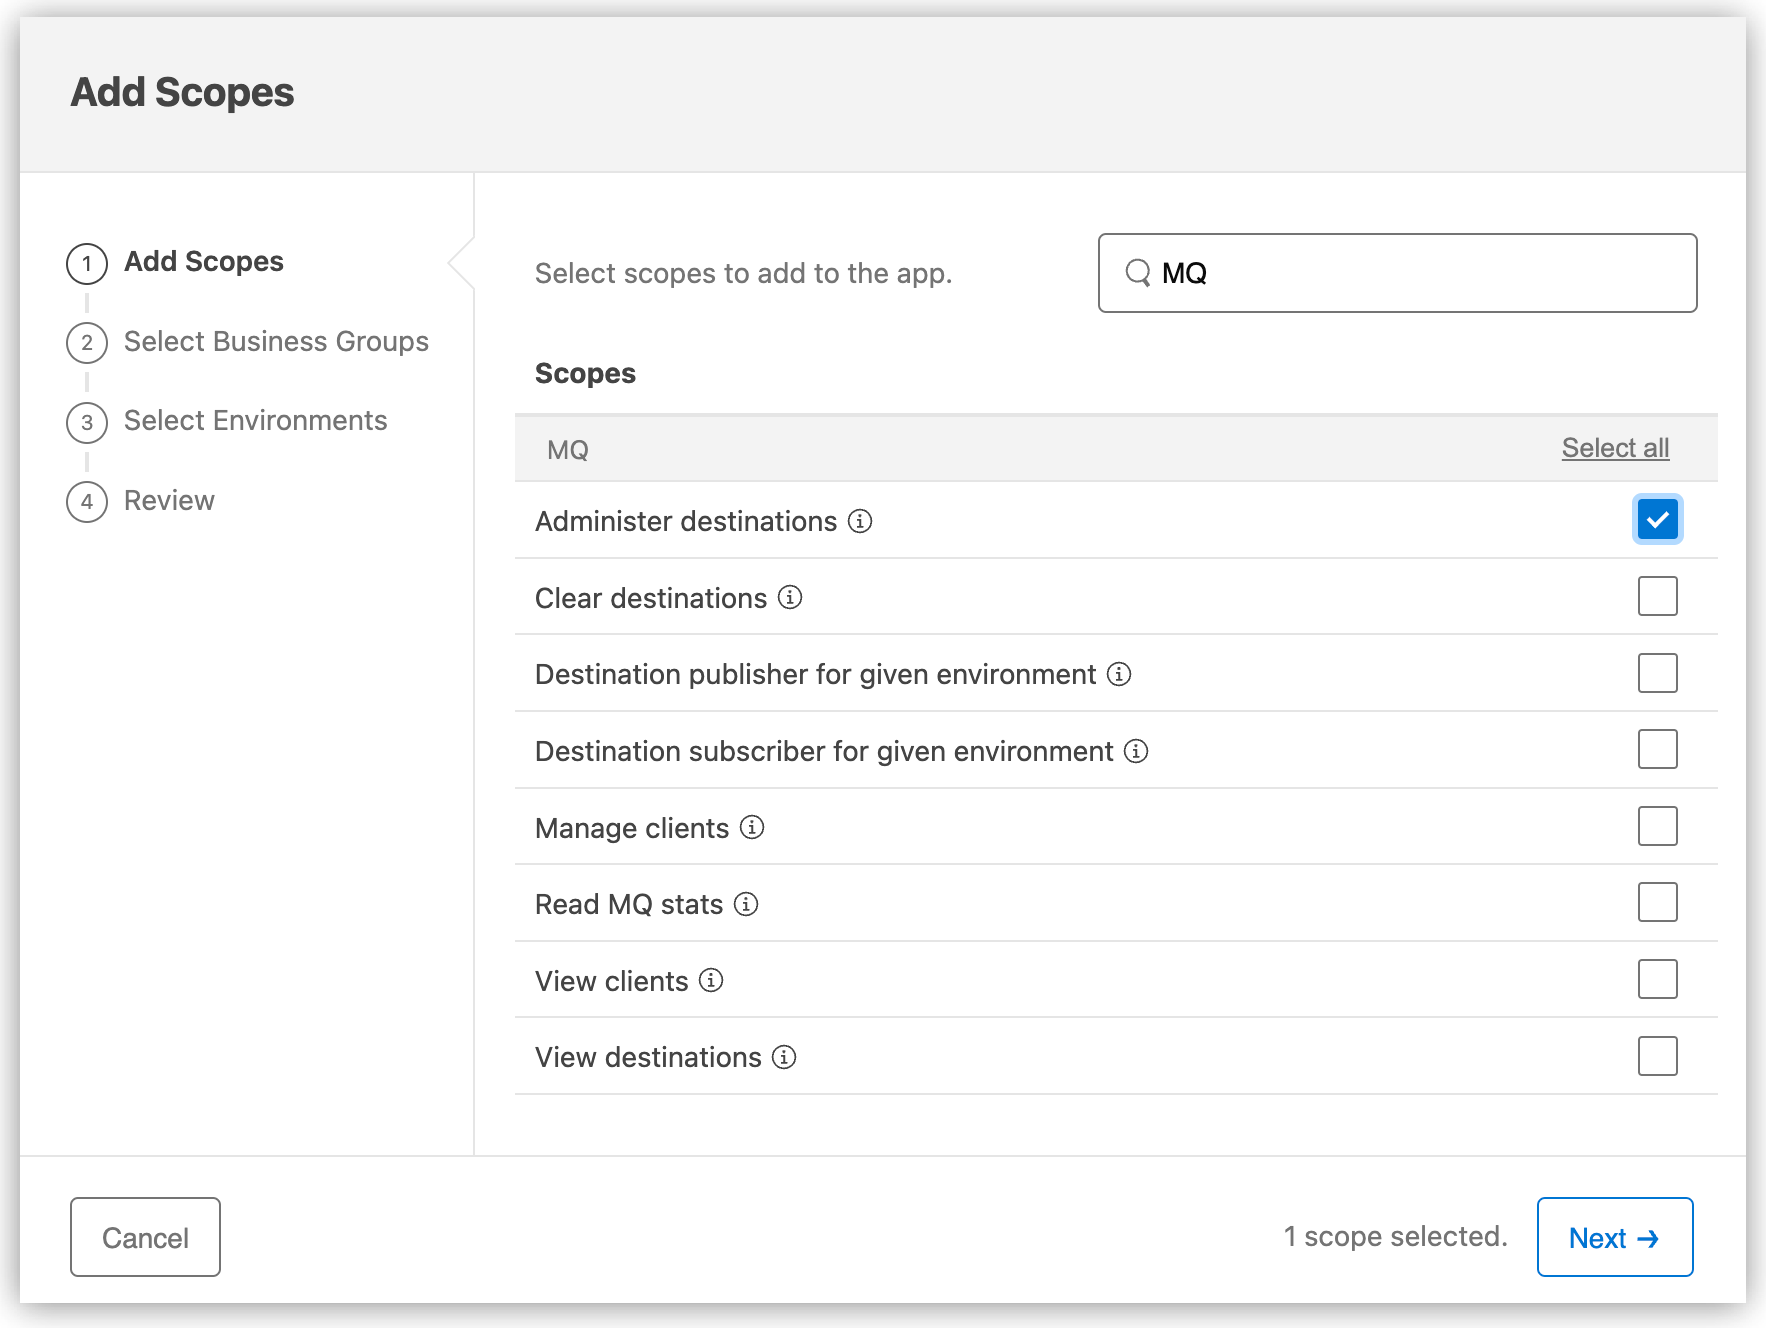
In Add Scopes window:
-
Enter "MQ" in the Filter scopes field.
-
Select the Anypoint MQ scopes to apply and click Next.
-
Select business groups to apply the scopes to and click Next.
-
Select the environments to apply the scopes to and click Next.
-
Click Add Scopes or Cancel to cancel your changes.
-
-
Click Save or Cancel to cancel your changes.
-
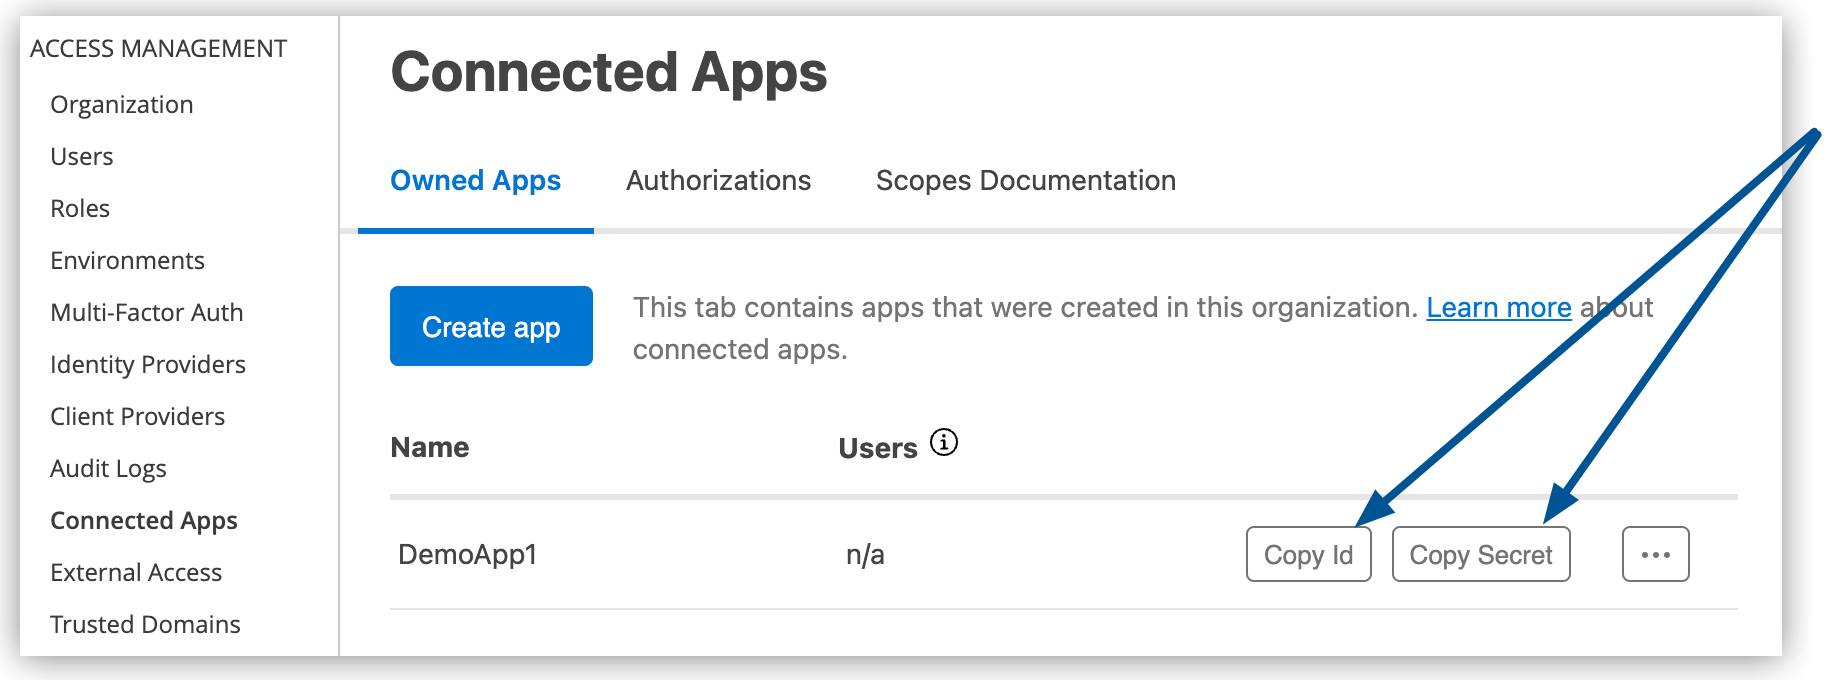
When you configure the connector, click Copy Id and Copy Secret to copy the ID and secret for the app you just created:

Use this ID and secret to get the access token required to authenticate with the Anypoint MQ API.
-
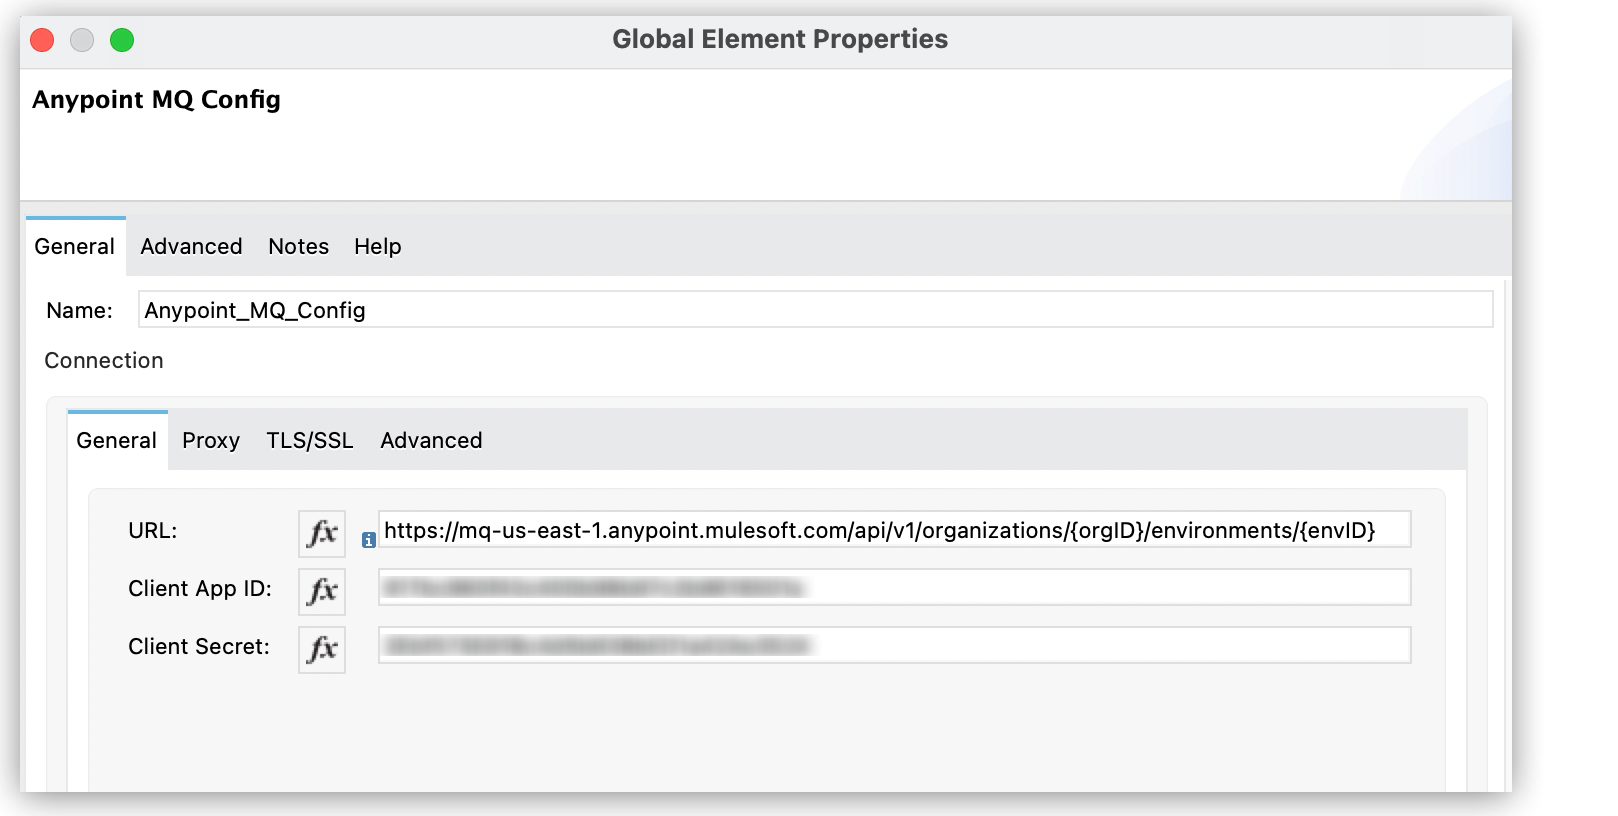
When you configure Anypoint MQ Connector in your Mule app, paste the ID and secret values in the Anypoint MQ Config window in Studio:

Don’t share the ID and secret pair with multiple apps.
For more information, see Create and Connect a Mule 4 App to Anypoint MQ in Anypoint Studio 7 in the Anypoint MQ tutorial.
For information about getting the access token for connected apps, see the Connected App Examples in the Access Management API.
The /authorize endpoints in the Anypoint MQ Admin API and Anypoint MQ Broker API do not support connected apps.
You can’t use tokens obtained from those endpoints to access a connected app.
Configure a Connected App Using the API
For information about configuring a connected app with the API, see How to create connected apps using the API.
Anypoint MQ Scopes
Anypoint MQ scopes apply to all destinations in the given organization and environment.
The Anypoint MQ scopes are:
| Scope in UI | Scope in API | Description |
|---|---|---|
Administer destinations |
|
|
Clear destinations |
|
|
Destination subscriber for given environment |
|
|
Destination publisher for given environment |
|
|
Manage clients |
|
|
Read MQ stats |
|
View organization and environment statistics. |
View clients |
|
View all client apps, including client app IDs and client secrets for each client app. |
View destinations |
|
|


