
Sending Messages to Multiple Queues Using Message Exchanges
You can send messages to multiple standard or FIFO queues simultaneously by binding those queues to a message exchange.
By default, a message exchange sends each message to every bound queue. You can instead route messages to specific bound queues by creating intelligent message-routing rules on the bindings. For information, see Route Messages by Configuring Rules on Message Exchanges.
The maximum size of a message sent to a message exchange is 10 MB. You can bind a maximum of 450 queues to a message exchange. You can bind a maximum of 25 queues to an exchange with message routing rules defined. If an exchange has more than 25 queue bindings, you can’t use intelligent message routing.
Before creating a message exchange, create one or more queues. For information, see Create a Queue.
|
Message exchanges support only the Publish operation; they don’t support the Consume operation. Anypoint MQ forwards messages published to a message exchange to the bound queues that are eligible under the binding configuration, and the app consumes from the queue. If an app attempts to consume from a message exchange,
the Anypoint MQ REST API throws this error:
|
Create a Message Exchange
To create a message exchange:
-
Sign in to Anypoint Platform.
-
Click MQ from the navigation menu or the main Anypoint Platform screen.
-
Click Destinations.
-
Click the Add icon to display the menu:
-
Select Exchange or FIFO Exchange.
For Queue or FIFO Queue, see Configuring and Using Queues.
-
Name the message exchange in the Create Exchange or Create FIFO Exchange page.
Message exchange names can contain up to 127 alphanumeric (a-z, A-Z, 0-9) and punctuation (. -) characters. They can’t contain spaces or other characters.
-
Click the checkboxes to bind queues to this message exchange:
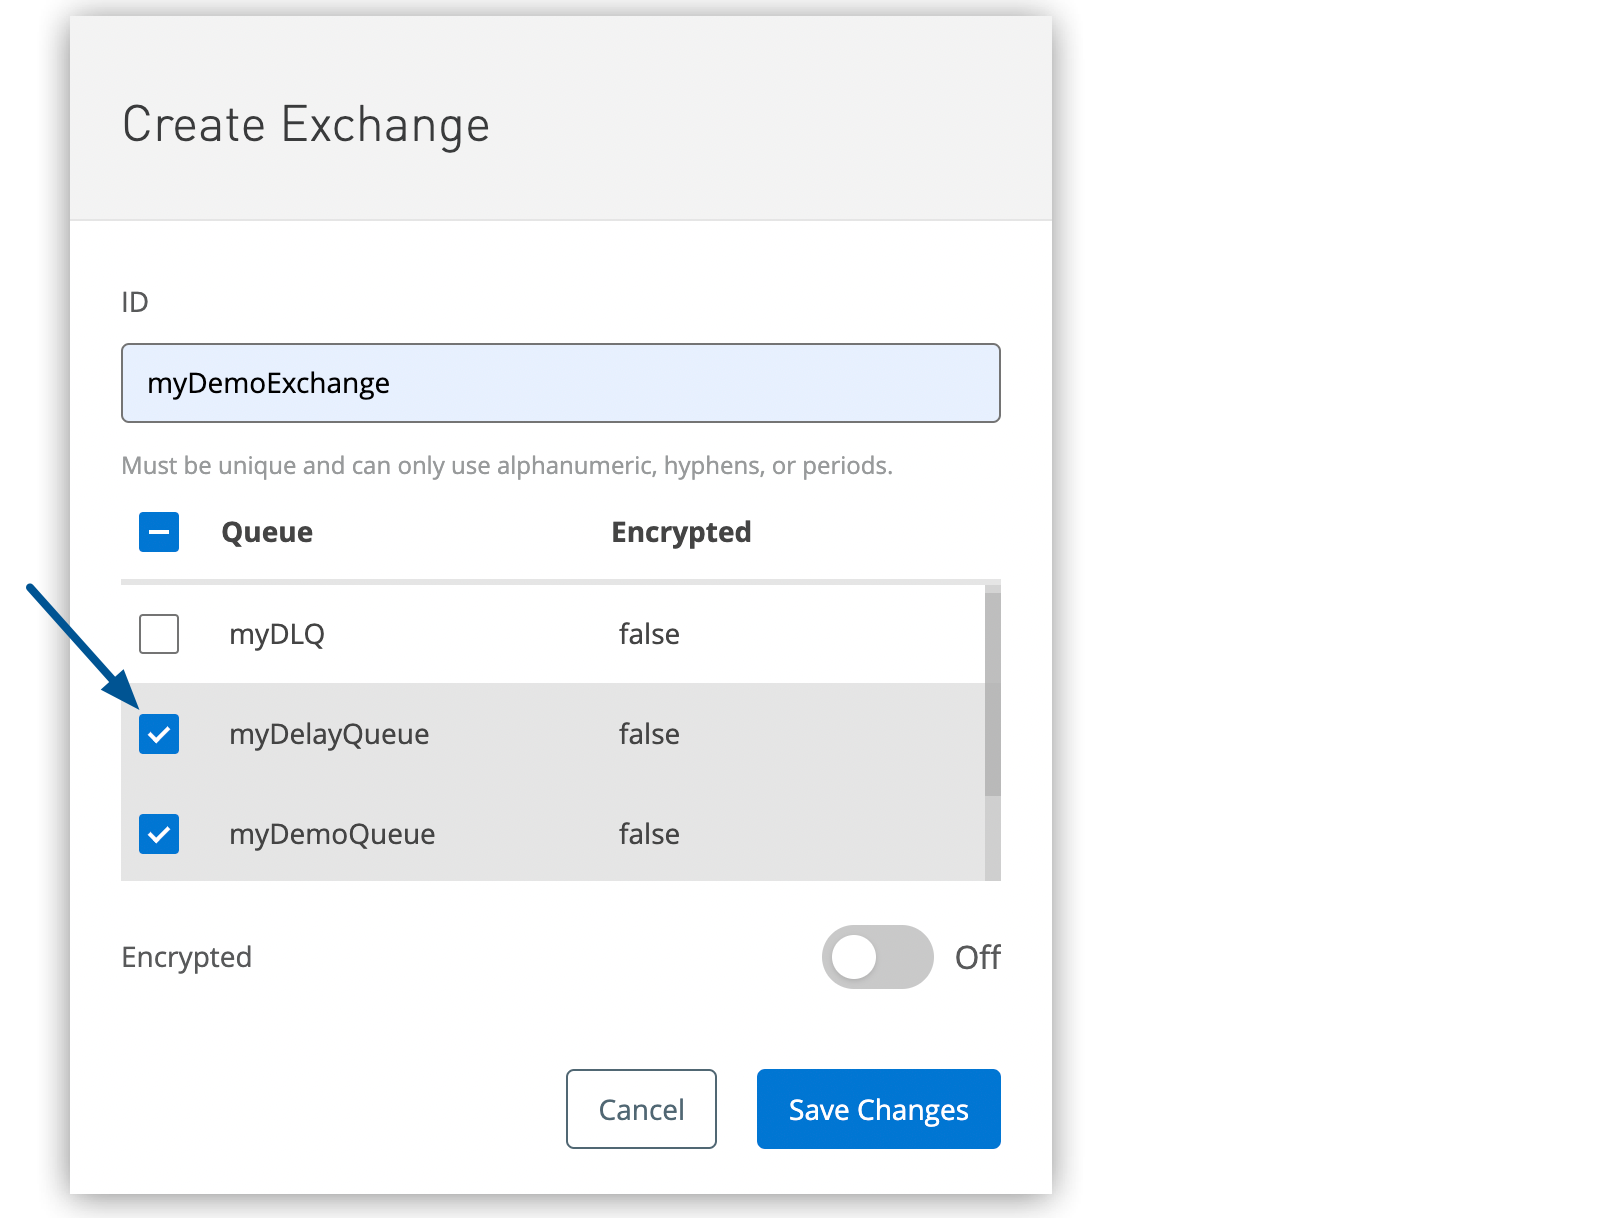
You can bind only standard queues to an exchange and only FIFO queues to a FIFO exchange. -
Click Save Changes.
-
In the Destinations page, click the message exchange type for the new exchange to display the bound queues in the details pane:
Bind a Queue to a Message Exchange
| You can bind a maximum of 450 queues to a message exchange. You can bind a maximum of 25 queues to an exchange with message routing rules defined. If an exchange has more than 25 queue bindings, you can’t use intelligent message routing. |
To bind a queue to a message exchange:
-
In Anypoint Platform > MQ, click Destinations in the navigation menu.
-
Click the message exchange ID to display the Exchange Settings page:
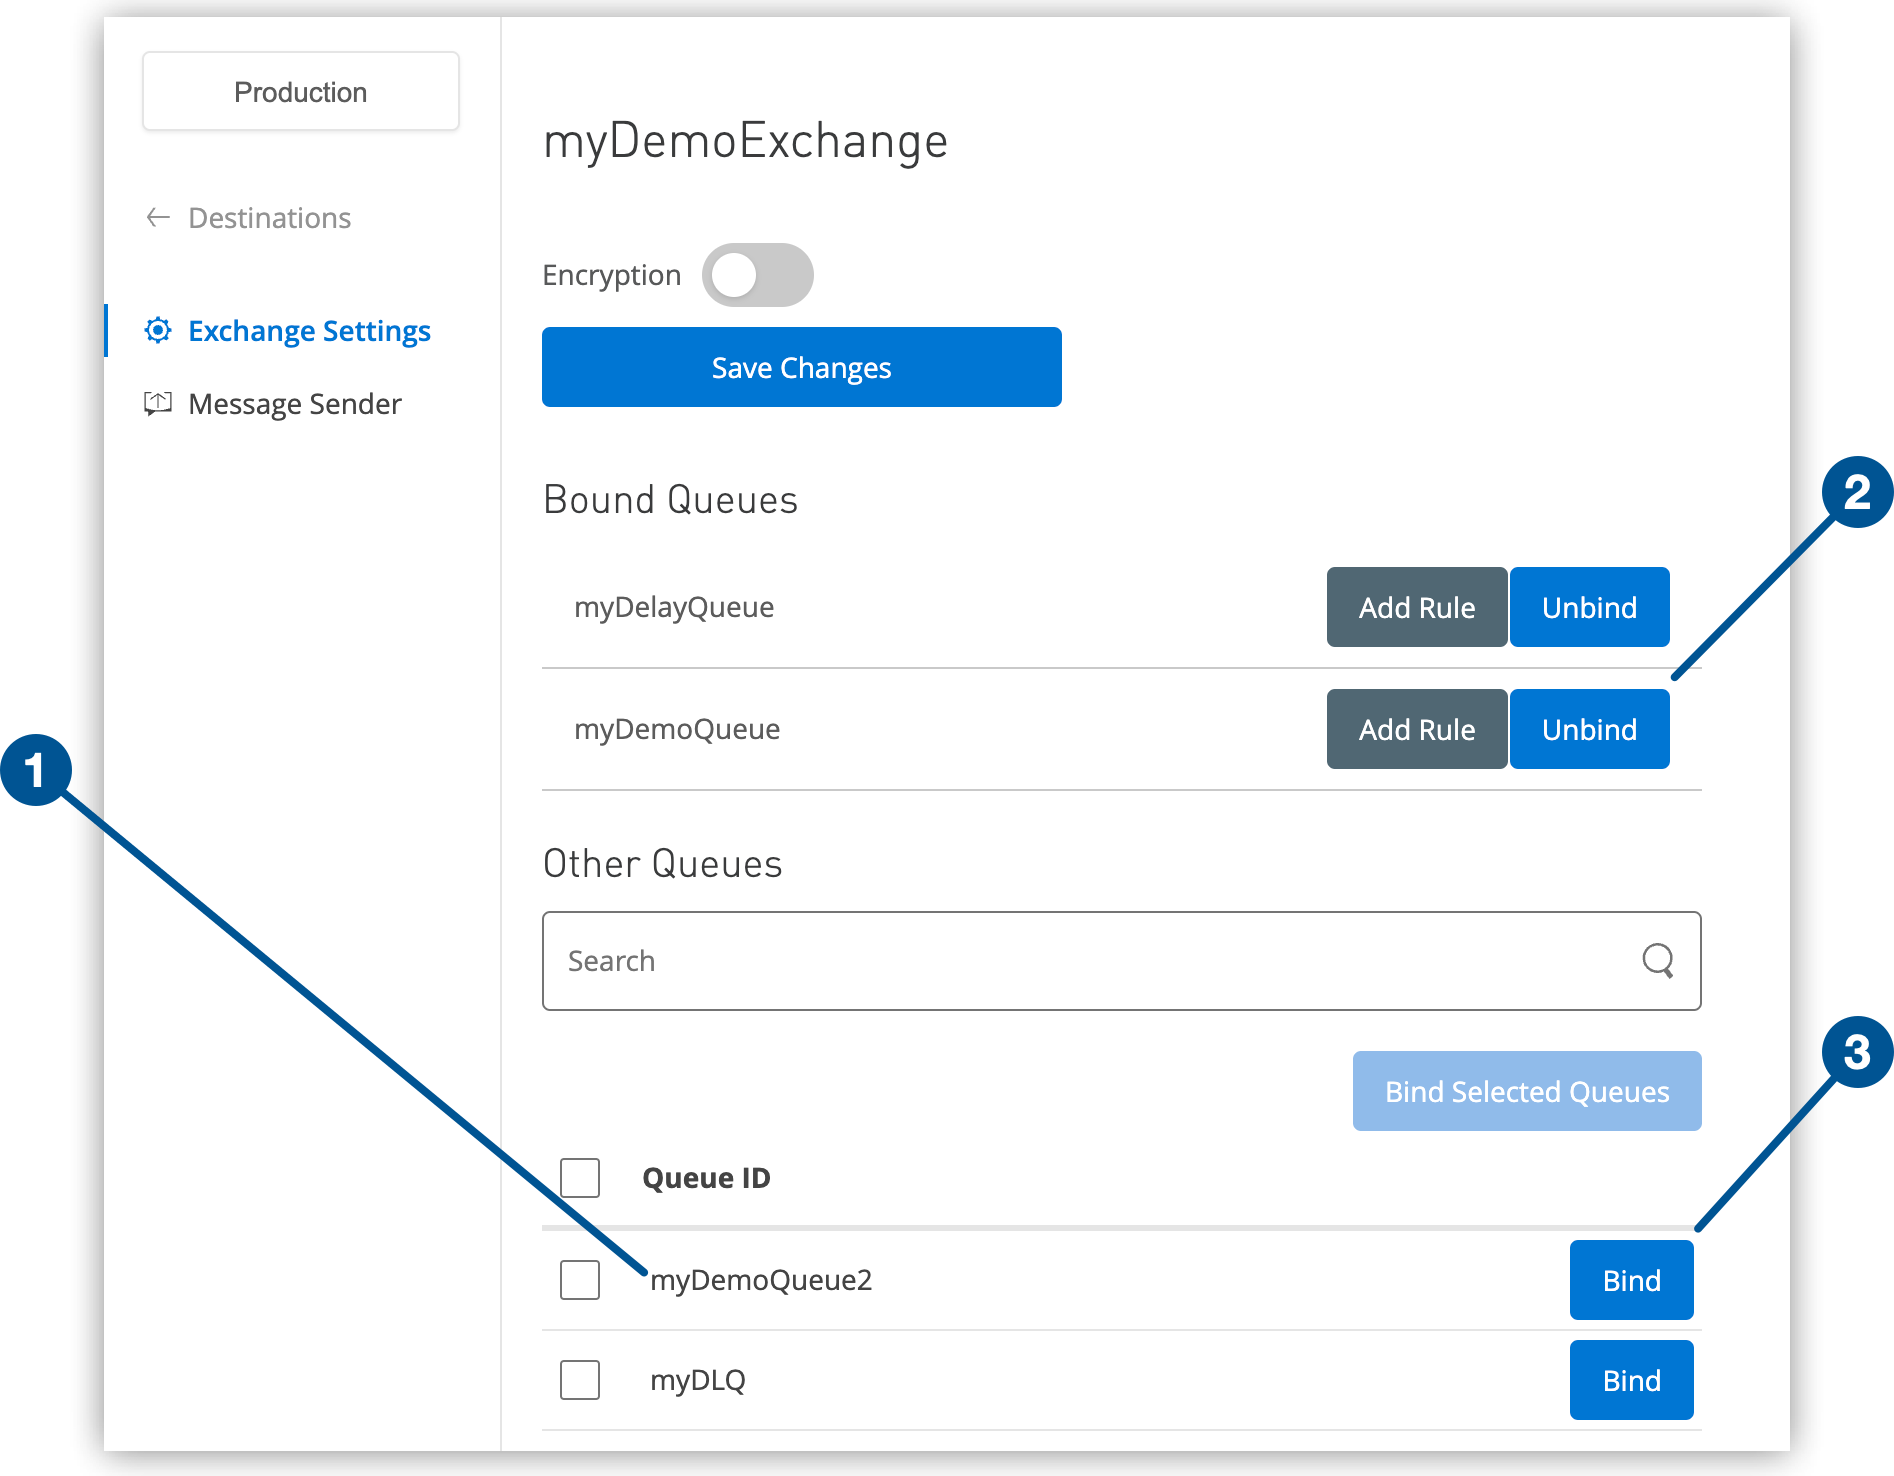
The page displays only standard queues for a message exchange and only FIFO queues for a FIFO exchange. -
In the settings page, click Bind or Unbind for each single queue you want to bind to or unbind from the message exchange.
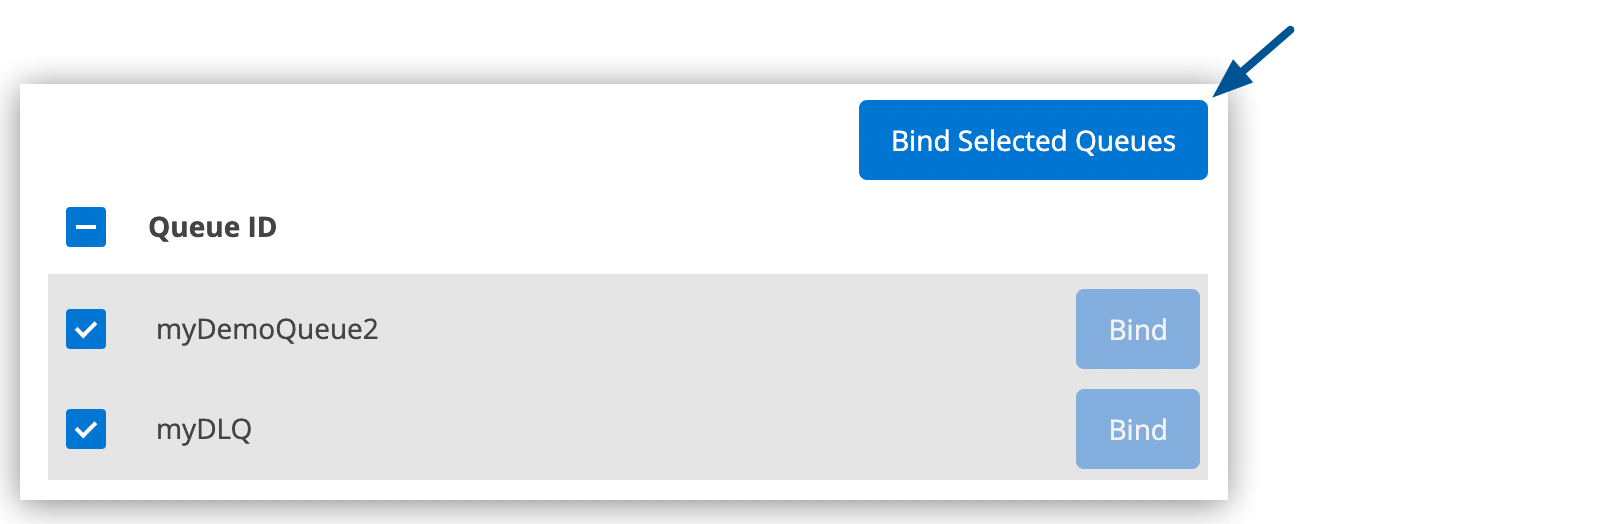
To select multiple queues to bind to the exchange, select the checkboxes and click the Bind Selected Queues button that appears:
Send a Message to a Message Exchange
Sending a message to a message exchange is similar to sending a message to a queue. The exchange evaluates its bindings and sends the message to each eligible bound queue. The maximum size for a message sent to a message exchange is 10 MB.
| A successful publish operation confirms that Anypoint MQ accepted the message for the exchange. It doesn’t confirm that a routing rule matched or that a bound queue received the message. If no bound queue receives the message, redelivery and dead-letter queue (DLQ) settings configured on queues don’t apply because the message never enters a queue. |
For details about eligible bindings and unmatched messages, see Route Messages by Configuring Rules on Message Exchanges.
If the payload contains any format except text (such as CSV, HTML, JSON, and XML), Anypoint MQ converts it to a string before sending, which increases the payload size.
This conversion might result in the payload exceeding the maximum payload size of 10 MB and causing a Payload too large error.
To send a message to a message exchange:
-
In Anypoint Platform > MQ, click Destinations in the navigation menu.
-
Click the message exchange ID to display the Exchange Settings page.
-
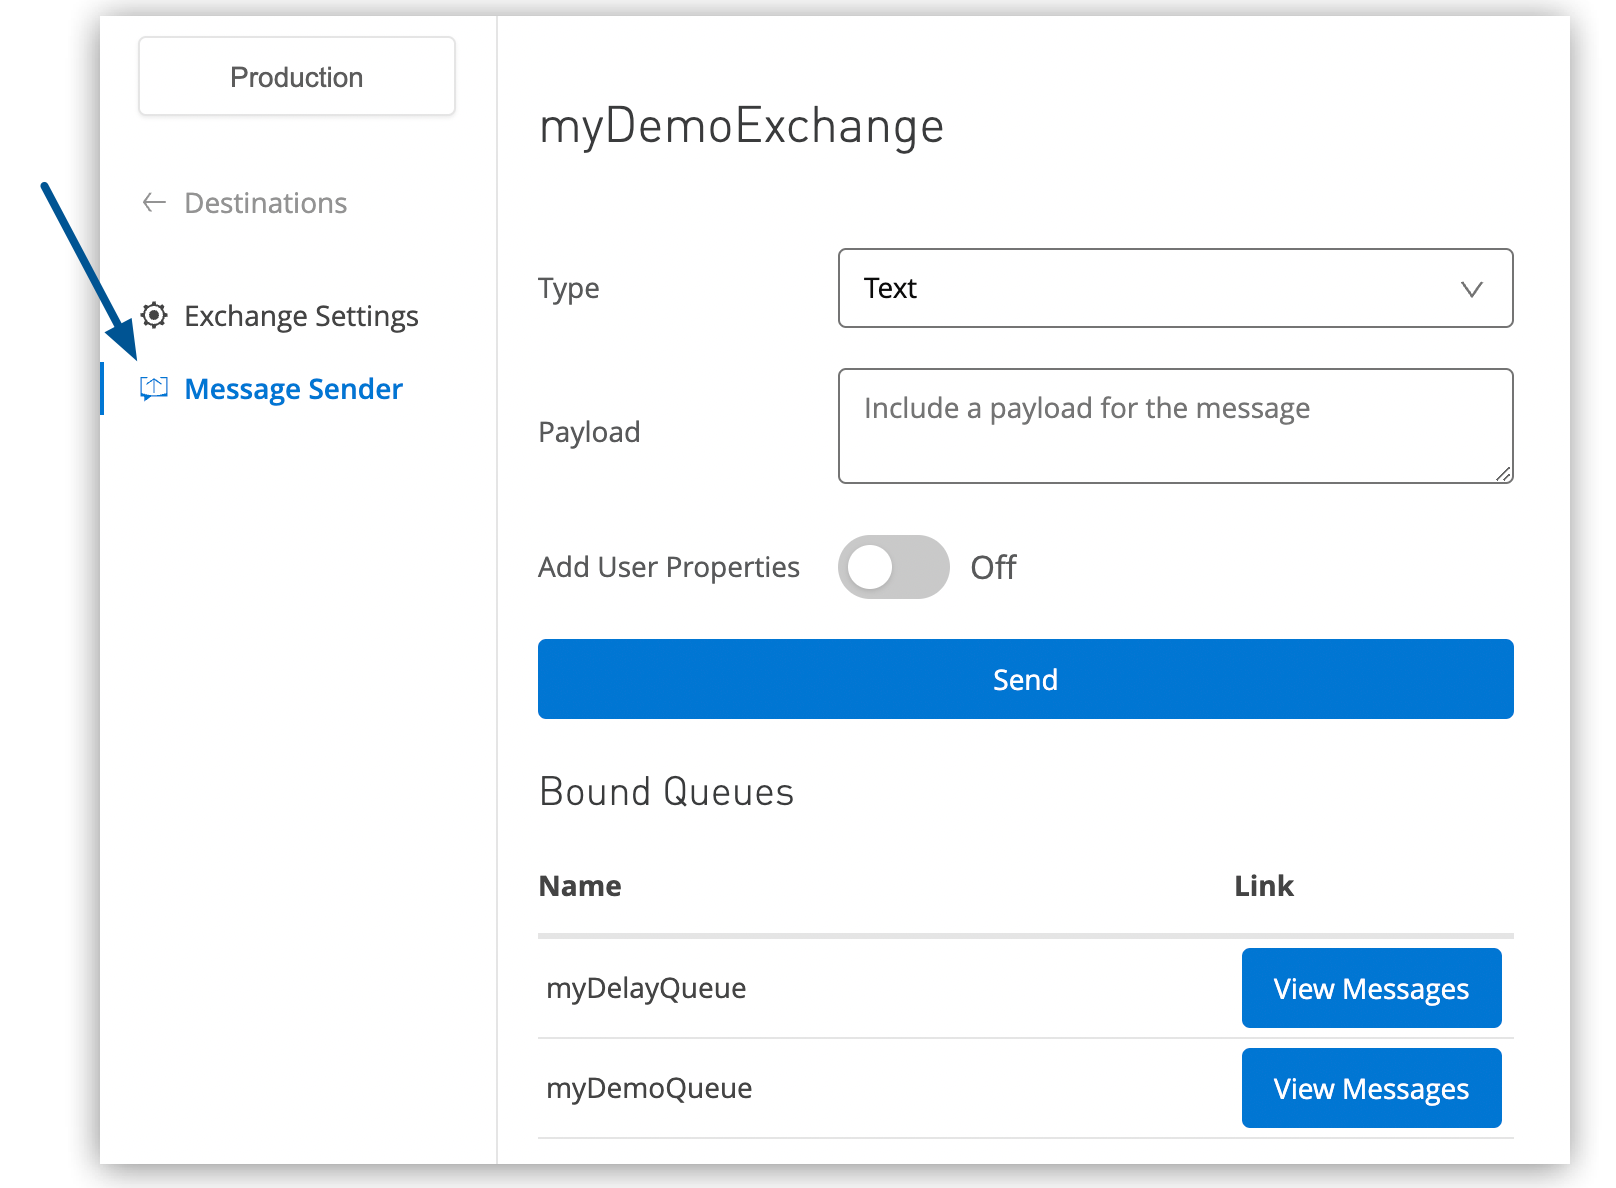
In the settings page, click Message Sender in the navigation menu:
-
Leave the Type field set to Text.
-
Enter text in the Payload field, such as
Hello Queues from myMessageExchange. -
If you want, toggle Add User Properties, specify the property name-value pairs to send, and click Add Property:
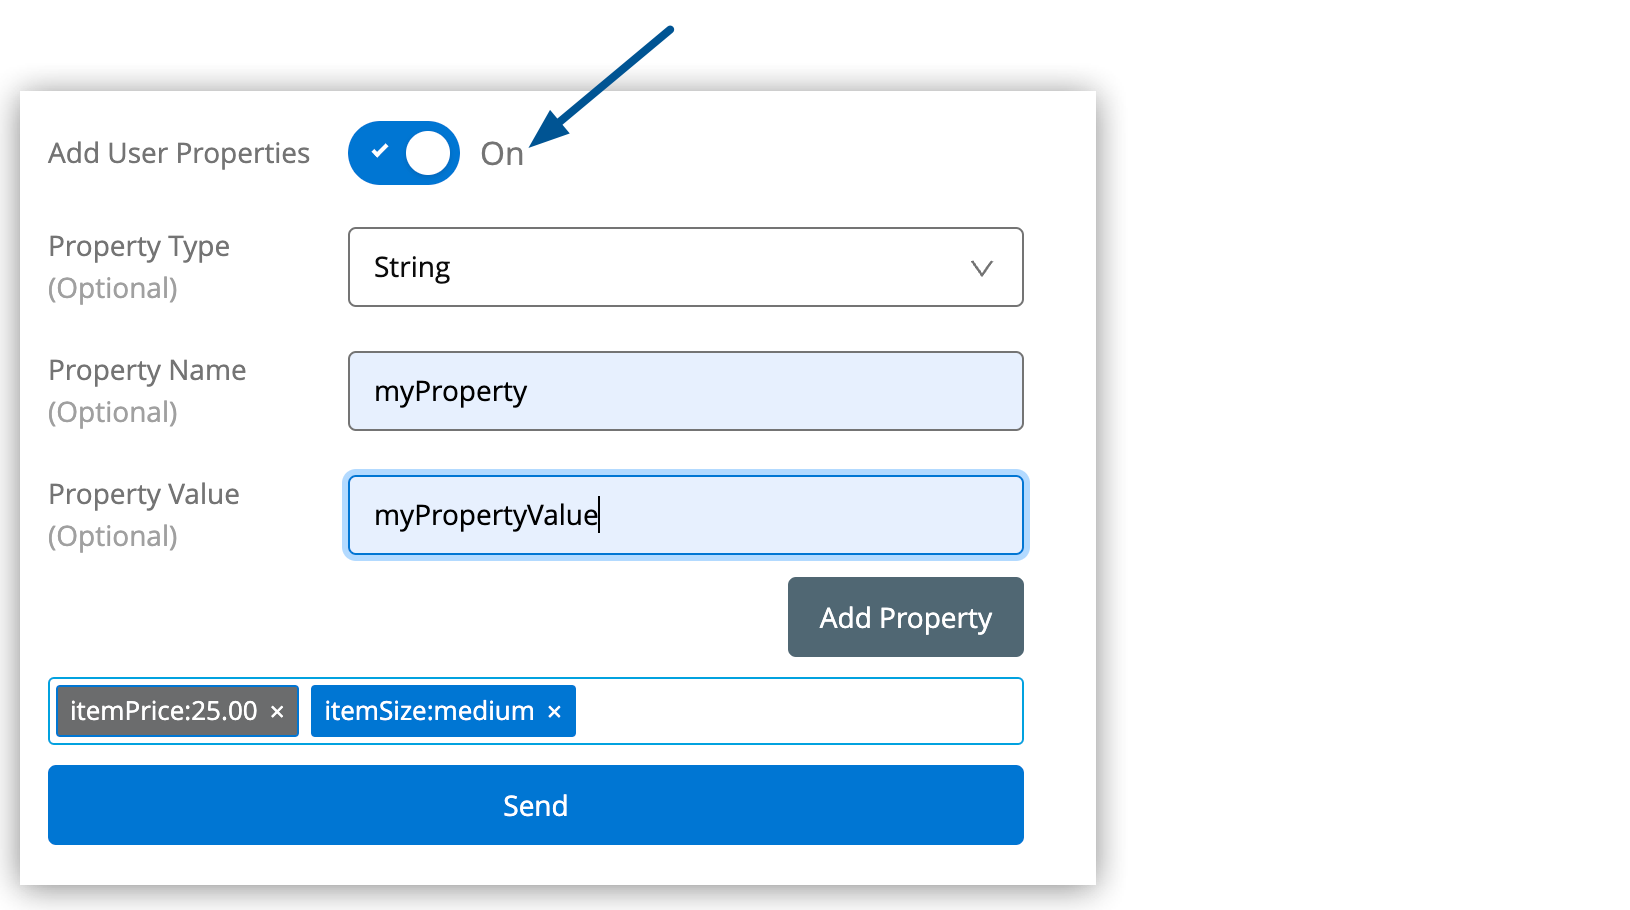
-
Click Send.
-
Click View Messages for a queue that is bound to the exchange to view the queue with the Message Browser.
You also send JSON content or comma-separated values (CSV) in the payload by changing the message Type value. See Send a JSON Message to a Queue and Send a CSV Message to a Queue.
Delete a Message Exchange
If a message exchange is no longer needed, you can delete it. All queue bindings for the deleted exchange queue are lost. Clients can’t publish or subscribe to the exchange.
To delete a message exchange:
-
In Anypoint Platform > MQ, click Destinations in the navigation menu.
-
In the Destinations page, click the message exchange type for the exchange to display the details pane.
-
Click the Delete icon:
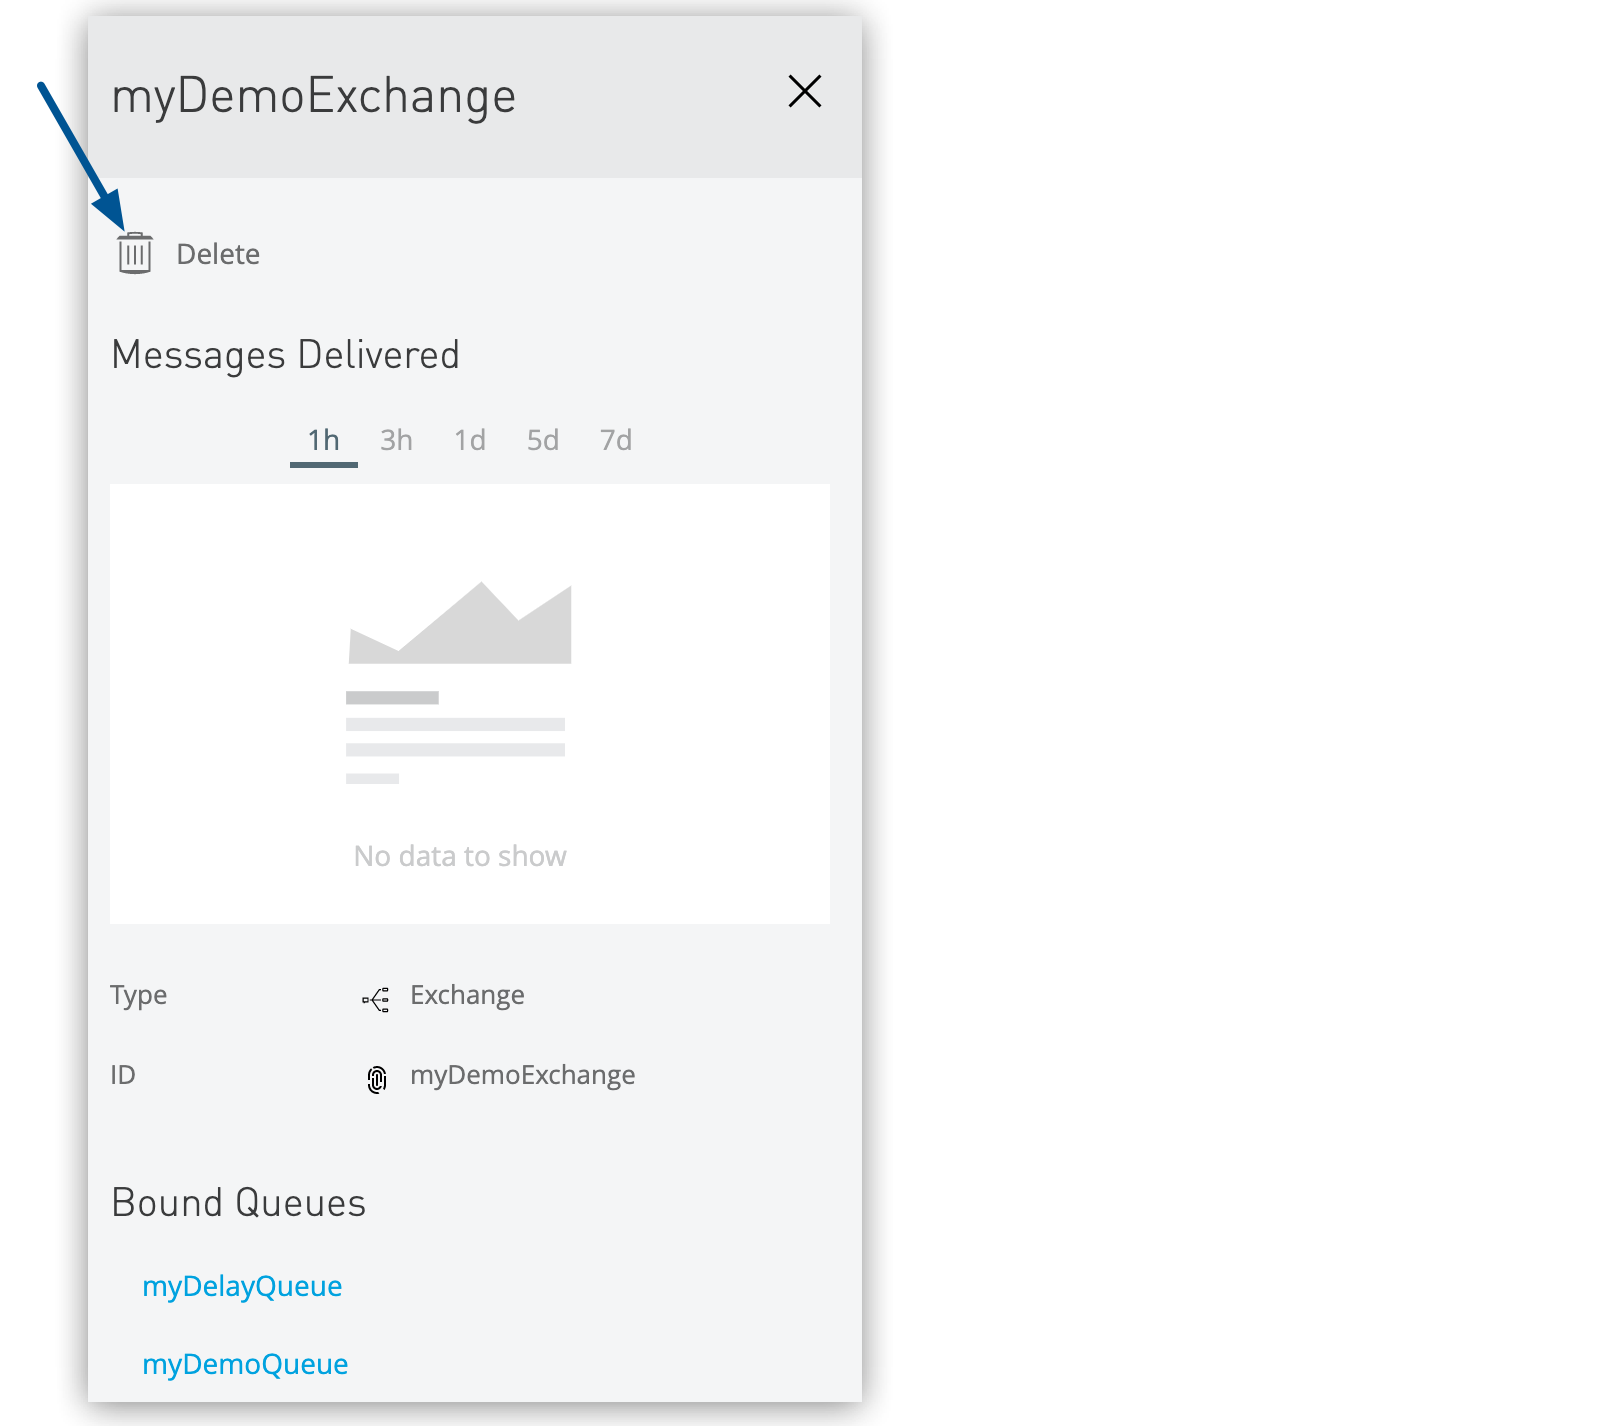
-
In the Delete Exchange window, select the checkbox to confirm and click Delete Exchange.