Step 5: Build the Automation from the BPMN diagram
Now that the BPMN diagram for the process to automate is ready, it’s time to use RPA Builder to specify each of the actions the RPA bot executes when it runs this process. Because you used RPA Recorder to create the diagram, each existing task already contains the action steps for the bot to execute. During this step, you add a new task to confirm that the sign-up process was successful by reading the confirmation text on the screen.
Before you start defining the actions, configure RPA Builder to connect with your RPA Manager repository so you can import the designs and re-upload them after the build phase is finished.
Step 5.1: Connect to the RPA Manager Repository
To connect RPA Builder with your RPA Manager repository:
-
Open RPA Builder.
-
If it is your first time opening RPA Builder, the connection dialog shows automatically. If the dialog does not show:
-
In the top menu bar, go to Options > Repository.
-
-
Provide the required information:
-
RPA Manager Address: The URL of the RPA Manager instance you want to connect to
For example: myorganization.rpa.mulesoft.com.
-
User Name: Your RPA Manager account user name
-
Password: Your RPA Manager account password
-
-
Click Test Connection
-
If the test fails, ensure the provided information is correct and try again
-
If the test succeeds, click OK to close the message
-
-
Click OK.
Step 5.2: Import the Project From the RPA Manager Repository
To import the project from the RPA Manager repository:
-
In RPA Builder, click the Repository Explorer panel.
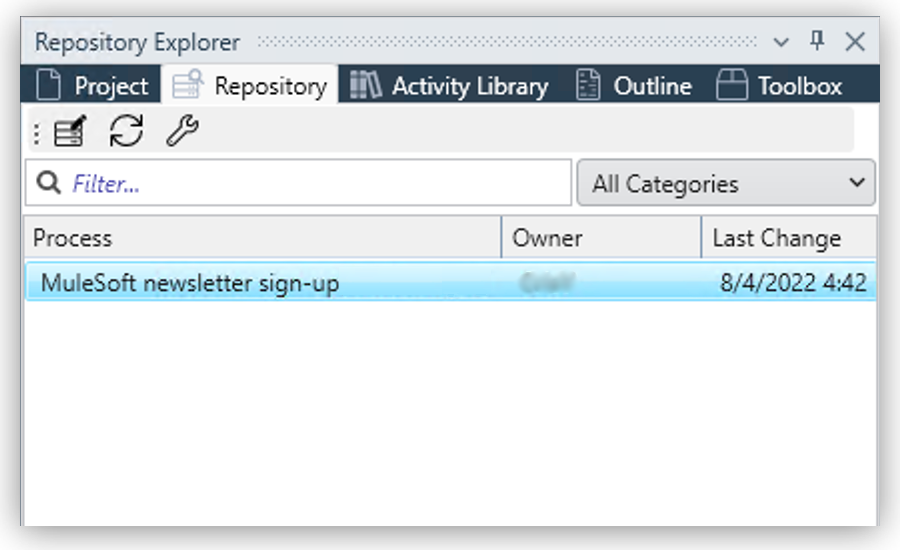
If this panel is not visible, go to the top menu bar and click View > Show Repository Explorer.
-
Find your project under the Process column and double-click it.
Step 5.3: Edit the Project and Add an Action Step
To add a new action step into your automation project:
-
In RPA Builder, drag the Create bot task element (
 ) from the BPMN editor into your process flow, after the Sign-up to newsletter task.
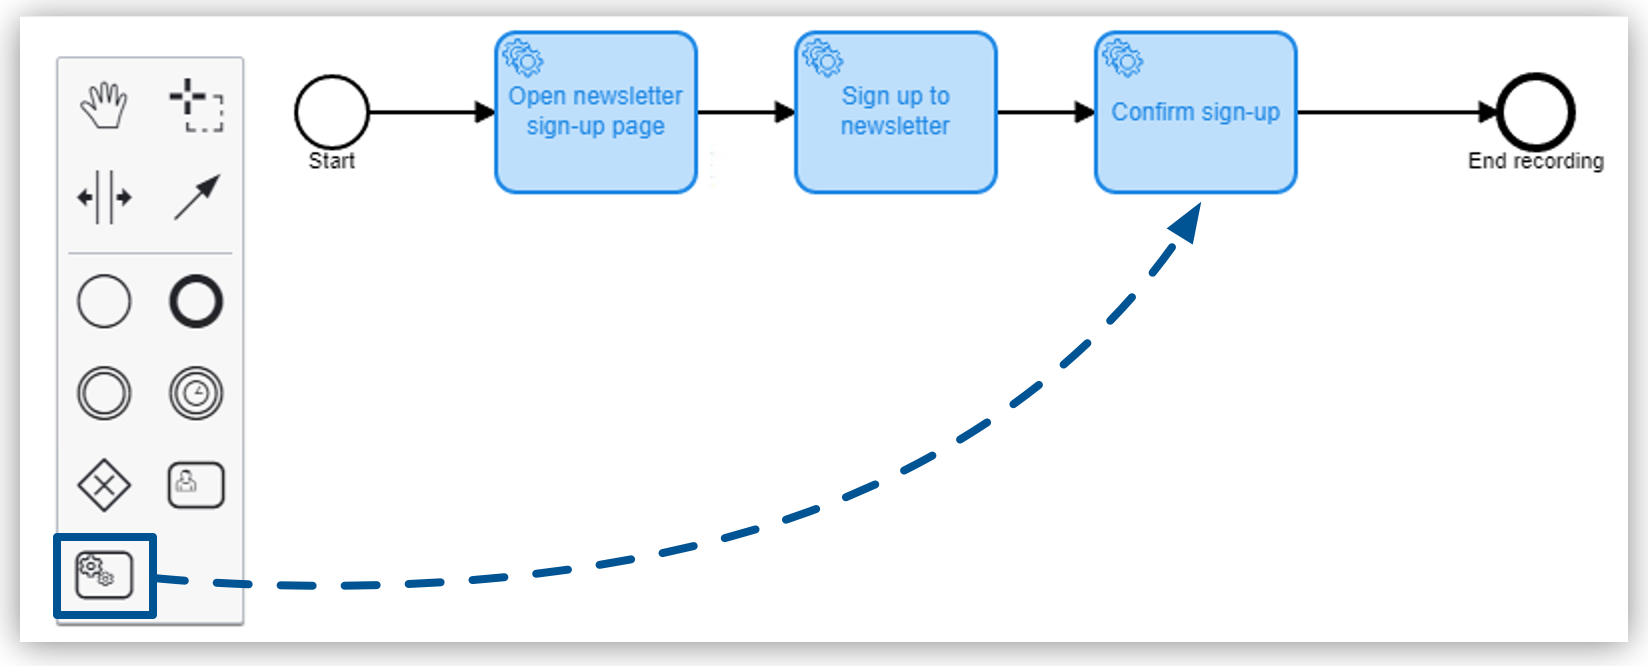
If the diagram does not automatically connect the new task, re-arrange the arrows to ensure that the new task comes after the Sign-up to newsletter task and connects to the End recording element.
-
In the new task element, write
Confirm sign-up. -
Double-click the Confirm sign-up task to open the workflow in edit mode.
This action opens the task for editing in the Workbench panel.
-
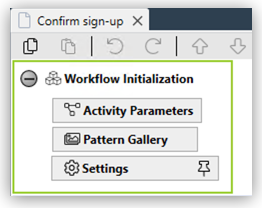
In the Workflow Initialization section, double-click Activity Parameters.
-
Double-click the generatedWebSession1 parameter to move it to the Used in this Workflow session.
Alternatively, you can use the arrow buttons to move this parameter.
RPA Recorder generated this Action Parameter when you selected the Continue with already existing web session option while creating Web tasks during step 4.2 of this tutorial. -
Click OK.
-
Click the Toolbox panel.
If this panel is not visible, in the top menu bar, go to View > Show Toolbox.
-
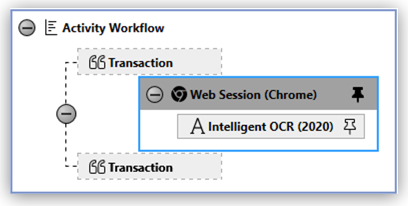
From the Web Automation section, drag a Web Session(Chrome) element into the Activity Workflow section.
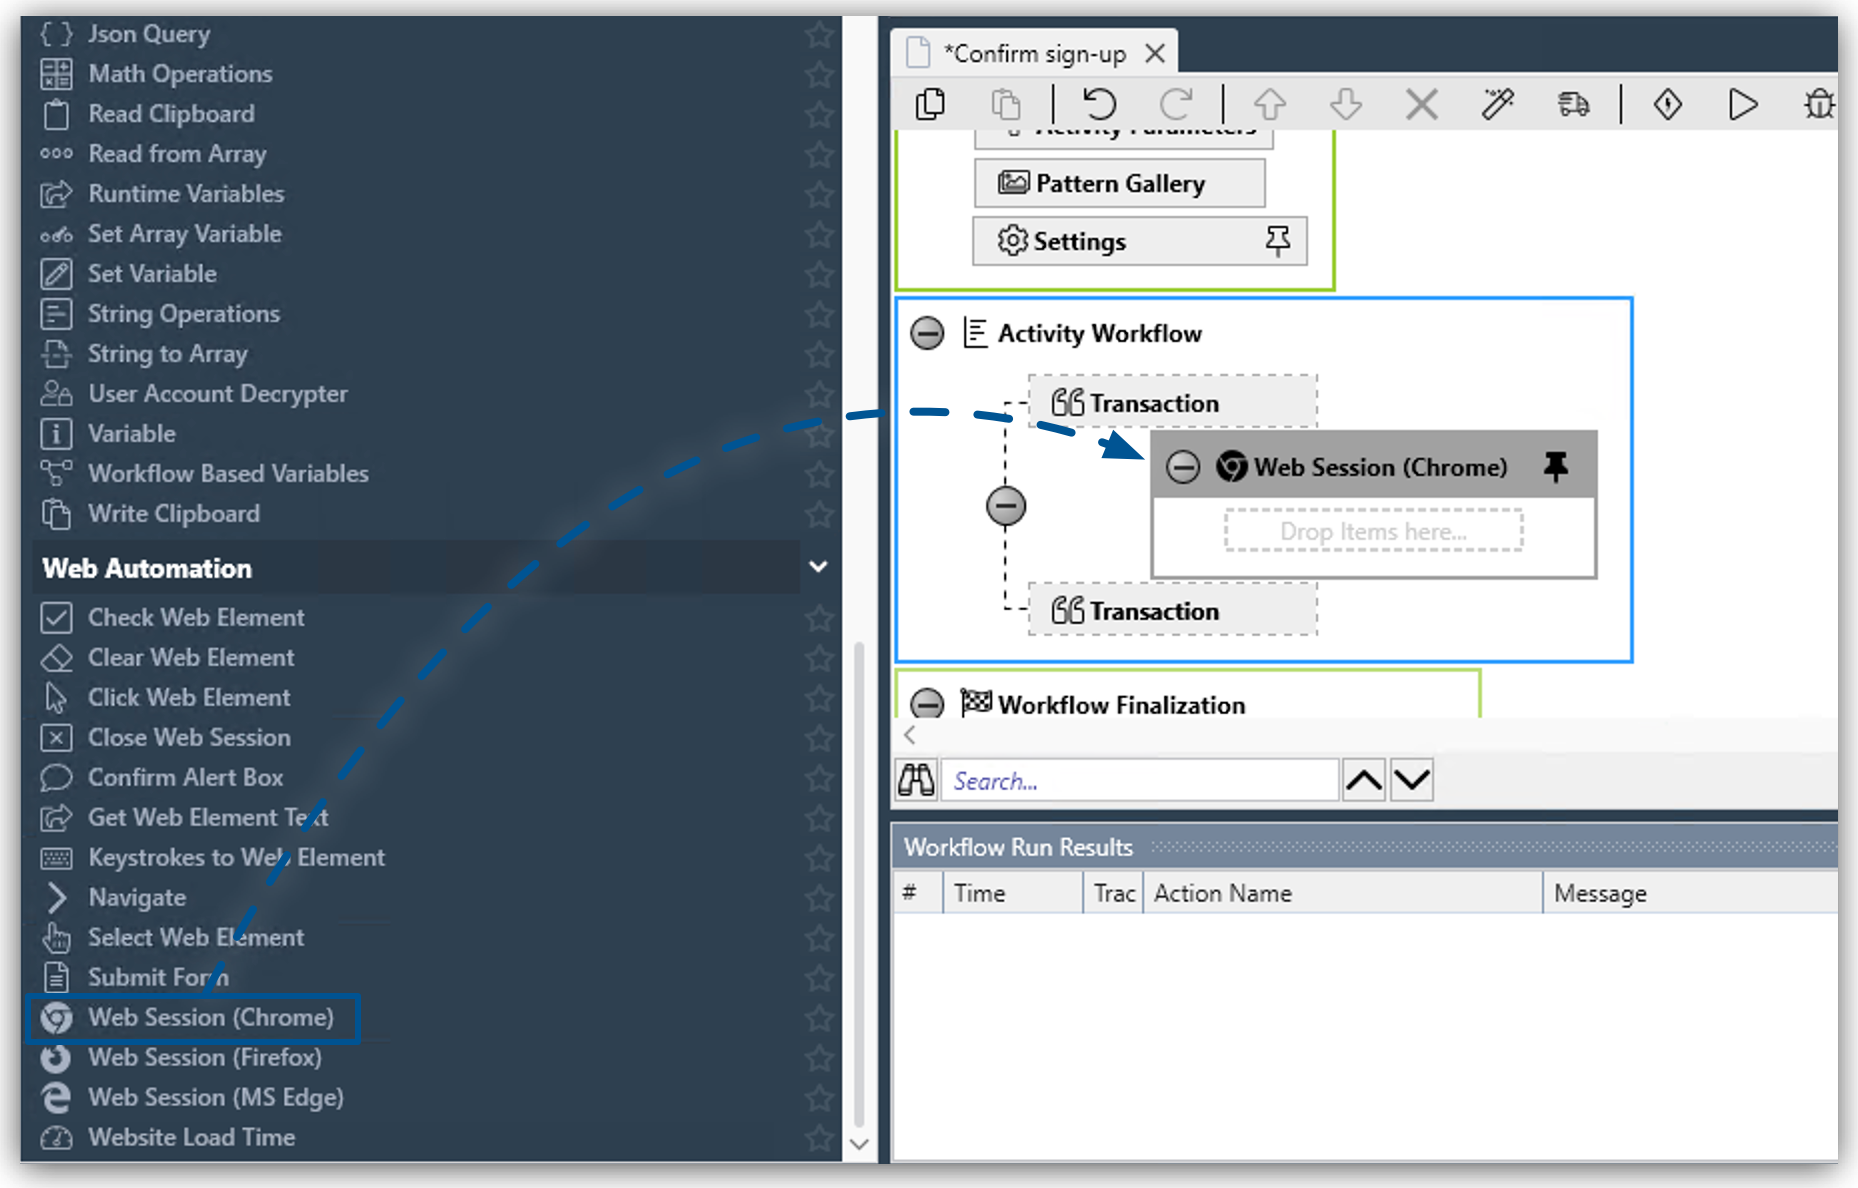
If you have a different web browser configured as the default, ensure that you use the corresponding Web session element that matches your default browser.
-
Double-click the Web Session element you just added in the Activity Workflow.
-
In Reuse Web Session, click the Web Session id drop-down menu and select Activity Parameters > generatedWebSession1.
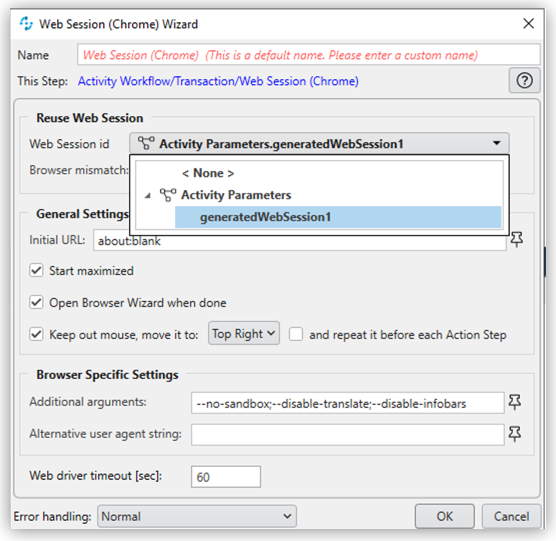
-
Click OK.
-
In the Toolbox panel, search for the Text Recognition (OCR) section and drag an Intelligent OCR(2020) element to the Web Session inside the Activity Workflow.
-
Double-click the Intelligent OC (2020) element.
-
In Search Mode, select Text Comparison.
-
In Search Text, write
"Thanks\s*for\s*signing\s*up".This regular expression matches the text even if it spans over multiple lines.
-
Click OK.
-
In the top menu bar, click File > Save Project.
After you add the text recognition task and save the project, perform a local test of your process.
Step 5.4: Perform a Local Test of the Process
To perform a local test of the created process:
-
Ensure your project is open for edit.
-
In the BPMN editor, click the Run Process (
 ) button.
This action starts the execution of the process and shows the Test run information window:
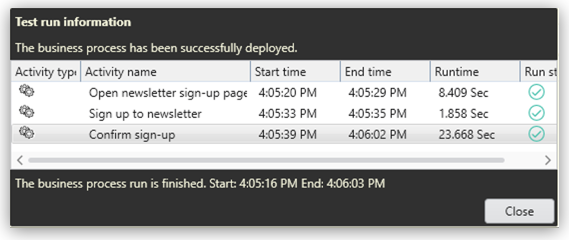
As the tasks start executing, notice that new entries appear in this window and show a Task execution succeeded (
 ) icon in the Run state column when they finish.
Because the RPA Bot conducts the test using your current Desktop session, do not interact with any elements in the screen until the test finishes. Otherwise, the test could fail. -
Click Close to close the Test run information window and return to RPA Builder.
After confirming that the test is successful, upload the project to RPA Manager.
Step 5.5: Upload the Project to RPA Manager
To upload the updated automation project to RPA Manager:
-
In RPA Builder, go to File > Upload Project.
-
Provide a description in the Changes: field and click Upload.
-
Confirm that the upload was successful and click OK.
-
Close RPA Builder.
Next Steps
You’ve modified the automation project, added a new task to the process, and verified that the automated process works as expected. Now, it is time to create a test plan in RPA Manager and execute the tests for this project.
Continue with Step 6: Test the automation