Anypoint Studio Setup
Setting up a proper development environment is crucial for a successful use of the Mule Runtime.
The following document outlines the steps to be taken before any significant use of Anypoint Studio, Mule, and our Cloud Solutions.
Initial Setup
Check Hardware and Software Requirements
-
Review the Hardware and Software requirements and make sure you meet the essentials.
Install Oracle JDK
-
If operating Mule 3.7 or newer, download and install the latest version of Oracle JDK here
.
| Java 7 is compatible with Mule 3.6 and below. |
Download and Install Anypoint Studio
-
See Download Anypoint Studio for detailed instructions
-
If you have any extensions you wish to add to Studio, such as premium connectors or the enterprise security package, see Installing Extensions
Credentials Setup
Configure Anypoint Platform Credentials
-
To associate your Anypoint Platform account to your local development environment:
-
Open Anypoint Studio Preferences.
-
Go to Anypoint Studio > Authentication
-
Click the Add button and enter your Anypoint Platform credentials
-
|
Studio versions 6.1.1 and later allow you to log in to Anypoint Platform using your configured federated external identity.
|
Obtain credentials to access paid components and controls
This process only needs to be done once. A project manager or whoever is responsible for project oversight should complete this step.
-
Log in to the Support Portal here
. If you do not have credentials to log in, contact your Customer Success Manager.
-
Click the "Case" tab located on the top of the Support Portal Home page.
-
Click the "Create New Case" button, at the right of the page header.
-
Fill out the required information (highlighted in red) and in the Description field, include a request for your credentials.
Development Environment Setup
Enable Private Cloud Edition Setup
Anypoint Studio versions 6.2 and later support the Anypoint Platform Private Cloud Edition (Anypoint Platform PCE) version 1.7 and earlier.
| Studio 6.5 is not compatible with Anypoint Platform PCE 2.x |
To set Private Cloud Edition Setup from Studio:

-
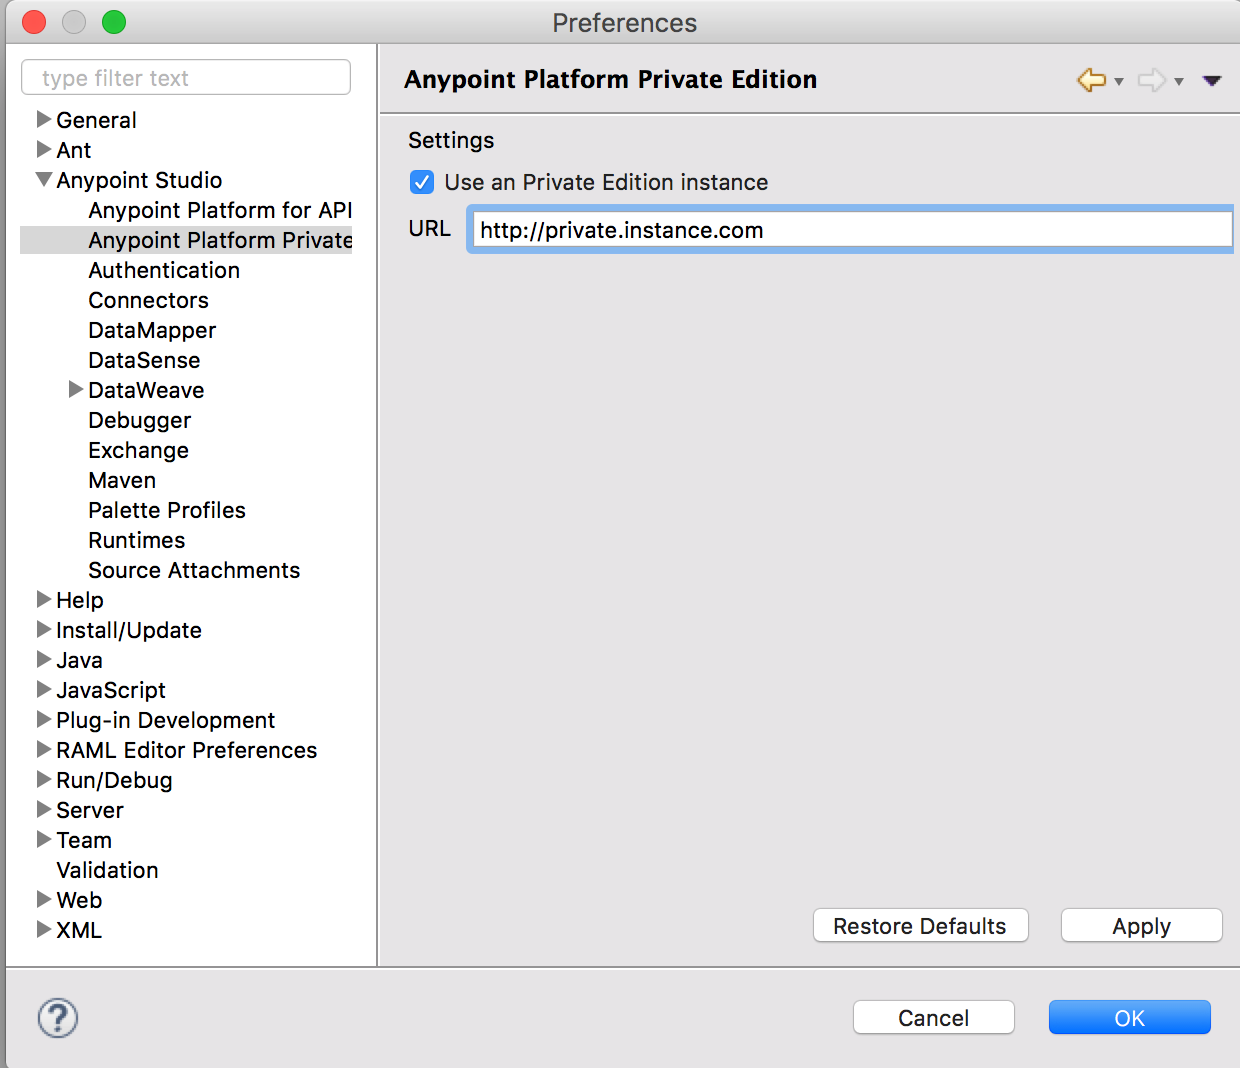
Navigate to Preferences.
-
Select the Anypoint Studio item from the left navigation bar.
-
Select the Anypoint Platform Private Edition option.
-
Select the Use a Private Edition instance check mark.
-
Type the URL of your Anypoint Platform Private Cloud Edition installation.
The existing URL is being used as a placeholder example. Replace this value with your Anypoint Platform URL.
Keep in mind that changing this value automatically changes the URL that’s set in the Exchange tab to whatever you set in this field +
/exchange/#!/. -
Click Apply
-
Click OK
|
If you choose to use a self-signed certificate on your Anypoint Platform Private Cloud Edition installation, you need to:
|
After configuring and enabling Private Cloud support you can:
-
Log in to your Anypoint Platform Private Cloud Edition from Studio configuring your platform’s credentials following the steps described above.
-
Configure API Sync and API Autodiscovery for APIs in your Private Cloud Edition platform.
-
Access your On-Premises Exchange Artifacts.
Customize the Exchange Address
You can change the default location of Anypoint Exchange to point to a private version of exchange.

To change the default address:
-
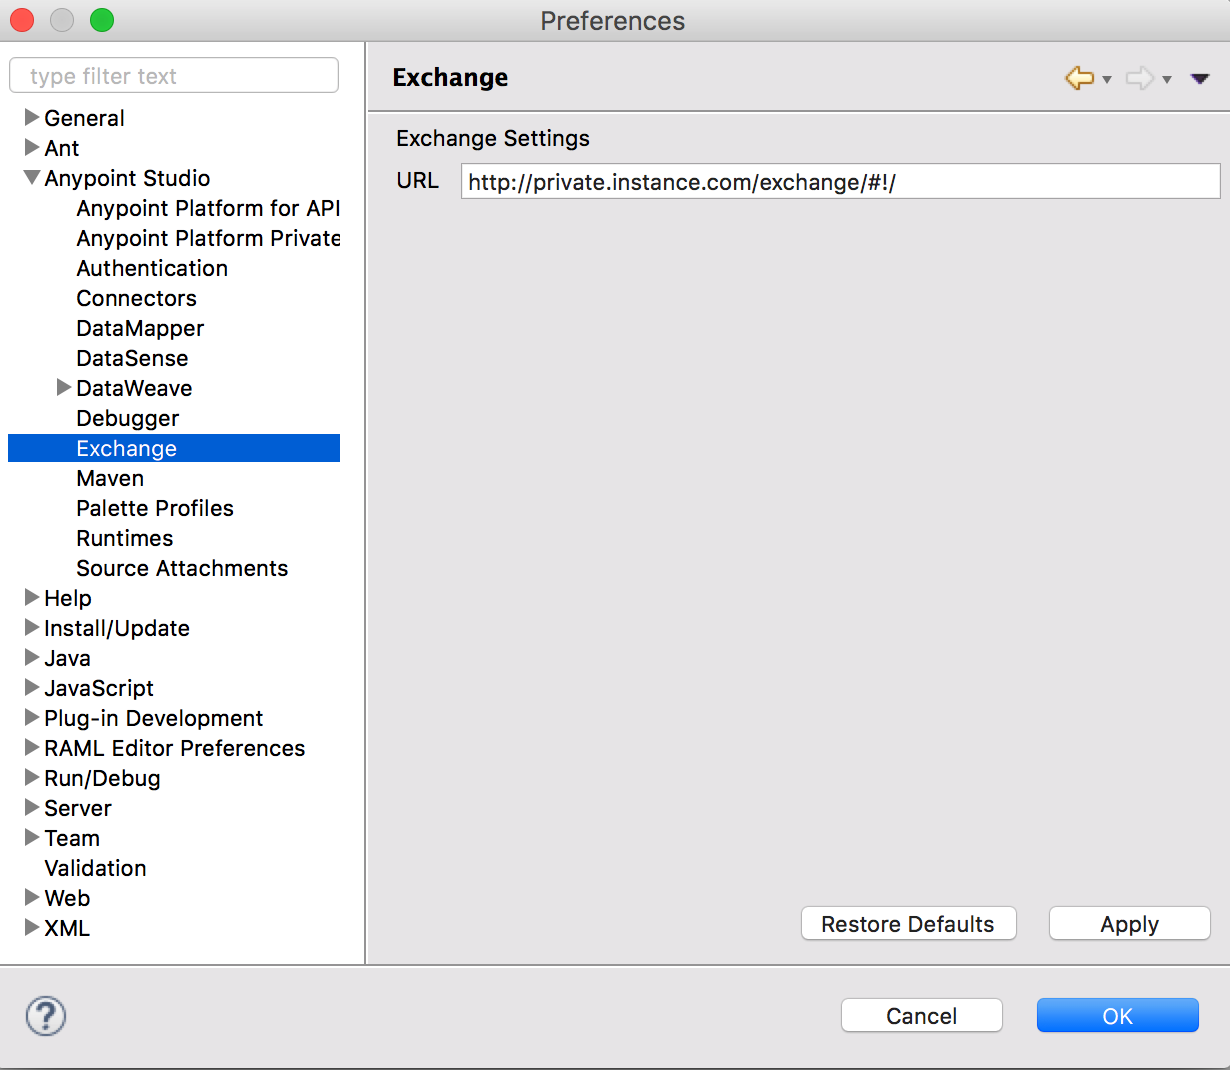
Navigate to Preferences.
-
Select the Anypoint Studio item from the left navigation bar.
-
Select the Exchange option.
-
Type the URL of your private exchange.
If you’re using the Anypoint Platform Private Cloud Edition, this field automatically changes when you follow the steps in Enable Private Cloud Edition Setup. This sets the exchange URL to the base URL you set there + /exchange/#!/. You can then modify the Exchange tab to customize this address.
Repositories Setup
Setup and Learn about Maven
Maven is a powerful build automation tool used for software project management. We highly urge our customers to use Maven, Gradle, or a similar in-house tool with any significant usage of MuleSoft software.
Setup Code Repository
Code Repositories facilitate the tracking and versioning of changes developers make to a software project; this enables several people to work on the same project simultaneously without creating conflicts among the changes and additions they make.
-
Learn more about two recommended Code Repositories: Subversion
and Git
.
Setup a Maven Repository Manager
A repository manager is a dedicated server application designed to manage repositories (internal and third party) of binary components.
The usage of a repository manager is a best practice for any significant usage of Maven. Check Nexus and Artifactory
as an example.
Configure MuleSoft Repositories
-
Open the Repository Manager of your choice and configure a Proxy repository with the following information:
-
Repository ID: muleee
-
Repository Name: MuleSoft EE Repository
-
Set up Remote Storage Location:
https://repository.mulesoft.org/nexus-ee/content/repositories/releases-ee/ -
Set the authentication method to use the User Name and password obtained from Support.
-
Manage your built-in Mule Runtimes
Adding Mule Runtimes
-
Anypoint Studio always comes bundled with the latest enterprise version of the Mule Runtime. If you wish to install any prior or beta version of the Runtime to develop applications with it in Studio, see Updating Studio, Mule and Components.
-
If you wish to develop applications with the free Community version of the Mule Runtime, see Installing Community Edition of Mule Runtime
Deploying to Production Environments
Anypoint Studio comes bundled with the latest runtime for deploying and testing your applications. This server, however, is not meant for production as uptime restrictions apply. To deploy an application to your production environment you can either use:
-
The Runtime Manager, to deploy to a cloud or a local server/server-group/cluster
Frequently Asked Questions
Does Studio Require any license keys?
No. Studio does not require any customer specific license keys. Just download Studio here and start learning how to use it following its official documentation.
How many additional users can I add to an account?
Depending on your needs, we can provide access to varying numbers of users. We do not provide a fixed number as every account is different.
Contact your Customer Success Manager for inquiries regarding the number of users you should add to your account.
How do I access the Support Portal?
Log in to the Support Portal here. If you do not have credentials to log in, contact your Customer Success Manager.
How do I file a support ticket within the Support Portal?
-
Log in to the Support Portal here
. If you do not have credentials to log in, contact your Customer Success Manager.
-
Click the "Case" tab located on the top of the Support Portal Home page.
-
Click the "Create New Case" button, at the right of the page header.
-
Fill out the required information (marked with an asterisk(*)). Our support team will respond soon.
Do you need to configure servers with Anypoint Studio?
No, Anypoint Studio runs as an independent application on your machine, and it does not need to be configured with any servers.
Where do I find my license key?
-
Log in to the Support Portal here
. If you do not have credentials to log in, contact your Customer Success Manager.
-
Click the "Subscriptions" tab located on the top of the Support Portal Home page.
-
Click on the "Subscription Name" of the Subscription for which you would like a license key. Note that you must click on the "Subscription Name" (second column on the right) or you will not be forwarded to the correct page.
-
Click on the "License ID" number found on the bottom left of the page.
-
Click on the "View" button to download your license key.
What happens when my license key expires?
MuleSoft operates an annual subscription model. Your Customer Success Manager will reach out with regards to renewal during their regular cadence with you. You can always reach out to your Customer Success Manager if you are interested in discussing renewal beforehand.


