User Interface
Following are the descriptions of every section and element in the RPA Recorder UI.
Home
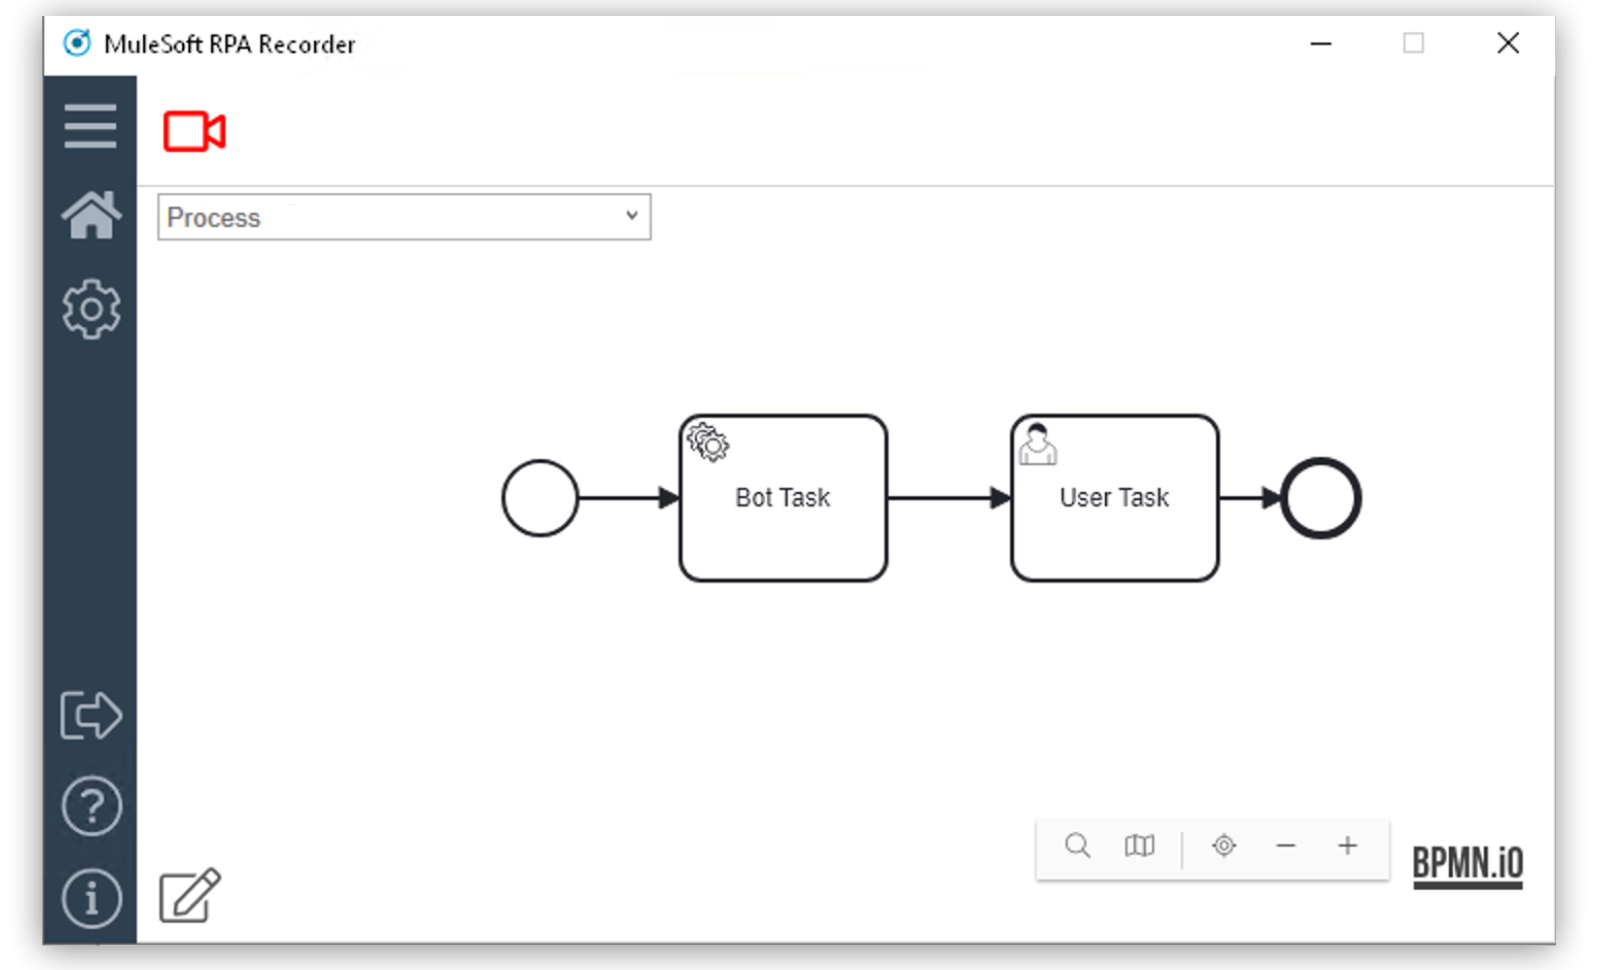
The Home section contains the main controls of RPA recorder. If RPA recorder is started from RPA Manager, the existing BPMN of the process also shows here.
Recording
The Recording Toolbar appears on the screen when RPA Recorder starts recording a process and contains the following buttons:
| Icon | Name | Description | Hot Key |
|---|---|---|---|
|
Start Recording |
Starts a new recording session. |
|
|
Pause Recording |
Pauses the current recording session. |
|
|
Finish Recording Session |
Finishes the current recording session and triggers the generation of Documents. |
— |
|
Take Screenshot |
Opens the Define Screenshot dialog. |
|
|
Image-based mouse clicks |
Adds the Image-Based Mouse Clicks to the current recording. |
|
|
Add Comment |
Opens the Add Comment dialog. |
|
|
Add Activity |
Opens the Add Activity dialog. |
|
Toast Notifications While Recording
When a recording state changes, a toast notification appears indicating current state. The notification stays for two seconds and disappears automatically.
Image-Based Mouse Clicks
Use image-based mouse clicks at any point during a recording session to record mouse clicks on a UI element that otherwise cannot be recorded properly. This feature guides you through the capture of image and mouse clicks. An image on the screen and mouse clicks must be captured, and the mouse clicks are recorded relative to the captured image.
The feature also checks your display settings automatically while recording to ensure the feature records correctly.
This feature will result in Search Pattern and Mouse Action action steps when the workflow is generated in RPA Builder from the recording.
When using this feature:
-
The Recording Toolbar is inactive.
-
Keyboard events are not recorded.
Recommended Display Settings
Apply the following recommended display settings to capture image-based mouse clicks:
-
Single monitor.
Although the image-based mouse clicks feature supports multiple monitors, the capturing is limited to the primary display for Bot tasks and the web page for Web tasks.
-
Display scaling of 100%. If the scaling is different, then there is a risk that the captured image will not be found by the workflow generated in RPA Builder from the recording.
To check your display settings before recording, go to Windows Settings > Display. If your Scale and layout or Multiple displays settings are different than what’s recommended when recording, a warning message shows each time you record an image-based mouse click, and you must confirm the message. If you change your Windows Settings, restart RPA Recorder to apply the changes.
Using Image-Based Mouse Clicks
To capture image-based mouse clicks:
-
Start a normal recording process.
-
While recording, press F3 to start recording image-based mouse clicks, or press the Image-Based Mouse Clicks icon on the Recording Toolbar. You can set the initial screen freeze delay from the toolbar by clicking the arrow next to the Image-Based Mouse Clicks icon.
-
Capture an image by selecting it on the screen, and then accept or retake the image with or without setting a capture delay. Then, set a mouse click, which the Recorder marks with a red dot. Record additional mouse clicks, such as double-mouse clicks, if desired.
-
Click Finish. This generates all relevant data for RPA Builder to create the Search Pattern and Mouse Action action steps for the recording.
The process documentation and PDF generated by the Recorder include the recording data. Once you finish using image-based mouse clicks, you can continue with the normal recording process.
When recording image-based mouse clicks in a Web Task:
-
Scrolling or zooming in the displayed web page or moving or resizing the browser window results in inaccurate relative clicks in the recording.
-
Navigating to a different web page when capturing image-based mouse clicks, such as by clicking a link, can cause inaccuracies in the recording of the subsequent relative mouse clicks.
-
The attribute selection panel is not enabled and cannot be expanded or collapsed. Once image-based mouse clicks recording is finished, the panel can be opened.
-
The browser window cannot be minimized, and the address bar and buttons are not enabled in the browser window.
Define Screenshot
Before you take a screenshot manually, the screen automatically freezes. You can select a method for taking manual screenshots:
-
Press
F9while recording to open the Define Screenshot window.

-
Select a freezing delay (in seconds), or no delay, from the dropdown menu.

| The timer delay mechanism takes effect regardless of the chosen screenshot method. |
Add Comment
You can add a comment as part of the recording to enrich the documentation with insight about a specific step.

| Pause the recording before adding a comment. If you open the Add Comment window while the recording is running, it pauses automatically. |
Add Activity
You can manually add an activity as part of the BPMN recording. Enter a name for the activity and select its type.

Possible activity types are:
-
Web Task
-
Bot Task
-
User Task
When you create a Web Task, you can choose to continue using the session of the last closed Web Task.
For User Tasks, RPA Recorder does not save documentation. You must enter a description.
To continue recording, add a Bot Task.
| Pause the recording before adding an activity or changing the creation mode of the activities. If you open the pop-up using the respective hot key while the recording is running, the recording automatically pauses. |
Web Recording Browser
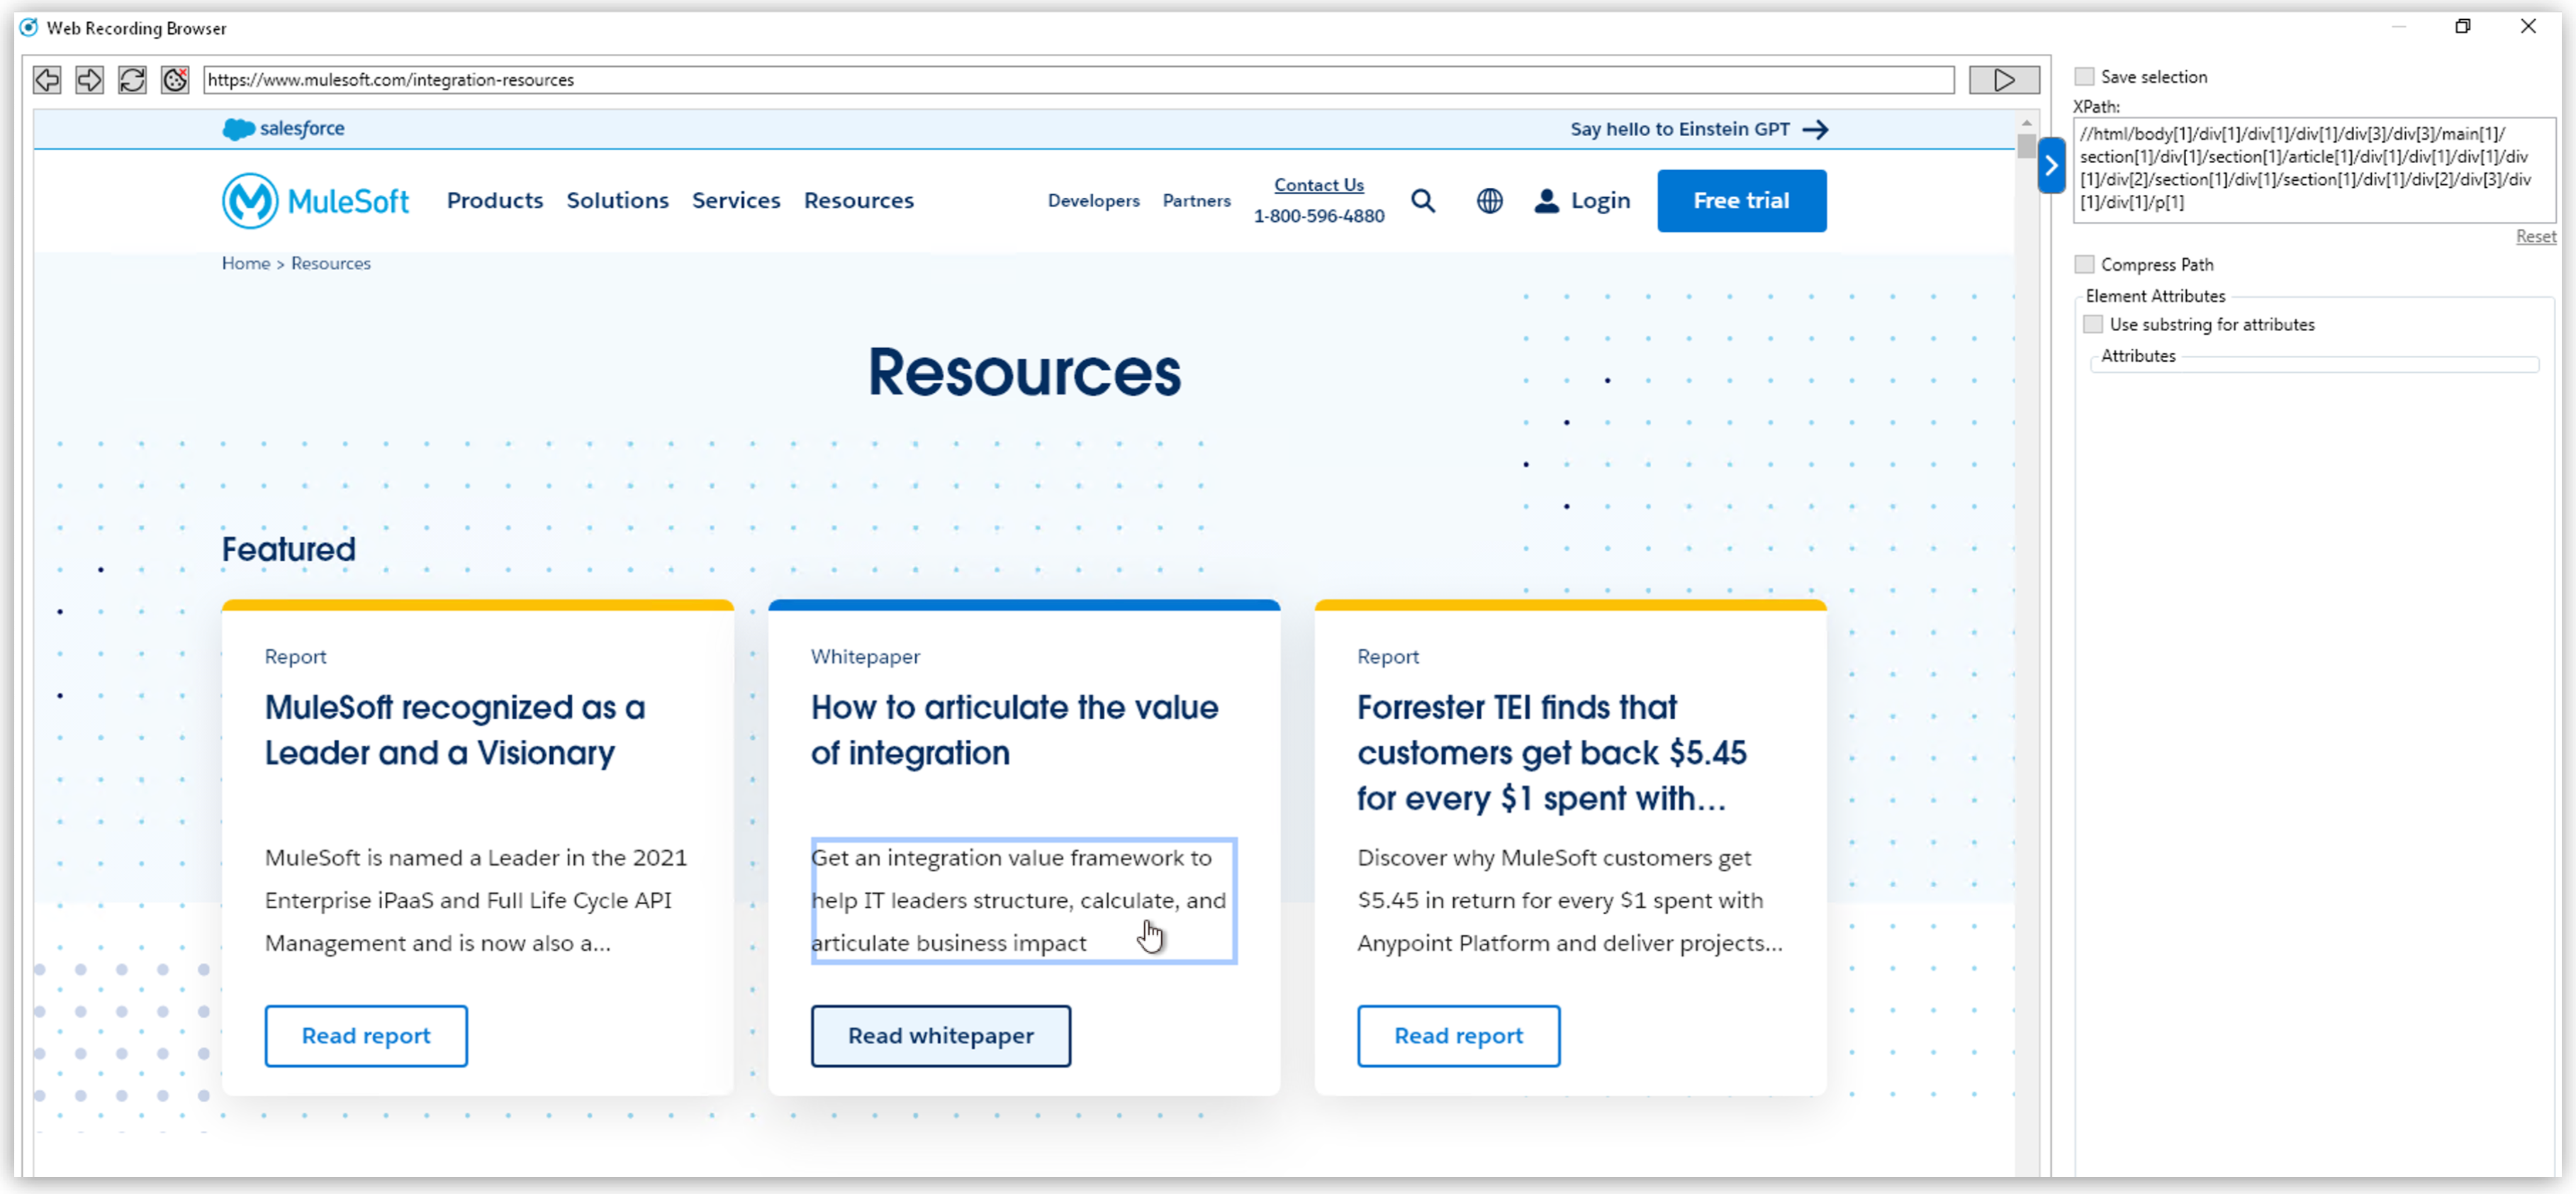
Use the Web Recording Browser to record website navigation actions. It behaves as a regular web browser and enables you to:
-
Automatically identify elements of a website with which you interact and determine their XPath and attributes.
-
Save your attribute selection of a web element to reuse it when recording the same web elements on a website.
-
Record mouse hover positioning during web navigation.
| Japanese keyboard input during Web recording is fully supported. |
Adding a Web Task opens the Web Recording Browser. When you add more than one Web Task, you can select Continue with already existing web session to display the last loaded page from the previous Web Task and continue from that point.
Otherwise, you can enter a URL in the address bar of the browser, and it loads this URL when you press Enter or click the Go button (![]() ).
).

Select Web Elements
When you hover the cursor over a web element, a blue border frames the element so that you know the area is clickable. The border also indicates you can record a mouse click on the element. After an interaction with an element (such as a mouse click or key press on the keyboard), the element’s XPath and available attributes show on the Attribute Selection panel.
To record the mouse hover event on a framed element, press F2.
By default, the Attribute Selection panel is hidden. Click on the right border of the Web Recording Browser to extend or collapse it.
Save Web Element Attributes
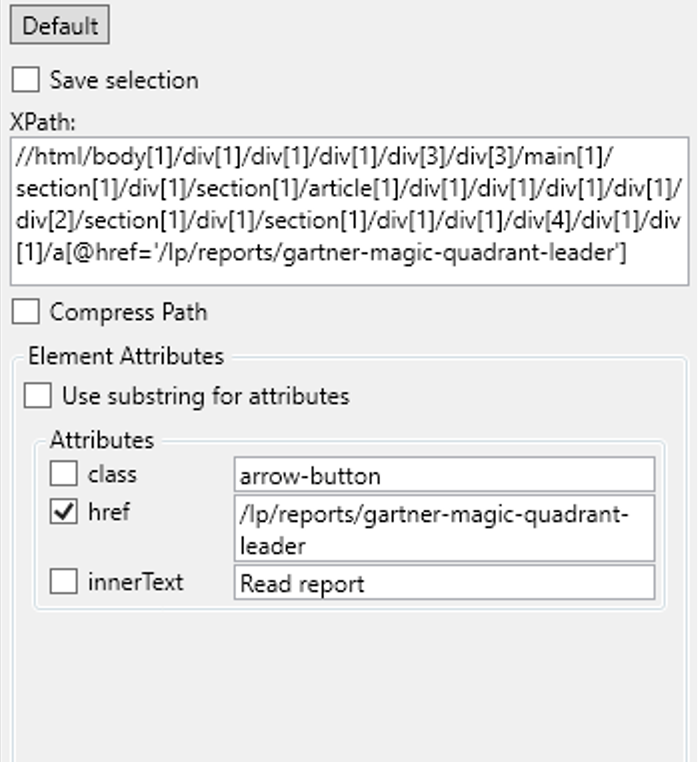
The Attribute Selection panel shows the default extracted XPath and all the attributes of the selected web element. Select one or more attributes by checking the box next to them. After you select an attribute, RPA Recorder adds the attribute and its value to the extracted XPath.
You can save your attribute selection for a web element to use it for future recorded events by checking Save selection.
If you select the saved element while recording the same website later on, the saved attribute displays as already selected in the attribute selection panel and appears as added to the extracted XPath.
If you don’t want to use the saved attributes for a given web element, click the Default button (![]() ) to revert back to the default extracted XPath for that web element.
) to revert back to the default extracted XPath for that web element.
Save Mouse Hover
You can record your mouse hover positioning while using the Web Recording Browser. This is particularly useful for capturing navigation through drop down menus.
To capture a mouse hover action during web recording, press F2 on a web element. This capture is indicated by a blue flashing box around the selected web element.
RPA Recorder Configuration
You can configure RPA Recorder and set preferences.
The configuration section is divided into the following sections:
Settings
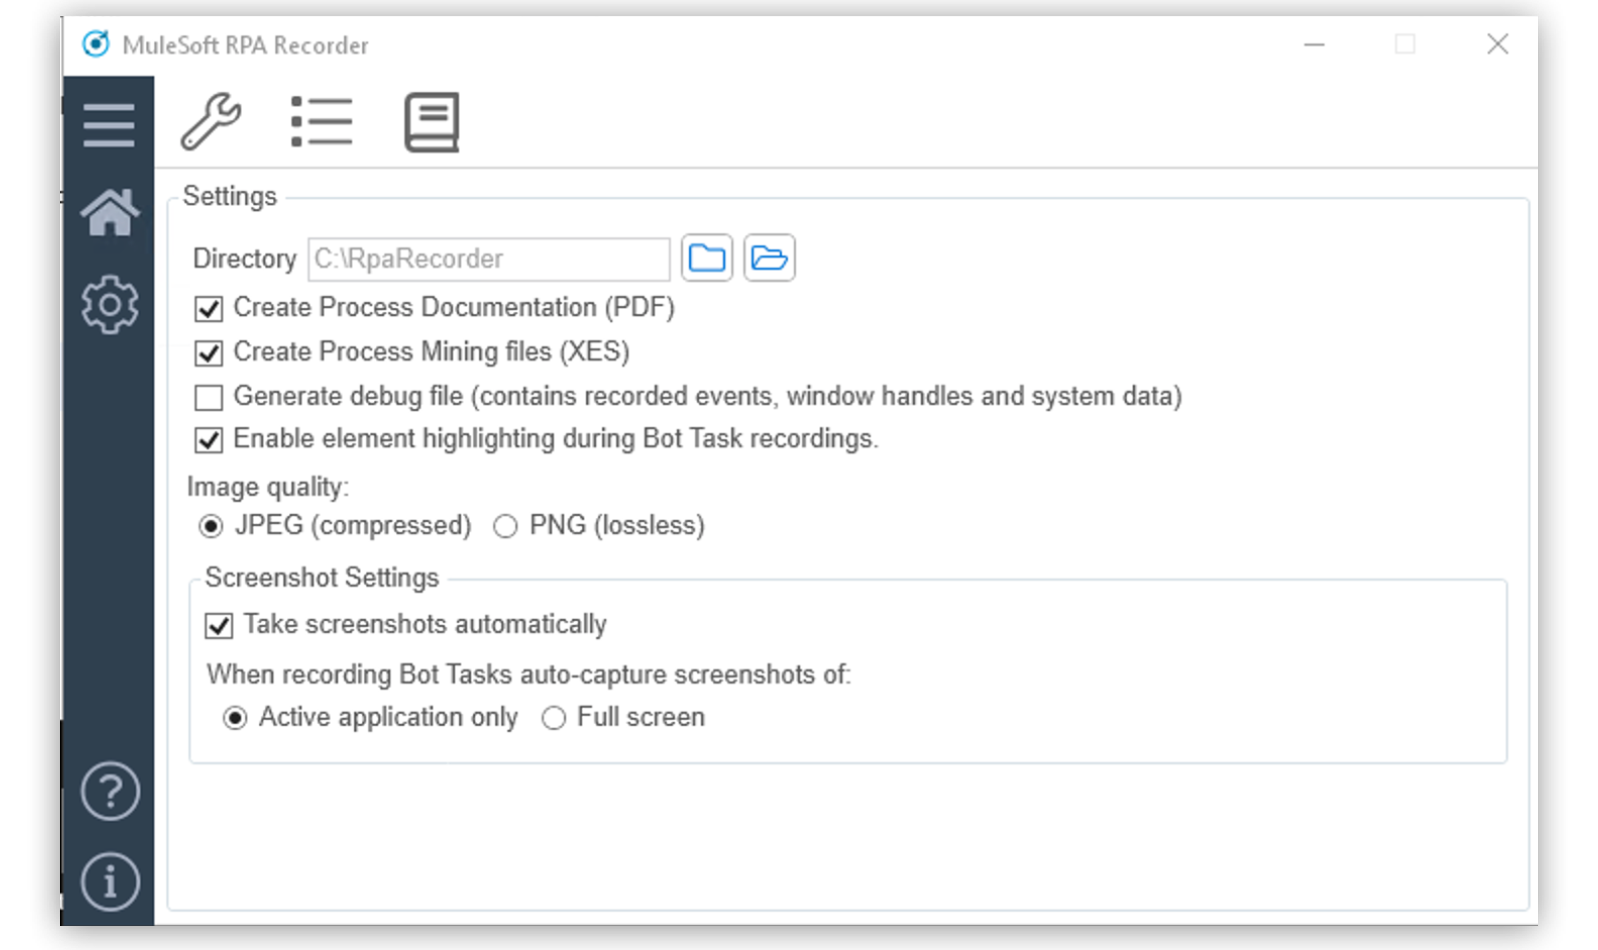
Use the following settings to configure RPA Recorder:
-
Directory
The local folder for storing documents (BPMN, PDF and XES) and application logs.
-
Create Process Documentation (PDF)
Select this option to save a process documentation file as a PDF after the recording session stops.
-
Create Process Mining files (XES)
Select this option to generate a XES process file after the recording session stops.
-
Generate debug file (contains recorded events, window handles and system data)
Select this option to generate a debug file after the recording session stops.
-
Enable element highlighting during Bot Task recordings.
Select this option to add a blue border around elements that are clicked while recording a Bot Task.
-
Image quality:
Select the quality of the screenshots on every mouse click. Available options are: JPEG (compressed) and PNG (lossless).
-
Screenshot Settings
-
Take screenshot automatically
Select this option to automatically take a screenshot on every mouse click.
-
When recording Bot Tasks auto-capture screenshots of:
Select the area to capture when RPA Recorder takes screenshots. Available options are: Active application only and Full screen.
-
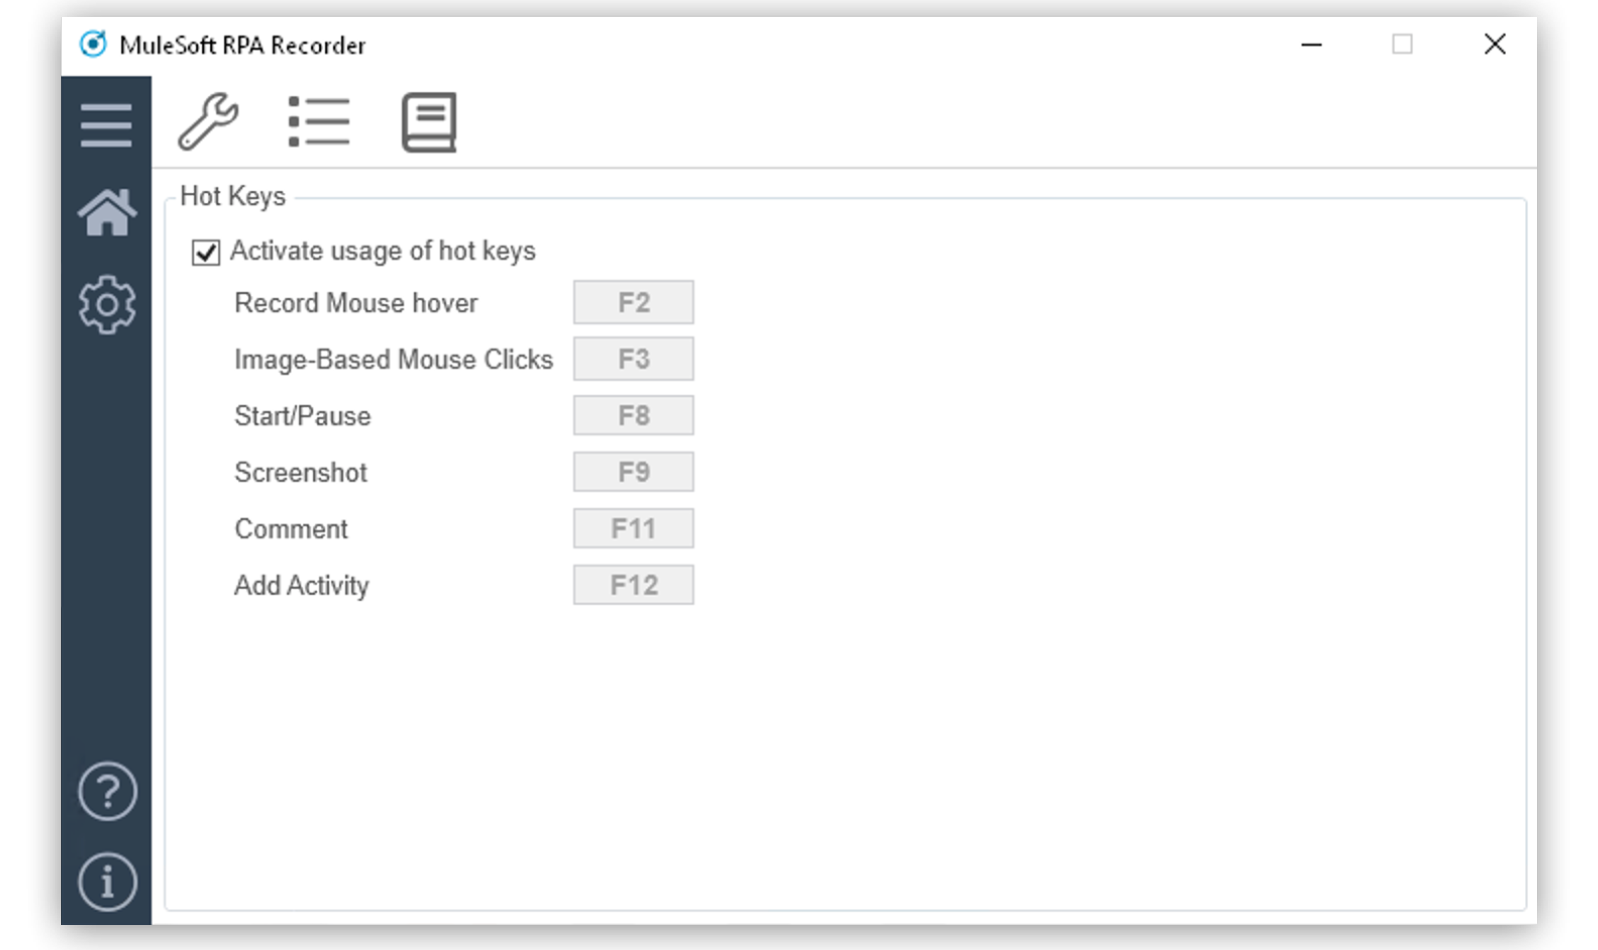
Hot Keys
This section displays information about the specific hot keys that can be used, and their description. Hot keys cannot be customized.
You can activate or deactivate the hot keys function by checking or unchecking the Activate usage of hot keys box. If activated, the hot keys invoke the corresponding action. If deactivated, the hot keys cannot control the recorder, and any hot key presses during a recording are recorded as normal key strokes.
The hot keys function is activated by default.

About Screen
The about screen contains general information about RPA Recorder:
-
Version number
-
Copyright information