Salesforce Data Cloud Connector 1.3 の例
次の例は Salesforce Data Cloud Connector を使用してさまざまな Salesforce Data Cloud API エンドポイントを統合する方法を示しています。
-
ストリーミング API 取り込みのフローは次のとおりです。
-
[Insert Data - Streaming API]
ストリーミング API を介してオブジェクトのエンドポイントにデータを挿入する方法を示します。 -
[Delete Data - Streaming API]
ストリーミング API を介して特定のオブジェクトのレコードを削除する方法を示します。
-
-
Bulk API 取り込みのフローは次のとおりです。
-
[Create Job - Bulk API]
Salesforce Data Cloud 取り込み API オブジェクトにデータをアップロードするために必要な一括ジョブを作成する方法を示します。 -
[Upload Job Data - Bulk API]
Salesforce Data Cloud 取り込み API オブジェクトに挿入するデータ、または Salesforce Data Cloud 取り込み API オブジェクトから削除するデータをアップロードする方法を示します。 -
[Close Job - Bulk API]
指定したジョブ ID の状況を更新し、ジョブを終了して処理キューに登録する方法を示します。 -
[Abort Job - Bulk API]
指定したジョブ ID の状況を更新し、ジョブを中止して処理キューには登録しないようにする方法を示します。 -
[Get Job - Bulk API]
指定したジョブ ID の現在の状況を取得する方法を示します。 -
[List Jobs - Bulk API]
すべての一括ジョブを取得する方法を示します。 -
[Delete Job - Bulk API]
指定したジョブ ID を削除または終了する方法を示します。これにより、Salesforce で保存されているジョブデータとメタデータが削除されます。
-
-
クエリ API のフローは次のとおりです。
-
[Query API]
データモデルオブジェクト、レークオブジェクト、統合オブジェクト、リンクオブジェクトにわたって Salesforce Data Cloud データレークを照会する方法を示します。 -
Query v2
Query v2 API を使用して Data Cloud データレイクに対してクエリを実行する方法を示します。 -
Query v2 - Get Next Batch
Query v2 Get Next Batch API を使用して次の結果のバッチを取得する方法を示します。
-
-
計算済みインサイト API のフローは次のとおりです。
-
[Insights - List Metadata API]
すべての計算済みインサイトのディメンションと基準などのメタデータを取得する方法を示します。 -
[Insights - Get Metadata API]
計算済みインサイトのディメンションと基準などのメタデータを取得する方法を示します。 -
[Insights - Get Insights API]
計算済みインサイトを照会する方法を示します。ユーザーはさまざまなディメンション、基準、検索条件を選択することによって、分析や絞り込みを行うことができます。
-
-
Profile API のフローは次のとおりです。
-
[Profile - List Metadata API]
すべてのデータモデルオブジェクトのメタデータを取得する方法を示します。 -
[Profile - Get Metadata API]
要求されたデータモデルオブジェクトのメタデータを取得する方法を示します。 -
[Profile - Search Records API]
検索条件に基づいてデータモデルオブジェクトレコードを取得する方法を示します。 -
[Profile - Search Records By ID API]
インデックスと検索条件に基づいてデータモデルオブジェクトレコードを取得する方法を示します。 -
[Profile - Search Records With Child Records API]
インデックスと検索条件に基づいてデータモデルオブジェクトレコードと子オブジェクトレコードを取得する方法を示します。 -
[Profile - Search Records With Insight API]
インデックスと検索条件に基づいてデータモデルオブジェクトレコードと計算済みビューを取得する方法を示します。
-
-
データアクション API のフローは次のとおりです。
-
[Data Action Webhook]
データアクションがトリガーされたときに操作を実行する方法を示します。
-
データの挿入 - ストリーミング API
この Mule フローでは、ストリーミング API を介してオブジェクトのエンドポイントにデータを挿入する方法を示します。 Salesforce API のドキュメントを参照してください。
この例では、次の操作を使用します。
-
HTTP Listener
ソースとオブジェクト名が URI パラメーターとして含まれる HTTP POST 要求からデータを受け取ります。 -
Logger
Listener から受け取った HTTP 要求を表示します。また、後で Insert Objects 操作からの HTTP 応答を表示します。 -
Streaming Insert
-
OAuth クライアントログイン情報、OAuth JWT、または OAuth のユーザー名とパスワードの選択に基づいて認証します。
-
ソース名、オブジェクト名、ペイロードを受け取ります。
-
Salesforce API をコールして、該当のオブジェクトのエンドポイントにペイロードを挿入します。
-

この例の XML
この例のフローをすばやく Mule アプリケーションに読み込むには、次のコードを Studio XML エディターに貼り付けます。
<?xml version="1.0" encoding="UTF-8"?>

<mule xmlns:sdc="http://www.mulesoft.org/schema/mule/sdc" xmlns:http="http://www.mulesoft.org/schema/mule/http"
	  xmlns="http://www.mulesoft.org/schema/mule/core"
	  xmlns:doc="http://www.mulesoft.org/schema/mule/documentation" xmlns:xsi="http://www.w3.org/2001/XMLSchema-instance" xsi:schemaLocation="http://www.mulesoft.org/schema/mule/core http://www.mulesoft.org/schema/mule/core/current/mule.xsd
http://www.mulesoft.org/schema/mule/http http://www.mulesoft.org/schema/mule/http/current/mule-http.xsd
http://www.mulesoft.org/schema/mule/sdc http://www.mulesoft.org/schema/mule/sdc/current/mule-sdc.xsd">
	<http:listener-config name="HTTP_Listener_config" doc:name="HTTP Listener config" >
		<http:listener-connection host="0.0.0.0" port="8081" />
	</http:listener-config>
    <configuration-properties doc:name="Configuration properties" file="mule-app.properties" />
    <sdc:sdc-config name="Salesforce_Data_Cloud_OAuth_JWT_config" doc:name="Salesforce Data Cloud config" >
		<sdc:oauth-jwt-connection consumerKey="${server.consumerKey}" keyStorePath="${server.keyStorePath}" storePassword="${server.keyStorePassword}" subject="${server.userName}" keyAlias="${server.certificateAlias}" audienceUrl="${server.audienceUrl}"/>
	</sdc:sdc-config>
	<sdc:sdc-config name="Salesforce_Data_Cloud_OAuth_UsernamePassword_config" doc:name="Salesforce Data Cloud config" >
		<sdc:oauth-user-pass-connection audienceUrl="${server.audienceUrl}" username="${server.userName}" password="${server.password}" clientId="${server.consumerKey}" clientSecret="${server.consumerSecret}"/>
	</sdc:sdc-config>

	<flow name="Insert-objectsFlow" >
		<http:listener doc:name="POST /insert/{sourceApiName}/{objectName}" config-ref="HTTP_Listener_config" path="/insert/{sourceApiName}/{objectName}" allowedMethods="POST"/>
		<logger level="INFO" doc:name="Request Logger" message="#[payload]"/>
		<sdc:insert-objects doc:name="Streaming Insert" config-ref="Salesforce_Data_Cloud_OAuth_JWT_config" sourceNameUriParam="#[attributes.uriParams.sourceApiName]" objectNameUriParam="#[attributes.uriParams.objectName]"/>
		<logger level="INFO" doc:name="Response Logger" />
	</flow>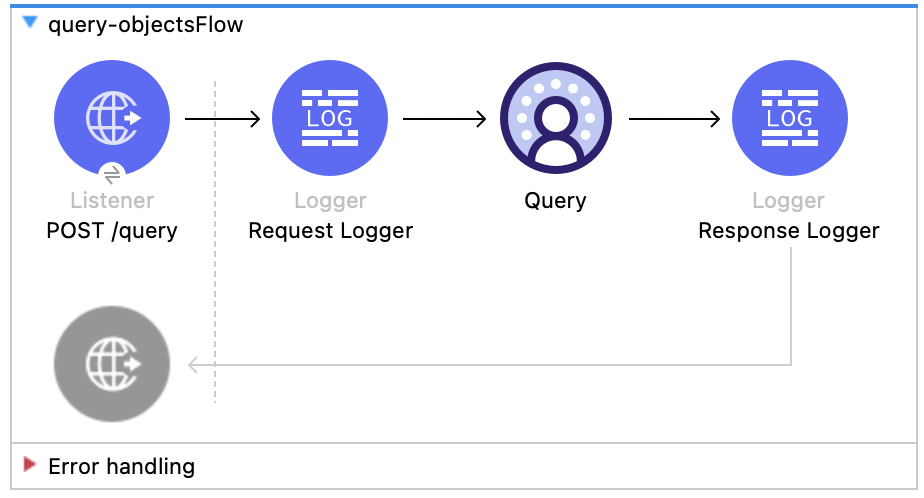
</mule>クエリ API
この Mule フローでは、カスタム SOQL クエリを使用して Data Cloud からデータを照会する方法を示します。 Salesforce SOQL のドキュメントを参照してください。
この例では、次の操作を使用します。
-
HTTP Listener
ペイロードにクエリが含まれる HTTP POST 要求からデータを受け取ります。 -
Logger
Listener から受け取った HTTP 要求を表示します。また、後で Query 操作からの HTTP 応答を表示します。 -
クエリ
-
OAuth クライアントログイン情報、OAuth JWT、または OAuth のユーザー名とパスワードの選択に基づいて認証します。
-
前の SOQL クエリを受け取ります。
-
クエリを含む Salesforce API をコールして、結果を受け取ります。
-
この例の XML
この例のフローをすばやく Mule アプリケーションに読み込むには、次のコードを Studio XML エディターに貼り付けます。
<?xml version="1.0" encoding="UTF-8"?>

<mule xmlns:sdc="http://www.mulesoft.org/schema/mule/sdc" xmlns:http="http://www.mulesoft.org/schema/mule/http"
	  xmlns="http://www.mulesoft.org/schema/mule/core"
	  xmlns:doc="http://www.mulesoft.org/schema/mule/documentation" xmlns:xsi="http://www.w3.org/2001/XMLSchema-instance" xsi:schemaLocation="http://www.mulesoft.org/schema/mule/core http://www.mulesoft.org/schema/mule/core/current/mule.xsd
http://www.mulesoft.org/schema/mule/http http://www.mulesoft.org/schema/mule/http/current/mule-http.xsd
http://www.mulesoft.org/schema/mule/sdc http://www.mulesoft.org/schema/mule/sdc/current/mule-sdc.xsd">
	<http:listener-config name="HTTP_Listener_config" doc:name="HTTP Listener config" >
		<http:listener-connection host="0.0.0.0" port="8081" />
	</http:listener-config>
    <configuration-properties doc:name="Configuration properties" file="mule-app.properties" />
    <sdc:sdc-config name="Salesforce_Data_Cloud_OAuth_JWT_config" doc:name="Salesforce Data Cloud config" >
		<sdc:oauth-jwt-connection consumerKey="${server.consumerKey}" keyStorePath="${server.keyStorePath}" storePassword="${server.keyStorePassword}" subject="${server.userName}" keyAlias="${server.certificateAlias}" audienceUrl="${server.audienceUrl}"/>
	</sdc:sdc-config>
	<sdc:sdc-config name="Salesforce_Data_Cloud_OAuth_UsernamePassword_config" doc:name="Salesforce Data Cloud config" >
		<sdc:oauth-user-pass-connection audienceUrl="${server.audienceUrl}" username="${server.userName}" password="${server.password}" clientId="${server.consumerKey}" clientSecret="${server.consumerSecret}"/>
	</sdc:sdc-config>

	<flow name="query-objectsFlow" >
		<http:listener doc:name="POST /query" config-ref="HTTP_Listener_config" path="/query" allowedMethods="POST"/>
		<logger level="INFO" doc:name="Request Logger" message="#[payload]"/>
		<sdc:query doc:name="Query" config-ref="Salesforce_Data_Cloud_OAuth_JWT_config"/>
		<logger level="INFO" doc:name="Response Logger" message="#[payload]"/>
	</flow>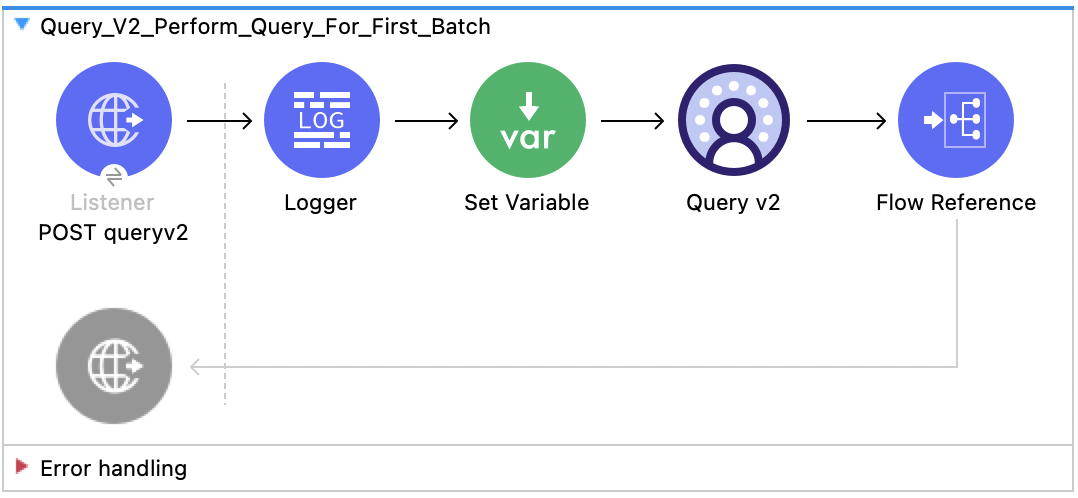
</mule>Query v2
この Mule フローでは、最初のクエリを送信する方法を示します。Query v2 - Get Next Batch の前にこのフローを使用します。Query v2 API についての詳細は、 「Data Cloud リファレンスガイド」を参照してください。
この例では、次の操作を使用します。
-
HTTP Listener
ペイロードにクエリが含まれる HTTP POST 要求からデータを受け取ります。 -
Logger
Listener から受信した HTTP 要求を表示します。 -
Set Variable
最大 10 件の結果のサンプルを取得するように sampleResults という変数を設定します。ページングコールには影響しません。この目的は、返されるペイロードを制限し、テストコールで 40 MB の大きなペイロードを使用しないようにすることです。 -
Query v2
Data Cloud データレイクに対してクエリを実行します。
-
Flow Reference
Query v2 - Get Next Batch フローを参照します。
この例の XML
この例のフローをすばやく Mule アプリケーションに読み込むには、次のコードを Studio XML エディターに貼り付けます。
<?xml version="1.0" encoding="UTF-8"?>

<mule xmlns:file="http://www.mulesoft.org/schema/mule/file"
      xmlns:sdc="http://www.mulesoft.org/schema/mule/sdc"
      xmlns:http="http://www.mulesoft.org/schema/mule/http"
      xmlns="http://www.mulesoft.org/schema/mule/core"
      xmlns:doc="http://www.mulesoft.org/schema/mule/documentation"
      xmlns:xsi="http://www.w3.org/2001/XMLSchema-instance"
      xsi:schemaLocation="
http://www.mulesoft.org/schema/mule/file http://www.mulesoft.org/schema/mule/file/current/mule-file.xsd
      http://www.mulesoft.org/schema/mule/core http://www.mulesoft.org/schema/mule/core/current/mule.xsd
      http://www.mulesoft.org/schema/mule/http http://www.mulesoft.org/schema/mule/http/current/mule-http.xsd
      http://www.mulesoft.org/schema/mule/sdc http://www.mulesoft.org/schema/mule/sdc/current/mule-sdc.xsd">

    <sdc:sdc-config name="Salesforce_Data_Cloud_config" doc:name="Salesforce Data Cloud config" doc:id="8b8cb9b6-54eb-453d-92a0-33199d6c51d9" >
		<sdc:oauth-jwt-connection />
	</sdc:sdc-config>
	<http:listener-config name="HTTP_Listener_config" doc:name="HTTP Listener config" doc:id="3797f40d-21cd-43a6-9ed4-c52fa6353a51" >
		<http:listener-connection host="0.0.0.0" port="8081" />
	</http:listener-config>
	<flow name="Query_V2_Perform_Query_For_First_Batch" doc:id="f6661148-d0ed-4cf0-867e-4c5966562ff1" >
        <http:listener doc:name="POST queryv2" doc:id="50fccf50-6807-49e4-89ba-561e6ccf7ab1" config-ref="HTTP_Listener_config" allowedMethods="POST" path="queryv2" outputMimeType="application/json"/>
        <logger level="INFO" doc:name="Logger" doc:id="b7e78a46-731a-46c8-88a7-e025af92af66" message='#["Received query: " ++ payload.sql as String]'/>
        <set-variable value="#[attributes.queryParams.sampleResults]" doc:name="Set Variable" doc:id="065c7163-4f4d-49fa-81e7-b5bc4b490ba0" variableName="sampleResults"/>
        <sdc:query-ansi-sql-v2 doc:name="Query v2" doc:id="84d8f88e-2b03-4186-bf40-b490b08b5feb" config-ref="Salesforce_Data_Cloud_config"/>
        <flow-ref doc:name="Flow Reference" doc:id="98389a4a-a2cd-4de2-b0fd-79e3dfa1f761" name="Query_V2_Get_Next_Batch"/>
    </flow>
</mule>
この例の実行手順
-
プロジェクトを保存します。
-
要求を送信してフローをテストします。次に例を示します。
curl --location 'http://127.0.0.1:8081/queryv2' \
--header 'Content-Type: application/json' \
--data '{"sql": "SELECT assigned_to_uid__c, campaign_name__c, cdp_sys_PartitionDate__c, coupon_code__c, currency__c, DataSource__c, DataSourceObject__c, expiry_date__c, sent__c, value__c FROM MunitQueryV2Test_coupons_C7876AA7__dll "}'
この要求例では次の応答例が返されます。この応答内の
nextBatchId を使用して、Query v2 - Get Next Batch で次の結果セットを取得できます (ある場合)。{ "data": [ [ "TorBsKqi", "kvoEyIhx", "2022-08-22 00:00:00.000 UTC", "pxMEsTAR", "GJWzpgut", "MunitQueryV2Test_b1ed190e_fd18_49ce_8813_f2f4ad59df50", "MunitQueryV2Test_coupons_C7876AA7", "2022-08-22 18:28:58.905 UTC", "RkXmYcdH", "87.000000000000000000" ], [...] ], "startTime": "2023-03-30T15:51:44.33103Z", "endTime": "2023-03-30T15:51:46.065576Z", "rowCount": 63803, "queryId": "20230330_155144_13391_5rx4m", "nextBatchId": "1449c1d1-2bf2-471d-824f-62c8f18c5c26", "done": false, "metadata": { "value__c": { "type": "DECIMAL", "placeInOrder": 9, "typeCode": 3 }, "sent__c": { "type": "VARCHAR", "placeInOrder": 8, "typeCode": 12 }, "assigned_to_uid__c": { "type": "VARCHAR", "placeInOrder": 0, "typeCode": 12 }, "currency__c": { "type": "VARCHAR", "placeInOrder": 4, "typeCode": 12 }, "DataSource__c": { "type": "VARCHAR", "placeInOrder": 5, "typeCode": 12 }, "campaign_name__c": { "type": "VARCHAR", "placeInOrder": 1, "typeCode": 12 }, "DataSourceObject__c": { "type": "VARCHAR", "placeInOrder": 6, "typeCode": 12 }, "coupon_code__c": { "type": "VARCHAR", "placeInOrder": 3, "typeCode": 12 }, "expiry_date__c": { "type": "TIMESTAMP WITH TIME ZONE", "placeInOrder": 7, "typeCode": 2014 }, "cdp_sys_PartitionDate__c": { "type": "TIMESTAMP WITH TIME ZONE", "placeInOrder": 2, "typeCode": 2014 } } }
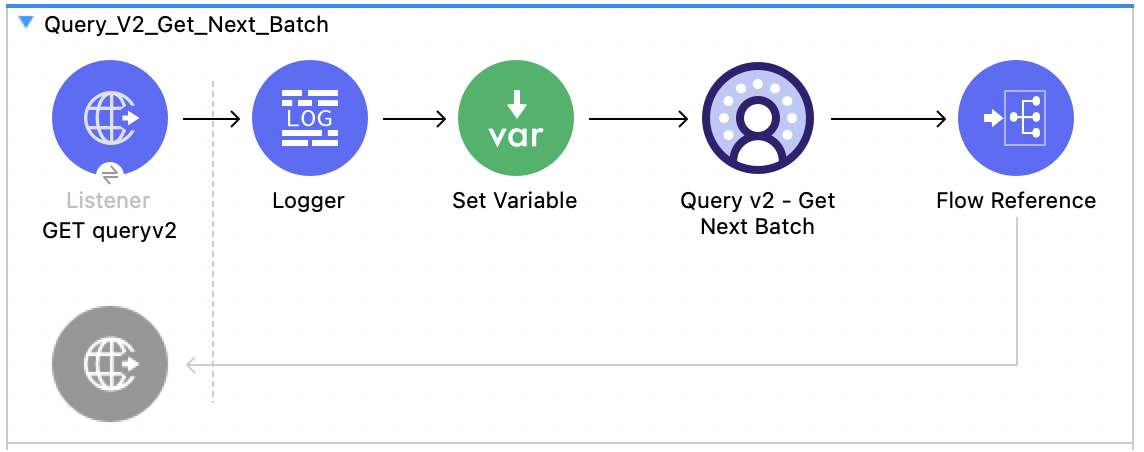
Query v2 - Get Next Batch
この Mule フローでは、Salesforce Data Cloud の前方移動のみのカーソル nextBatchId を使用して、結果を確認する方法を示します。Query v2 の後にこのフローを使用します。Query v2 Get Next Batch API についての詳細は、 「Data Cloud リファレンスガイド」を参照してください。
この例では、次の操作を使用します。
-
HTTP Listener
ペイロードにクエリが含まれる HTTP GET 要求からデータを受け取ります。 -
Logger
Listener から受信した HTTP 要求を表示します。 -
Set Variable
最大 10 件の結果のサンプルを取得するように sampleResults という変数を設定します。ページングコールには影響しません。この目的は、返されるペイロードを制限し、テストコールで 40 MB の大きなペイロードを使用しないようにすることです。 -
Query v2 - Get Next Batch
nextBatchId を使用し、前方移動カーソルを使用して、Query v2 および Query v2 - Get Next Batch フローからより多くの結果を取得します。 -
Flow Reference
Query v2 フローを参照します。
この例の XML
この例のフローをすばやく Mule アプリケーションに読み込むには、次のコードを Studio XML エディターに貼り付けます。
<?xml version="1.0" encoding="UTF-8"?>
<mule xmlns:file="http://www.mulesoft.org/schema/mule/file"
xmlns:sdc="http://www.mulesoft.org/schema/mule/sdc"
xmlns:http="http://www.mulesoft.org/schema/mule/http"
xmlns="http://www.mulesoft.org/schema/mule/core"
xmlns:doc="http://www.mulesoft.org/schema/mule/documentation"
xmlns:xsi="http://www.w3.org/2001/XMLSchema-instance"
xsi:schemaLocation="
http://www.mulesoft.org/schema/mule/file http://www.mulesoft.org/schema/mule/file/current/mule-file.xsd
http://www.mulesoft.org/schema/mule/core http://www.mulesoft.org/schema/mule/core/current/mule.xsd
http://www.mulesoft.org/schema/mule/http http://www.mulesoft.org/schema/mule/http/current/mule-http.xsd
http://www.mulesoft.org/schema/mule/sdc http://www.mulesoft.org/schema/mule/sdc/current/mule-sdc.xsd">
<sdc:sdc-config name="Salesforce_Data_Cloud_config" doc:name="Salesforce Data Cloud config" doc:id="8b8cb9b6-54eb-453d-92a0-33199d6c51d9" >
<sdc:oauth-jwt-connection />
</sdc:sdc-config>
<http:listener-config name="HTTP_Listener_config" doc:name="HTTP Listener config" doc:id="3797f40d-21cd-43a6-9ed4-c52fa6353a51" >
<http:listener-connection host="0.0.0.0" port="8081" />
</http:listener-config>
<sdc:sdc-config name="Salesforce_Data_Cloud_config1" doc:name="Salesforce Data Cloud config" doc:id="acb1d379-3715-4253-9c34-ab33d5977a4a" >
<sdc:oauth-jwt-connection />
</sdc:sdc-config>
<flow name="Query_V2_Get_Next_Batch" doc:id="041306ea-0617-4ae1-870b-5300dcf57ba6" >
<http:listener doc:name="GET queryv2" doc:id="0ab08df2-c966-4e0c-ba80-07249a92dfa0" config-ref="HTTP_Listener_config" path="queryv2" allowedMethods="GET"/>
<logger level="INFO" doc:name="Logger" doc:id="f197bc98-829d-489c-8318-ceee4bcdd8f6" message='#["Next Batch ID Received: " ++ attributes.queryParams.nextBatchId as String]'/>
<set-variable value="#[attributes.queryParams.sampleResults]" doc:name="Set Variable" doc:id="0ae026f9-1660-4d10-8025-213a9a4fb0f5" variableName="sampleResults"/>
<sdc:get-next-batch-ansi-sql-v2 doc:name="Query v2 - Get Next Batch" doc:id="1a9b3856-5991-4177-8783-1e4a2c0496a0" config-ref="Salesforce_Data_Cloud_config1" nextBatchIdUriParam="#[attributes.queryParams.nextBatchId]"/>
<flow-ref doc:name="Flow Reference" doc:id="ed91ecf6-821d-43e0-969b-4bc0ad921431" name="Query_V2_Perform_Query_For_First_Batch" />
</flow>
</mule>この例の実行手順
-
プロジェクトを保存します。
-
要求を送信してフローをテストします。次に例を示します。
curl --location 'http://127.0.0.1:8081/queryv2?nextBatchId=3e2f0036-f75b-4ee9-a29b-35d8f914e2f1'
この要求例では次の応答例が返されます。
{
    "data": [
        [
            "TorBsKqi",
            "kvoEyIhx",
            "2022-08-22 00:00:00.000 UTC",
            "pxMEsTAR",
            "GJWzpgut",
            "MunitQueryV2Test_b1ed190e_fd18_49ce_8813_f2f4ad59df50",
            "MunitQueryV2Test_coupons_C7876AA7",
            "2022-08-22 18:28:58.905 UTC",
            "RkXmYcdH",
            "87.000000000000000000"
        ],
        [...]
    ],
    "startTime": "2023-03-30T15:51:44.33103Z",
    "endTime": "2023-03-30T15:51:46.065576Z",
    "rowCount": 63803,
    "queryId": "20230330_155144_13391_5rx4m",
    "nextBatchId": "1449c1d1-2bf2-471d-824f-62c8f18c5c26",
    "done": false,
    "metadata": {
        "value__c": {
            "type": "DECIMAL",
            "placeInOrder": 9,
            "typeCode": 3
        },
        "sent__c": {
            "type": "VARCHAR",
            "placeInOrder": 8,
            "typeCode": 12
        },
        "assigned_to_uid__c": {
            "type": "VARCHAR",
            "placeInOrder": 0,
            "typeCode": 12
        },
        "currency__c": {
            "type": "VARCHAR",
            "placeInOrder": 4,
            "typeCode": 12
        },
        "DataSource__c": {
            "type": "VARCHAR",
            "placeInOrder": 5,
            "typeCode": 12
        },
        "campaign_name__c": {
            "type": "VARCHAR",
            "placeInOrder": 1,
            "typeCode": 12
        },
        "DataSourceObject__c": {
            "type": "VARCHAR",
            "placeInOrder": 6,
            "typeCode": 12
        },
        "coupon_code__c": {
            "type": "VARCHAR",
            "placeInOrder": 3,
            "typeCode": 12
        },
        "expiry_date__c": {
            "type": "TIMESTAMP WITH TIME ZONE",
            "placeInOrder": 7,
            "typeCode": 2014
        },
        "cdp_sys_PartitionDate__c": {
            "type": "TIMESTAMP WITH TIME ZONE",
            "placeInOrder": 2,
            "typeCode": 2014
        }
    }
}
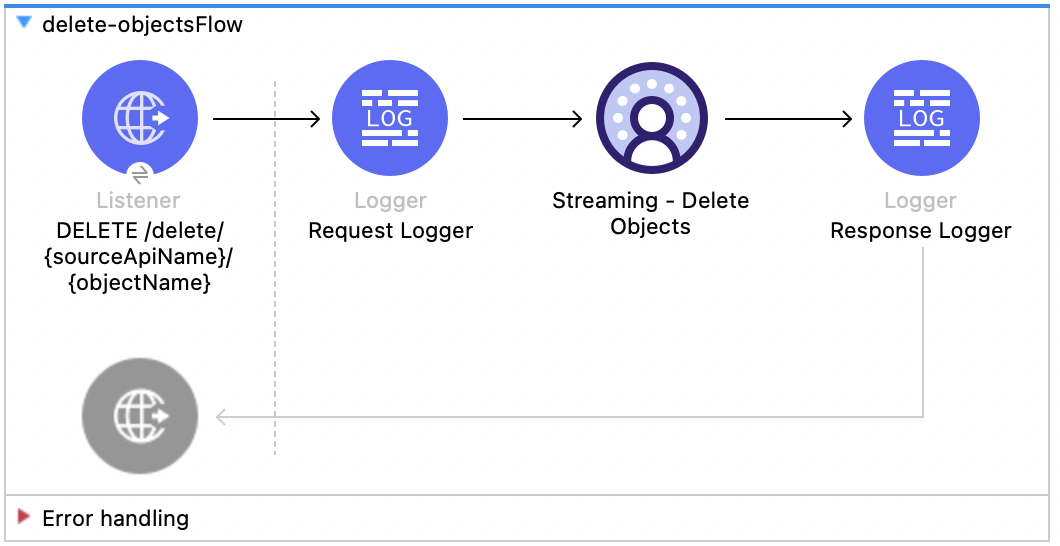
データの削除 - ストリーミング API
この Mule フローでは、オブジェクトのエンドポイントを使用してストリーミング API を介してデータを削除する方法を示します。 Salesforce API のドキュメントを参照してください。
この例では、次の操作を使用します。
-
HTTP Listener
ソース API とオブジェクト名が URI パラメーターとして含まれ、レコード ID がクエリパラメーターとして含まれる HTTP DELETE 要求からデータを受け取ります。 -
Logger
Listener から受け取った HTTP 要求を表示します。また、後で Streaming Delete 操作からの HTTP 応答を表示します。 -
Streaming Delete
-
OAuth クライアントログイン情報、OAuth JWT、または OAuth のユーザー名とパスワードの選択に基づいて認証します。
-
ソース API 参照名、オブジェクト名、レコード ID を受け取ります。
-
Salesforce API をコールして、該当のオブジェクトのエンドポイントを使用してクエリパラメーターからレコードを削除します。
-
この例の XML
この例のフローをすばやく Mule アプリケーションに読み込むには、次のコードを Studio XML エディターに貼り付けます。
<?xml version="1.0" encoding="UTF-8"?>
<mule xmlns:sdc="http://www.mulesoft.org/schema/mule/sdc" xmlns:http="http://www.mulesoft.org/schema/mule/http"
xmlns="http://www.mulesoft.org/schema/mule/core"
xmlns:doc="http://www.mulesoft.org/schema/mule/documentation" xmlns:xsi="http://www.w3.org/2001/XMLSchema-instance" xsi:schemaLocation="http://www.mulesoft.org/schema/mule/core http://www.mulesoft.org/schema/mule/core/current/mule.xsd
http://www.mulesoft.org/schema/mule/http http://www.mulesoft.org/schema/mule/http/current/mule-http.xsd
http://www.mulesoft.org/schema/mule/sdc http://www.mulesoft.org/schema/mule/sdc/current/mule-sdc.xsd">
<http:listener-config name="HTTP_Listener_config" doc:name="HTTP Listener config" >
<http:listener-connection host="0.0.0.0" port="8081" />
</http:listener-config>
<configuration-properties doc:name="Configuration properties" file="mule-app.properties" />
<sdc:sdc-config name="Salesforce_Data_Cloud_OAuth_JWT_config" doc:name="Salesforce Data Cloud config" >
<sdc:oauth-jwt-connection consumerKey="${server.consumerKey}" keyStorePath="${server.keyStorePath}" storePassword="${server.keyStorePassword}" subject="${server.userName}" keyAlias="${server.certificateAlias}" audienceUrl="${server.audienceUrl}"/>
</sdc:sdc-config>
<sdc:sdc-config name="Salesforce_Data_Cloud_OAuth_UsernamePassword_config" doc:name="Salesforce Data Cloud config" >
<sdc:oauth-user-pass-connection audienceUrl="${server.audienceUrl}" username="${server.userName}" password="${server.password}" clientId="${server.consumerKey}" clientSecret="${server.consumerSecret}"/>
</sdc:sdc-config>
<flow name="delete-objectsFlow" >
<http:listener doc:name="DELETE /delete/{sourceApiName}/{objectName}" config-ref="HTTP_Listener_config" path="/delete/{sourceApiName}/{objectName}" allowedMethods="DELETE"/>
<logger level="INFO" doc:name="Request Logger" />
<sdc:delete-objects doc:name="Streaming - Delete Objects" config-ref="Salesforce_Data_Cloud_OAuth_JWT_config" idsQueryParams="#[output application/java --- [attributes.queryParams.ids]]" sourceNameUriParam="#[attributes.uriParams.sourceApiName]" objectNameUriParam="#[attributes.uriParams.objectName]"/>
<logger level="INFO" doc:name="Response Logger" />
</flow>
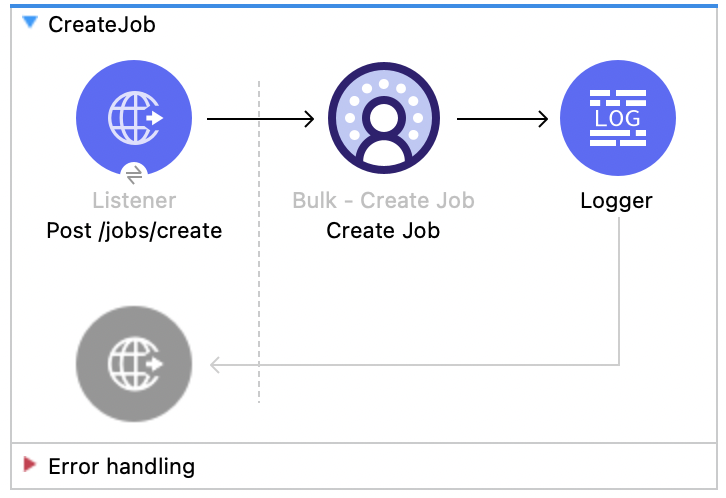
</mule>ジョブの作成 - Bulk API
この Mule フローでは、Salesforce Data Cloud 取り込み API オブジェクトにデータをアップロードする一括ジョブを作成する方法を示します。 Salesforce API のドキュメントを参照してください。
この例では、次の操作を使用します。
-
HTTP Listener
ソース API とオブジェクト名が URI パラメーターとして含まれ、レコード ID がクエリパラメーターとして含まれる HTTP POST 要求からデータを受け取ります。 -
Logger
Listener から受け取った HTTP 要求を表示します。また、後で Create Job 操作からの HTTP 応答を表示します。 -
Create Job:
-
OAuth クライアントログイン情報、OAuth JWT、または OAuth のユーザー名とパスワードの選択に基づいて認証します。
-
ソース API 参照名、オブジェクト名、ジョブ操作を受け取ります。ジョブ操作については、「リファレンス」ページを参照してください。
-
ジョブを作成する Salesforce API をコールして、応答を返します。
-
この例の XML
この例のフローをすばやく Mule アプリケーションに読み込むには、次のコードを Studio XML エディターに貼り付けます。
<?xml version="1.0" encoding="UTF-8"?>

<mule xmlns:salesforce="http://www.mulesoft.org/schema/mule/salesforce" xmlns:ee="http://www.mulesoft.org/schema/mule/ee/core"
	xmlns:file="http://www.mulesoft.org/schema/mule/file"
	xmlns:sdc="http://www.mulesoft.org/schema/mule/sdc" xmlns:http="http://www.mulesoft.org/schema/mule/http" xmlns="http://www.mulesoft.org/schema/mule/core" xmlns:doc="http://www.mulesoft.org/schema/mule/documentation" xmlns:xsi="http://www.w3.org/2001/XMLSchema-instance" xsi:schemaLocation="http://www.mulesoft.org/schema/mule/core http://www.mulesoft.org/schema/mule/core/current/mule.xsd
http://www.mulesoft.org/schema/mule/http http://www.mulesoft.org/schema/mule/http/current/mule-http.xsd
http://www.mulesoft.org/schema/mule/sdc http://www.mulesoft.org/schema/mule/sdc/current/mule-sdc.xsd
http://www.mulesoft.org/schema/mule/file http://www.mulesoft.org/schema/mule/file/current/mule-file.xsd
http://www.mulesoft.org/schema/mule/ee/core http://www.mulesoft.org/schema/mule/ee/core/current/mule-ee.xsd
http://www.mulesoft.org/schema/mule/salesforce http://www.mulesoft.org/schema/mule/salesforce/current/mule-salesforce.xsd">
	<http:listener-config name="HTTP_Listener_config" doc:name="HTTP Listener config" >
		<http:listener-connection host="0.0.0.0" port="8081" />
	</http:listener-config>
	<sdc:sdc-config name="Salesforce_Data_Cloud_OAuth_JWT_config" doc:name="Salesforce Data Cloud config" >
		<sdc:oauth-jwt-connection consumerKey="${server.consumerKey}" keyStorePath="${server.keyStorePath}" storePassword="${server.keyStorePassword}" subject="${server.userName}" audienceUrl="${server.audienceUrl}" keyAlias="${server.certificateAlias}" />
	</sdc:sdc-config>
	<configuration-properties doc:name="Configuration properties" file="mule-app.properties" />
	<sdc:sdc-config name="Salesforce_Data_Cloud_OAuth_UsernamePassword_config" doc:name="Salesforce Data Cloud config" >
		<sdc:oauth-user-pass-connection clientId="${server.consumerKey}" clientSecret="${server.consumerSecret}" username="${server.userName}" password="${server.password}" audienceUrl="${server.audienceUrl}" />
	</sdc:sdc-config>
	<flow name="CreateJob" >
		<http:listener doc:name="Post /jobs/create" config-ref="HTTP_Listener_config" path="/jobs/create/{sourceApiName}/{objectName}/{operation}"/>
		<sdc:create-bulk-job doc:name="Create Job" config-ref="Salesforce_Data_Cloud_OAuth_UsernamePassword_config" sourceNameUriParam="#[attributes.uriParams.sourceApiName]" objectNameUriParam="#[attributes.uriParams.objectName]" operationUriParam="#[attributes.uriParams.operation]"/>
		<logger level="INFO" doc:name="Logger" />
	</flow>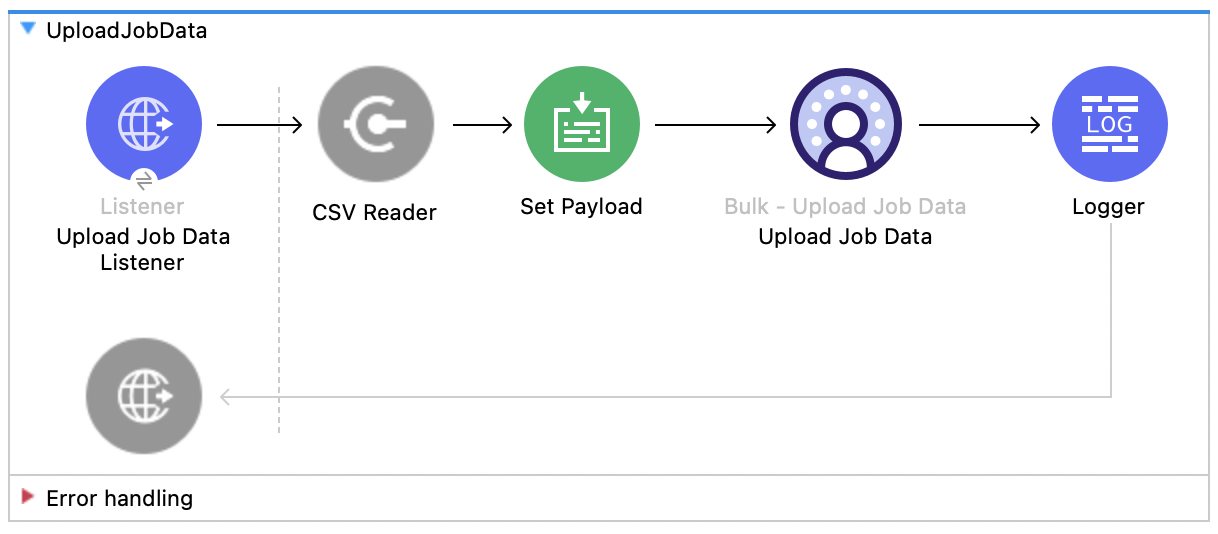
</mule>ジョブデータのアップロード - Bulk API
この Mule フローでは、ジョブ ID で指定した Salesforce Data Cloud 取り込み API オブジェクトに挿入するデータ、またはその Salesforce Data Cloud 取り込み API オブジェクトから削除するデータをアップロードする方法を示します。 Salesforce API のドキュメントを参照してください。
この例では、次の操作を使用します。
-
HTTP Listener
URI にジョブ ID が含まれる HTTP POST 要求からデータを受け取ります。 -
CSV Reader
絶対ファイルパスで設定された CSV からデータを読み取ります。 -
Set Payload
Upload Job Data 用の CSV データでペイロードを更新します。 -
Upload Job Data
-
OAuth クライアントログイン情報、OAuth JWT、または OAuth のユーザー名とパスワードの選択に基づいて認証します。
-
HTTP 要求からのジョブ ID と、ペイロードにある CSV データを受け取ります。
-
データを CSV から Salesforce Data Cloud 取り込み API オブジェクトにアップロードし、最終的に HTTP 応答を返します。
-
-
Logger
Upload Job Data 操作からの HTTP 結果を表示します。
この例の XML
この例のフローをすばやく Mule アプリケーションに読み込むには、次のコードを Studio XML エディターに貼り付けます。
<?xml version="1.0" encoding="UTF-8"?>

<mule xmlns:salesforce="http://www.mulesoft.org/schema/mule/salesforce" xmlns:ee="http://www.mulesoft.org/schema/mule/ee/core"
	xmlns:file="http://www.mulesoft.org/schema/mule/file"
	xmlns:sdc="http://www.mulesoft.org/schema/mule/sdc" xmlns:http="http://www.mulesoft.org/schema/mule/http" xmlns="http://www.mulesoft.org/schema/mule/core" xmlns:doc="http://www.mulesoft.org/schema/mule/documentation" xmlns:xsi="http://www.w3.org/2001/XMLSchema-instance" xsi:schemaLocation="http://www.mulesoft.org/schema/mule/core http://www.mulesoft.org/schema/mule/core/current/mule.xsd
http://www.mulesoft.org/schema/mule/http http://www.mulesoft.org/schema/mule/http/current/mule-http.xsd
http://www.mulesoft.org/schema/mule/sdc http://www.mulesoft.org/schema/mule/sdc/current/mule-sdc.xsd
http://www.mulesoft.org/schema/mule/file http://www.mulesoft.org/schema/mule/file/current/mule-file.xsd
http://www.mulesoft.org/schema/mule/ee/core http://www.mulesoft.org/schema/mule/ee/core/current/mule-ee.xsd
http://www.mulesoft.org/schema/mule/salesforce http://www.mulesoft.org/schema/mule/salesforce/current/mule-salesforce.xsd">
	<http:listener-config name="HTTP_Listener_config" doc:name="HTTP Listener config" >
		<http:listener-connection host="0.0.0.0" port="8081" />
	</http:listener-config>
	<sdc:sdc-config name="Salesforce_Data_Cloud_OAuth_JWT_config" doc:name="Salesforce Data Cloud config" >
		<sdc:oauth-jwt-connection consumerKey="${server.consumerKey}" keyStorePath="${server.keyStorePath}" storePassword="${server.keyStorePassword}" subject="${server.userName}" audienceUrl="${server.audienceUrl}" keyAlias="${server.certificateAlias}" />
	</sdc:sdc-config>
	<configuration-properties doc:name="Configuration properties" file="mule-app.properties" />
	<sdc:sdc-config name="Salesforce_Data_Cloud_OAuth_UsernamePassword_config" doc:name="Salesforce Data Cloud config" >
		<sdc:oauth-user-pass-connection clientId="${server.consumerKey}" clientSecret="${server.consumerSecret}" username="${server.userName}" password="${server.password}" audienceUrl="${server.audienceUrl}" />
	</sdc:sdc-config>
	<flow name="UploadJobData" >
        <http:listener doc:name="Upload Job Data Listener" config-ref="HTTP_Listener_config" path="/jobs/upload/{jobId}"/>
        <file:read doc:name="CSV Reader" path="" target="content"/>
        <set-payload value="#[vars.content]" doc:name="Set Payload" />
        <sdc:upload-data-bulk-job doc:name="Upload Job Data" config-ref="Salesforce_Data_Cloud_OAuth_JWT_config" idUriParam="#[attributes.uriParams.jobId]"/>
        <logger level="INFO" doc:name="Logger" message="#[message]"/>
    </flow>
</mule>
この例の実行手順
-
CSV への有効な絶対ファイルパスを CSV Reader の [File Path (ファイルパス)] 属性に入力します。
-
プロジェクトを保存します。
-
ジョブを作成し、そのジョブ ID をコピーします。
-
前の手順でコピーしたジョブ ID を使用して
POST を localhost:8081/jobs/upload/{JOB_ID} に送信し、フローをテストします。
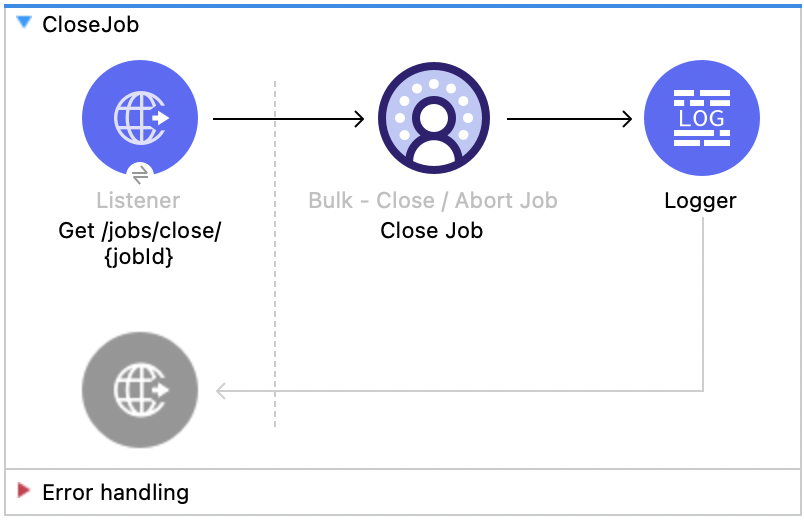
ジョブの終了 - Bulk API
この Mule フローでは、指定したジョブ ID の状況を更新してジョブを終了する方法を示します。終了したジョブは、 Salesforce API のドキュメント処理キューに登録されます。
この例では、次の操作を使用します。
-
HTTP Listener
URI パラメーターにジョブ ID が含まれる HTTP GET 要求からデータを受け取ります。 -
Logger
Close Job 操作からの HTTP 応答を表示します。 -
Close Job
-
OAuth クライアントログイン情報、OAuth JWT、または OAuth のユーザー名とパスワードの選択に基づいて認証します。
-
指定されたジョブを受け取ります。
-
UploadComplete 状態を使用して Salesforce API をコールし、該当のジョブを完了した後、HTTP 応答を受け取ります。
-
この例の XML
この例のフローをすばやく Mule アプリケーションに読み込むには、次のコードを Studio XML エディターに貼り付けます。
<?xml version="1.0" encoding="UTF-8"?>

<mule xmlns:salesforce="http://www.mulesoft.org/schema/mule/salesforce" xmlns:ee="http://www.mulesoft.org/schema/mule/ee/core"
	xmlns:file="http://www.mulesoft.org/schema/mule/file"
	xmlns:sdc="http://www.mulesoft.org/schema/mule/sdc" xmlns:http="http://www.mulesoft.org/schema/mule/http" xmlns="http://www.mulesoft.org/schema/mule/core" xmlns:doc="http://www.mulesoft.org/schema/mule/documentation" xmlns:xsi="http://www.w3.org/2001/XMLSchema-instance" xsi:schemaLocation="http://www.mulesoft.org/schema/mule/core http://www.mulesoft.org/schema/mule/core/current/mule.xsd
http://www.mulesoft.org/schema/mule/http http://www.mulesoft.org/schema/mule/http/current/mule-http.xsd
http://www.mulesoft.org/schema/mule/sdc http://www.mulesoft.org/schema/mule/sdc/current/mule-sdc.xsd
http://www.mulesoft.org/schema/mule/file http://www.mulesoft.org/schema/mule/file/current/mule-file.xsd
http://www.mulesoft.org/schema/mule/ee/core http://www.mulesoft.org/schema/mule/ee/core/current/mule-ee.xsd
http://www.mulesoft.org/schema/mule/salesforce http://www.mulesoft.org/schema/mule/salesforce/current/mule-salesforce.xsd">
	<http:listener-config name="HTTP_Listener_config" doc:name="HTTP Listener config" >
		<http:listener-connection host="0.0.0.0" port="8081" />
	</http:listener-config>
	<sdc:sdc-config name="Salesforce_Data_Cloud_OAuth_JWT_config" doc:name="Salesforce Data Cloud config" >
		<sdc:oauth-jwt-connection consumerKey="${server.consumerKey}" keyStorePath="${server.keyStorePath}" storePassword="${server.keyStorePassword}" subject="${server.userName}" audienceUrl="${server.audienceUrl}" keyAlias="${server.certificateAlias}" />
	</sdc:sdc-config>
	<configuration-properties doc:name="Configuration properties" file="mule-app.properties" />
	<sdc:sdc-config name="Salesforce_Data_Cloud_OAuth_UsernamePassword_config" doc:name="Salesforce Data Cloud config" >
		<sdc:oauth-user-pass-connection clientId="${server.consumerKey}" clientSecret="${server.consumerSecret}" username="${server.userName}" password="${server.password}" audienceUrl="${server.audienceUrl}" />
	</sdc:sdc-config>
	<flow name="CloseJob" >
		<http:listener doc:name="Get /jobs/close/{jobId}" config-ref="HTTP_Listener_config" path="/jobs/close/{jobId}"/>
		<sdc:update-bulk-operation-job doc:name="Close Job" config-ref="Salesforce_Data_Cloud_OAuth_JWT_config" idUriParam="#[attributes.uriParams.jobId]" state="UploadComplete"/>
		<logger level="INFO" doc:name="Logger" />
	</flow>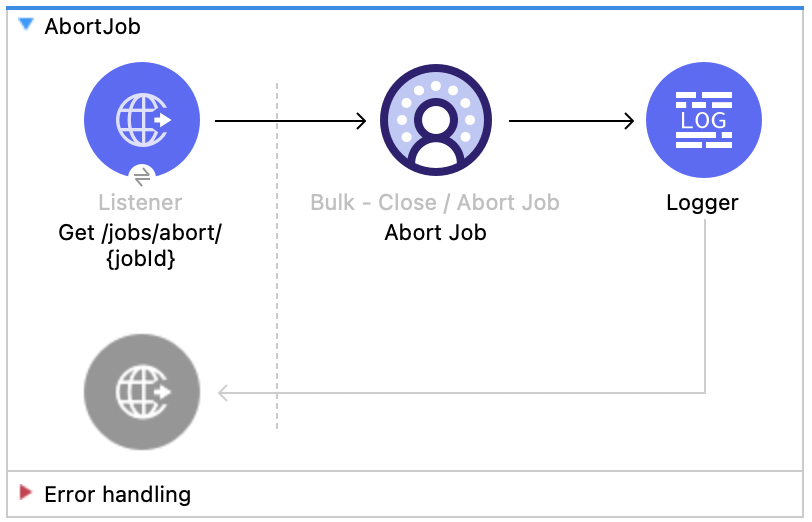
</mule>ジョブの中止 - Bulk API
この Mule フローでは、指定したジョブ ID の状況を更新してジョブを中止する方法を示します。中止したジョブは、 Salesforce API のドキュメント処理キューに登録されません。
この例では、次の操作を使用します。
-
HTTP Listener
URI パラメーターにジョブ ID が含まれる HTTP GET 要求からデータを受け取ります。 -
Logger
Abort Job 操作からの HTTP 応答を表示します。 -
Abort Job:
-
OAuth クライアントログイン情報、OAuth JWT、または OAuth のユーザー名とパスワードの選択に基づいて認証します。
-
URI パラメーターとして使用されたジョブ ID を受け取ります。
-
aborted 状態を使用して Salesforce API をコールし、該当のジョブを中止した後、HTTP 応答を受け取ります。
-
この例の XML
この例のフローをすばやく Mule アプリケーションに読み込むには、次のコードを Studio XML エディターに貼り付けます。
<?xml version="1.0" encoding="UTF-8"?>

<mule xmlns:salesforce="http://www.mulesoft.org/schema/mule/salesforce" xmlns:ee="http://www.mulesoft.org/schema/mule/ee/core"
	xmlns:file="http://www.mulesoft.org/schema/mule/file"
	xmlns:sdc="http://www.mulesoft.org/schema/mule/sdc" xmlns:http="http://www.mulesoft.org/schema/mule/http" xmlns="http://www.mulesoft.org/schema/mule/core" xmlns:doc="http://www.mulesoft.org/schema/mule/documentation" xmlns:xsi="http://www.w3.org/2001/XMLSchema-instance" xsi:schemaLocation="http://www.mulesoft.org/schema/mule/core http://www.mulesoft.org/schema/mule/core/current/mule.xsd
http://www.mulesoft.org/schema/mule/http http://www.mulesoft.org/schema/mule/http/current/mule-http.xsd
http://www.mulesoft.org/schema/mule/sdc http://www.mulesoft.org/schema/mule/sdc/current/mule-sdc.xsd
http://www.mulesoft.org/schema/mule/file http://www.mulesoft.org/schema/mule/file/current/mule-file.xsd
http://www.mulesoft.org/schema/mule/ee/core http://www.mulesoft.org/schema/mule/ee/core/current/mule-ee.xsd
http://www.mulesoft.org/schema/mule/salesforce http://www.mulesoft.org/schema/mule/salesforce/current/mule-salesforce.xsd">
	<http:listener-config name="HTTP_Listener_config" doc:name="HTTP Listener config" >
		<http:listener-connection host="0.0.0.0" port="8081" />
	</http:listener-config>
	<sdc:sdc-config name="Salesforce_Data_Cloud_OAuth_JWT_config" doc:name="Salesforce Data Cloud config" >
		<sdc:oauth-jwt-connection consumerKey="${server.consumerKey}" keyStorePath="${server.keyStorePath}" storePassword="${server.keyStorePassword}" subject="${server.userName}" audienceUrl="${server.audienceUrl}" keyAlias="${server.certificateAlias}" />
	</sdc:sdc-config>
	<configuration-properties doc:name="Configuration properties" file="mule-app.properties" />
	<sdc:sdc-config name="Salesforce_Data_Cloud_OAuth_UsernamePassword_config" doc:name="Salesforce Data Cloud config" >
		<sdc:oauth-user-pass-connection clientId="${server.consumerKey}" clientSecret="${server.consumerSecret}" username="${server.userName}" password="${server.password}" audienceUrl="${server.audienceUrl}" />
	</sdc:sdc-config>
	<flow name="AbortJob" >
		<http:listener doc:name="Get /jobs/abort/{jobId}"  config-ref="HTTP_Listener_config" path="/jobs/abort/{jobId}"/>
		<sdc:update-bulk-operation-job doc:name="Abort Job" config-ref="Salesforce_Data_Cloud_OAuth_JWT_config" idUriParam="#[attributes.uriParams.jobId]" state="Aborted"/>
		<logger level="INFO" doc:name="Logger" />
	</flow>
</mule>
この例の実行手順
-
プロジェクトを保存します。
-
ジョブを作成し、結果のジョブ ID をコピーします。
-
前の手順でコピーしたジョブ ID を使用して
GET を localhost:8081/jobs/abort/{JOB_ID} に送信し、フローをテストします。
ジョブの取得 - Bulk API
この Mule フローでは、指定したジョブ ID の現在の状況を取得する方法を示します。 Salesforce API のドキュメントを参照してください。
この例では、次の操作を使用します。
-
HTTP Listener
URI パラメーターにジョブ ID が含まれる HTTP GET 要求からデータを受け取ります。 -
Logger
Get Job 操作からの HTTP 応答を表示します。 -
Get Job
-
OAuth クライアントログイン情報、OAuth JWT、または OAuth のユーザー名とパスワードの選択に基づいて認証します。
-
URI パラメーターからジョブ ID を受け取ります。
-
Salesforce API をコールして、ジョブの状況を返します。
-

この例の XML
この例のフローをすばやく Mule アプリケーションに読み込むには、次のコードを Studio XML エディターに貼り付けます。
<?xml version="1.0" encoding="UTF-8"?>

<mule xmlns:salesforce="http://www.mulesoft.org/schema/mule/salesforce" xmlns:ee="http://www.mulesoft.org/schema/mule/ee/core"
	xmlns:file="http://www.mulesoft.org/schema/mule/file"
	xmlns:sdc="http://www.mulesoft.org/schema/mule/sdc" xmlns:http="http://www.mulesoft.org/schema/mule/http" xmlns="http://www.mulesoft.org/schema/mule/core" xmlns:doc="http://www.mulesoft.org/schema/mule/documentation" xmlns:xsi="http://www.w3.org/2001/XMLSchema-instance" xsi:schemaLocation="http://www.mulesoft.org/schema/mule/core http://www.mulesoft.org/schema/mule/core/current/mule.xsd
http://www.mulesoft.org/schema/mule/http http://www.mulesoft.org/schema/mule/http/current/mule-http.xsd
http://www.mulesoft.org/schema/mule/sdc http://www.mulesoft.org/schema/mule/sdc/current/mule-sdc.xsd
http://www.mulesoft.org/schema/mule/file http://www.mulesoft.org/schema/mule/file/current/mule-file.xsd
http://www.mulesoft.org/schema/mule/ee/core http://www.mulesoft.org/schema/mule/ee/core/current/mule-ee.xsd
http://www.mulesoft.org/schema/mule/salesforce http://www.mulesoft.org/schema/mule/salesforce/current/mule-salesforce.xsd">
	<http:listener-config name="HTTP_Listener_config" doc:name="HTTP Listener config" >
		<http:listener-connection host="0.0.0.0" port="8081" />
	</http:listener-config>
	<sdc:sdc-config name="Salesforce_Data_Cloud_OAuth_JWT_config" doc:name="Salesforce Data Cloud config" >
		<sdc:oauth-jwt-connection consumerKey="${server.consumerKey}" keyStorePath="${server.keyStorePath}" storePassword="${server.keyStorePassword}" subject="${server.userName}" audienceUrl="${server.audienceUrl}" keyAlias="${server.certificateAlias}" />
	</sdc:sdc-config>
	<configuration-properties doc:name="Configuration properties" file="mule-app.properties" />
	<sdc:sdc-config name="Salesforce_Data_Cloud_OAuth_UsernamePassword_config" doc:name="Salesforce Data Cloud config" >
		<sdc:oauth-user-pass-connection clientId="${server.consumerKey}" clientSecret="${server.consumerSecret}" username="${server.userName}" password="${server.password}" audienceUrl="${server.audienceUrl}" />
	</sdc:sdc-config>
	<flow name="GetJob" >
		<http:listener doc:name="Get /jobs/get/{jobId}" config-ref="HTTP_Listener_config" path="/jobs/get/{jobId}"/>
		<sdc:get-bulk-job doc:name="Get Job" config-ref="Salesforce_Data_Cloud_OAuth_JWT_config" idUriParam="#[attributes.uriParams.jobId]"/>
		<logger level="INFO" doc:name="Logger" />
	</flow>
</mule>
この例の実行手順
-
プロジェクトを保存します。
-
ジョブを作成し、結果のジョブ ID をコピーします。
-
前の手順でコピーしたジョブ ID を使用して
GET を localhost:8081/jobs/get/{JOB_ID} に送信し、フローをテストします。
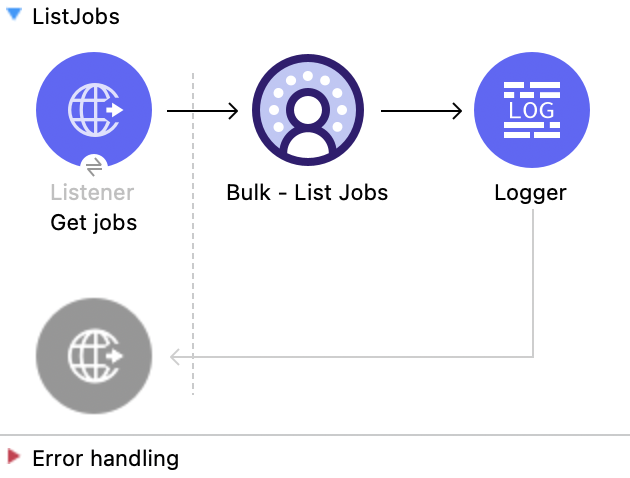
ジョブのリスト - Bulk API
この Mule フローでは、すべての一括ジョブを取得する方法を示します。 Salesforce API のドキュメントを参照してください。
この例では、次の操作を使用します。
-
HTTP Listener
URI パラメーターにすべてのジョブが含まれる HTTP GET 要求からデータを受け取ります。 -
Logger
List Jobs 操作からの HTTP 応答を表示します。 -
List Jobs
-
OAuth クライアントログイン情報、OAuth JWT、または OAuth のユーザー名とパスワードの選択に基づいて認証します。
-
URI パラメーターからすべてのジョブを受け取ります。
-
Salesforce API をコールして、ジョブの状況を返します。
-
この例の XML
この例のフローをすばやく Mule アプリケーションに読み込むには、次のコードを Studio XML エディターに貼り付けます。
<?xml version="1.0" encoding="UTF-8"?>

<mule xmlns:salesforce="http://www.mulesoft.org/schema/mule/salesforce" xmlns:ee="http://www.mulesoft.org/schema/mule/ee/core"
	xmlns:file="http://www.mulesoft.org/schema/mule/file"
	xmlns:sdc="http://www.mulesoft.org/schema/mule/sdc" xmlns:http="http://www.mulesoft.org/schema/mule/http" xmlns="http://www.mulesoft.org/schema/mule/core" xmlns:doc="http://www.mulesoft.org/schema/mule/documentation" xmlns:xsi="http://www.w3.org/2001/XMLSchema-instance" xsi:schemaLocation="http://www.mulesoft.org/schema/mule/core http://www.mulesoft.org/schema/mule/core/current/mule.xsd
http://www.mulesoft.org/schema/mule/http http://www.mulesoft.org/schema/mule/http/current/mule-http.xsd
http://www.mulesoft.org/schema/mule/sdc http://www.mulesoft.org/schema/mule/sdc/current/mule-sdc.xsd
http://www.mulesoft.org/schema/mule/file http://www.mulesoft.org/schema/mule/file/current/mule-file.xsd
http://www.mulesoft.org/schema/mule/ee/core http://www.mulesoft.org/schema/mule/ee/core/current/mule-ee.xsd
http://www.mulesoft.org/schema/mule/salesforce http://www.mulesoft.org/schema/mule/salesforce/current/mule-salesforce.xsd">
	<http:listener-config name="HTTP_Listener_config" doc:name="HTTP Listener config" >
		<http:listener-connection host="0.0.0.0" port="8081" />
	</http:listener-config>
	<sdc:sdc-config name="Salesforce_Data_Cloud_OAuth_JWT_config" doc:name="Salesforce Data Cloud config" >
		<sdc:oauth-jwt-connection consumerKey="${server.consumerKey}" keyStorePath="${server.keyStorePath}" storePassword="${server.keyStorePassword}" subject="${server.userName}" audienceUrl="${server.audienceUrl}" keyAlias="${server.certificateAlias}" />
	</sdc:sdc-config>
	<configuration-properties doc:name="Configuration properties" file="mule-app.properties" />
	<sdc:sdc-config name="Salesforce_Data_Cloud_OAuth_UsernamePassword_config" doc:name="Salesforce Data Cloud config" >
		<sdc:oauth-user-pass-connection clientId="${server.consumerKey}" clientSecret="${server.consumerSecret}" username="${server.userName}" password="${server.password}" audienceUrl="${server.audienceUrl}" />
	</sdc:sdc-config>
	<sdc:sdc-config name="Salesforce_Data_Cloud_config" doc:name="Salesforce Data Cloud config" doc:id="c458e8ae-2484-463b-8ec8-b65f385f1816" >
		<sdc:oauth-jwt-connection />
	</sdc:sdc-config>
	<flow name="GetJob" >
		<http:listener doc:name="Get jobs" config-ref="HTTP_Listener_config" path="/jobs/get/"/>
		<sdc:get-bulk-jobs doc:name="Bulk - List Jobs" doc:id="8138e10a-91a7-40f7-9060-0ab5c1c58ad2" config-ref="Salesforce_Data_Cloud_config"/>
		<logger level="INFO" doc:name="Logger" />
	</flow>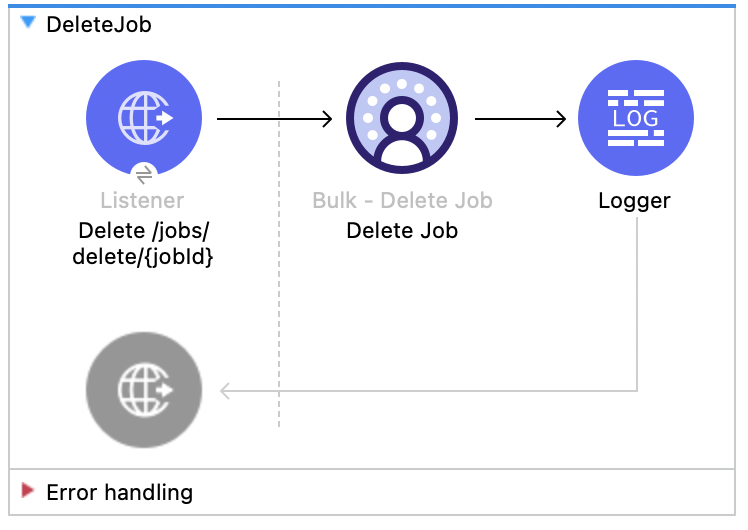
</mule>ジョブの削除 - Bulk API
この Mule フローでは、指定したジョブ ID を削除または終了する方法を示します。これにより、Salesforce で保存されているジョブデータとメタデータが削除されます。
ジョブを削除するには、そのジョブの状況が UploadComplete、JobComplete、Aborted、または Failed である必要があります。 Salesforce API のドキュメントを参照してください。
この例では、次の操作を使用します。
-
HTTP Listener
URI パラメーターにジョブ ID が含まれる HTTP DELETE 要求からデータを受け取ります。 -
Logger
Delete Job 操作からの HTTP 応答を表示します。 -
Delete Job
-
OAuth クライアントログイン情報、OAuth JWT、または OAuth のユーザー名とパスワードの選択に基づいて認証します。
-
URI パラメーターで使用されたジョブ ID を受け取ります。
-
Salesforce API をコールして、ジョブを削除します。
-
この例の XML
この例のフローをすばやく Mule アプリケーションに読み込むには、次のコードを Studio XML エディターに貼り付けます。
<?xml version="1.0" encoding="UTF-8"?>

<mule xmlns:salesforce="http://www.mulesoft.org/schema/mule/salesforce" xmlns:ee="http://www.mulesoft.org/schema/mule/ee/core"
	xmlns:file="http://www.mulesoft.org/schema/mule/file"
	xmlns:sdc="http://www.mulesoft.org/schema/mule/sdc" xmlns:http="http://www.mulesoft.org/schema/mule/http" xmlns="http://www.mulesoft.org/schema/mule/core" xmlns:doc="http://www.mulesoft.org/schema/mule/documentation" xmlns:xsi="http://www.w3.org/2001/XMLSchema-instance" xsi:schemaLocation="http://www.mulesoft.org/schema/mule/core http://www.mulesoft.org/schema/mule/core/current/mule.xsd
http://www.mulesoft.org/schema/mule/http http://www.mulesoft.org/schema/mule/http/current/mule-http.xsd
http://www.mulesoft.org/schema/mule/sdc http://www.mulesoft.org/schema/mule/sdc/current/mule-sdc.xsd
http://www.mulesoft.org/schema/mule/file http://www.mulesoft.org/schema/mule/file/current/mule-file.xsd
http://www.mulesoft.org/schema/mule/ee/core http://www.mulesoft.org/schema/mule/ee/core/current/mule-ee.xsd
http://www.mulesoft.org/schema/mule/salesforce http://www.mulesoft.org/schema/mule/salesforce/current/mule-salesforce.xsd">
	<http:listener-config name="HTTP_Listener_config" doc:name="HTTP Listener config" >
		<http:listener-connection host="0.0.0.0" port="8081" />
	</http:listener-config>
	<sdc:sdc-config name="Salesforce_Data_Cloud_OAuth_JWT_config" doc:name="Salesforce Data Cloud config" >
		<sdc:oauth-jwt-connection consumerKey="${server.consumerKey}" keyStorePath="${server.keyStorePath}" storePassword="${server.keyStorePassword}" subject="${server.userName}" audienceUrl="${server.audienceUrl}" keyAlias="${server.certificateAlias}" />
	</sdc:sdc-config>
	<configuration-properties doc:name="Configuration properties" file="mule-app.properties" />
	<sdc:sdc-config name="Salesforce_Data_Cloud_OAuth_UsernamePassword_config" doc:name="Salesforce Data Cloud config" >
		<sdc:oauth-user-pass-connection clientId="${server.consumerKey}" clientSecret="${server.consumerSecret}" username="${server.userName}" password="${server.password}" audienceUrl="${server.audienceUrl}" />
	</sdc:sdc-config>
	<flow name="DeleteJob" >
		<http:listener doc:name="Delete /jobs/delete/{jobId}" config-ref="HTTP_Listener_config" path="/jobs/delete/{jobId}"/>
		<sdc:delete-bulk-job doc:name="Delete Job" config-ref="Salesforce_Data_Cloud_OAuth_JWT_config" idUriParam="#[attributes.uriParams.jobId]"/>
		<logger level="INFO" doc:name="Logger" />
	</flow>
</mule>
この例の実行手順
-
プロジェクトを保存します。
-
ジョブを作成し、結果のジョブ ID をコピーします。
-
コピーしたジョブを使用して、ジョブを終了します ([Close Job - Bulk API]フローを参照)。
-
前の手順でコピーしたジョブ ID を使用して
DELETE を localhost:8081/jobs/delete/{JOB_ID} に送信し、フローをテストします。
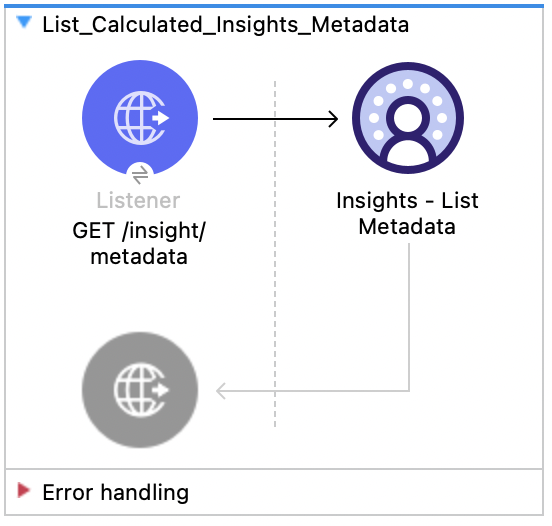
インサイト - メタデータのリスト API
この Mule フローでは、すべての計算済みインサイトのディメンションと検索条件などのメタデータを取得する方法を示します。
この例では、次の操作を使用します。
-
HTTP Listener
HTTP GET 要求を受け取ります。 -
Insights - List Metadata
-
OAuth クライアントログイン情報、OAuth JWT、または OAuth のユーザー名とパスワードの選択に基づいて認証します。
-
Salesforce Data Cloud API をコールして、すべての計算済みインサイトのメタデータを返します。
-
この例の XML
この例のフローをすばやく Mule アプリケーションに読み込むには、次のコードを Studio XML エディターに貼り付けます。
<?xml version="1.0" encoding="UTF-8"?>

<mule xmlns:salesforce="http://www.mulesoft.org/schema/mule/salesforce" xmlns:ee="http://www.mulesoft.org/schema/mule/ee/core"
	xmlns:file="http://www.mulesoft.org/schema/mule/file"
	xmlns:sdc="http://www.mulesoft.org/schema/mule/sdc" xmlns:http="http://www.mulesoft.org/schema/mule/http" xmlns="http://www.mulesoft.org/schema/mule/core" xmlns:doc="http://www.mulesoft.org/schema/mule/documentation" xmlns:xsi="http://www.w3.org/2001/XMLSchema-instance" xsi:schemaLocation="http://www.mulesoft.org/schema/mule/core http://www.mulesoft.org/schema/mule/core/current/mule.xsd
http://www.mulesoft.org/schema/mule/http http://www.mulesoft.org/schema/mule/http/current/mule-http.xsd
http://www.mulesoft.org/schema/mule/sdc http://www.mulesoft.org/schema/mule/sdc/current/mule-sdc.xsd
http://www.mulesoft.org/schema/mule/file http://www.mulesoft.org/schema/mule/file/current/mule-file.xsd
http://www.mulesoft.org/schema/mule/ee/core http://www.mulesoft.org/schema/mule/ee/core/current/mule-ee.xsd
http://www.mulesoft.org/schema/mule/salesforce http://www.mulesoft.org/schema/mule/salesforce/current/mule-salesforce.xsd">
	<http:listener-config name="HTTP_Listener_config" doc:name="HTTP Listener config" >
		<http:listener-connection host="0.0.0.0" port="8081" />
	</http:listener-config>
	<sdc:sdc-config name="Salesforce_Data_Cloud_OAuth_JWT_config" doc:name="Salesforce Data Cloud config" >
		<sdc:oauth-jwt-connection consumerKey="${server.consumerKey}" keyStorePath="${server.keyStorePath}" storePassword="${server.keyStorePassword}" subject="${server.userName}" audienceUrl="${server.audienceUrl}" keyAlias="${server.certificateAlias}" />
	</sdc:sdc-config>
	<configuration-properties doc:name="Configuration properties" file="mule-app.properties" />
	<sdc:sdc-config name="Salesforce_Data_Cloud_OAuth_UsernamePassword_config" doc:name="Salesforce Data Cloud config" >
		<sdc:oauth-user-pass-connection clientId="${server.consumerKey}" clientSecret="${server.consumerSecret}" username="${server.userName}" password="${server.password}" audienceUrl="${server.audienceUrl}" />
	</sdc:sdc-config>
	<flow name="List_Calculated_Insights_Metadata" >
		<http:listener doc:name="GET /insight/metadata" allowedMethods="GET" path="/insight/metadata" config-ref="HTTP_Listener_config"/>
		<sdc:get-all-calculated-insight-metadata doc:name="Insights - List Metadata"  config-ref="Salesforce_Data_Cloud_OAuth_JWT_config"/>
	</flow>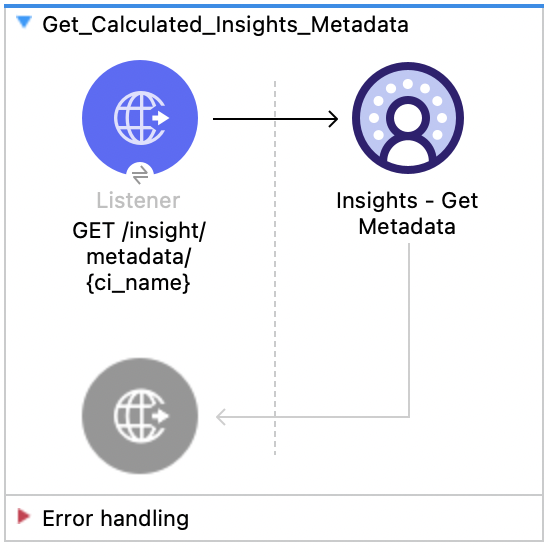
</mule>インサイト - メタデータの取得 API
この Mule フローでは、計算済みインサイトのディメンションと検索条件などのメタデータを取得する方法を示します。使用方法と詳細については、 『Salesforce Data Cloud API 開発者ガイド』を参照してください。
この例では、次の操作を使用します。
-
HTTP Listener
必須 URI パラメーターとして計算済みインサイト名が含まれる HTTP GET 要求を受け取ります。 -
Insights - Get Metadata
-
OAuth クライアントログイン情報、OAuth JWT、または OAuth のユーザー名とパスワードの選択に基づいて認証します。
-
計算済みインサイト名を受け取ります。
-
Salesforce Data Cloud API をコールして、要求された計算済みインサイトのメタデータを返します。
-
この例の XML
この例のフローをすばやく Mule アプリケーションに読み込むには、次のコードを Studio XML エディターに貼り付けます。
<?xml version="1.0" encoding="UTF-8"?>

<mule xmlns:salesforce="http://www.mulesoft.org/schema/mule/salesforce" xmlns:ee="http://www.mulesoft.org/schema/mule/ee/core"
	xmlns:file="http://www.mulesoft.org/schema/mule/file"
	xmlns:sdc="http://www.mulesoft.org/schema/mule/sdc" xmlns:http="http://www.mulesoft.org/schema/mule/http" xmlns="http://www.mulesoft.org/schema/mule/core" xmlns:doc="http://www.mulesoft.org/schema/mule/documentation" xmlns:xsi="http://www.w3.org/2001/XMLSchema-instance" xsi:schemaLocation="http://www.mulesoft.org/schema/mule/core http://www.mulesoft.org/schema/mule/core/current/mule.xsd
http://www.mulesoft.org/schema/mule/http http://www.mulesoft.org/schema/mule/http/current/mule-http.xsd
http://www.mulesoft.org/schema/mule/sdc http://www.mulesoft.org/schema/mule/sdc/current/mule-sdc.xsd
http://www.mulesoft.org/schema/mule/file http://www.mulesoft.org/schema/mule/file/current/mule-file.xsd
http://www.mulesoft.org/schema/mule/ee/core http://www.mulesoft.org/schema/mule/ee/core/current/mule-ee.xsd
http://www.mulesoft.org/schema/mule/salesforce http://www.mulesoft.org/schema/mule/salesforce/current/mule-salesforce.xsd">
	<http:listener-config name="HTTP_Listener_config" doc:name="HTTP Listener config" >
		<http:listener-connection host="0.0.0.0" port="8081" />
	</http:listener-config>
	<sdc:sdc-config name="Salesforce_Data_Cloud_OAuth_JWT_config" doc:name="Salesforce Data Cloud config" >
		<sdc:oauth-jwt-connection consumerKey="${server.consumerKey}" keyStorePath="${server.keyStorePath}" storePassword="${server.keyStorePassword}" subject="${server.userName}" audienceUrl="${server.audienceUrl}" keyAlias="${server.certificateAlias}" />
	</sdc:sdc-config>
	<configuration-properties doc:name="Configuration properties" file="mule-app.properties" />
	<sdc:sdc-config name="Salesforce_Data_Cloud_OAuth_UsernamePassword_config" doc:name="Salesforce Data Cloud config" >
		<sdc:oauth-user-pass-connection clientId="${server.consumerKey}" clientSecret="${server.consumerSecret}" username="${server.userName}" password="${server.password}" audienceUrl="${server.audienceUrl}" />
	</sdc:sdc-config>
	<flow name="Get_Calculated_Insights_Metadata" >
		<http:listener doc:name="GET /insight/metadata/{ci_name}" config-ref="HTTP_Listener_config" path="/insight/metadata/{ci_name}" allowedMethods="GET"/>
		<sdc:get-calculated-insight-metadata doc:name="Insights - Get Metadata" config-ref="Salesforce_Data_Cloud_OAuth_JWT_config" ciNameUriParam="#[attributes.uriParams.ci_name]"/>
	</flow>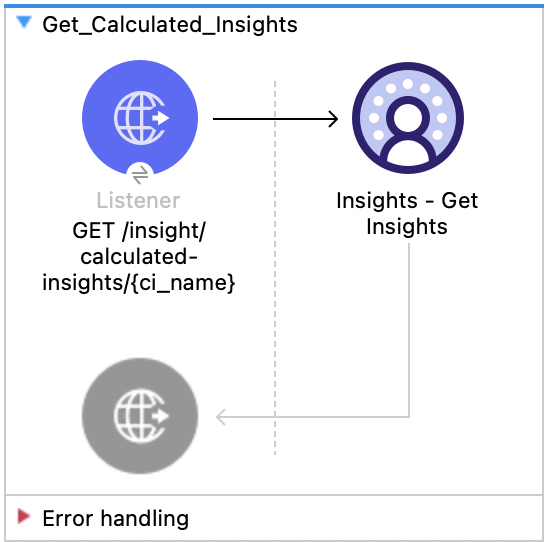
</mule>インサイト - インサイトの取得 API
この Mule フローでは、計算済みインサイトを照会する方法を示します。ユーザーはさまざまなディメンション、基準、検索条件を選択することによって、分析や絞り込みを行うことができます。使用方法と詳細については、 『Salesforce Data Cloud API 開発者ガイド』を参照してください。
この例では、次の操作を使用します。
-
HTTP Listener
必須 URI パラメーターとしての計算済みインサイト名と省略可能なクエリパラメーターの組み合わせが含まれる HTTP GET 要求を受け取ります。 -
Insights - Get Insights
-
OAuth クライアントログイン情報、OAuth JWT、または OAuth のユーザー名とパスワードの選択に基づいて認証します。
-
計算済みインサイト名と省略可能なその他の URI パラメーターを受け取ります。
-
Salesforce Data Cloud API をコールして、クエリ条件に一致する要求された計算済みインサイトのレコードを返します。
-
この例の XML
この例のフローをすばやく Mule アプリケーションに読み込むには、次のコードを Studio XML エディターに貼り付けます。
<?xml version="1.0" encoding="UTF-8"?>

<mule xmlns:salesforce="http://www.mulesoft.org/schema/mule/salesforce" xmlns:ee="http://www.mulesoft.org/schema/mule/ee/core"
	xmlns:file="http://www.mulesoft.org/schema/mule/file"
	xmlns:sdc="http://www.mulesoft.org/schema/mule/sdc" xmlns:http="http://www.mulesoft.org/schema/mule/http" xmlns="http://www.mulesoft.org/schema/mule/core" xmlns:doc="http://www.mulesoft.org/schema/mule/documentation" xmlns:xsi="http://www.w3.org/2001/XMLSchema-instance" xsi:schemaLocation="http://www.mulesoft.org/schema/mule/core http://www.mulesoft.org/schema/mule/core/current/mule.xsd
http://www.mulesoft.org/schema/mule/http http://www.mulesoft.org/schema/mule/http/current/mule-http.xsd
http://www.mulesoft.org/schema/mule/sdc http://www.mulesoft.org/schema/mule/sdc/current/mule-sdc.xsd
http://www.mulesoft.org/schema/mule/file http://www.mulesoft.org/schema/mule/file/current/mule-file.xsd
http://www.mulesoft.org/schema/mule/ee/core http://www.mulesoft.org/schema/mule/ee/core/current/mule-ee.xsd
http://www.mulesoft.org/schema/mule/salesforce http://www.mulesoft.org/schema/mule/salesforce/current/mule-salesforce.xsd">
	<http:listener-config name="HTTP_Listener_config" doc:name="HTTP Listener config" >
		<http:listener-connection host="0.0.0.0" port="8081" />
	</http:listener-config>
	<sdc:sdc-config name="Salesforce_Data_Cloud_OAuth_JWT_config" doc:name="Salesforce Data Cloud config" >
		<sdc:oauth-jwt-connection consumerKey="${server.consumerKey}" keyStorePath="${server.keyStorePath}" storePassword="${server.keyStorePassword}" subject="${server.userName}" audienceUrl="${server.audienceUrl}" keyAlias="${server.certificateAlias}" />
	</sdc:sdc-config>
	<configuration-properties doc:name="Configuration properties" file="mule-app.properties" />
	<sdc:sdc-config name="Salesforce_Data_Cloud_OAuth_UsernamePassword_config" doc:name="Salesforce Data Cloud config" >
		<sdc:oauth-user-pass-connection clientId="${server.consumerKey}" clientSecret="${server.consumerSecret}" username="${server.userName}" password="${server.password}" audienceUrl="${server.audienceUrl}" />
	</sdc:sdc-config>
	<flow name="Get_Calculated_Insights" >
		<http:listener doc:name="GET /insight/calculated-insights/{ci_name}" config-ref="HTTP_Listener_config" path="/insight/calculated-insights/{ci_name}" allowedMethods="GET"/>
		<sdc:get-calculated-insight-with-filters-fields-and-limit doc:name="Insights - Get Insights" config-ref="Salesforce_Data_Cloud_OAuth_JWT_config" ciNameUriParam="#[attributes.uriParams.ci_name]" dimensionsQueryParam="#[attributes.queryParams.dimensions]" measuresQueryParam="#[attributes.queryParams.measures]" limitQueryParam="#[attributes.queryParams.limit]" offsetQueryParam="#[attributes.queryParams.offset]" filtersQueryParam="#[attributes.queryParams.filters]" orderbyQueryParam="#[attributes.queryParams.orderby]" timeGranularityQueryParam="#[attributes.queryParams.timeGranularity]"/>
	</flow>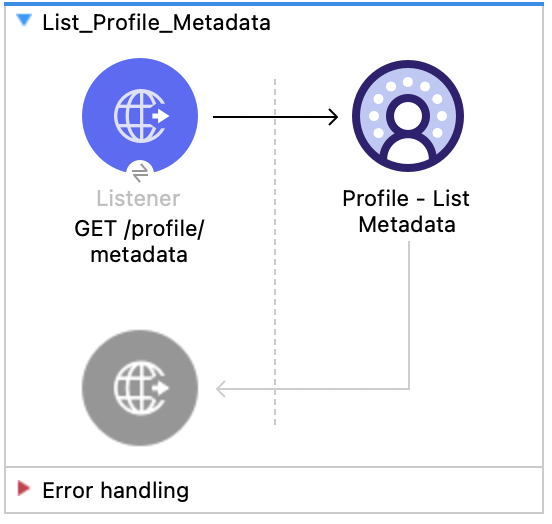
</mule>プロファイル - メタデータのリスト API
この Mule フローでは、データモデルオブジェクトのリストとその項目およびカテゴリを取得する方法を示します。使用方法と詳細については、 『Salesforce Data Cloud API 開発者ガイド』を参照してください。
この例では、次の操作を使用します。
-
HTTP Listener
HTTP GET 要求を受け取ります。 -
Profile - List Metadata
-
OAuth クライアントログイン情報、OAuth JWT、または OAuth のユーザー名とパスワードの選択に基づいて認証します。
-
Salesforce Data Cloud API をコールして、データモデルオブジェクトのリストとその項目およびカテゴリを返します。
-
この例の XML
この例のフローをすばやく Mule アプリケーションに読み込むには、次のコードを Studio XML エディターに貼り付けます。
<?xml version="1.0" encoding="UTF-8"?>

<mule xmlns:salesforce="http://www.mulesoft.org/schema/mule/salesforce" xmlns:ee="http://www.mulesoft.org/schema/mule/ee/core"
	xmlns:file="http://www.mulesoft.org/schema/mule/file"
	xmlns:sdc="http://www.mulesoft.org/schema/mule/sdc" xmlns:http="http://www.mulesoft.org/schema/mule/http" xmlns="http://www.mulesoft.org/schema/mule/core" xmlns:doc="http://www.mulesoft.org/schema/mule/documentation" xmlns:xsi="http://www.w3.org/2001/XMLSchema-instance" xsi:schemaLocation="http://www.mulesoft.org/schema/mule/core http://www.mulesoft.org/schema/mule/core/current/mule.xsd
http://www.mulesoft.org/schema/mule/http http://www.mulesoft.org/schema/mule/http/current/mule-http.xsd
http://www.mulesoft.org/schema/mule/sdc http://www.mulesoft.org/schema/mule/sdc/current/mule-sdc.xsd
http://www.mulesoft.org/schema/mule/file http://www.mulesoft.org/schema/mule/file/current/mule-file.xsd
http://www.mulesoft.org/schema/mule/ee/core http://www.mulesoft.org/schema/mule/ee/core/current/mule-ee.xsd
http://www.mulesoft.org/schema/mule/salesforce http://www.mulesoft.org/schema/mule/salesforce/current/mule-salesforce.xsd">
	<http:listener-config name="HTTP_Listener_config" doc:name="HTTP Listener config" >
		<http:listener-connection host="0.0.0.0" port="8081" />
	</http:listener-config>
	<sdc:sdc-config name="Salesforce_Data_Cloud_OAuth_JWT_config" doc:name="Salesforce Data Cloud config" >
		<sdc:oauth-jwt-connection consumerKey="${server.consumerKey}" keyStorePath="${server.keyStorePath}" storePassword="${server.keyStorePassword}" subject="${server.userName}" audienceUrl="${server.audienceUrl}" keyAlias="${server.certificateAlias}" />
	</sdc:sdc-config>
	<configuration-properties doc:name="Configuration properties" file="mule-app.properties" />
	<sdc:sdc-config name="Salesforce_Data_Cloud_OAuth_UsernamePassword_config" doc:name="Salesforce Data Cloud config" >
		<sdc:oauth-user-pass-connection clientId="${server.consumerKey}" clientSecret="${server.consumerSecret}" username="${server.userName}" password="${server.password}" audienceUrl="${server.audienceUrl}" />
	</sdc:sdc-config>
	<flow name="List_Profile_Metadata" >
		<http:listener doc:name="GET /profile/metadata" allowedMethods="GET" path="/profile/metadata" config-ref="HTTP_Listener_config"/>
		<sdc:get-meta-by-category doc:name="Profile - List Metadata" config-ref="Salesforce_Data_Cloud_OAuth_JWT_config"/>
	</flow>
</mule>プロファイル - メタデータの取得 API
この Mule フローでは、すべてのデータモデルオブジェクトのメタデータを取得する方法を示します。使用方法と詳細については、 『Salesforce Data Cloud API 開発者ガイド』を参照してください。
この例では、次の操作を使用します。
-
HTTP Listener
必須 URI パラメーターとしてデータモデル名が含まれる HTTP GET 要求を受け取ります。 -
Profile - Get Metadata
-
OAuth クライアントログイン情報、OAuth JWT、または OAuth のユーザー名とパスワードの選択に基づいて認証します。
-
データモデル名を受け取ります。
-
Salesforce Data Cloud API をコールして、要求されたデータモデルオブジェクトのメタデータを返します。
-

この例の XML
この例のフローをすばやく Mule アプリケーションに読み込むには、次のコードを Studio XML エディターに貼り付けます。
<?xml version="1.0" encoding="UTF-8"?>

<mule xmlns:salesforce="http://www.mulesoft.org/schema/mule/salesforce" xmlns:ee="http://www.mulesoft.org/schema/mule/ee/core"
	xmlns:file="http://www.mulesoft.org/schema/mule/file"
	xmlns:sdc="http://www.mulesoft.org/schema/mule/sdc" xmlns:http="http://www.mulesoft.org/schema/mule/http" xmlns="http://www.mulesoft.org/schema/mule/core" xmlns:doc="http://www.mulesoft.org/schema/mule/documentation" xmlns:xsi="http://www.w3.org/2001/XMLSchema-instance" xsi:schemaLocation="http://www.mulesoft.org/schema/mule/core http://www.mulesoft.org/schema/mule/core/current/mule.xsd
http://www.mulesoft.org/schema/mule/http http://www.mulesoft.org/schema/mule/http/current/mule-http.xsd
http://www.mulesoft.org/schema/mule/sdc http://www.mulesoft.org/schema/mule/sdc/current/mule-sdc.xsd
http://www.mulesoft.org/schema/mule/file http://www.mulesoft.org/schema/mule/file/current/mule-file.xsd
http://www.mulesoft.org/schema/mule/ee/core http://www.mulesoft.org/schema/mule/ee/core/current/mule-ee.xsd
http://www.mulesoft.org/schema/mule/salesforce http://www.mulesoft.org/schema/mule/salesforce/current/mule-salesforce.xsd">
	<http:listener-config name="HTTP_Listener_config" doc:name="HTTP Listener config" >
		<http:listener-connection host="0.0.0.0" port="8081" />
	</http:listener-config>
	<sdc:sdc-config name="Salesforce_Data_Cloud_OAuth_JWT_config" doc:name="Salesforce Data Cloud config" >
		<sdc:oauth-jwt-connection consumerKey="${server.consumerKey}" keyStorePath="${server.keyStorePath}" storePassword="${server.keyStorePassword}" subject="${server.userName}" audienceUrl="${server.audienceUrl}" keyAlias="${server.certificateAlias}" />
	</sdc:sdc-config>
	<configuration-properties doc:name="Configuration properties" file="mule-app.properties" />
	<sdc:sdc-config name="Salesforce_Data_Cloud_OAuth_UsernamePassword_config" doc:name="Salesforce Data Cloud config" >
		<sdc:oauth-user-pass-connection clientId="${server.consumerKey}" clientSecret="${server.consumerSecret}" username="${server.userName}" password="${server.password}" audienceUrl="${server.audienceUrl}" />
	</sdc:sdc-config>
	<flow name="Get_Profile_Metadata" >
		<http:listener doc:name="GET /profile/metadata/{dataModelName}" allowedMethods="GET" path="/profile/metadata/{dataModelName}" config-ref="HTTP_Listener_config"/>
		<sdc:get-meta doc:name="Profile - Get Metadata" config-ref="Salesforce_Data_Cloud_OAuth_JWT_config" dataModelNameUriParam="#[attributes.uriParams.dataModelName]"/>
	</flow>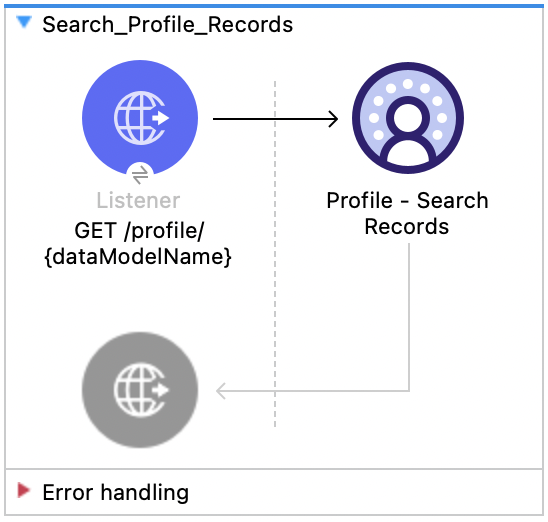
</mule>プロファイル - レコードの検索 API
この Mule フローでは、検索条件に基づいてデータモデルオブジェクトレコードを取得する方法を示します。使用方法と詳細については、 『Salesforce Data Cloud API 開発者ガイド』を参照してください。
この例では、次の操作を使用します。
-
HTTP Listener
必須 URI パラメーターとしてのデータモデル名、必須クエリパラメーターとしての項目、さらにその他のクエリパラメーターの組み合わせが含まれる HTTP GET 要求を受け取ります。 -
Profile - Search Records
-
OAuth クライアントログイン情報、OAuth JWT、または OAuth のユーザー名とパスワードの選択に基づいて認証します。
-
データモデル名、項目、省略可能なクエリパラメーターを受け取ります。
-
Salesforce Data Cloud API をコールして、検索条件に基づいてデータモデルオブジェクトレコードを返します。
-
この例の XML
この例のフローをすばやく Mule アプリケーションに読み込むには、次のコードを Studio XML エディターに貼り付けます。
<?xml version="1.0" encoding="UTF-8"?>

<mule xmlns:salesforce="http://www.mulesoft.org/schema/mule/salesforce" xmlns:ee="http://www.mulesoft.org/schema/mule/ee/core"
	xmlns:file="http://www.mulesoft.org/schema/mule/file"
	xmlns:sdc="http://www.mulesoft.org/schema/mule/sdc" xmlns:http="http://www.mulesoft.org/schema/mule/http" xmlns="http://www.mulesoft.org/schema/mule/core" xmlns:doc="http://www.mulesoft.org/schema/mule/documentation" xmlns:xsi="http://www.w3.org/2001/XMLSchema-instance" xsi:schemaLocation="http://www.mulesoft.org/schema/mule/core http://www.mulesoft.org/schema/mule/core/current/mule.xsd
http://www.mulesoft.org/schema/mule/http http://www.mulesoft.org/schema/mule/http/current/mule-http.xsd
http://www.mulesoft.org/schema/mule/sdc http://www.mulesoft.org/schema/mule/sdc/current/mule-sdc.xsd
http://www.mulesoft.org/schema/mule/file http://www.mulesoft.org/schema/mule/file/current/mule-file.xsd
http://www.mulesoft.org/schema/mule/ee/core http://www.mulesoft.org/schema/mule/ee/core/current/mule-ee.xsd
http://www.mulesoft.org/schema/mule/salesforce http://www.mulesoft.org/schema/mule/salesforce/current/mule-salesforce.xsd">
	<http:listener-config name="HTTP_Listener_config" doc:name="HTTP Listener config" >
		<http:listener-connection host="0.0.0.0" port="8081" />
	</http:listener-config>
	<sdc:sdc-config name="Salesforce_Data_Cloud_OAuth_JWT_config" doc:name="Salesforce Data Cloud config" >
		<sdc:oauth-jwt-connection consumerKey="${server.consumerKey}" keyStorePath="${server.keyStorePath}" storePassword="${server.keyStorePassword}" subject="${server.userName}" audienceUrl="${server.audienceUrl}" keyAlias="${server.certificateAlias}" />
	</sdc:sdc-config>
	<configuration-properties doc:name="Configuration properties" file="mule-app.properties" />
	<sdc:sdc-config name="Salesforce_Data_Cloud_OAuth_UsernamePassword_config" doc:name="Salesforce Data Cloud config" >
		<sdc:oauth-user-pass-connection clientId="${server.consumerKey}" clientSecret="${server.consumerSecret}" username="${server.userName}" password="${server.password}" audienceUrl="${server.audienceUrl}" />
	</sdc:sdc-config>
	<flow name="Search_Profile_Records" >
		<http:listener doc:name="GET /profile/{dataModelName}" config-ref="HTTP_Listener_config" path="/profile/{dataModelName}"/>
		<sdc:get-parent-with-filters doc:name="Profile - Search Records"  config-ref="Salesforce_Data_Cloud_OAuth_JWT_config" dataModelNameUriParam="#[attributes.uriParams.dataModelName]" orderbyQueryParam="#[attributes.queryParams.orderby]" filtersQueryParam="#[attributes.queryParams.filters]" fieldsQueryParam="#[attributes.queryParams.fields]" limitQueryParam="#[attributes.queryParams.limit]" offsetQueryParam="#[attributes.queryParams.offset]"/>
	</flow>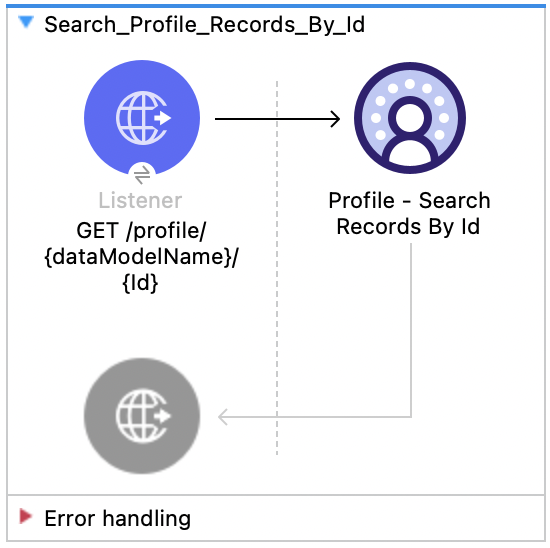
</mule>プロファイル - ID によるレコードの検索 API
この Mule フローでは、検索インデックスと検索条件に基づいてデータモデルオブジェクトレコードを取得する方法を示します。使用方法と詳細については、 『Salesforce Data Cloud API 開発者ガイド』を参照してください。
この例では、次の操作を使用します。
-
HTTP Listener
必須 URI パラメーターとしてのデータモデル名と ID、省略可能なクエリパラメーターの組み合わせが含まれる HTTP GET 要求を受け取ります。 -
Profile - Search Records By Id
-
OAuth クライアントログイン情報、OAuth JWT、または OAuth のユーザー名とパスワードの選択に基づいて認証します。
-
データモデル名、ID、省略可能なクエリパラメーターを受け取ります。
-
Salesforce Data Cloud API をコールして、検索インデックスと検索条件に基づいてデータモデルオブジェクトレコードを返します。
-
この例の XML
この例のフローをすばやく Mule アプリケーションに読み込むには、次のコードを Studio XML エディターに貼り付けます。
<?xml version="1.0" encoding="UTF-8"?>

<mule xmlns:salesforce="http://www.mulesoft.org/schema/mule/salesforce" xmlns:ee="http://www.mulesoft.org/schema/mule/ee/core"
	xmlns:file="http://www.mulesoft.org/schema/mule/file"
	xmlns:sdc="http://www.mulesoft.org/schema/mule/sdc" xmlns:http="http://www.mulesoft.org/schema/mule/http" xmlns="http://www.mulesoft.org/schema/mule/core" xmlns:doc="http://www.mulesoft.org/schema/mule/documentation" xmlns:xsi="http://www.w3.org/2001/XMLSchema-instance" xsi:schemaLocation="http://www.mulesoft.org/schema/mule/core http://www.mulesoft.org/schema/mule/core/current/mule.xsd
http://www.mulesoft.org/schema/mule/http http://www.mulesoft.org/schema/mule/http/current/mule-http.xsd
http://www.mulesoft.org/schema/mule/sdc http://www.mulesoft.org/schema/mule/sdc/current/mule-sdc.xsd
http://www.mulesoft.org/schema/mule/file http://www.mulesoft.org/schema/mule/file/current/mule-file.xsd
http://www.mulesoft.org/schema/mule/ee/core http://www.mulesoft.org/schema/mule/ee/core/current/mule-ee.xsd
http://www.mulesoft.org/schema/mule/salesforce http://www.mulesoft.org/schema/mule/salesforce/current/mule-salesforce.xsd">
	<http:listener-config name="HTTP_Listener_config" doc:name="HTTP Listener config" >
		<http:listener-connection host="0.0.0.0" port="8081" />
	</http:listener-config>
	<sdc:sdc-config name="Salesforce_Data_Cloud_OAuth_JWT_config" doc:name="Salesforce Data Cloud config" >
		<sdc:oauth-jwt-connection consumerKey="${server.consumerKey}" keyStorePath="${server.keyStorePath}" storePassword="${server.keyStorePassword}" subject="${server.userName}" audienceUrl="${server.audienceUrl}" keyAlias="${server.certificateAlias}" />
	</sdc:sdc-config>
	<configuration-properties doc:name="Configuration properties" file="mule-app.properties" />
	<sdc:sdc-config name="Salesforce_Data_Cloud_OAuth_UsernamePassword_config" doc:name="Salesforce Data Cloud config" >
		<sdc:oauth-user-pass-connection clientId="${server.consumerKey}" clientSecret="${server.consumerSecret}" username="${server.userName}" password="${server.password}" audienceUrl="${server.audienceUrl}" />
	</sdc:sdc-config>
	<flow name="Search_Profile_Records_By_Id" >
		<http:listener doc:name="GET /profile/{dataModelName}/{Id}" config-ref="HTTP_Listener_config" path="/profile/{dataModelName}/{Id}"/>
		<sdc:get-parent doc:name="Profile - Search Records By Id" config-ref="Salesforce_Data_Cloud_OAuth_JWT_config" dataModelNameUriParam="#[attributes.uriParams.dataModelName]" idUriParam="#[attributes.uriParams.Id]" searchKeyQueryParam="#[attributes.queryParams.searchKey]" fieldsQueryParam="#[attributes.queryParams.fields]" filtersQueryParam="#[attributes.queryParams.filters]" limitQueryParam="#[attributes.queryParams.limit]" orderbyQueryParam="#[attributes.queryParams.orderby]" offsetQueryParam="#[attributes.queryParams.offset]"/>
	</flow>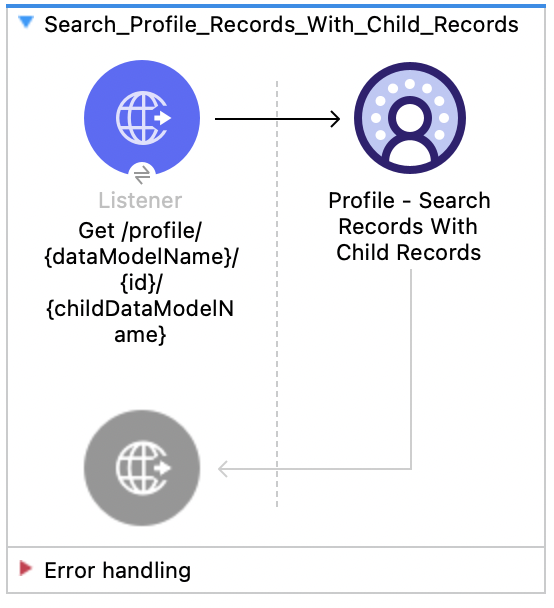
</mule>プロファイル - レコードと子レコードの検索 API
この Mule フローでは、インデックスと検索条件に基づいてデータモデルオブジェクトレコードと子データモデルオブジェクトレコードを取得する方法を示します。使用方法と詳細については、 『Salesforce Data Cloud API 開発者ガイド』を参照してください。
この例では、次の操作を使用します。
-
HTTP Listener
必須 URI パラメーターとしてのデータモデル名、子データモデル名、ID と、省略可能なクエリパラメーターの組み合わせが含まれる HTTP GET 要求を受け取ります。 -
Profile - Search Records With Child Records
-
OAuth クライアントログイン情報、OAuth JWT、または OAuth のユーザー名とパスワードの選択に基づいて認証します。
-
データモデル名、子データモデル名、ID と、省略可能なクエリパラメーターを受け取ります。
-
Salesforce Data Cloud API をコールして、インデックスと検索条件に基づいてデータモデルオブジェクトレコードと子データモデルオブジェクトレコードを返します。
-
この例の XML
この例のフローをすばやく Mule アプリケーションに読み込むには、次のコードを Studio XML エディターに貼り付けます。
<?xml version="1.0" encoding="UTF-8"?>

<mule xmlns:salesforce="http://www.mulesoft.org/schema/mule/salesforce" xmlns:ee="http://www.mulesoft.org/schema/mule/ee/core"
	xmlns:file="http://www.mulesoft.org/schema/mule/file"
	xmlns:sdc="http://www.mulesoft.org/schema/mule/sdc" xmlns:http="http://www.mulesoft.org/schema/mule/http" xmlns="http://www.mulesoft.org/schema/mule/core" xmlns:doc="http://www.mulesoft.org/schema/mule/documentation" xmlns:xsi="http://www.w3.org/2001/XMLSchema-instance" xsi:schemaLocation="http://www.mulesoft.org/schema/mule/core http://www.mulesoft.org/schema/mule/core/current/mule.xsd
http://www.mulesoft.org/schema/mule/http http://www.mulesoft.org/schema/mule/http/current/mule-http.xsd
http://www.mulesoft.org/schema/mule/sdc http://www.mulesoft.org/schema/mule/sdc/current/mule-sdc.xsd
http://www.mulesoft.org/schema/mule/file http://www.mulesoft.org/schema/mule/file/current/mule-file.xsd
http://www.mulesoft.org/schema/mule/ee/core http://www.mulesoft.org/schema/mule/ee/core/current/mule-ee.xsd
http://www.mulesoft.org/schema/mule/salesforce http://www.mulesoft.org/schema/mule/salesforce/current/mule-salesforce.xsd">
	<http:listener-config name="HTTP_Listener_config" doc:name="HTTP Listener config" >
		<http:listener-connection host="0.0.0.0" port="8081" />
	</http:listener-config>
	<sdc:sdc-config name="Salesforce_Data_Cloud_OAuth_JWT_config" doc:name="Salesforce Data Cloud config" >
		<sdc:oauth-jwt-connection consumerKey="${server.consumerKey}" keyStorePath="${server.keyStorePath}" storePassword="${server.keyStorePassword}" subject="${server.userName}" audienceUrl="${server.audienceUrl}" keyAlias="${server.certificateAlias}" />
	</sdc:sdc-config>
	<configuration-properties doc:name="Configuration properties" file="mule-app.properties" />
	<sdc:sdc-config name="Salesforce_Data_Cloud_OAuth_UsernamePassword_config" doc:name="Salesforce Data Cloud config" >
		<sdc:oauth-user-pass-connection clientId="${server.consumerKey}" clientSecret="${server.consumerSecret}" username="${server.userName}" password="${server.password}" audienceUrl="${server.audienceUrl}" />
	</sdc:sdc-config>
	<flow name="Search_Profile_Records_With_Child_Records" >
		<http:listener doc:name="Get /profile/{dataModelName}/{id}/{childDataModelName}" allowedMethods="GET" config-ref="HTTP_Listener_config" path="/profile/{dataModelName}/{id}/{childDataModelName}"/>
		<sdc:get-parent-and-child doc:name="Profile - Search Records With Child Records" searchKeyQueryParam="#[attributes.queryParams.searchKey]" fieldsQueryParam="#[attributes.queryParams.fields]" limitQueryParam="#[attributes.queryParams.limit]" filtersQueryParam="#[attributes.queryParams.filters]" offsetQueryParam="#[attributes.queryParams.offset]" orderbyQueryParam="#[attributes.queryParams.orderby]" dataModelNameUriParam="#[attributes.uriParams.dataModelName]" idUriParam="#[attributes.uriParams.id]" childDataModelNameUriParam="#[attributes.uriParams.childDataModelName]" config-ref="Salesforce_Data_Cloud_OAuth_JWT_config"/>
	</flow>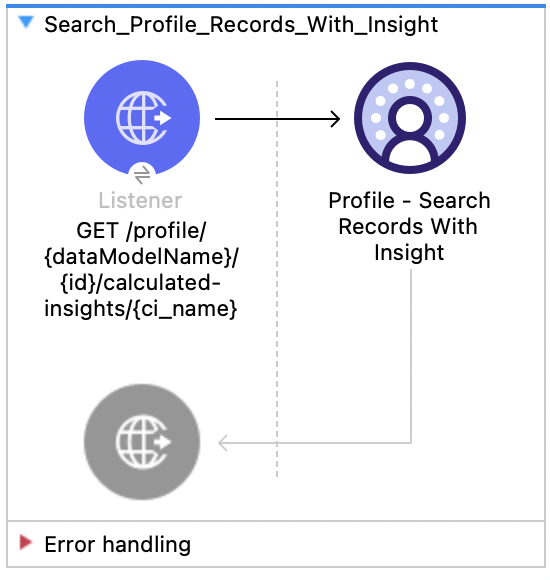
</mule>プロファイル - レコードとインサイトの検索 API
この Mule フローでは、インデックスと検索条件に基づいてデータモデルオブジェクトレコードと計算済みビューを取得する方法を示します。使用方法と詳細については、 『Salesforce Data Cloud API 開発者ガイド』を参照してください。
この例では、次の操作を使用します。
-
HTTP Listener
必須 URI パラメーターとしてのデータモデル名、ID、計算済みインサイト名と、省略可能なクエリパラメーターの組み合わせが含まれる HTTP GET 要求を受け取ります。 -
Profile - Search Records With Insight
-
OAuth クライアントログイン情報、OAuth JWT、または OAuth のユーザー名とパスワードの選択に基づいて認証します。
-
データモデル名、ID、計算済みインサイト名と、省略可能なクエリパラメーターを受け取ります。
-
Salesforce Data Cloud API をコールして、インデックスと検索条件に基づいてデータモデルオブジェクトレコードと計算済みビューを返します。
-
この例の XML
この例のフローをすばやく Mule アプリケーションに読み込むには、次のコードを Studio XML エディターに貼り付けます。
<?xml version="1.0" encoding="UTF-8"?>

<mule xmlns:salesforce="http://www.mulesoft.org/schema/mule/salesforce" xmlns:ee="http://www.mulesoft.org/schema/mule/ee/core"
	xmlns:file="http://www.mulesoft.org/schema/mule/file"
	xmlns:sdc="http://www.mulesoft.org/schema/mule/sdc" xmlns:http="http://www.mulesoft.org/schema/mule/http" xmlns="http://www.mulesoft.org/schema/mule/core" xmlns:doc="http://www.mulesoft.org/schema/mule/documentation" xmlns:xsi="http://www.w3.org/2001/XMLSchema-instance" xsi:schemaLocation="http://www.mulesoft.org/schema/mule/core http://www.mulesoft.org/schema/mule/core/current/mule.xsd
http://www.mulesoft.org/schema/mule/http http://www.mulesoft.org/schema/mule/http/current/mule-http.xsd
http://www.mulesoft.org/schema/mule/sdc http://www.mulesoft.org/schema/mule/sdc/current/mule-sdc.xsd
http://www.mulesoft.org/schema/mule/file http://www.mulesoft.org/schema/mule/file/current/mule-file.xsd
http://www.mulesoft.org/schema/mule/ee/core http://www.mulesoft.org/schema/mule/ee/core/current/mule-ee.xsd
http://www.mulesoft.org/schema/mule/salesforce http://www.mulesoft.org/schema/mule/salesforce/current/mule-salesforce.xsd">
	<http:listener-config name="HTTP_Listener_config" doc:name="HTTP Listener config" >
		<http:listener-connection host="0.0.0.0" port="8081" />
	</http:listener-config>
	<sdc:sdc-config name="Salesforce_Data_Cloud_OAuth_JWT_config" doc:name="Salesforce Data Cloud config" >
		<sdc:oauth-jwt-connection consumerKey="${server.consumerKey}" keyStorePath="${server.keyStorePath}" storePassword="${server.keyStorePassword}" subject="${server.userName}" audienceUrl="${server.audienceUrl}" keyAlias="${server.certificateAlias}" />
	</sdc:sdc-config>
	<configuration-properties doc:name="Configuration properties" file="mule-app.properties" />
	<sdc:sdc-config name="Salesforce_Data_Cloud_OAuth_UsernamePassword_config" doc:name="Salesforce Data Cloud config" >
		<sdc:oauth-user-pass-connection clientId="${server.consumerKey}" clientSecret="${server.consumerSecret}" username="${server.userName}" password="${server.password}" audienceUrl="${server.audienceUrl}" />
	</sdc:sdc-config>
	<flow name="Search_Profile_Records_With_Insight" >
		<http:listener doc:name="GET /profile/{dataModelName}/{id}/calculated-insights/{ci_name}" allowedMethods="GET" config-ref="HTTP_Listener_config" path="/profile/{dataModelName}/{id}/calculated-insights/{ci_name}"/>
		<sdc:get-computed-view-for-profile doc:name="Profile - Search Records With Insight" config-ref="Salesforce_Data_Cloud_OAuth_JWT_config" dataModelNameUriParam="#[attributes.uriParams.dataModelName]" idUriParam="#[attributes.uriParams.id]" ciNameUriParam="#[attributes.uriParams.ci_name]" searchKeyQueryParam="#[attributes.queryParams.searchKey]" dimensionsQueryParam="#[attributes.queryParams.dimensions]" measuresQueryParam="#[attributes.queryParams.measures]" limitQueryParam="#[attributes.queryParams.limit]" filtersQueryParam="#[attributes.queryParams.filters]" offsetQueryParam="#[attributes.queryParams.offset]" orderbyQueryParam="#[attributes.queryParams.orderby]" timeGranularityQueryParam="#[attributes.queryParams.timeGranularity]"/>
	</flow>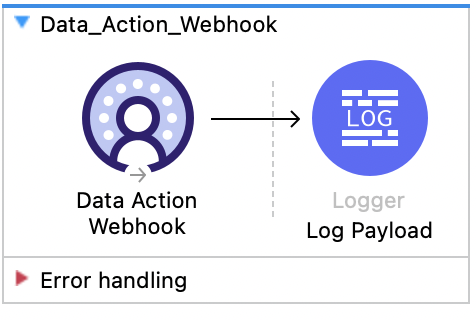
</mule>データアクション Web フック
この Mule フローでは、データアクションによってトリガーされたときにペイロードを記録する Web フックを作成する方法を示します。 Salesforce データアクションのドキュメントを参照してください。
この例では、次の操作を使用します。
-
データアクション Web フック
Salesforce Data Cloud データアクションのターゲットとして Web フックを作成します。 -
Logger
データアクション Web フックに送信されたペイロードを表示します。
この例の XML
この例のフローをすばやく Mule アプリケーションに読み込むには、次のコードを Studio XML エディターに貼り付けます。
<?xml version="1.0" encoding="UTF-8"?>

<mule xmlns:sdc="http://www.mulesoft.org/schema/mule/sdc"
	xmlns:http="http://www.mulesoft.org/schema/mule/http"
    xmlns="http://www.mulesoft.org/schema/mule/core"
	xmlns:doc="http://www.mulesoft.org/schema/mule/documentation"
	xmlns:xsi="http://www.w3.org/2001/XMLSchema-instance"
    xsi:schemaLocation="
    http://www.mulesoft.org/schema/mule/core http://www.mulesoft.org/schema/mule/core/current/mule.xsd
    http://www.mulesoft.org/schema/mule/sdc http://www.mulesoft.org/schema/mule/sdc/current/mule-sdc.xsd">
	<flow name="Data_Action_Webhook" doc:id="3072197f-ee1f-4ed5-99d2-a9fa62230dbf" >
		<sdc:webhook-listener doc:name="Data Action Webhook" doc:id="fe3a924a-ba94-447d-9d3c-df079fc01de2" config-ref="Salesforce_Data_Cloud_Sdc_webhook_config" path="${webhook.path}" signingKey="${webhook.signingKey}" signingAlgorithm="HmacSHA256"/>
		<logger level="INFO" doc:name="Log Payload" doc:id="716538d3-7d06-4e9c-a4f7-b0d350b4dafe" message="#[output application/json --- payload]"/>
	</flow>
</mule>
この例の実行手順
-
データアクションターゲットを作成し、アクションターゲット種別を
Webhook にします。 -
データアクションターゲットを使用してストリーミング計算済みインサイトに対して条件を実行する データアクションを作成します。
-
Mule プロジェクトを保存します。
-
データアクションターゲットがアプリケーションの URL を参照するようにします。
アプリケーション URL は
https://{{app-name}}.{{region}}.cloudhub.io/webhook のようになります。 -
データアクションの条件をトリガーしてフローをテストし、記録されたペイロードを確認します。