How Composer Works
A flow defines the automated processes between two or more systems. Think of it as the schema for an entire automation process. For example, you can automate any of these actions with Composer:
-
Copy all new records in one Salesforce org and replicate them in another.
-
Create employee records or job requisitions in Workday, and populate some of the fields with data from another system.
-
Check a source of data every fifteen minutes, and if the data changed, copy those changes to a Tableau data source.
You can also combine multiple actions in a single flow, such as replicating Salesforce records and then sending a Slack message to a particular channel based on the record type. Understanding how the basic building blocks of a flow work together makes it easier to confidently build and test flows. Building a flow is a simple matter of adding a trigger and all the actions you want to perform to complete an automated process.
Triggers
The first step of the flow is always a trigger. The options available depend on which connection or schedule you choose:
-
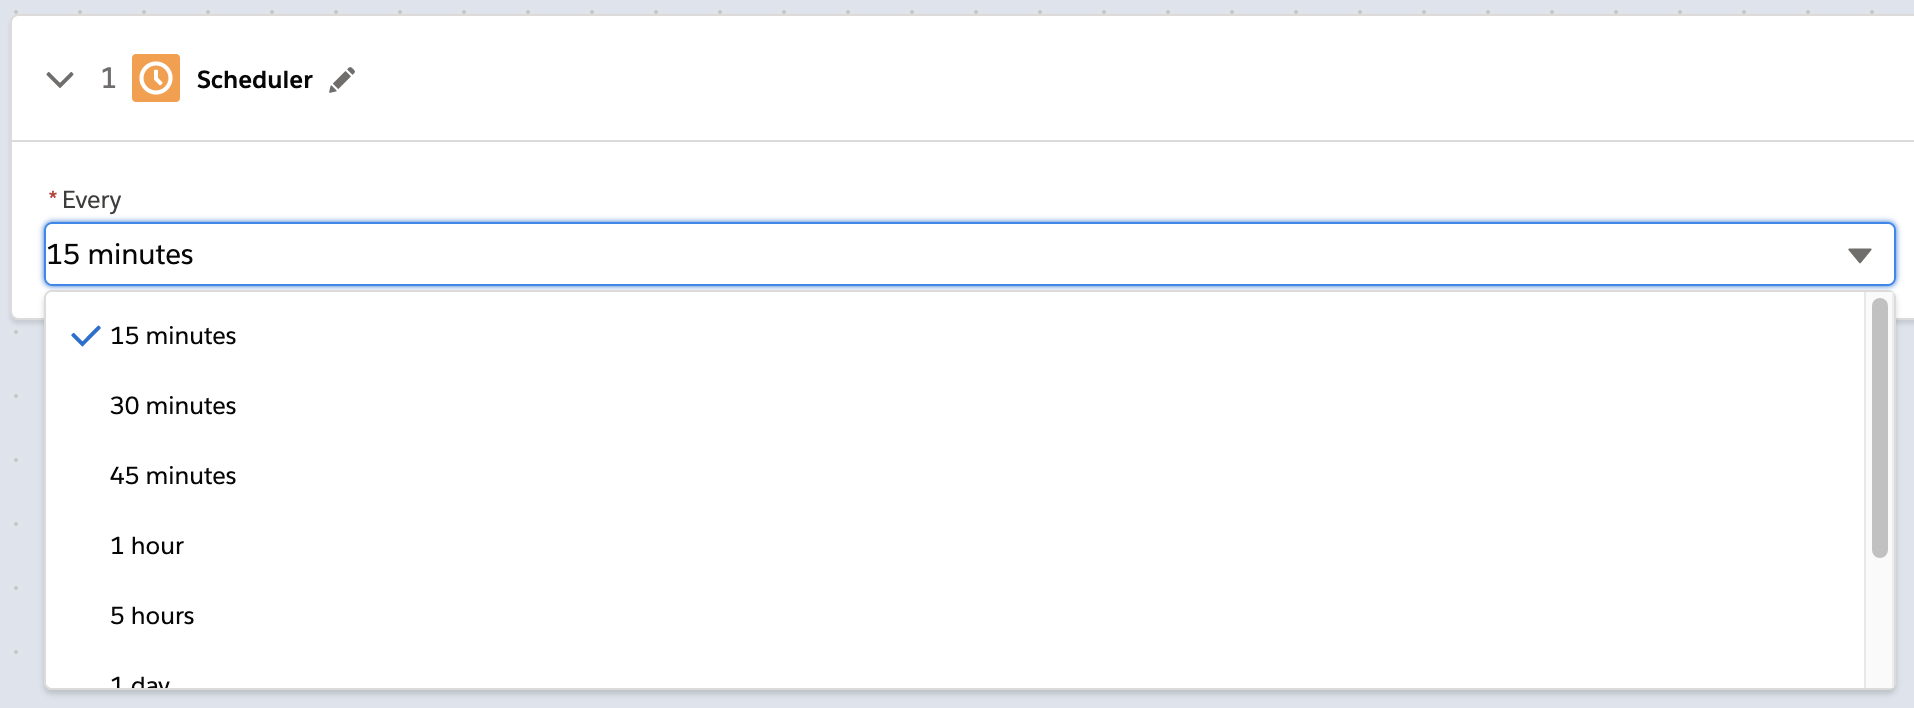
If you choose a time interval instead of an event, you won’t see any options: the trigger is finished, and you are ready to create the actions that define what this flow does.
-
If you choose a connection, define what kind of data triggers the flow and is fetched, available for the actions you’ll define next.
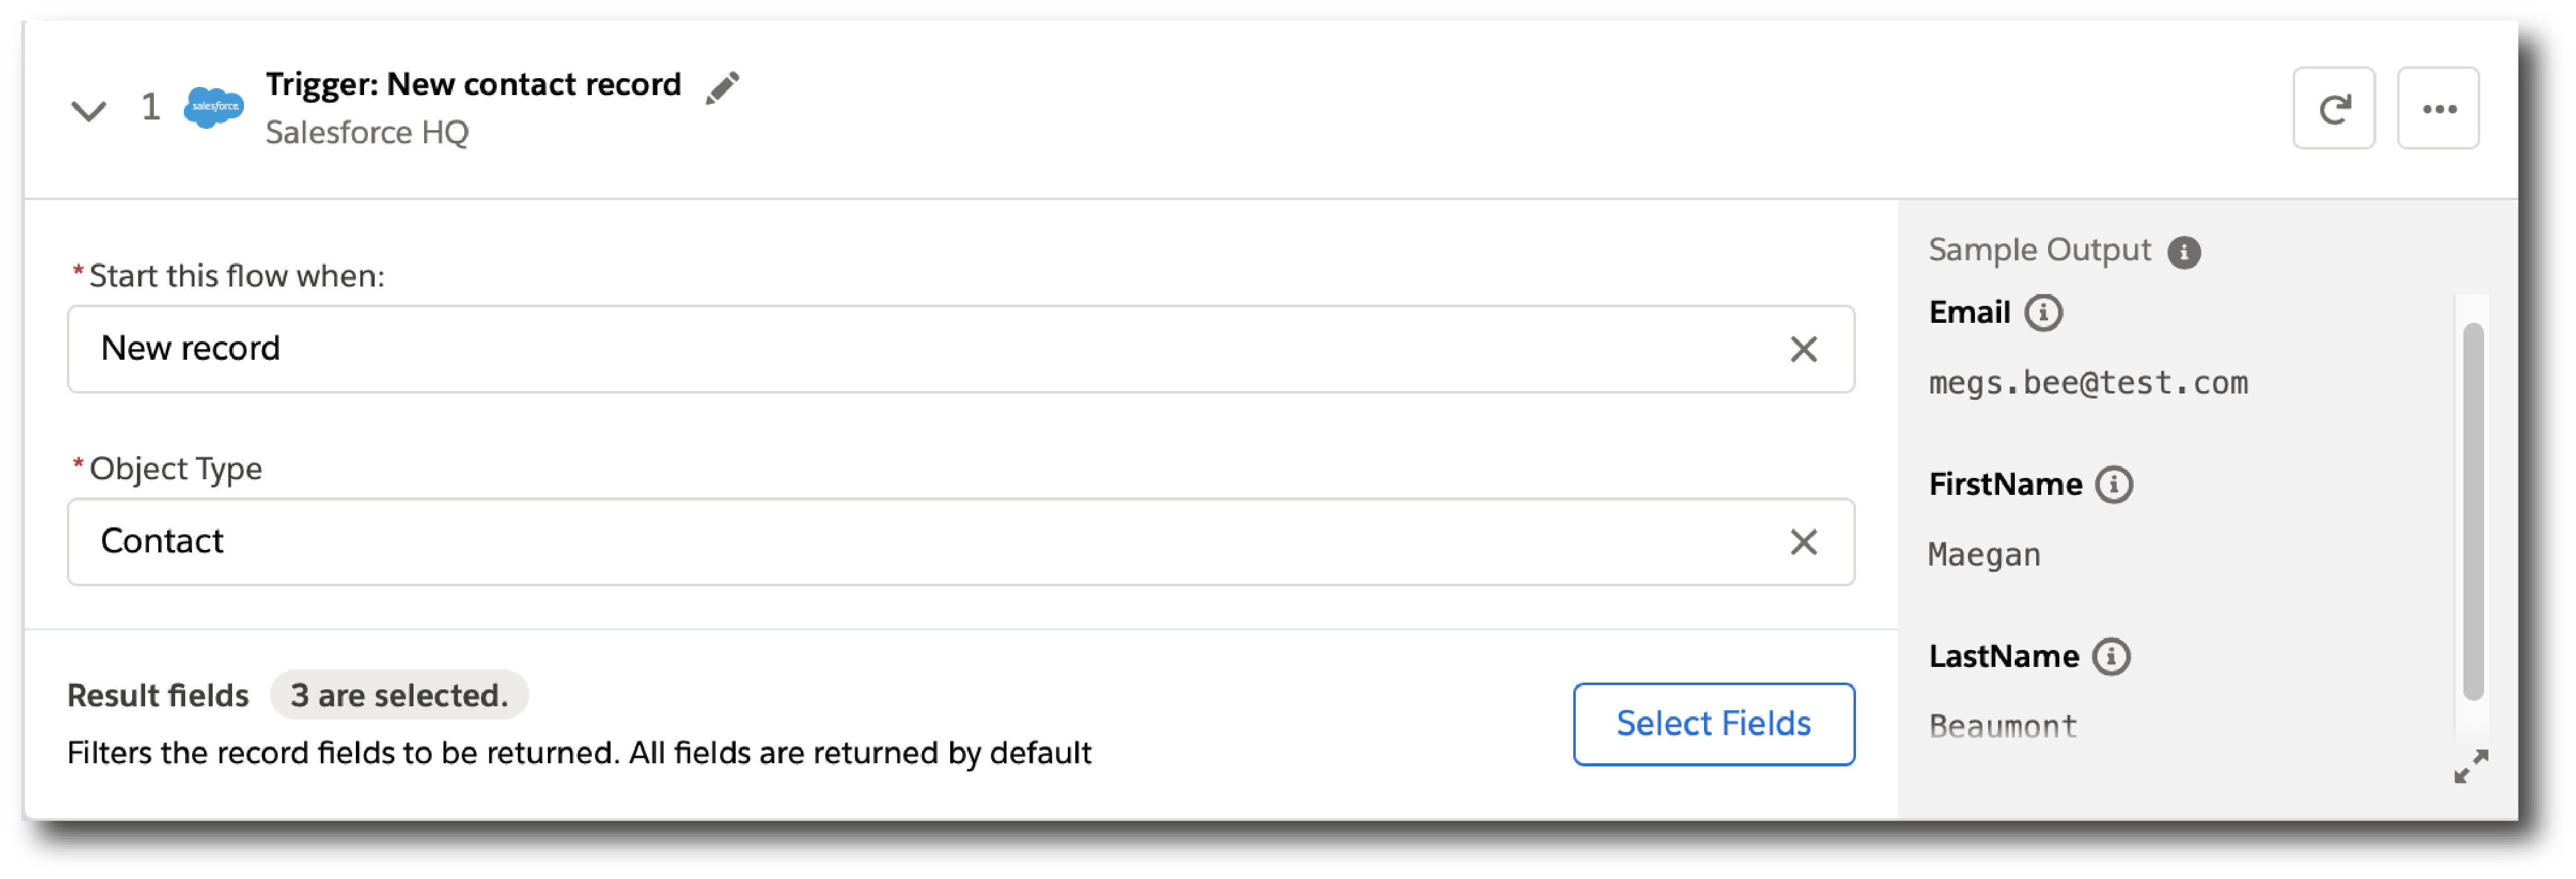
The following example shows a trigger that uses a connection:
-
Trigger is the name of the trigger, a name you provide.
-
Salesforce Org HQ is the name of the connection which this trigger uses as the data source. The trigger listens to the data source and starts when an event specified in the next field occurs, or when a time interval is reached.
-
Start this flow when: is a list of actions that can start a flow for the chosen connection. Click in the text box to see a list of options.
-
Object type is a list of objects you can choose, such as account or opportunity for a Salesforce connection. The label here and the choices you are given depend on the connection.
-
Result fields by default lists the number of fields that will be available to the flow each time it is triggered. To work with only some record fields, click Select Fields.
-
Sample Output shows you the field name and a sample value taken from an actual record in the data source you connected to. Check the sample output to confirm that you’ve connected to the correct account. It also helps you understand the data that you’ll be able to work with.
To see the API Name of the field, hover over the information bubble next to each field name.
You can test your trigger and adjust as needed. Simply click Test, then make the system event happen: in this example, create a new Salesforce contact. If the test completes without errors, you’re ready for the next step: define the actions that this flow will perform after being triggered.
Choosing Between Using Connections or a Scheduler
After you create and name a flow, choose what triggers the flow: an event in a system such as Salesforce or Workday (creating a connection), or a time interval specified by a Scheduler, such as "every fifteen minutes.
Triggering a flow with an event is done with a connection, and triggering with a time schedule is done with Scheduler.
Triggering Flows by Using Connections
Using connections to trigger flows protects your login credentials while giving easy access to data sources:
-
Only you can see the connections you create.
-
Your credentials are never exposed or accessible after you create a connection to replace them.
-
You can’t change the name of a connection after it is used in a flow that is deployed.
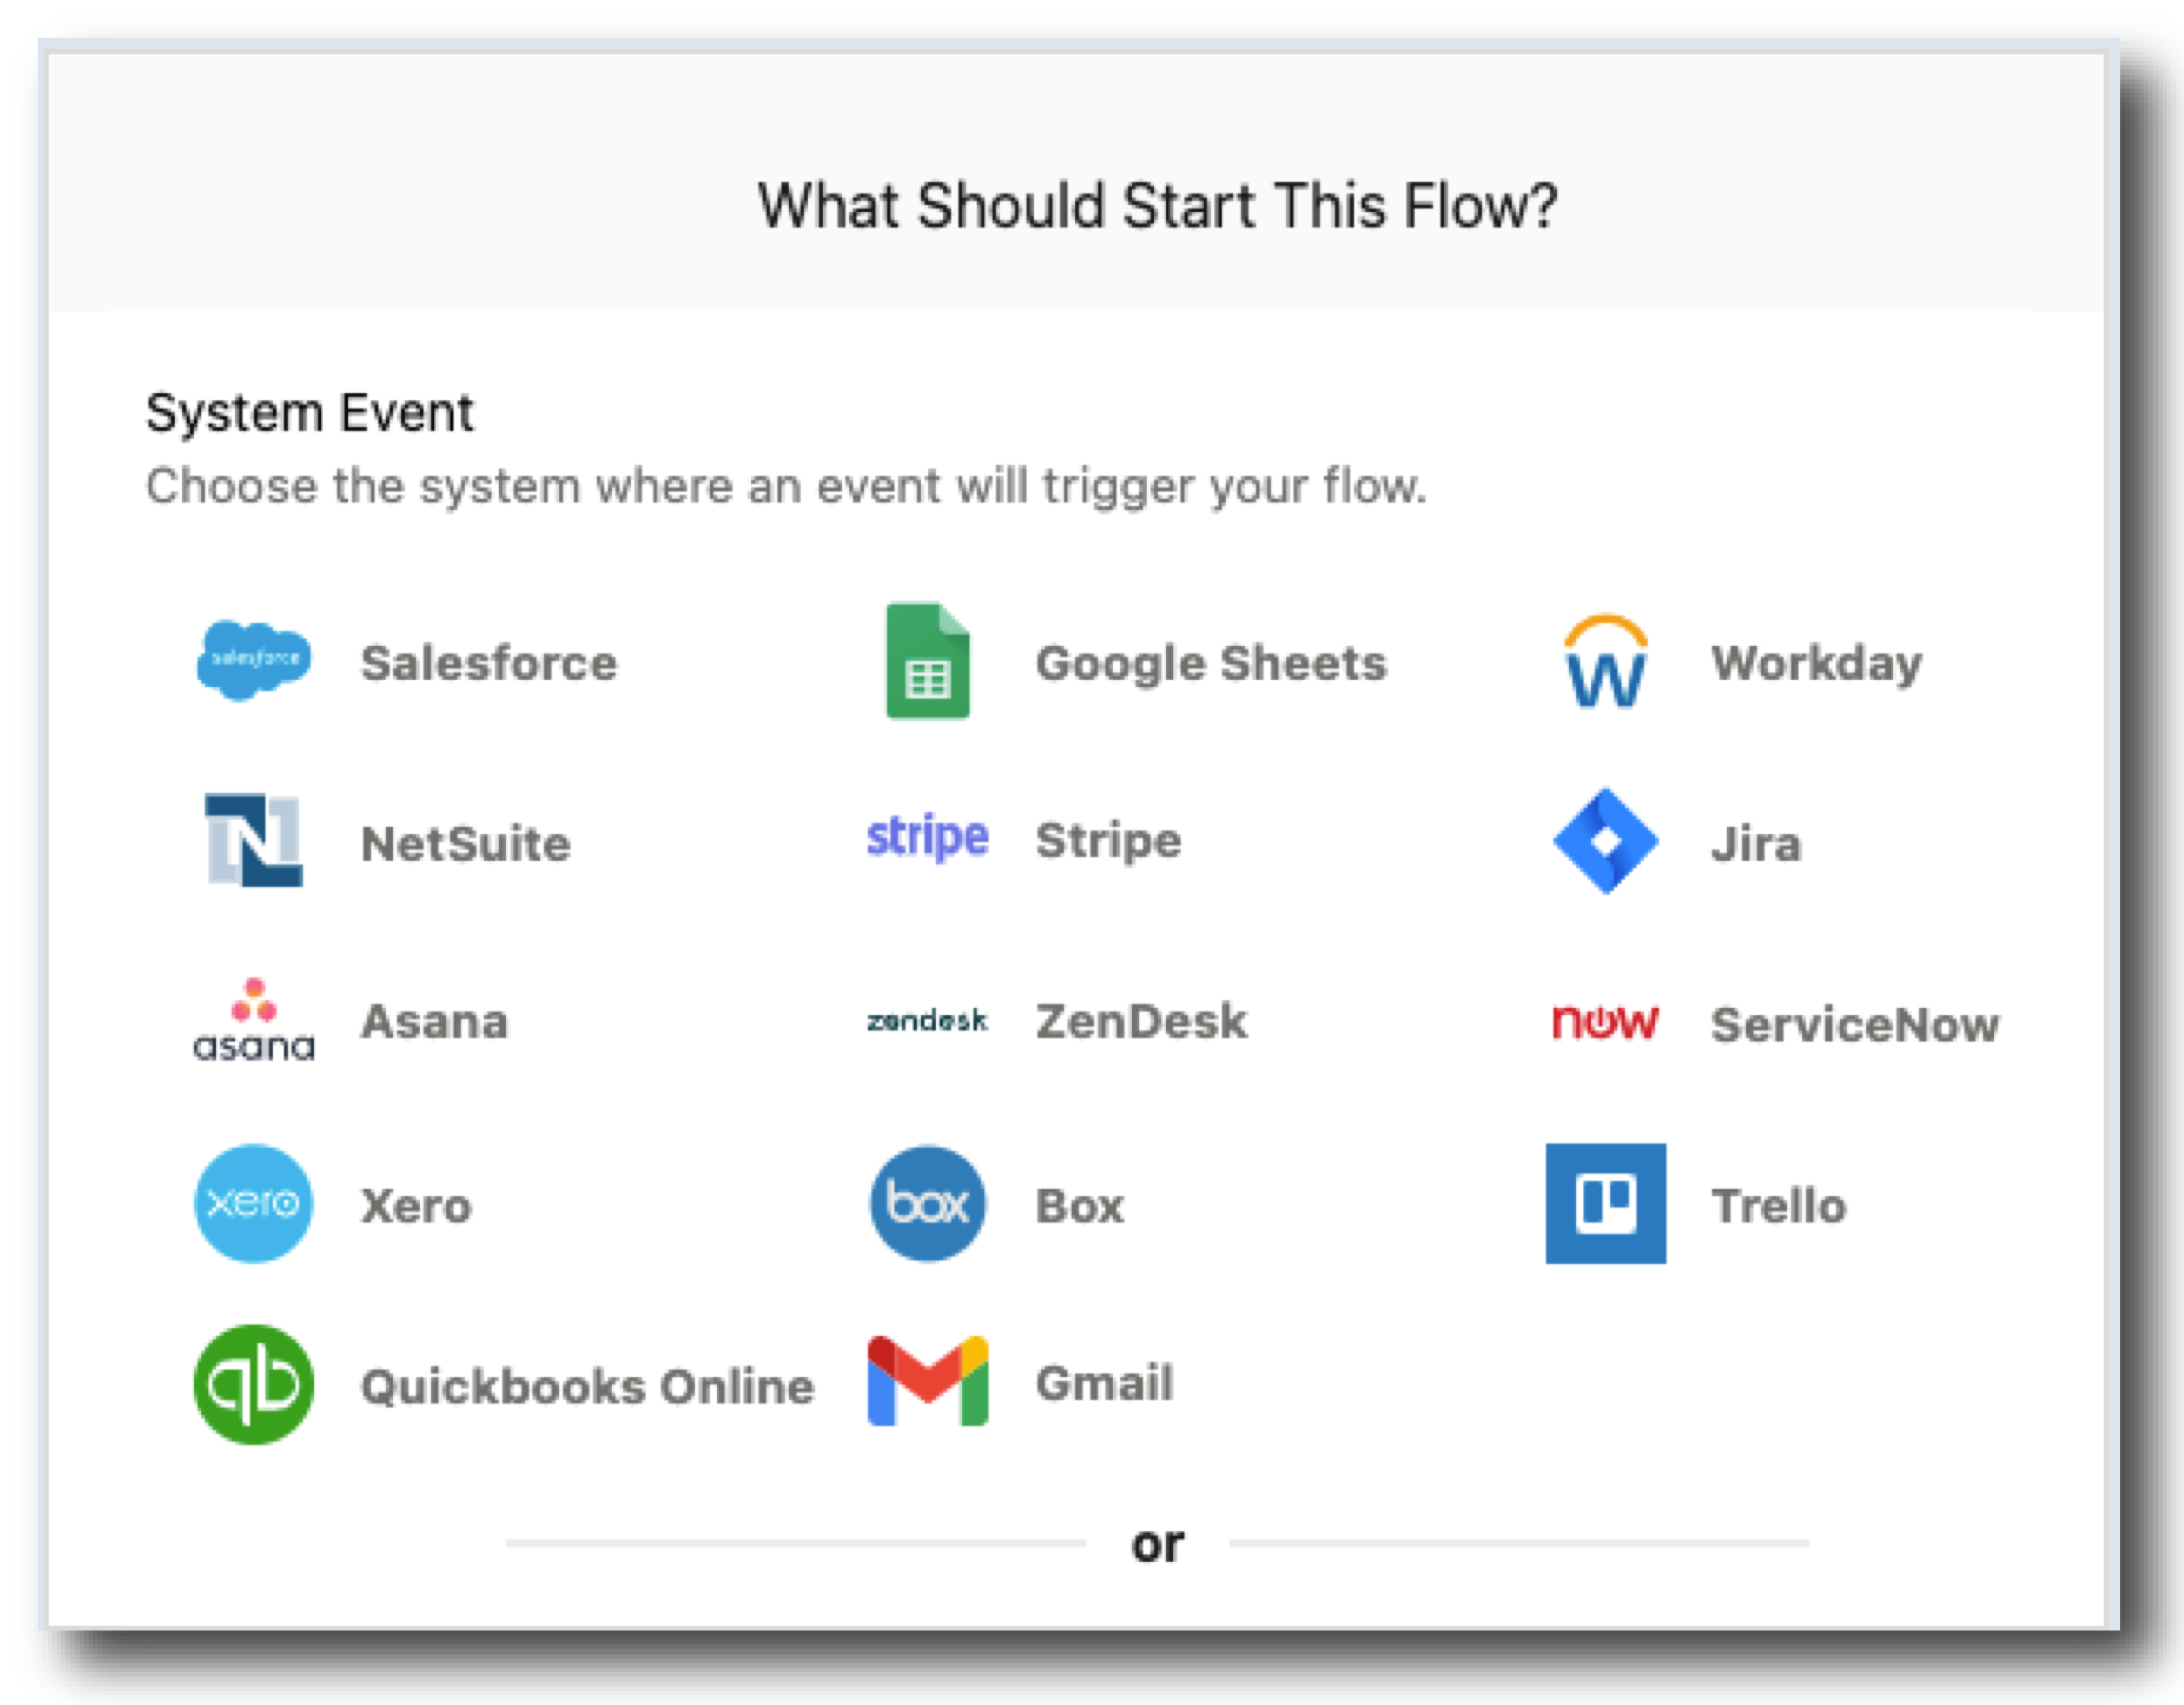
The first step in triggering a flow is connecting to the system where the trigger will occur. In the What Should Start This Flow dialog, choose or create a connection as the first step of creating a trigger:
-
Choose an existing connection from the list.
-
Click Add New Connection to create a new connection that is automatically selected after you create it.
-
Manage connections by changing connection names or deleting connections.
Actions
An action is a step in the flow. You create the first action of the flow right after the trigger, and as with the trigger, you can choose a connection. You’ll have access to the data fetched by the trigger and any previous actions as well.
However, you can also start with a flow control before the action.

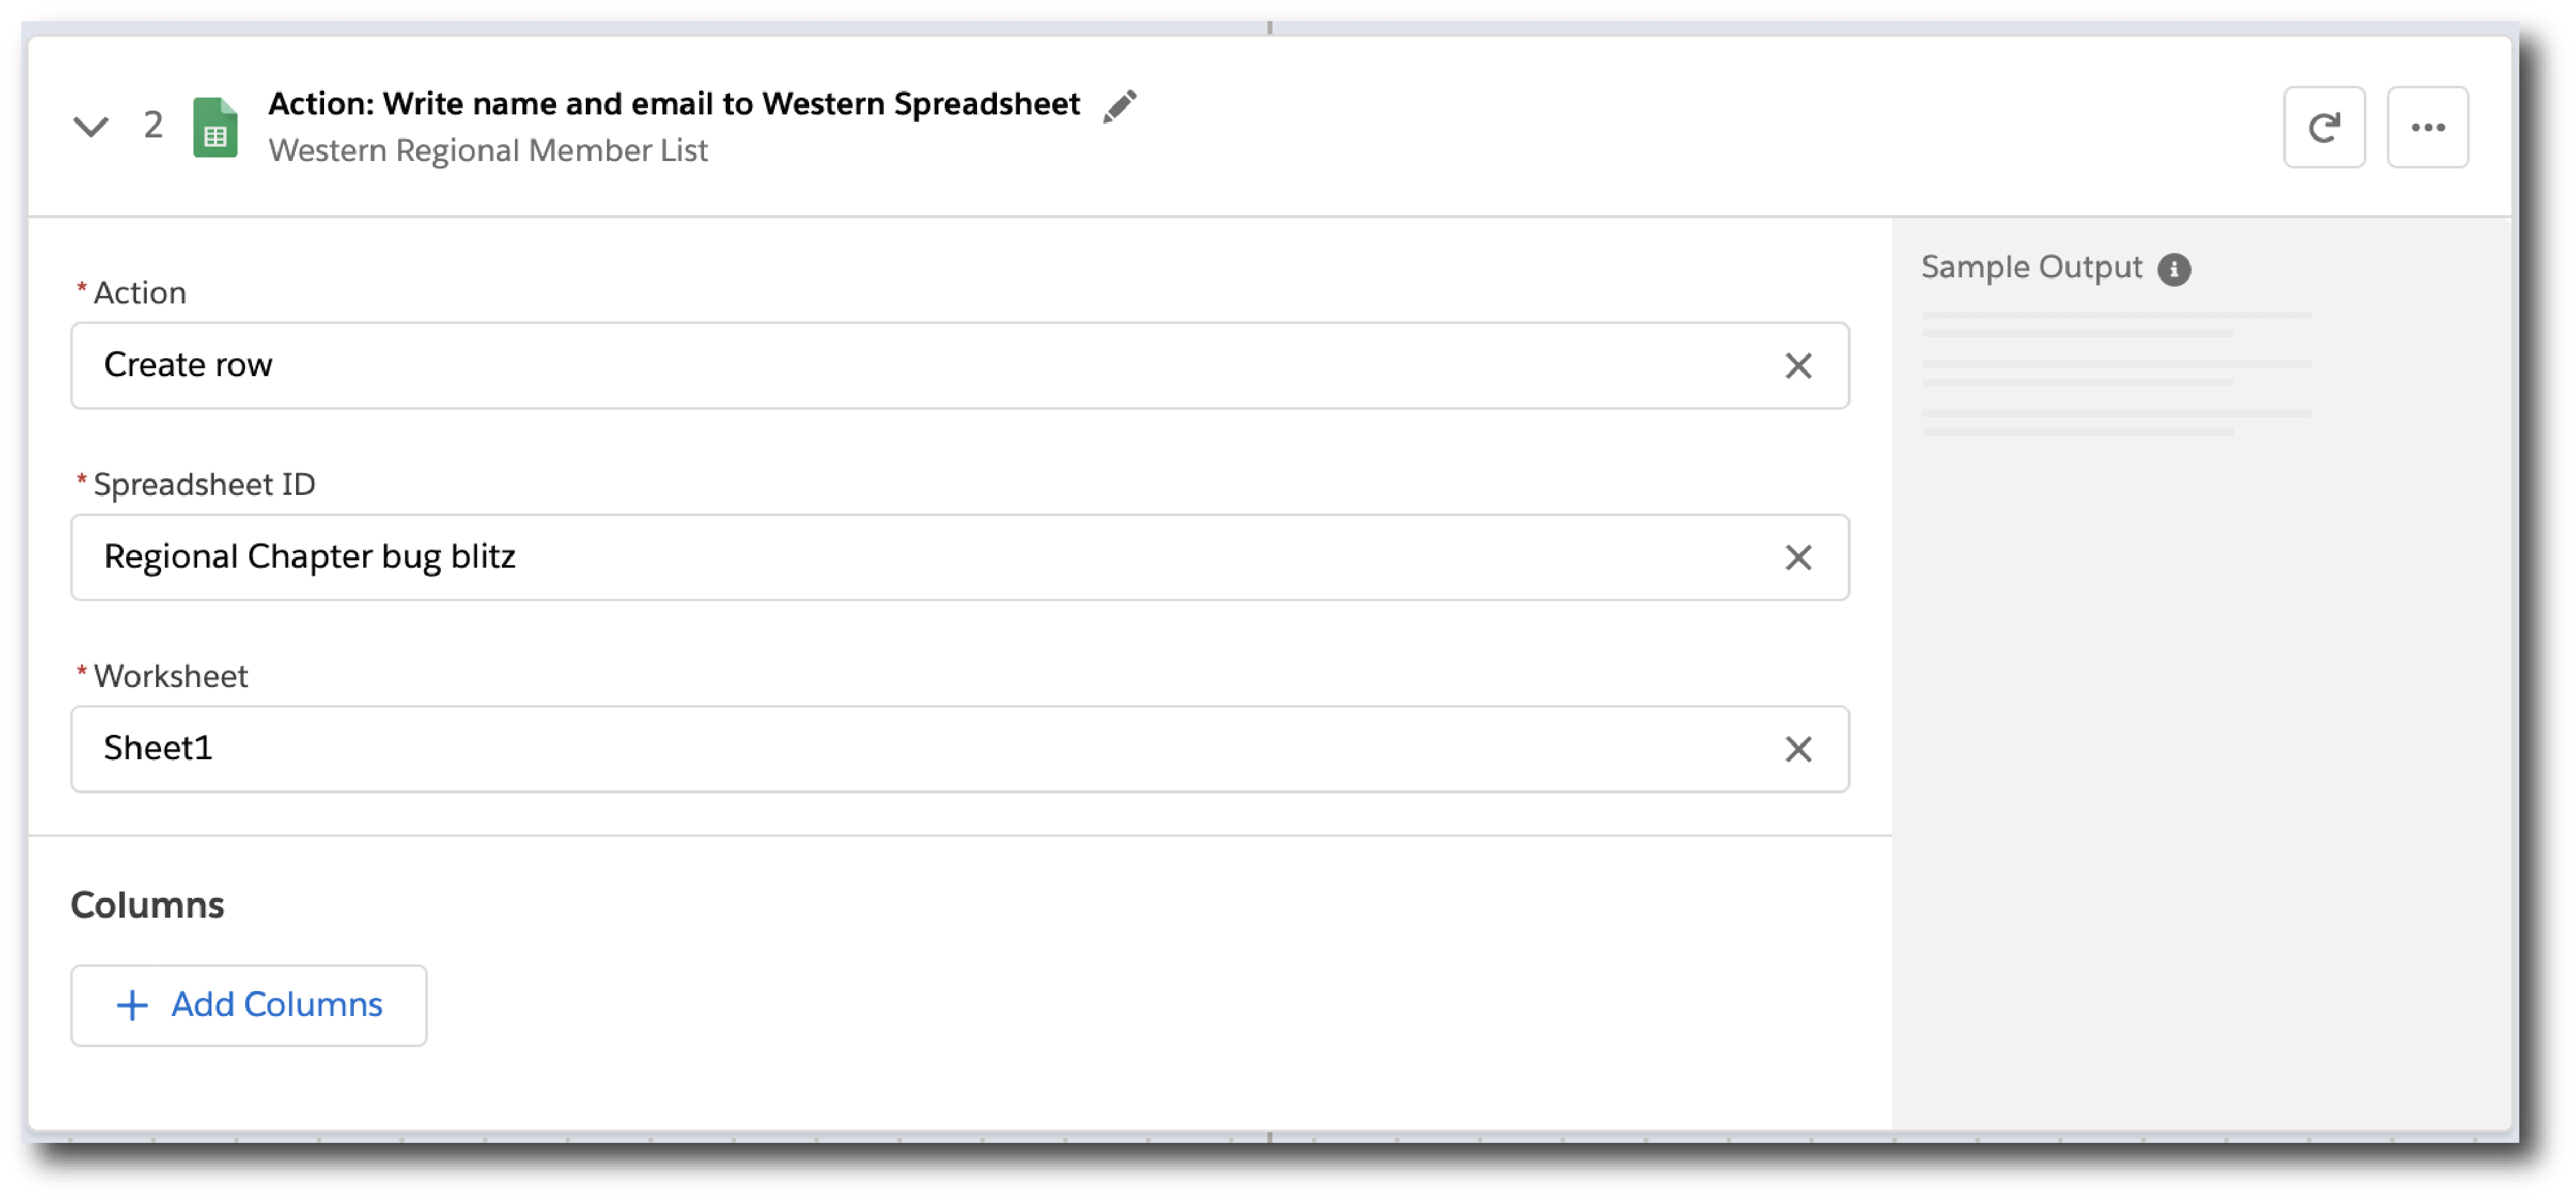
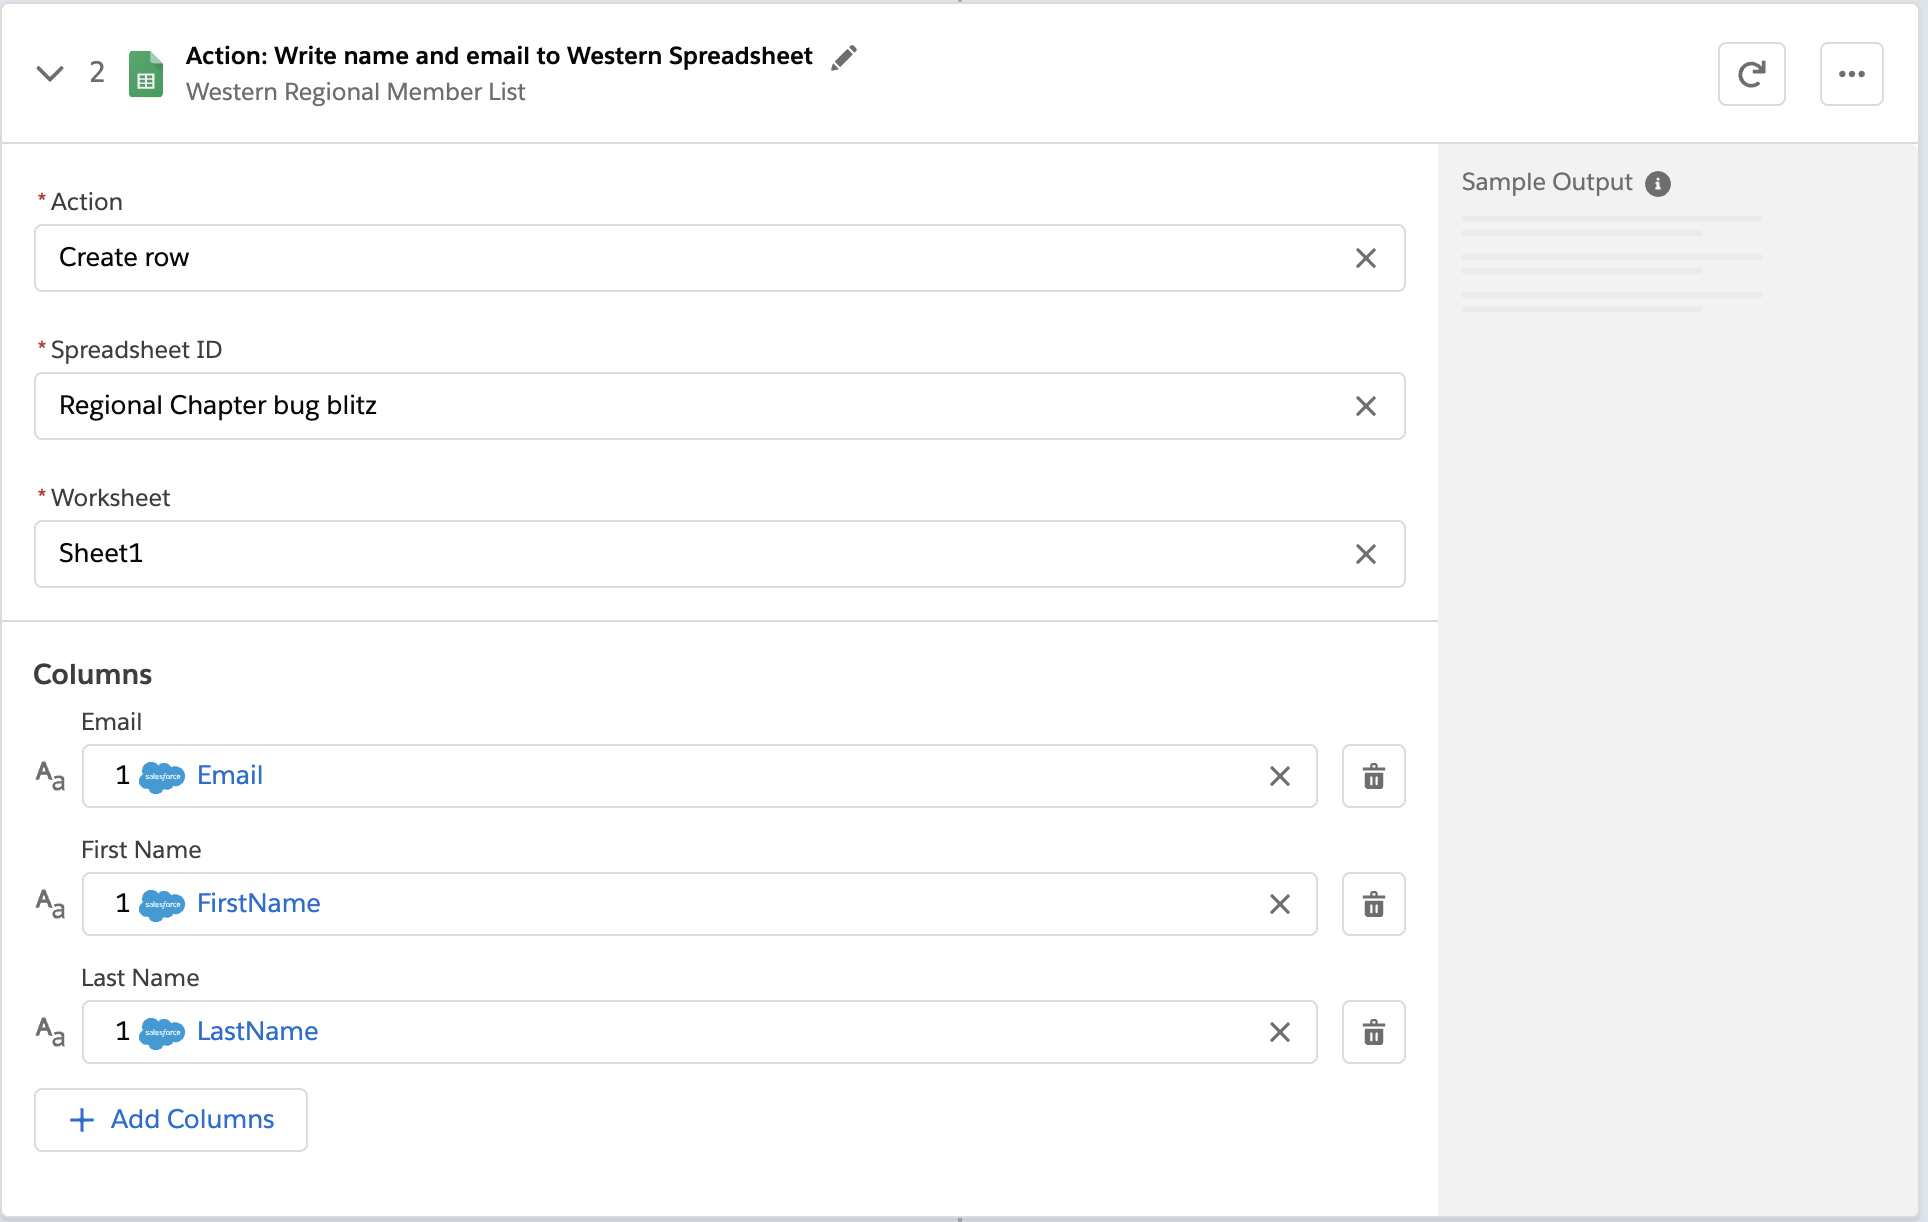
In the following example, a Salesforce admin has created an action, named it, and chosen a connection to their Google spreadsheets, as you can see in the top banner of the action. The admin has also defined the action: in this case, create a new row in a spreadsheet and populate it with some fields from the flow trigger (each new contact record).
-
Action is the task you want to perform. The actions you can choose from depend on which connection you choose.
The rest of the fields in this section depend on the connection type, and the action you choose.
-
Spreadsheet ID is the name of the spreadsheet this action will use. You can search for and select any of the spreadsheets that you can access using the credentials you used to create the connection.
-
Worksheet is the name of the worksheet where you will add a row.
-
Columns is the area where you map the trigger fields to columns in the spreadsheet. This area, like the others, is different for different systems. In this example, click Add Columns to see all the columns from the spreadsheet listed and choose the ones you want to work with here:
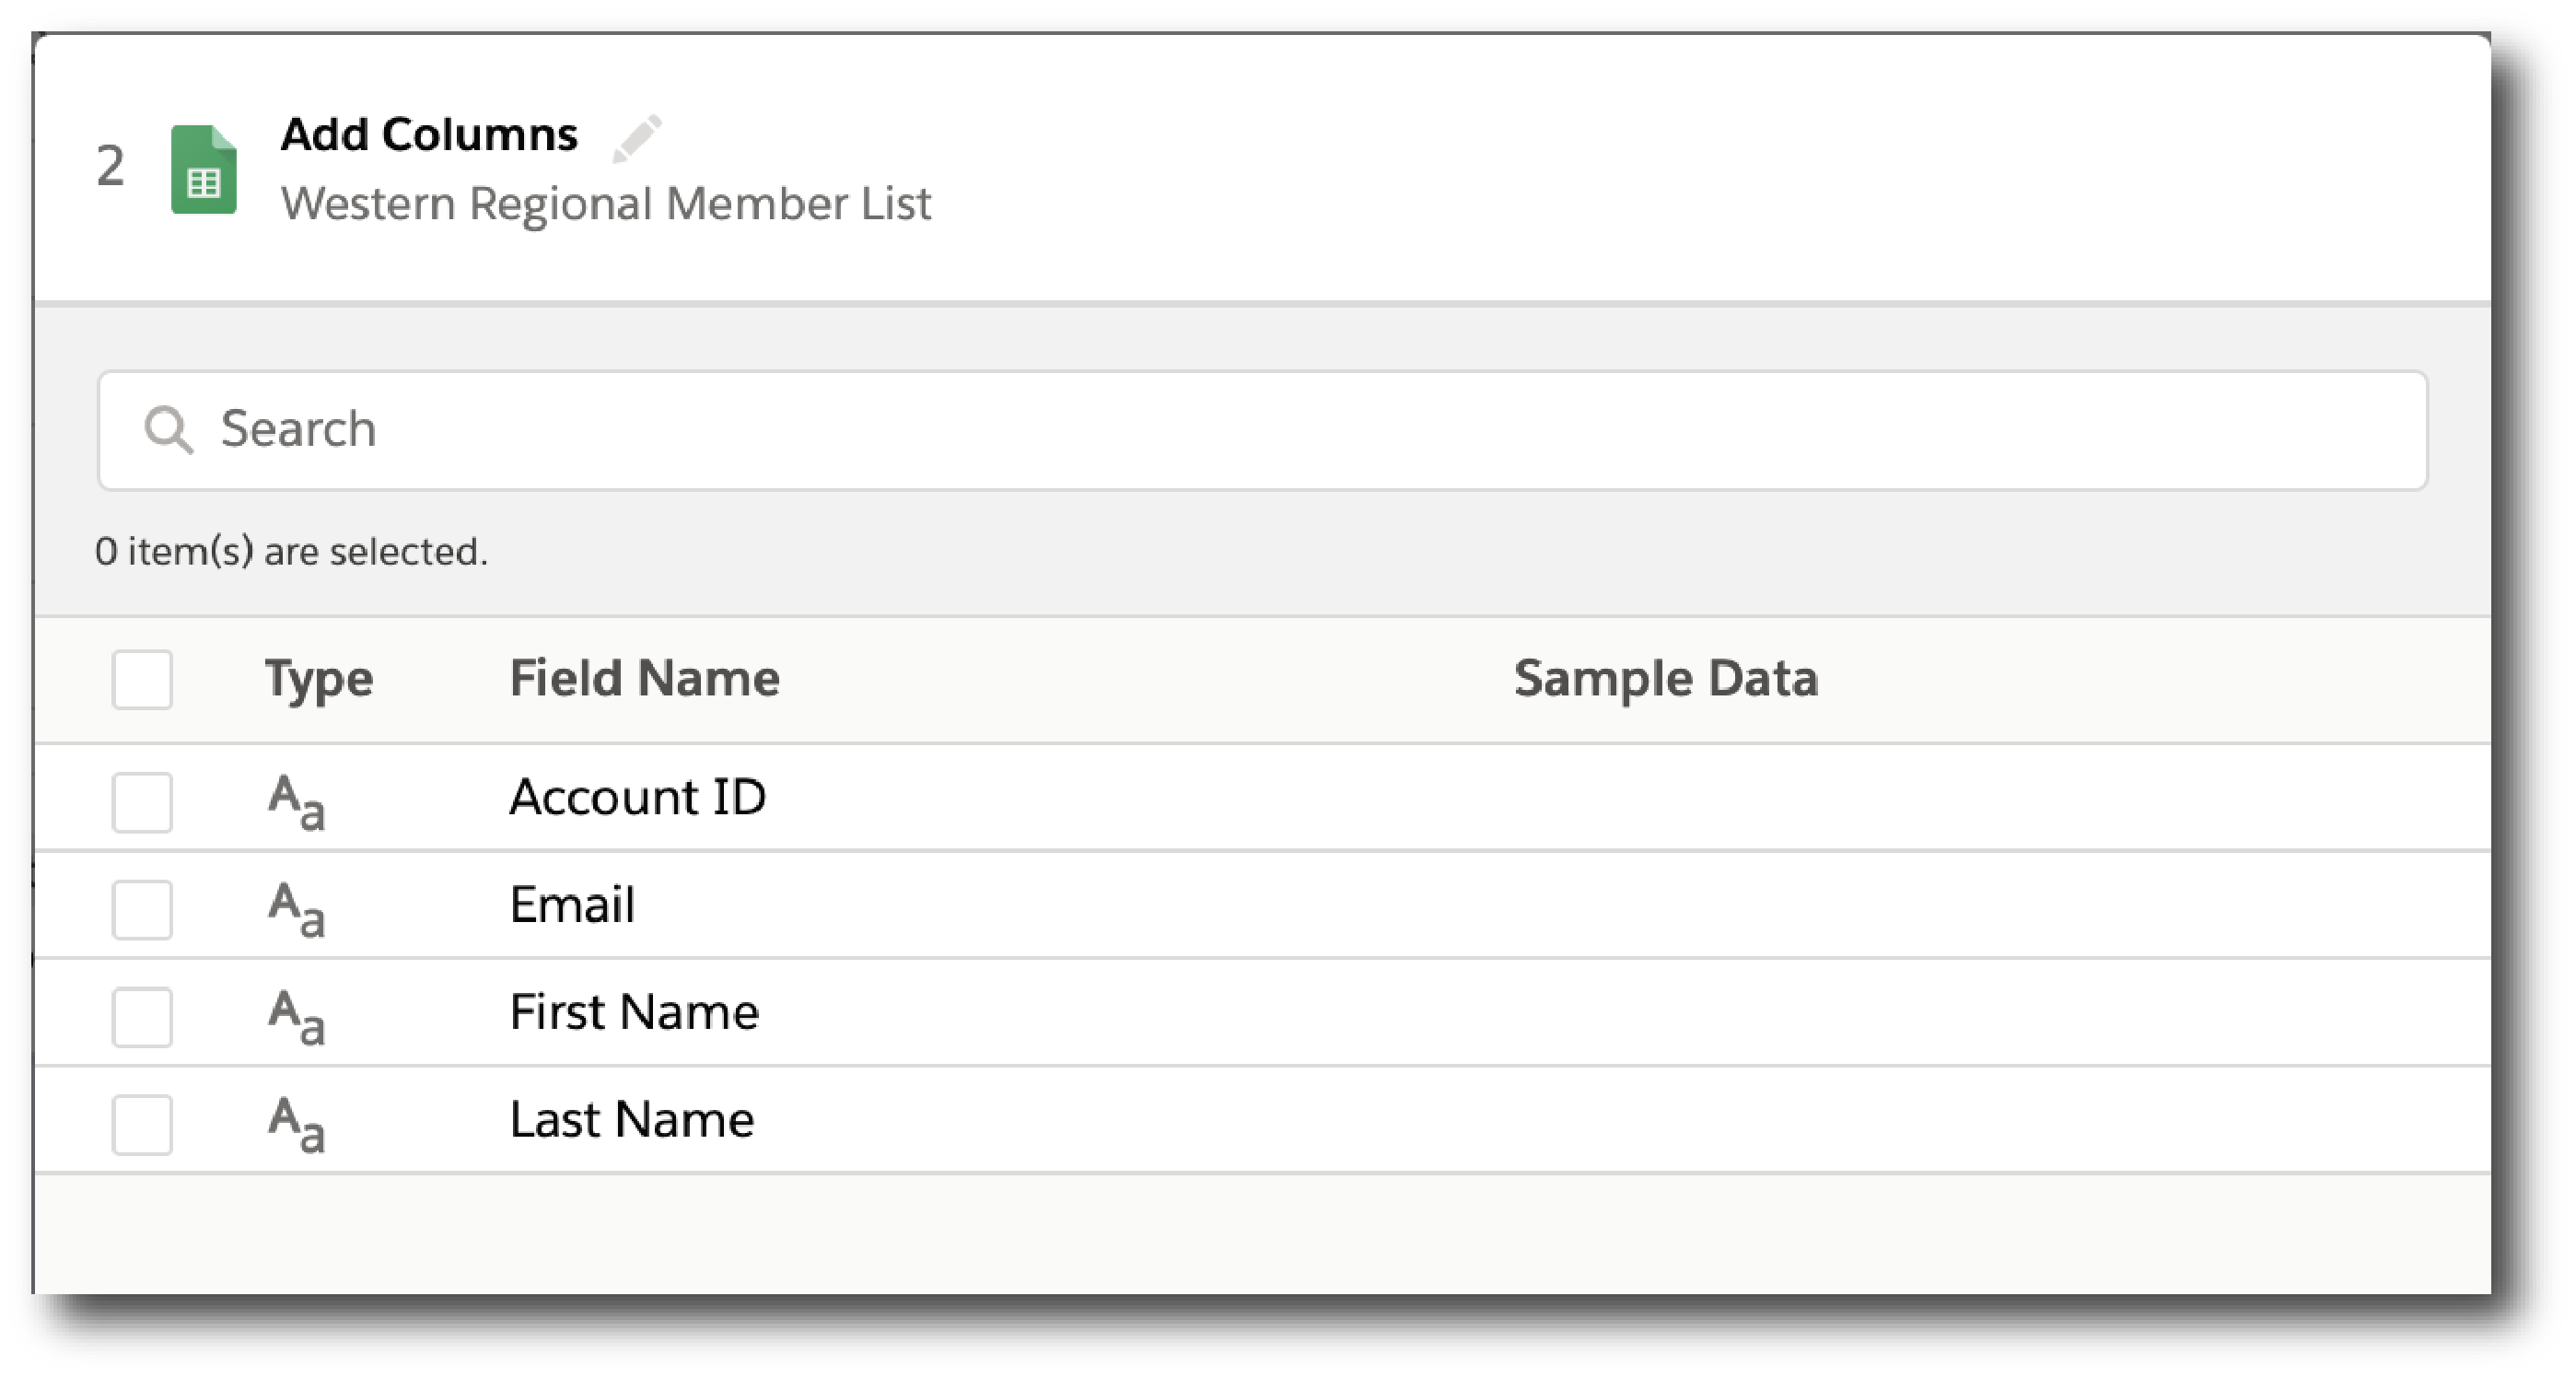
Choose which fields you want to act upon, and then map the fields you fetched with the trigger or previous actions with these:
Map the fields delivered by the trigger to the spreadsheet rows you selected. In this example, Email, FirstName, and LastName will be mapped to the Google sheet columns Email, First Name, and Last Name. You don’t have to map all the fields fetched in your action or trigger connection.
Remember, the selection pane (Columns) is different depending on the connection for this action and other choices. For a list of valid actions for each connection, see the reference topic for the system you are interested in.
This is the complete action, ready for testing:
The fields from Salesforce that are mapped to the Google Sheet fields are data pills, containers for everything that might be in a field (or other resource, depending on the connection).
Data Pills
Data pills contain the complexity of a data structure, making it easy to map data from triggers or previous actions. Using data pills, data mapping can be as simple or as complex as you need:
-
You can concatenate two or more data pills by mapping them to the same field, column, or other data target.
-
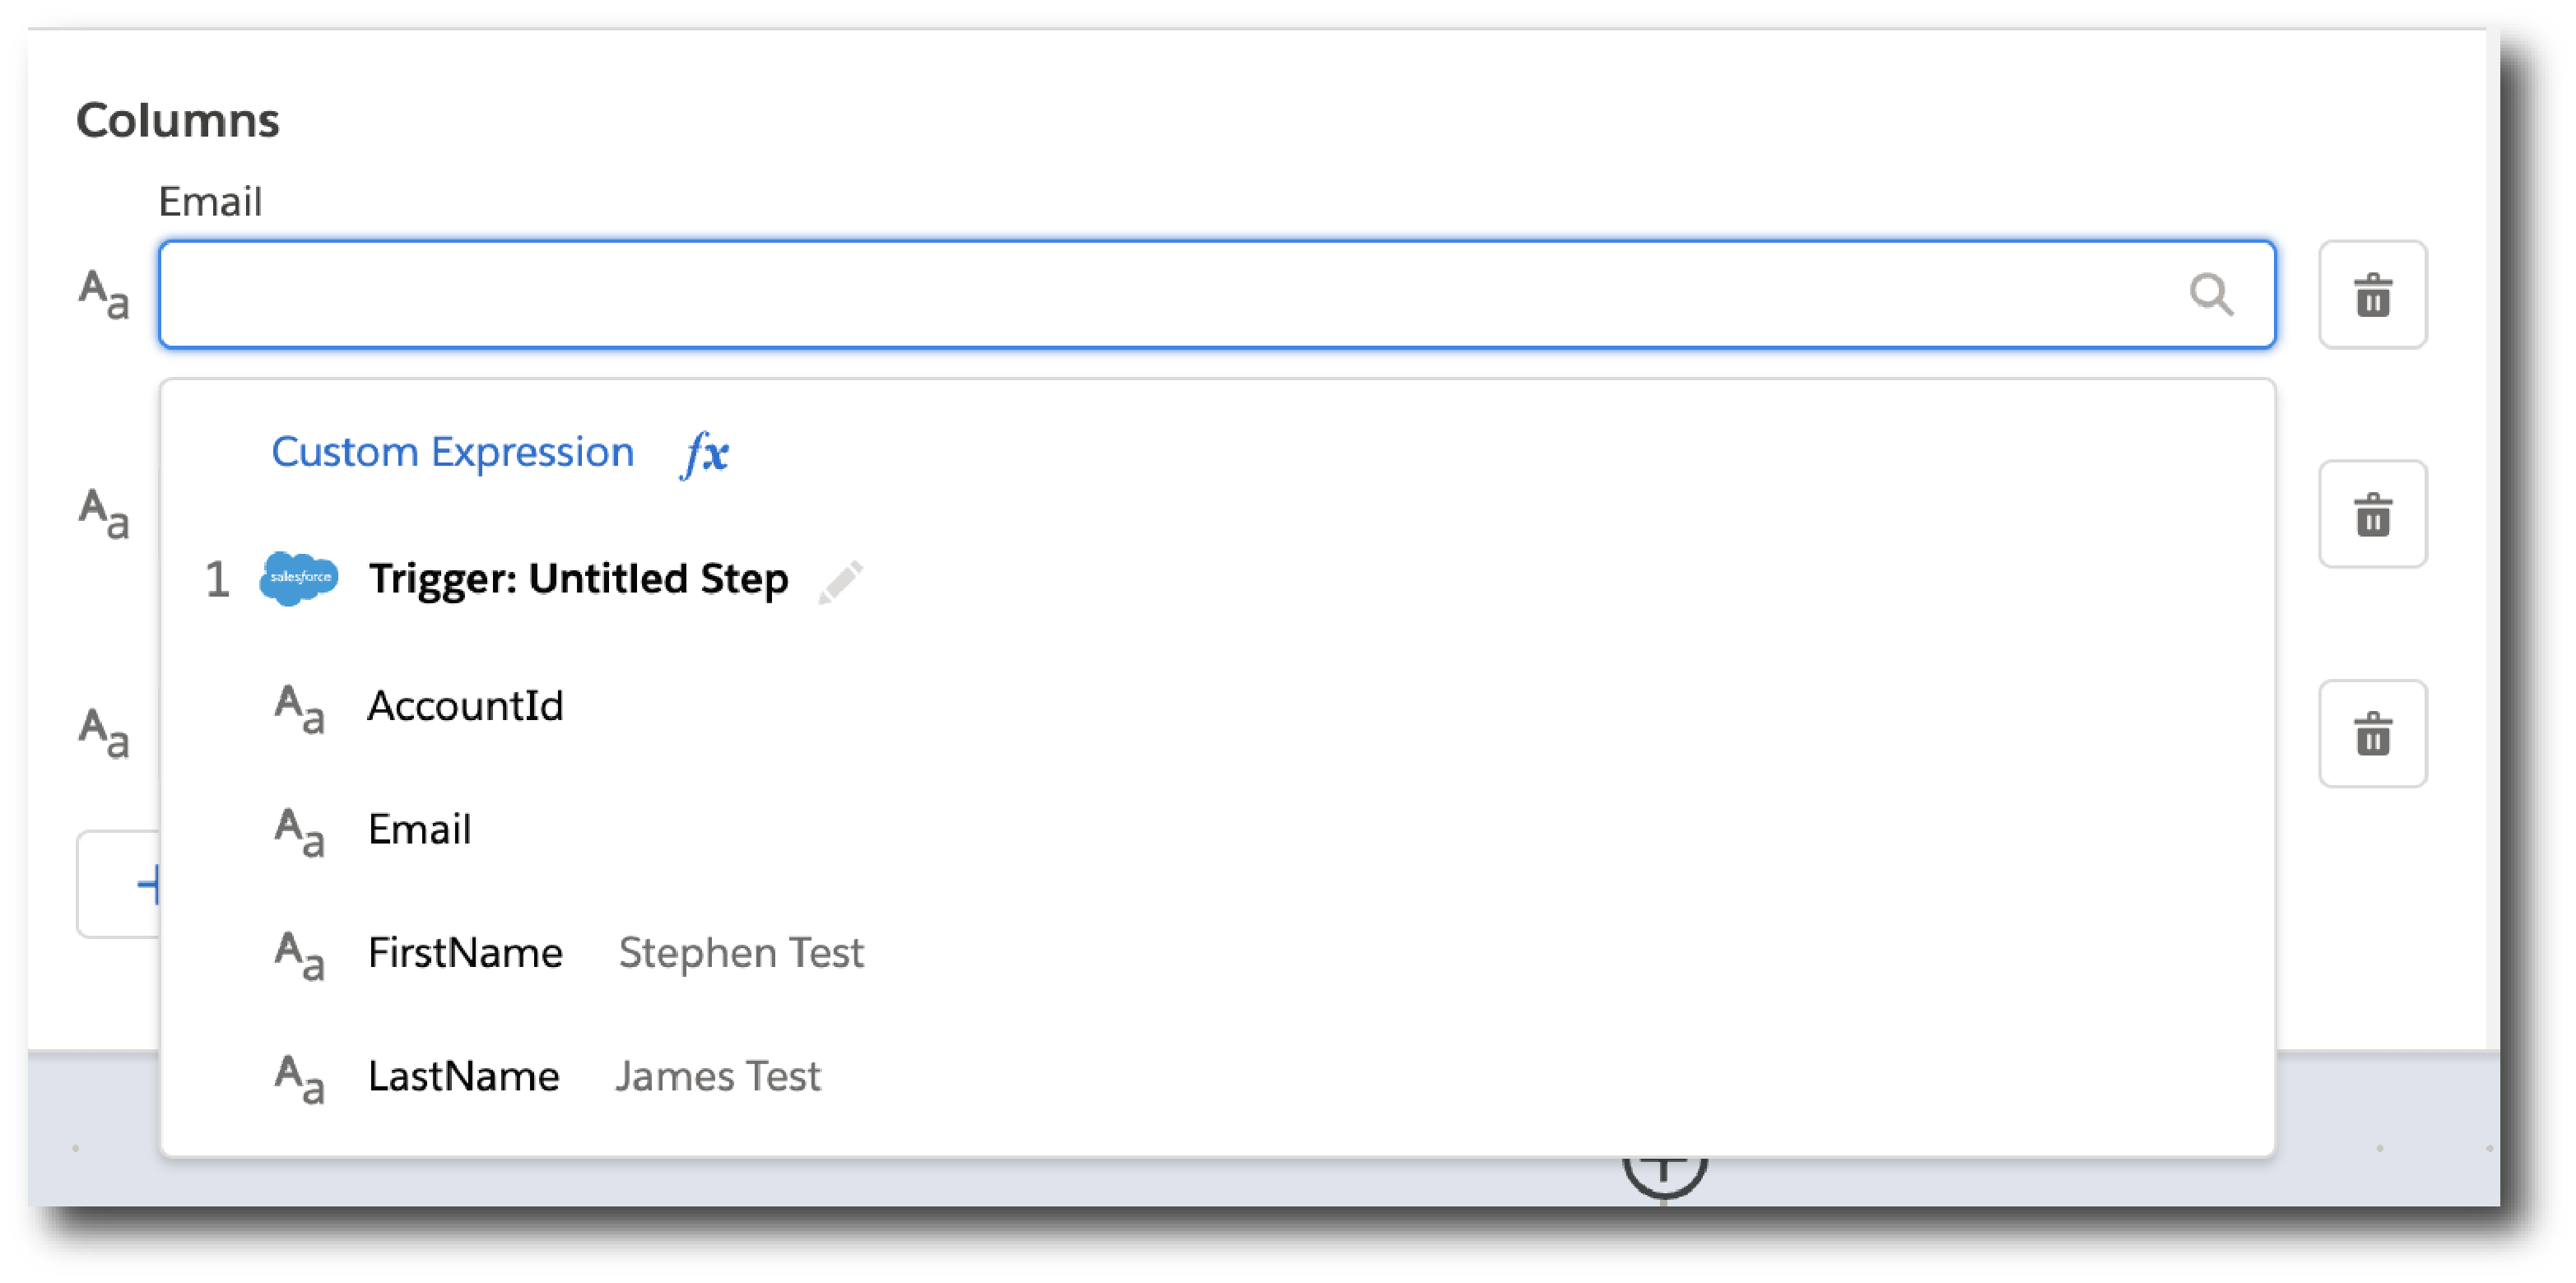
You can create a custom expression instead of simply mapping data pills to data targets, by select Custom Express fx. For example, you might want to add some text such as
Copied from Salesforceafter a data pill, to flag it for inspection. -
You can construct a list of strings with multiple comma-separated data pills and manually-entered string values. If you enter a single data pill, Composer automatically converts that data pill to a list. When using the
list of stringsdata pill, if you also select a data pill of the data typestring,number,booleanordate, those data pills are appended to the existing list and the non-string data pills will be typecast to astringdata type.
If a data pill is a field with a null or blank value, and you map it to an optional field, Composer removes it from the flow. If you map it to a required field, an error occurs because a value is required.
Flow Controls
If you need to add logic to your flow beyond a basic action, you can use a For Each loop or an If/Else block. You’ll define the flow control and then specify the action to be taken based on the logic applied to the data fetched previously.
For Each Loop
A For Each loop acts on each record in a list. For example, if the flow fetches a set of contacts from Salesforce, you can loop through the list and copy each record to a row in a Google Sheet.
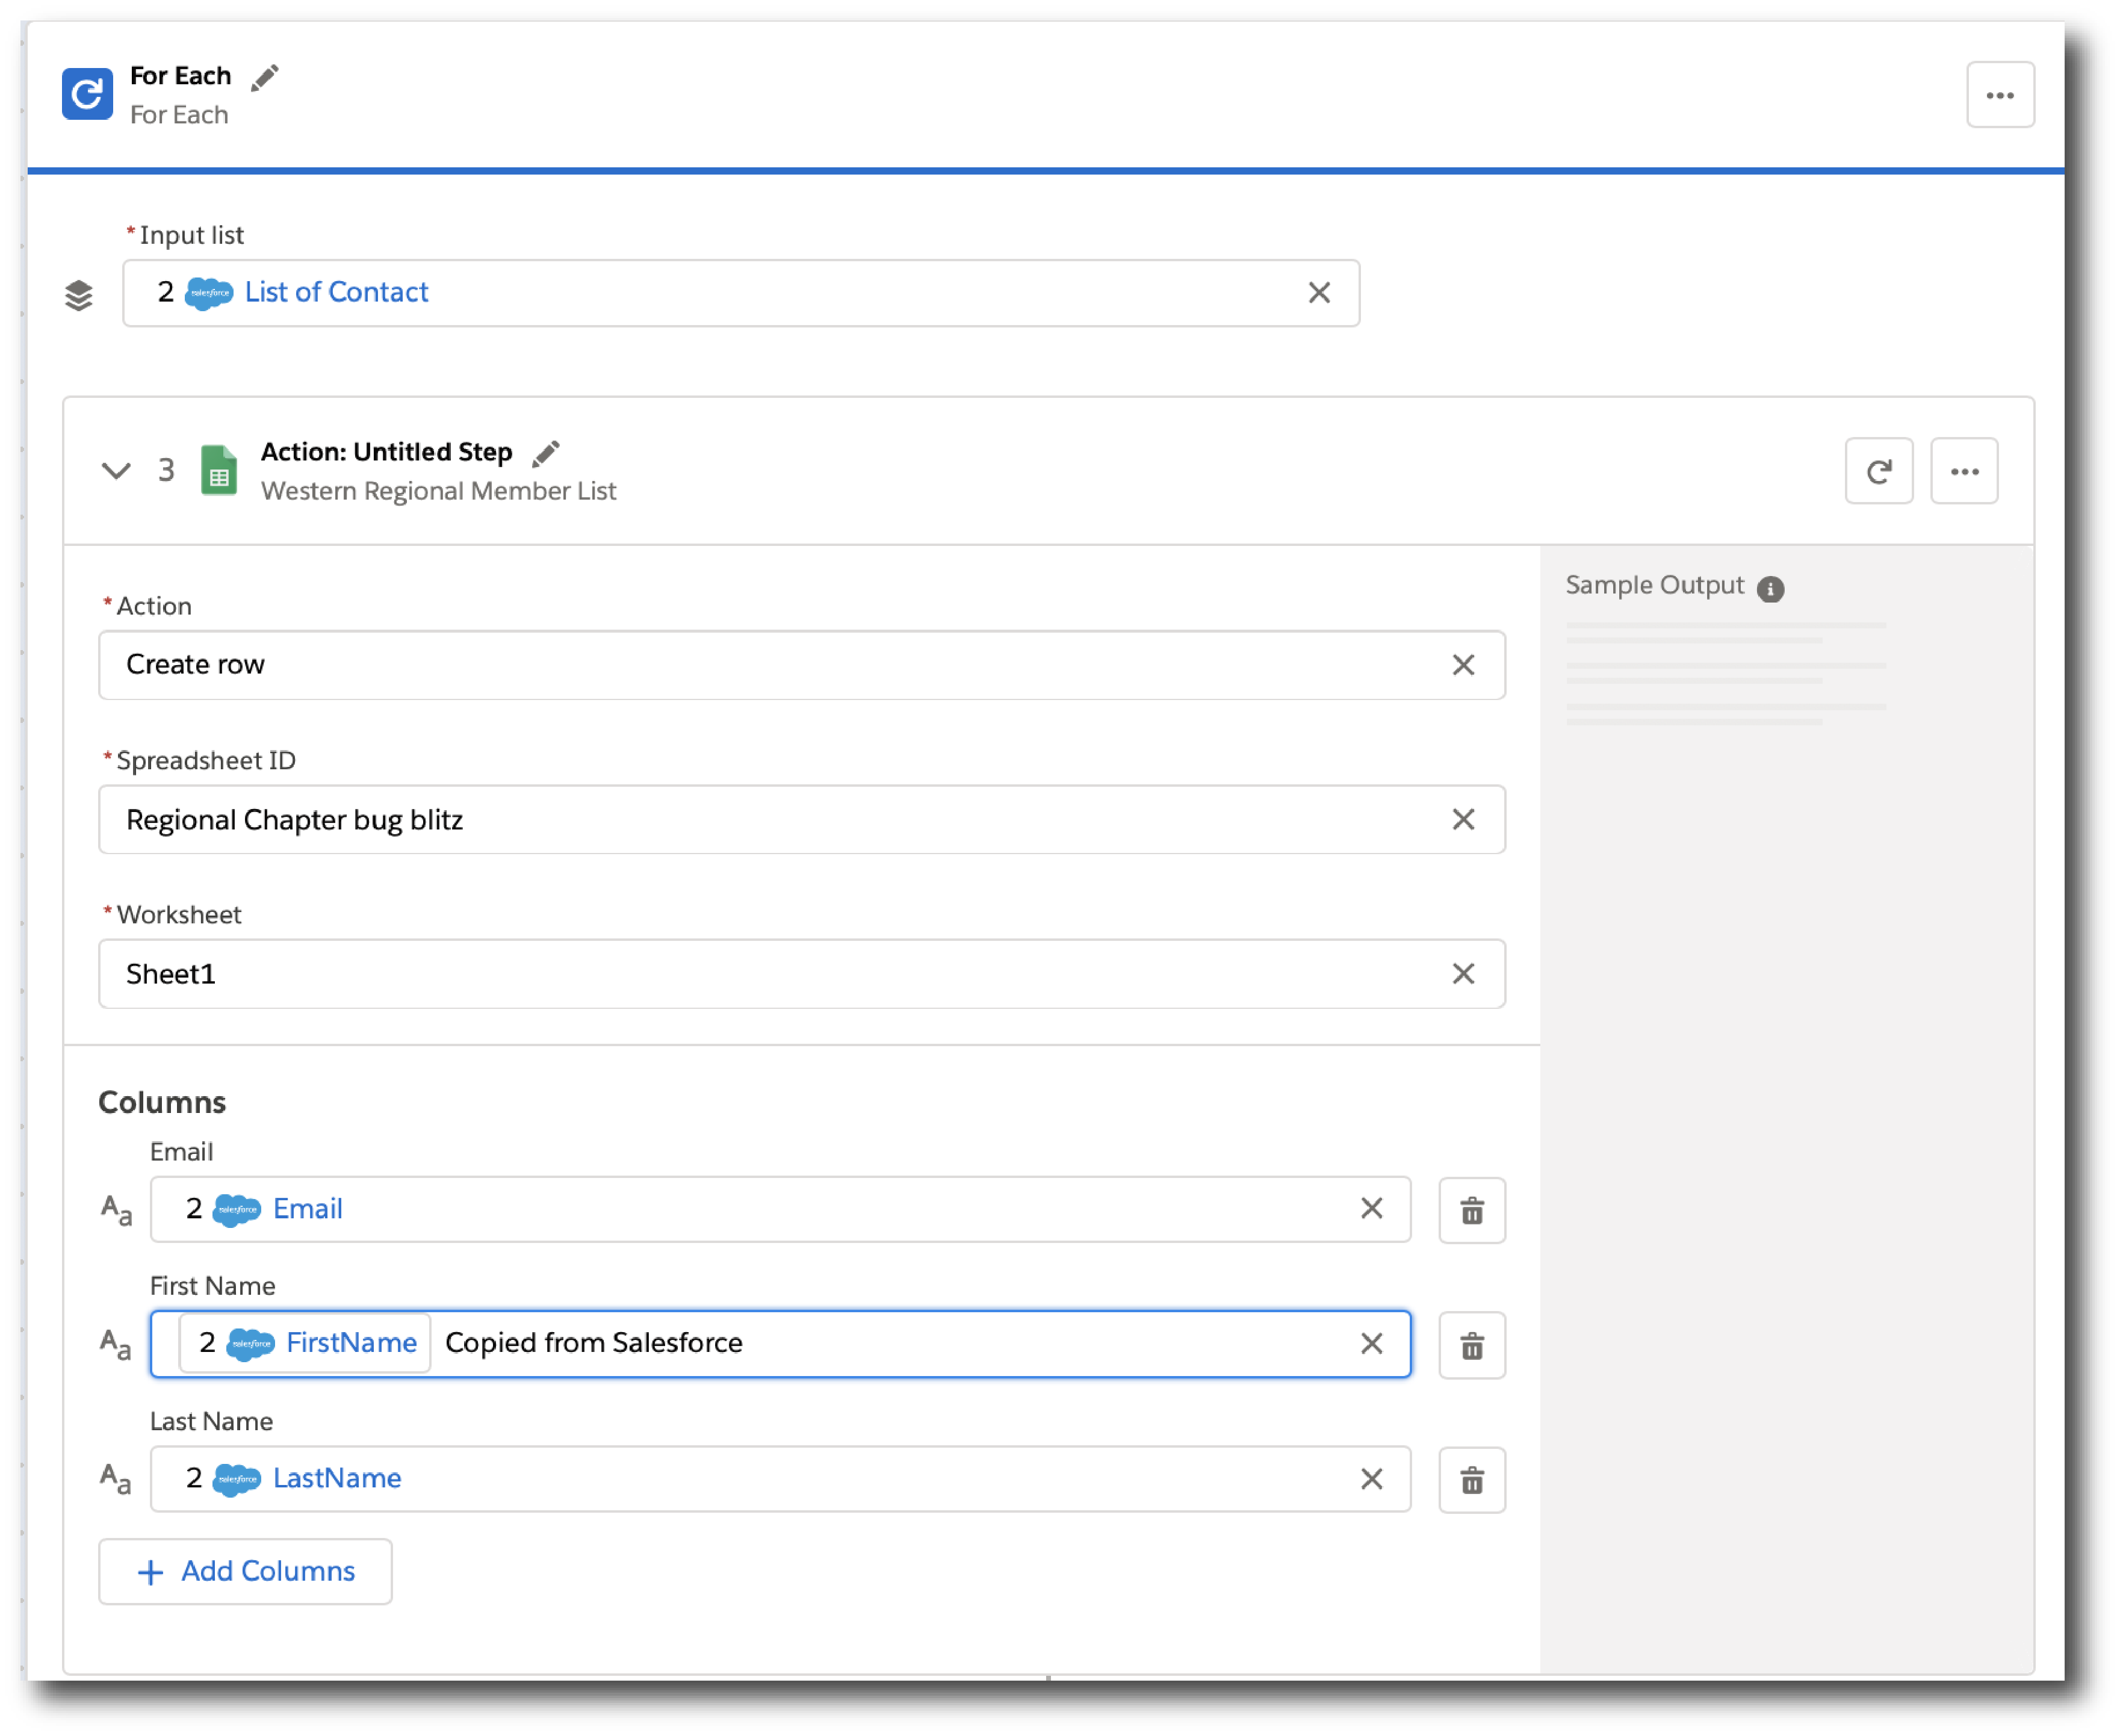
Input list is chosen from the list of records available from a previous action. In this example, a previous action fetched all the contact records associated with a single account.
The rest of the steps are the actions that are to be performed on each record in the list. In this example, the action writes contacts to a Google Sheet, one record per row.
If/Else Block
An If/Else block takes a single record and checks to see if it meets conditions you specify. If it does, you define what actions to take.
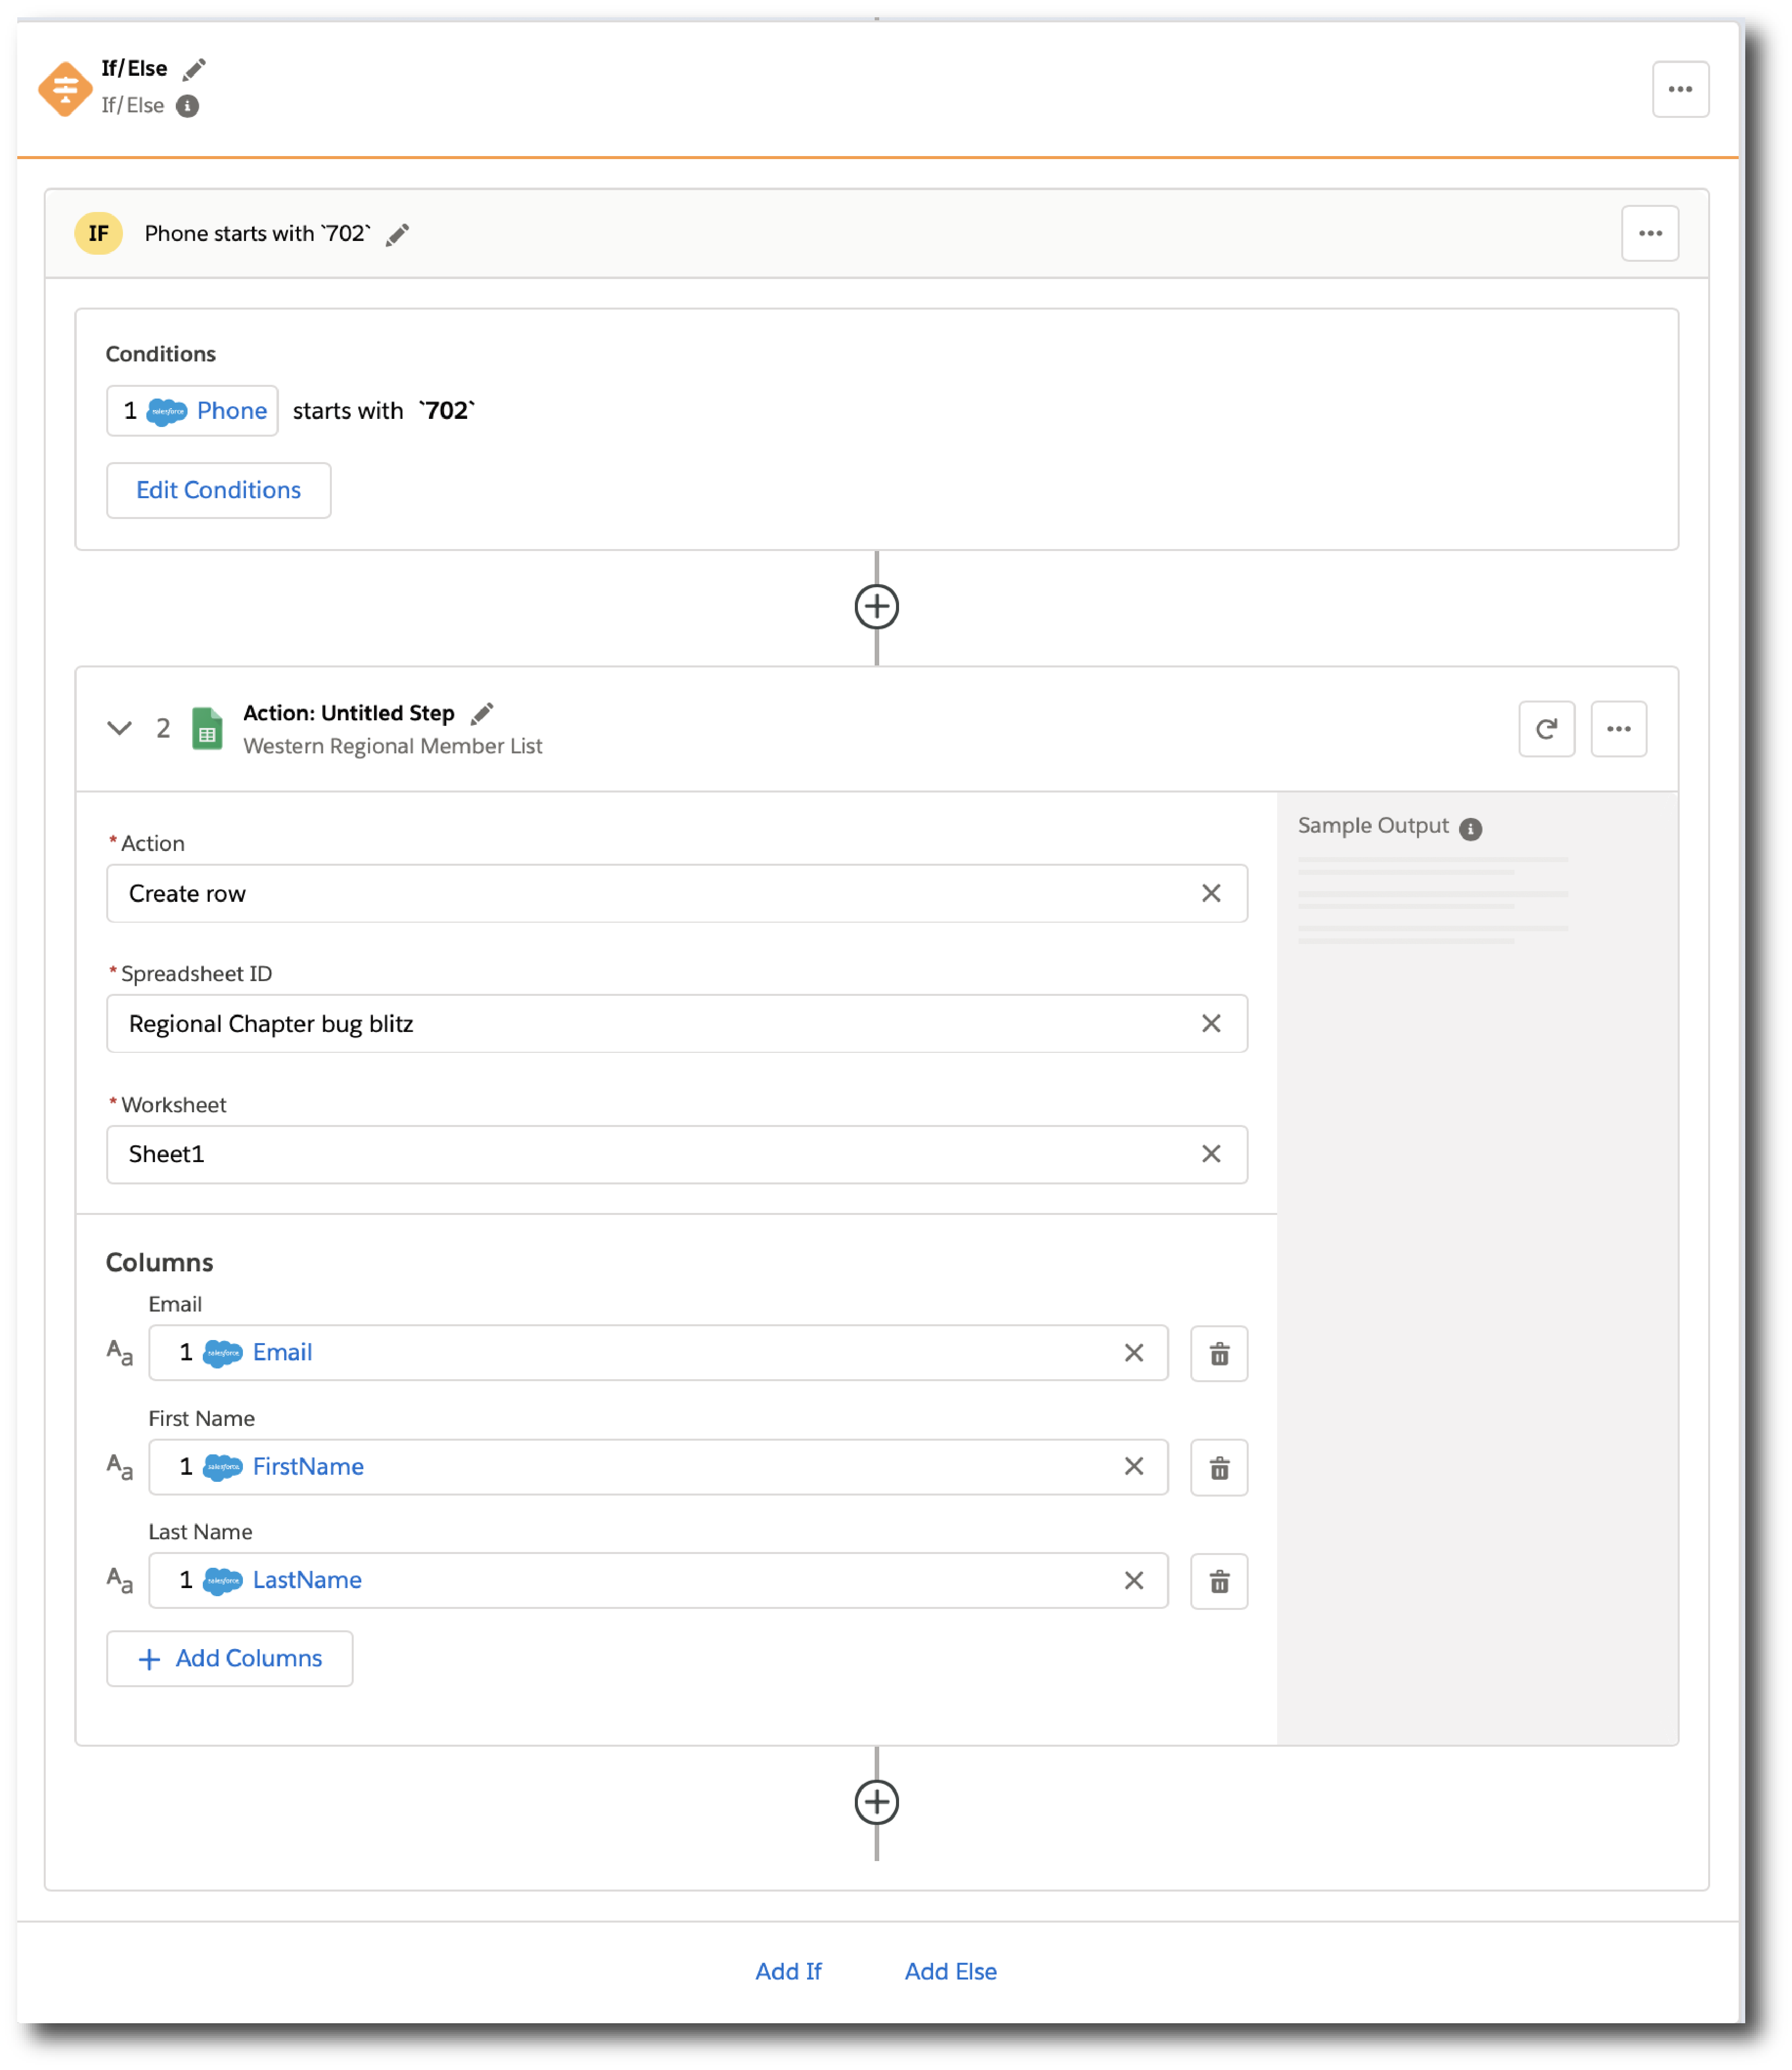
This example shows only one If branch: if the phone number on the record starts with 702, then the first and last names are copied to a row in a Google Sheet. If a record doesn’t meet the criteria, no action is taken, and the flow moves on to the next action, since there is only one branch.
You can add up to 20 conditions per branch and as many actions per branch as you need. Click Add If to add branches. After specifying all the branches you need, you can specify a fall-through action with Add Else.
Be careful how you order your If statements. The action specified by the first branch whose conditions are met is the only action performed in the If/Else block.
Test
You can test your work after every trigger and action. As you test, you can add or delete triggers, actions, and flow controls. You can also change the connection you use in triggers or actions to another connection of the same system type.
After testing is complete, you are ready to activate your flow.