Using a Flow and Creating a Trigger
You can use Composer to address integration problems in your organization by building and configuring flows. In Composer, a trigger is the flow’s sequence of actions. This is the first step of a flow. Prior to creating a trigger, you must first create, clone, or import a flow.
Create a Flow
You can create a new flow (from scratch or from template) or clone an existing flow.
Create a New Flow From Scratch
To create a new flow from scratch:
-
From the Composer Home page, click Create new flow > Create Flow from Scratch.
Your flow is named automatically. -
To change the name automatically created for your new flow, click the pencil icon next to Untitled Flow and create a custom name using any of the characters A-Z, a-z, 0-9, space, hyphen ( - ), dot ( . ), and underscore ( _ ).
-
Click Save.
Now you are ready to create a flow trigger.
Create a New Flow From Template
To create a new flow from template:
-
From the Composer Home page, click Create new Flow > Create Flow from Template.
-
Explore the template options and select the template you want to use.
-
Ensure you meet the prerequisites and if so, click Use this Template.
-
Configure your connections and information required by the flow.
-
Click Create flow.
Now you are ready to use your flow. For more information about templates, refer to Build a Flow Using Templates.
Clone an Existing Flow
To clone an existing flow:
-
From the sidebar, click Flows.
-
On the Flows page, click the name of the flow you want to clone.
-
Click Clone.
Composer copies the existing flow and opens the copy in the Flow Details page. Notice that the flow is named Copy of original flow name.
-
If you want to rename the flow, click the pencil icon next to Copy of original flow name and use any of the characters A-Z, a-z, 0-9, space, hyphen ( - ), dot ( . ), and underscore ( _ ).
-
Click Save.
Export a Flow
To export a flow as a JSON file:
-
Open an existing flow.
The <Flow Name> page appears. -
Click View.
-
Click the wrench icon > Export.
The flow is exported as a JSON file.
Import a Flow
To import a flow as JSON file:
-
Create a new flow or open an existing flow.
The <Flow Name> page appears. -
Click View.
The <Flow Name> page appears. -
Click the wrench icon > Import - Beta.
The Select Flow dialog box appears. -
Click Select flow.
Your files appear. -
Navigate to and select the JSON file that you want to upload and then click Open.
The selected file appears in the Select Flow dialog box. -
In the Connect with <Connector Name> drop down, choose an existing connection or create a new one:
-
Click an existing connection to select it.
-
Click Add new <Connector Name> Connection to create a new connection and select it.
-
-
Click Import Flow. Note that importing a flow will replace the existing flow.
The flow is imported and appears on the <Flow Name> page. -
Click Save.
The flow is imported.
Refresh a Flow
When building a flow, you may need to refresh the flow to view updated data at either the object level or the field level.
To refresh a object:
-
Open the flow.
-
Click the refresh icon in the upper right corner of the trigger or action card that you want to refresh.
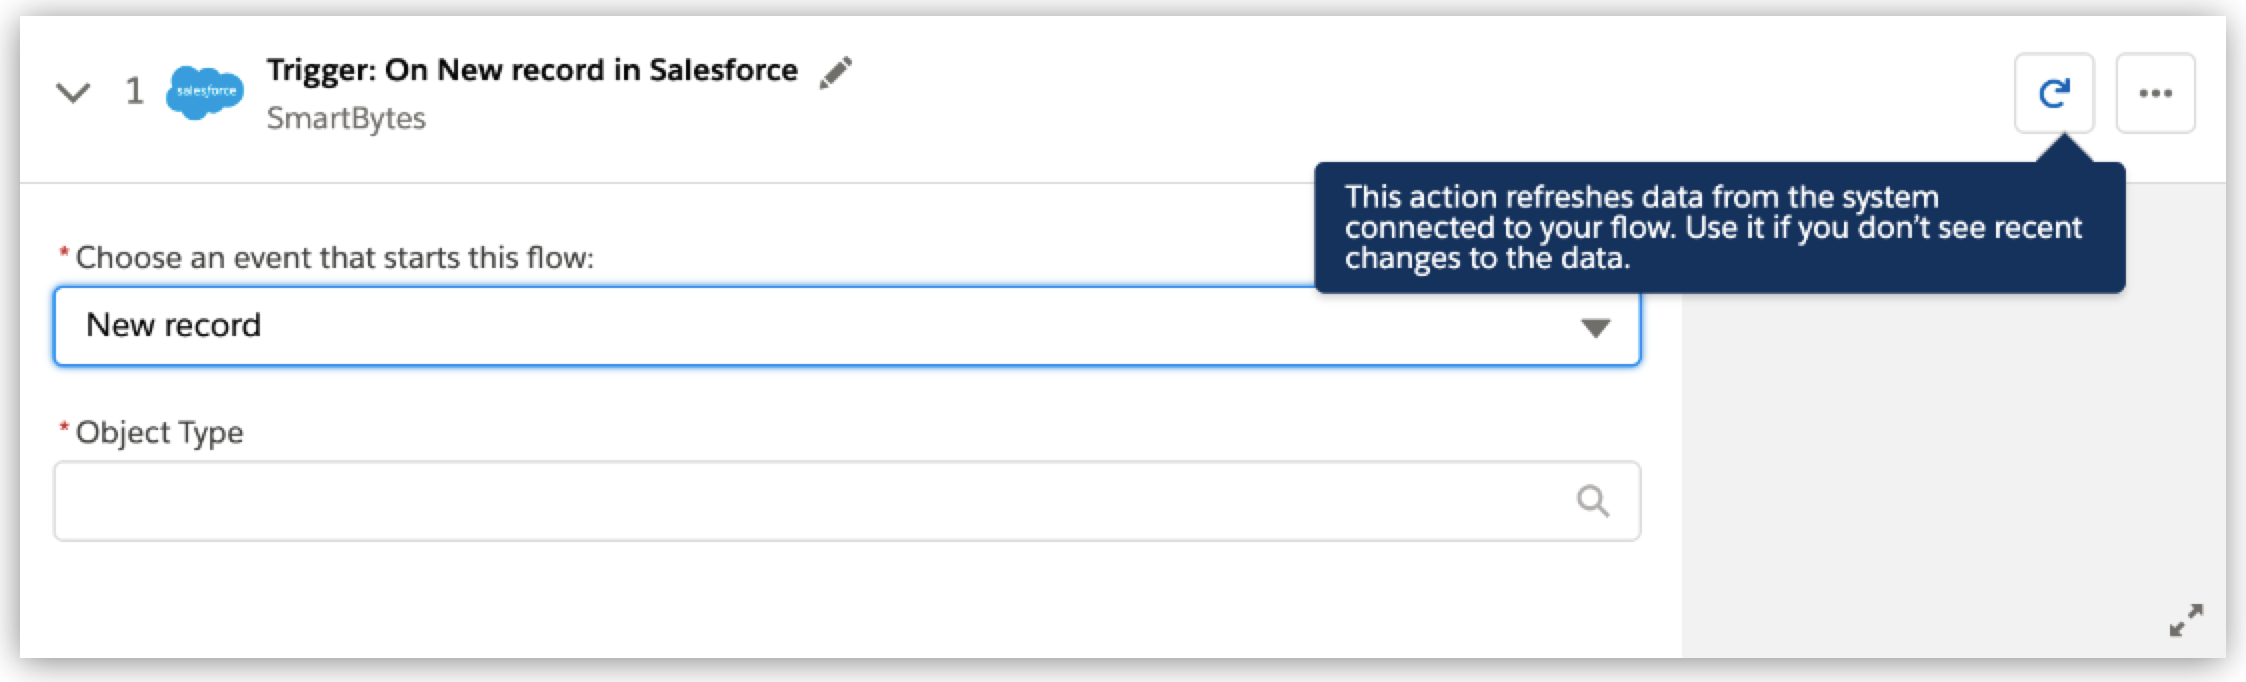 The cache for the object type is cleared and the new data is retrieved.
To refresh a field:
-
Open the flow.
-
Click the refresh icon in the bottom left corner of the trigger or action card.
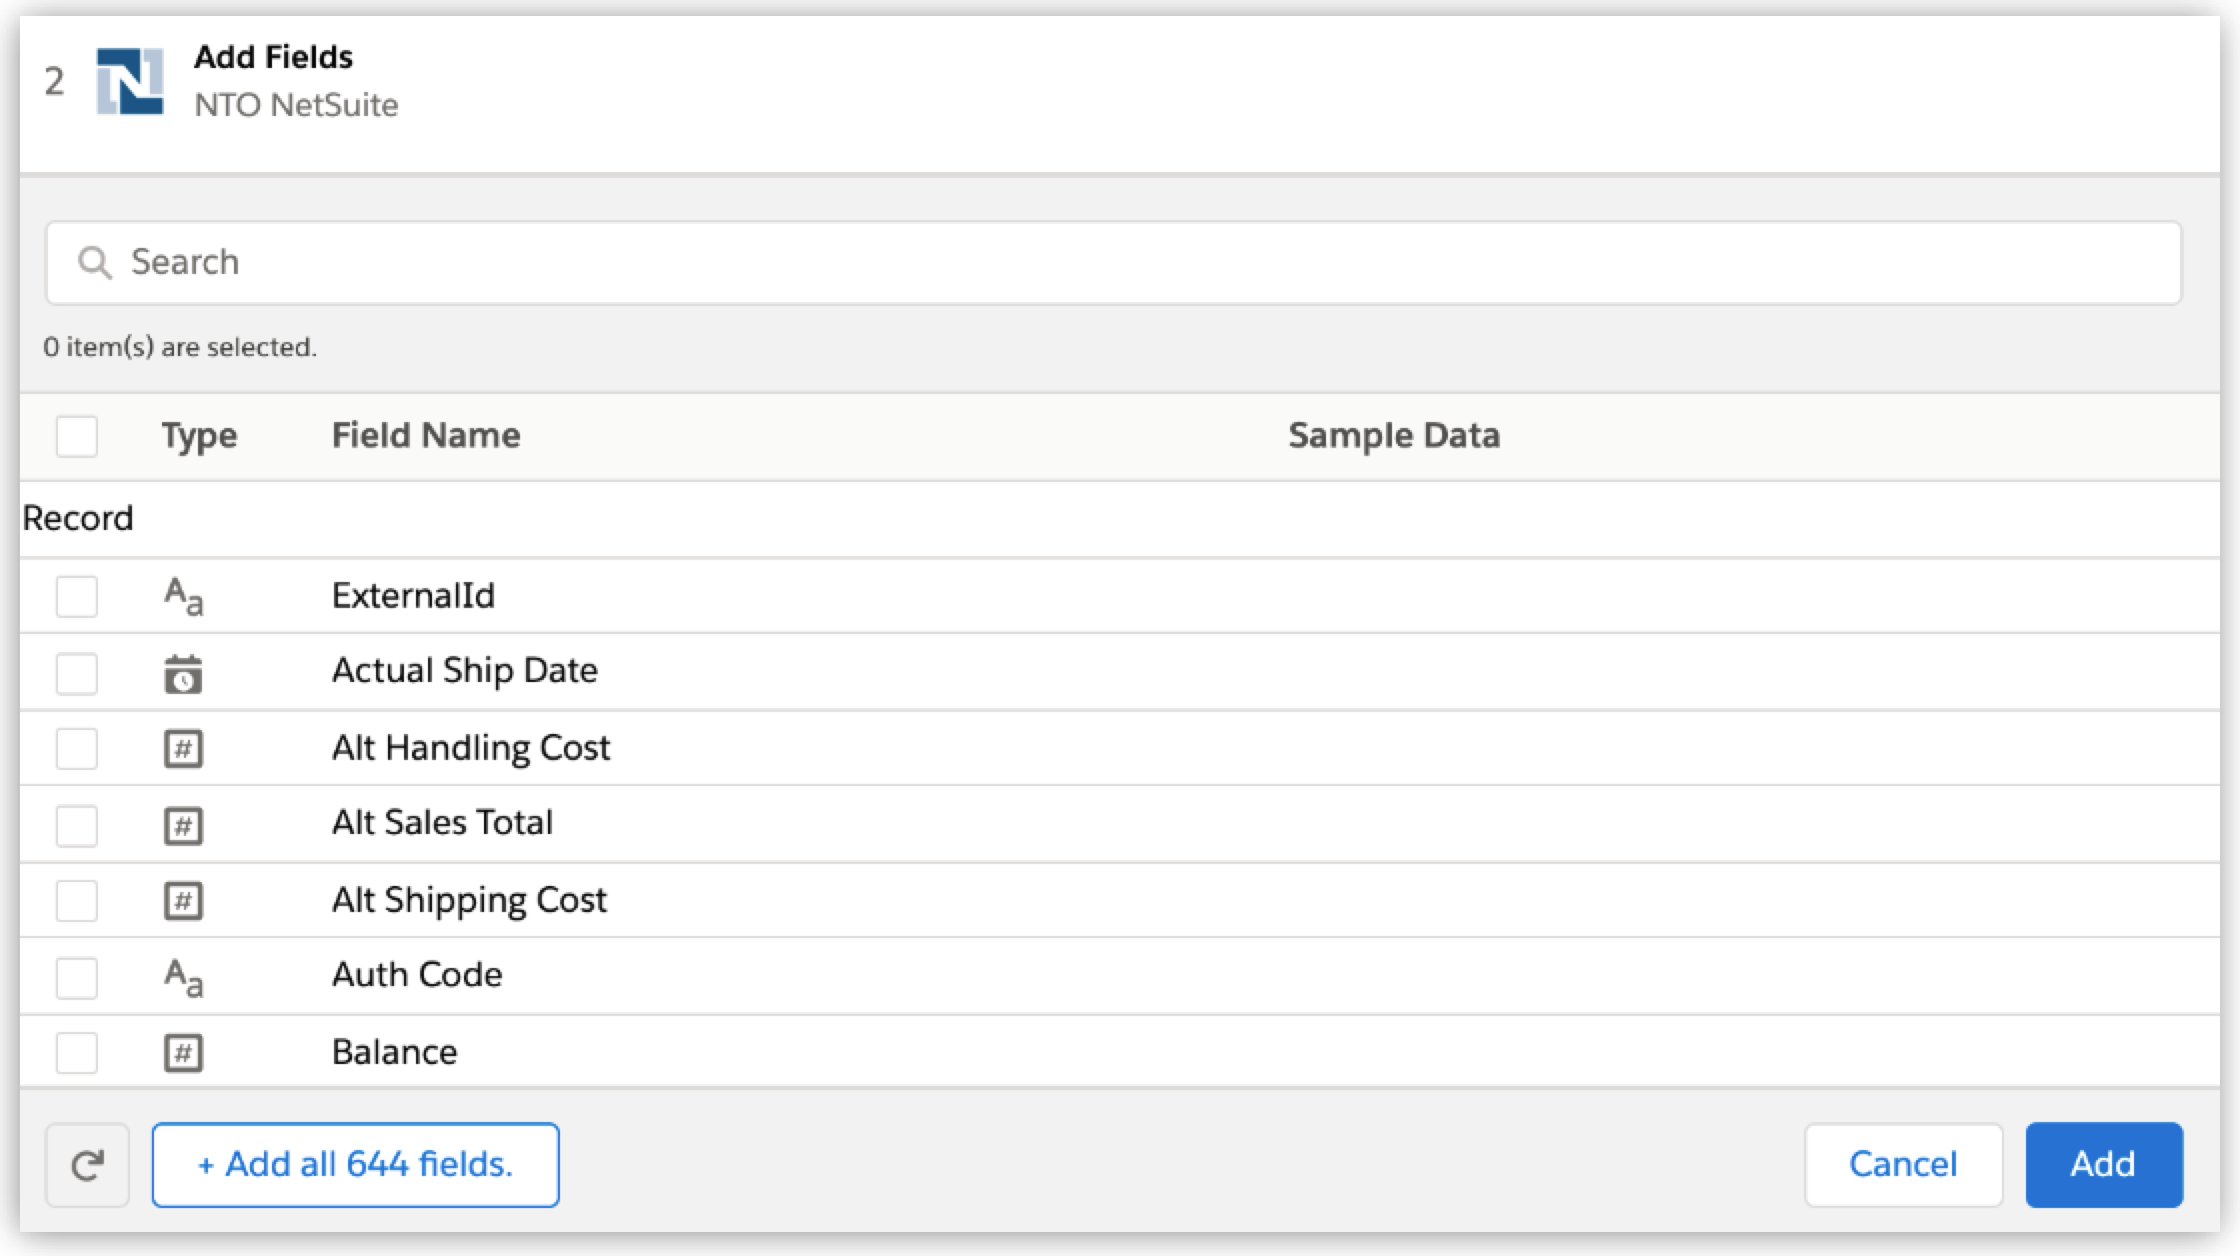 The cache for the field is cleared. The new value providers for the field are retrieved.
Create a Flow Trigger
After you create or clone a flow, define the trigger: the event or time interval that starts the flow. A trigger step is required to test or activate your flow.
To define a trigger based on an event:
-
Open a flow if it is not already open. The What Should Start This Flow? dialog is displayed.
-
Select the connector where the triggering event occurs. Your existing connections are displayed.
You can choose an existing connection or create a new one:
-
Click an existing connection to select it.
-
Click Add new connector name Connection to create a new connection and select it.
You can rename or delete connections from this dialog by clicking the gear icon.
-
-
After you choose a connection, the trigger step displays:
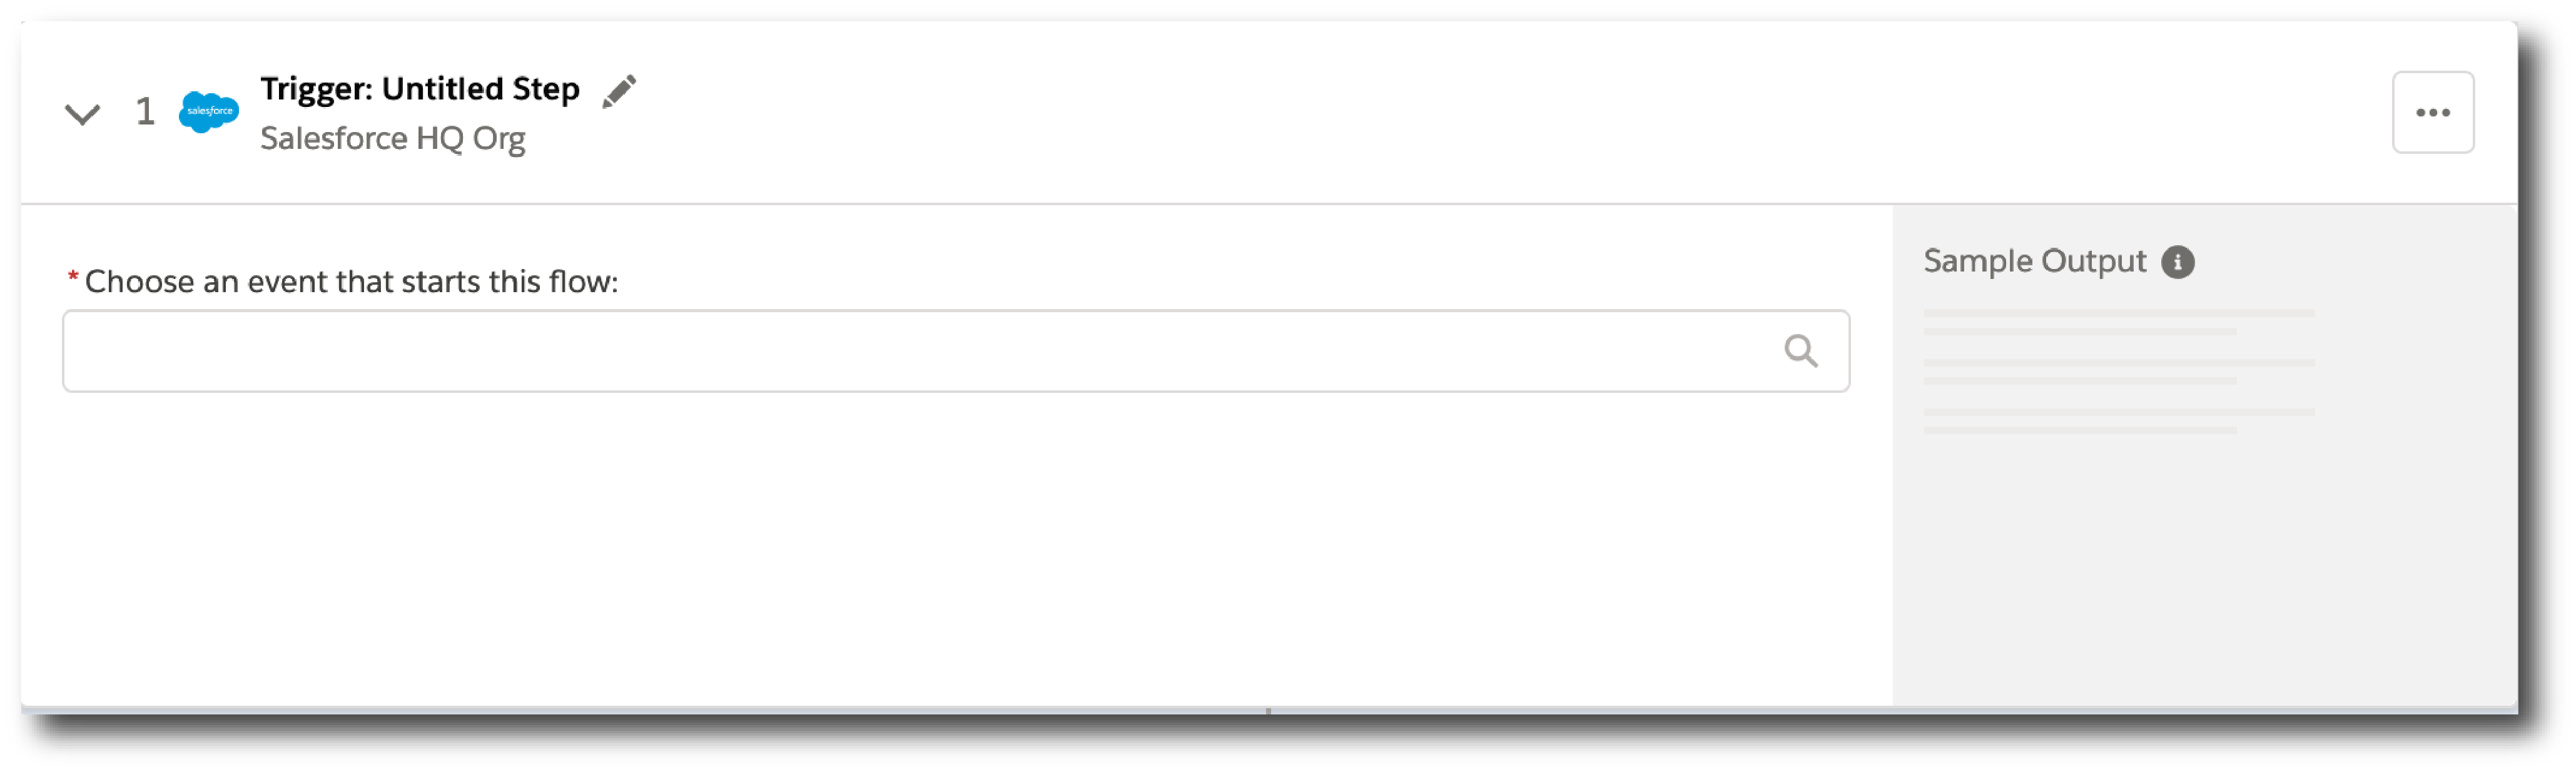
Your trigger is named automatically. All triggers are named by combining the event or operation with the system name. For example, "On new record in Salesforce".
-
Optionally, you can rename the trigger. Valid characters: A-Z, a-z, 0-9, space, hyphen ( - ), dot ( . ), and underscore ( _ ).
-
Choose an event that starts the flow. Supply additional information as requested.
-
Click Save.
-