Managing Business Groups in Anypoint Platform
Use business groups to delegate administrative responsibilities, control access to resources, and structure your organization’s access management.
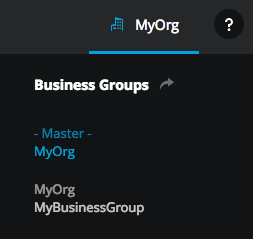
In the Access Management Business Groups page, you can:
-
Create business groups.
-
View a hierarchical tree of all the business groups you have permissions to view.
-
View and edit properties of a business group.
Permissions determine What you can view and edit.
-
Add and delete business groups (if enabled at the root business group level).
-
View the Client ID and Client Secret for environments.
Access a Business Group
-
Sign in to Anypoint Platform using an account that has the Organization Administrator permission.
-
Select Access Management from the
 menu.
menu. -
In the Access Management navigation menu, click Business Groups.
-
Click the name of the root business group.
Create a Business Group
When you create a new business group under the top-level (root) business group, all the current users with the Organization Administrator permission in the root business group appear in the list of users in the newly created business group.
-
Sign in to Anypoint Platform using an account that has the Organization Administrator permission.
-
Select Access Management from the
menu. -
In the Access Management navigation menu, select Business Groups.
-
Click the name of the business group.
The Settings section appears, showing details about the root organization or business group.
-
To create the root business group for your organization, click Create business group.
-
To create a child business group, click the … menu for the parent business group.
-
Click Create child group.
-
In the dialog box, enter:
-
Business Group name: Name for the new business group.
-
Owner: Assign an existing Organization Administrator as the business group owner.
-
Select Can create Business Groups to allow the owner to create child business groups under this business group.
-
Select Can create environments to allow the owner to create environments within this business group.
-
You can assign some or all of the redistributable resources (vCores, VPCs, and so on) that your organization owns to an individual business group. This ensures that the resources are used by the CloudHub deployments that belong to the business group. You can assign the resources when you create the business group, or edit these settings later.
-
Enable CloudHub global deployment
This option is available only if global deployment is enabled on the parent business group. When global deployment is enabled, the region is auto-populated according to the region you specified. -
Static IPs
This option is available only if the parent business group has static IPs assigned to it. This option enables the use of static IP addresses.
-
-
Click Add Business Group.
The business group appears in the hierarchy, under the root organization.
|
Allocating redistributable resources to a business group makes those resources available only to that business group, which makes them unavailable to the parent organization. |
Create a Child Business Group
Create a business group hierarchy to help you better control user access to resources.
-
To create a child business group, click the … menu for the parent business group.
-
In the Add Business Group dialog, enter a Business Group name and Owner, then select from these options:
-
Owner can create Business Groups
Users with the Organization Administrator permission can create child business groups in a business group that they own.
-
Owner can create environments
Users with the Organization Administrator permission can create environments within their business groups.
-
Enable CloudHub global deployment
This option is available only if global deployment is enabled on the parent business group. When global deployment is enabled, the region is auto-populated according to the region you specified.
-
Static IPs:
This option is available only if the parent business group has static IPs assigned to it. This option enables the use of static IP addresses.
-
-
Click Add Business Group.
The new business group appears in the parent business group hierarchy.
Navigate Between Business Groups
When your organization has multiple business groups, you can switch between them in the list of business groups. Switching between business groups changes the list of available CloudHub deployments, APIs, users, and roles settings.
|
When you create a business group, log out and log in to Anypoint Platform to see newly-created business groups in the business group navigation menu. When you log in to Anypoint Platform, you return to the business group where you were last active when you logged out of Anypoint Platform. |
If you don’t have the Organization Administrator permission, you can view only the business groups that you have permissions to view. In the Organization tab, your organization tree displays only the business groups to which you belong.
View User and Team Access
You can view a list of users or teams that have access to a business group or environment and filter by their assigned permissions.
-
In the Access Management navigation menu, select Business Groups.
-
Click the name of the business group.
The Settings section appears, showing details about the root organization or business group.
-
Select the Access Overview tab.
-
Select the business group or environment from the dropdown to view a list of users with access to the selected business group or environment.
-
Select a permission from the dropdown to see a list of users with the selected permission in the selected business group or environment.
-
-
To see teams with access to the selected business group or environment, select Teams from the dropdown.
-
To see teams that have specific permissions assigned, select the permission from the dropdown.
Permissions that are granted directly to users outside of the Teams feature aren’t shown.
Delete a Business Group
Only an organization administrator that belongs to a business group can delete it. The top-level (root) business group can’t be deleted, even by an organization administrator.
-
In the Access Management navigation menu, click Business Groups.
-
Click the name of your root organization.
-
Click the … menu for the business group to delete.
-
In the confirmation dialog, enter the name of the business group and then click Delete.
Redistribute Resources Between Existing Business Groups
You can redistribute resources (like vCores, VPCs, load balancers, small or large Managed Omni Gateways) between business groups at the business group level only, not at the root organization level.
You must have the Organization Administrator permission for the root organization to redistribute resources.
|
Allocating redistributable resources to a business group makes those resources available only to that business group, which makes them unavailable to the parent organization. |
The business group hierarchy prevents a child business group from consuming additional resources from its parent group unless an organization administrator redistributes those resources to the child group. Resource distribution proceeds from root to parent to child. For example, you can’t redistribute sandbox VCores to a child business group if the parent business group doesn’t have any sandbox vCores available, even if the root organization has sandbox vCores available.
Additionally, the root organization or parent business group can’t reclaim resources allocated to a business group that isn’t a direct child.
-
In the Access Management navigation menu, click Business Groups.
-
Click the name of the business group to reassign resources to.
The Settings section appears, showing details about the root organization or business group.
-
Click the Settings tab.
-
Enter the number of vCores for the business group.
-
Click Save changes.
The Business Group Info window includes a resource counter that shows a value representing available resources, the sum of those resources that are reassigned to child business groups, and resources currently in use by the selected business group.
Client ID and Client Secret
Each root business group, child business group, and environment, has its own associated unique client ID and client secret. These are used for authentication by users who aren’t business group administrators to access assets within a business group. The client ID and password are generated by Anypoint Platform for each environment you create, and they are globally unique.
To deploy proxies or APIs to CloudHub, you must use these values to configure a customer-hosted Mule Runtime or legacy API Gateway.
| Business group-level client IDs and client secrets are supported only for backward compatibility. In newer Anypoint Platform accounts, use the client ID and client secret for an environment instead. See Environments. |
View the Client ID and Secret for Environments
-
Sign in to Anypoint Platform using an account that has the Organization Administrator permission.
-
Select Access Management from the
menu. -
In the Access Management navigation menu, click Business Groups.
-
Click the name of your root organization.
-
Click the Environments tab.
-
Click the name of the environment.
-
Next to the client secret, click Show.
View the Client ID and Secret for Business Groups
-
Sign in to Anypoint Platform using an account that has the Organization Administrator permission.
-
Select Access Management from the
menu. -
In the Access Management navigation menu, click Business Groups.
-
Click the name of your root organization.
-
Click the Settings tab.
-
Next to the client secret, click Show.
|
Manage Root Business Group Settings
Only users with the Organization Administrator permission can manage these settings.
An organization administrator can modify the business group owner, name, domain name, and session timeout for its users.
To access these settings:
-
Sign in to Anypoint Platform using an account that has the Organization Administrator permission.
-
Select Access Management from the
menu. -
In the Access Management navigation menu, click Business Groups.
-
Click the name of your root organization.
-
Click the Settings tab.
-
Modify any of the following settings, then click Save changes.
-
Name
This can be anything, for example, the name of the company.
-
Owner
The owner of the business group.
Business groups are hierarchical. The owner of a parent business group automatically has and retains administrator permissions for any child business group of that parent, even if they make another Organization Administrator user owner of a child business group. -
Organization domain
Although multiple business groups can be created by different users using the same business group name, each business group must have a unique domain name.
Changing the name or domain name of a business group changes the deep links to any existing API Portals in your business group. -
Default session timeout
Set the amount of time (in minutes) a user is inactive before they are automatically signed out of Anypoint Platform. The default is 60 minutes, the minimum is 15 minutes, and the maximum is 180 minutes.
-
Confidentiality Notification
Create a custom window that appears when users log in to your business group. The character limit is 1000 alphanumeric characters and symbols:
@,:,?,!,,,.,;,',_, and-. You can also add line breaks using\nand tabs using\t. If you leave this field blank, users don’t receive a notification at signin. -
Runtime Manager
The default region for Runtime Manager.
-
You can also view the business group ID, client ID, and client secret. These values apply to the root business group and grant permissions for all of the business groups contained within.
To modify your multi-factor authentication settings for your business group, click the Identity Providers in the Access Management navigation menu. Business groups created after April 30, 2022 require multi-factor authentication by default for all users.
View Limits for a Business Group
Each business group has a Limits section that shows how close it is to reaching the limits that are imposed by Anypoint Platform.
To view limits:
-
In the Access Management navigation menu, select Business Groups.
-
Click the name of the business group.
The Settings section appears, showing details about the root organization or business group.
-
Click the business group to view limits for.
-
Click the Limits tab.
For more information on limits in Access Management, see Limits.
Find your Business Group ID
For some operations, it’s necessary to specify your business group (organization) ID, or orgId. You also need your business group ID to designate a business group or root business group when creating certain types of requests.
You can get your business group ID from your business group URL, executing an Anypoint CLI command, or using a token to invoke the Anypoint Platform REST API.
View Your Business Group URL
After signing in to Anypoint Platform, you can view your business group ID by accessing business groups.
-
Sign in to Anypoint Platform.
-
Select Access Management from the
menu. -
If you’re using the new feature UI (Teams feature is enabled):
-
In the Access Management navigation menu, click Business Groups.
-
In the tree that contains the root business group, click the root business group name.
The URL in your browser’s address bar now appears in the following format:
https://anypoint.mulesoft.com/accounts/businessGroups/<XXXXXXX-XXXX-XXXX-XXXX-XXXXXXX>;.The business group ID is
XXXXXXX-XXXX-XXXX-XXXX-XXXXXXXin the example, and it appears afterbusinessGroups/in your URL.
-
-
If you are using the classic UI (Teams feature is not enabled):
-
In the Access Management navigation menu, click Business Groups.
A tree containing the root business group and child business groups appears. -
Click the business group.
The business group ID appears in the Business Group Id field.
-
Use Anypoint CLI to Get Business Group Details
If you have the Anypoint CLI (command-line interface) tool installed, you can use it to get a list of the business groups, their types, and the business group ID.
For example, when you run the account:business-group:list [flags] command, your business group information appears in the following format:
| Name | Type | ID |
|---|---|---|
Great Company |
Root |
12345678-7831-8734-9999-a0a0a0a0a0a0 |
Retail |
Business unit |
abcdef01-1234-53e1-a3b4-b0b0b0b0b0b0 |
Engineering |
Business unit |
87654321-abcd-e8e2-bab4-c0c0c0c0c0c0 |
In the example, the ID next to Root is the business group ID.
Invoke the Anypoint Platform REST API
To get a token to invoke the Anypoint Platform REST API, see How to generate your Authorization Bearer token for Anypoint Platform. Then, invoke the URL https://anypoint.mulesoft.com/accounts/api/me using the token.
For example:
$ curl -H "Authorization: Bearer [YOUR_ACCESS_TOKEN]" https://anypoint.mulesoft.com/accounts/api/me
Share Business Group Resources
All API versions and CloudHub environments that you create in a business group are accessible only to users within the business group.
To share resources with a user, invite the user to join your business group, and the user must accept the invitation and join the business group you sent the invitation from. See Inviting Users for more information.
|
Because the business group name (often the company name) isn’t necessarily unique, it isn’t sufficient for the invited user to join the business group and use the company name associated with the root business group. The organization domain name you set in the business group information is what distinguishes your business group from other business groups. Invited users must use the link they receive in the invitation email to join your business group. |
If your business group is configured to use an external federated identity system, inviting users is unnecessary because they are authenticated by the external identity provider.
After a user joins your business group, they have access to the resources associated with the permissions or roles assigned to them. You can assign permissions to grant users access to different resources within the business group. A best practice is to assign permissions to the user at the time you invite them to join your business group so the roles are in effect when the user signs in for the first time.
If your business group contains business groups, you can give users access to multiple business groups by granting them permissions within each group.
Connect MuleSoft Composer to Anypoint Platform
Business groups that use both MuleSoft Composer and Anypoint Platform can connect the two products.
To link MuleSoftComposer to Anypoint Platform:
-
Sign in to Anypoint Platform using an account that has the Organization Administrator permission.
-
Select Access Management from the
menu. -
In the Access Management navigation menu, click Composer Sync.
-
In the Composer Sync Orgs page, click Add Composer Orgs.
-
In the Add organization window, in the Organization ID box, enter your Composer organization and then click Add.
You can locate your Composer Organization ID by navigating to Composer > Settings > Account > General Information. An email is generated and sent to the Composer organization admin, which provides a link to sync Anypoint Platform to Composer.