Manage Transit Gateway Attachments
Use Anypoint Runtime Manager to manage transit gateway attachments, such as adding and removing a route from the route table or detaching an Anypoint VPN from a transit gateway.
Rename a Transit Gateway Attachment
You might want to rename a transit gateway attachment to match the attachment name in AWS.
To rename a transit gateway attachment:
-
On the Transit Gateways page, click the Transit Gateway menu (…) and select Edit name:

-
In the popup window, enter a new name and click Save.
Add a Route to the Transit Gateway Route Table
You might want to add a route to enable a new subnet to be accessible through the transit gateway.
-
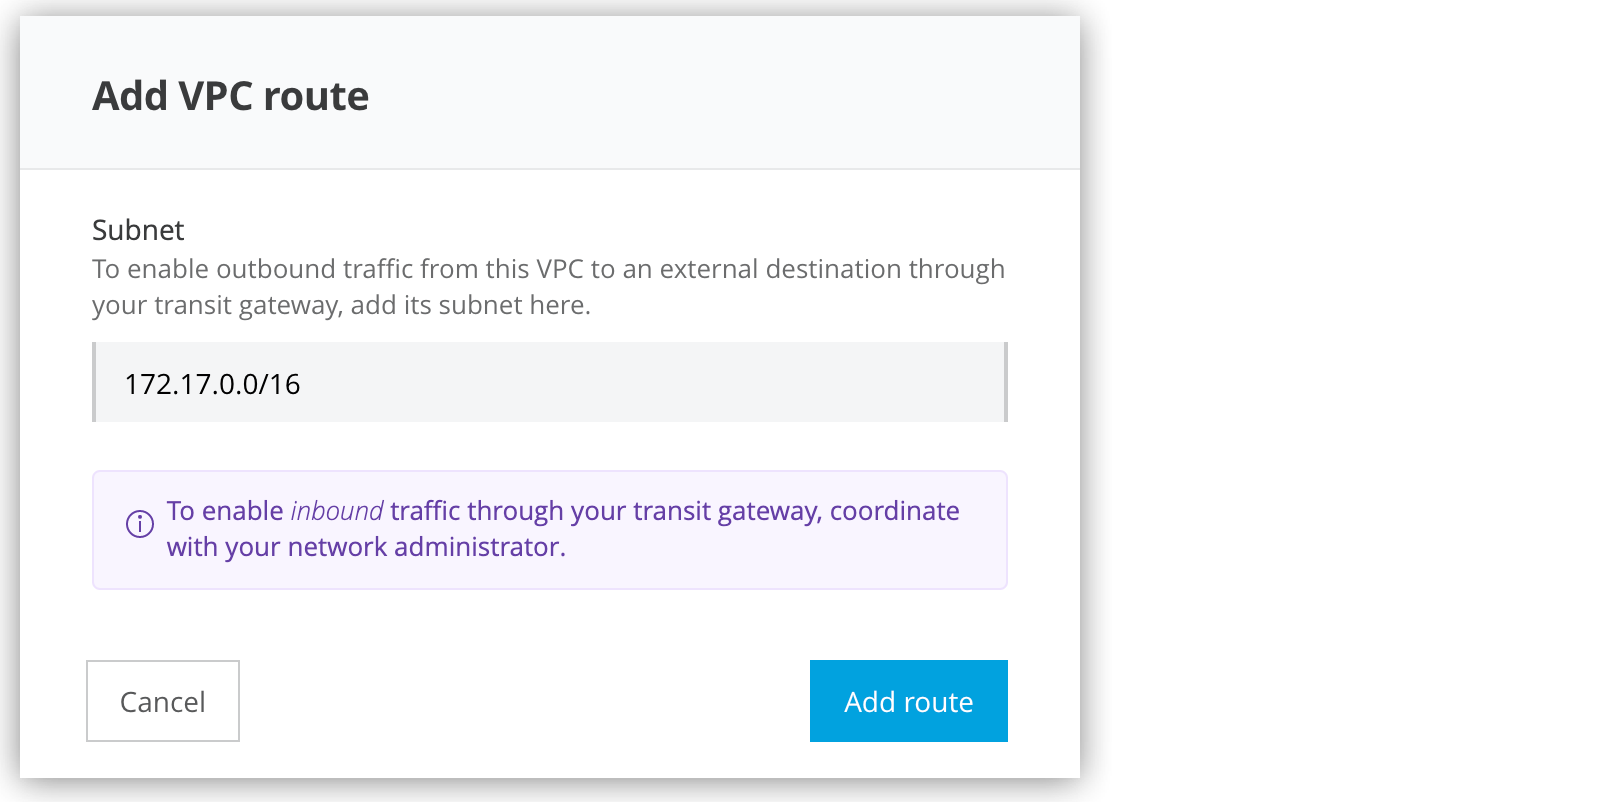
In Anypoint Platform, navigate to Transit Gateways > VPCs and click Add Route.
-
In the Add VPC Route window, use CIDR notation to enter a single subnet for your AWS VPC:

-
Click Add Route.
Anypoint Platform submits the new route to AWS.
| When you add a new route, the platform ensures it doesn’t conflict with any existing routes in the VPC, whether they’re static or propagated from a BGP connection. If the new route is a duplicate, either remove the existing route or split the new route into smaller ones to avoid any collisions. |
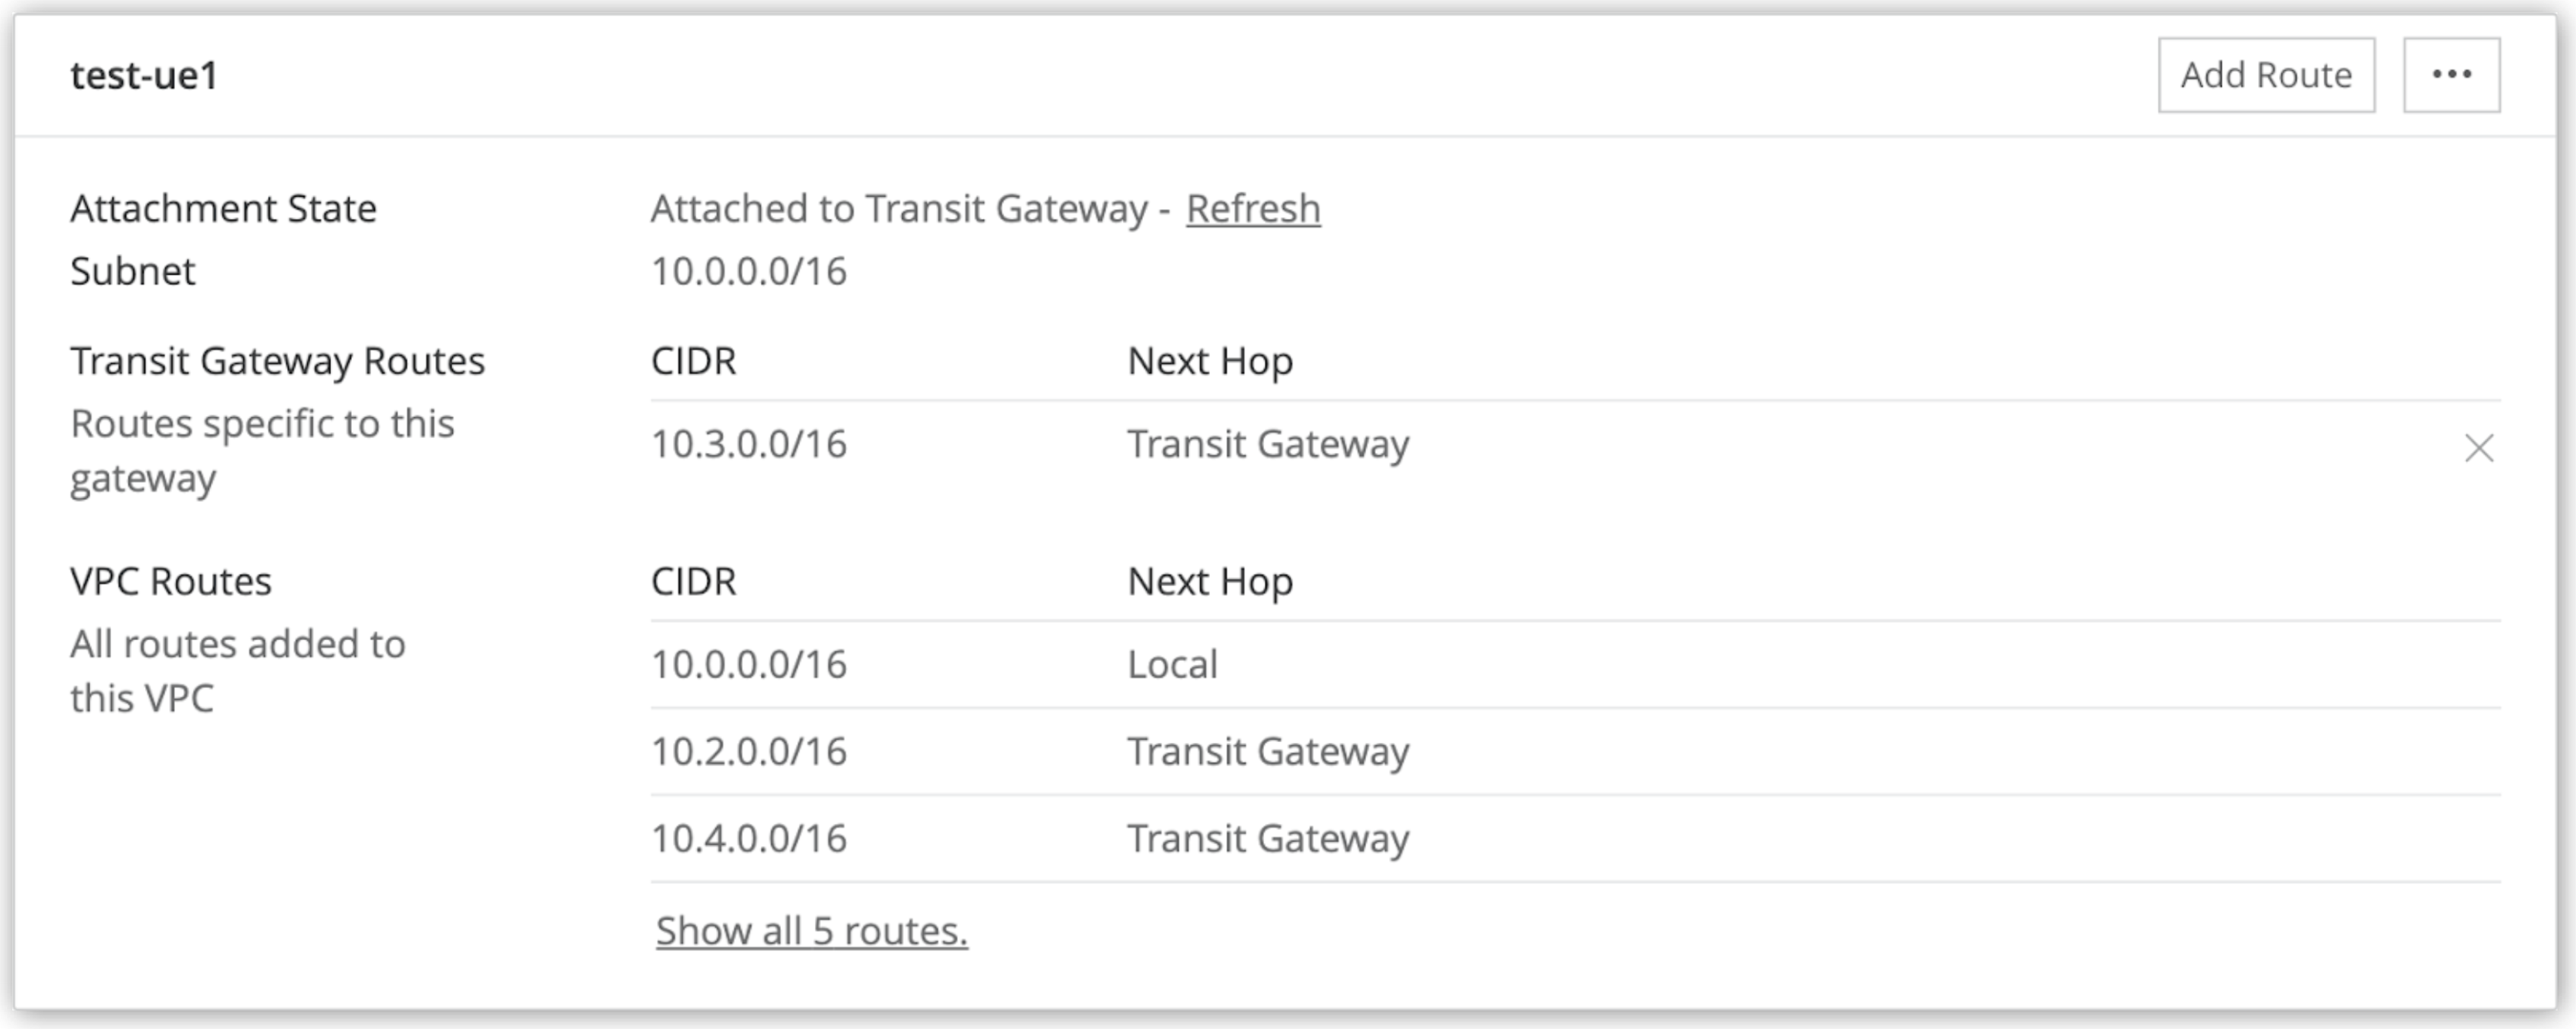
When the route addition succeeds, the Transit Gateways page shows the Route added message and the Transit Gateways page shows the route CIDR in the route table.
In the route tables, added routes show Transit Gateway as the value in the Next Hop column.
Specific routes attached to the transit gateway show under Transit Gateway Routes. Other routes in the VPC show under VPC Routes.

Remove a Route from the Transit Gateway Route Table
You might need to remove a route if you no longer want a subnet to be accessible through the transit gateway.
To remove a route:
-
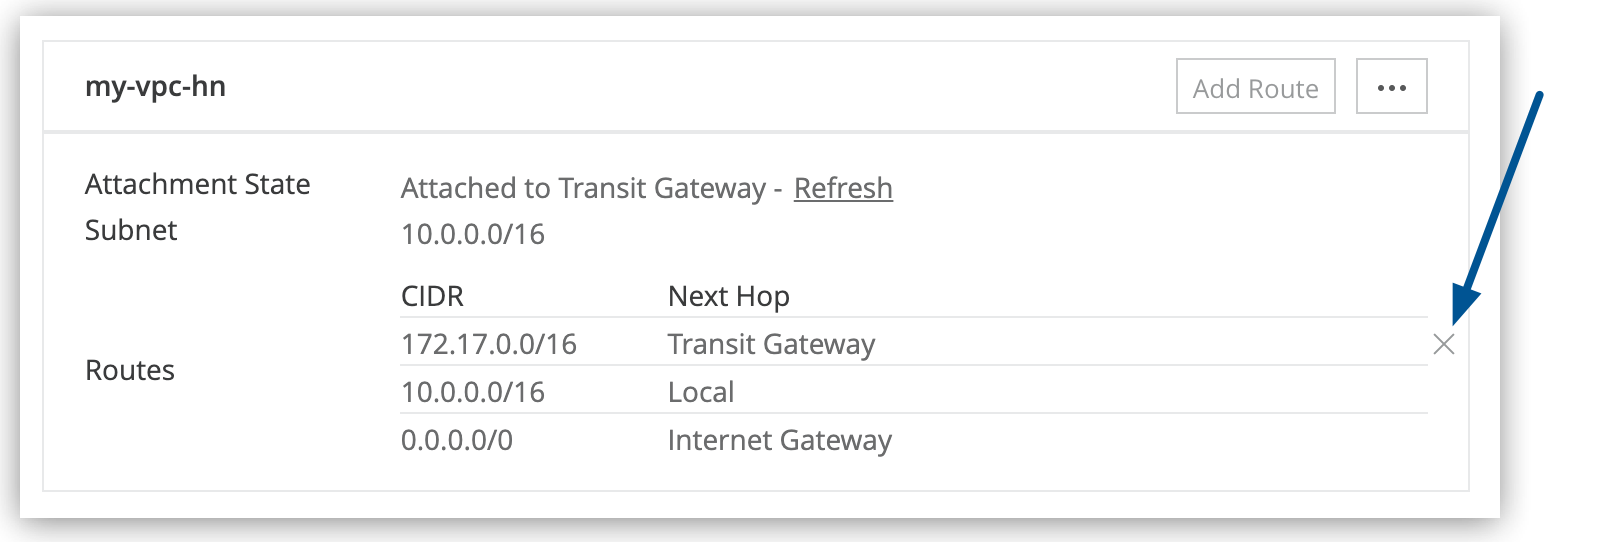
On the Transit Gateways page, in the VPCs section, click the X icon in the appropriate Transit Gateway route row of the route table:

-
At the confirmation prompt, click Remove.
Detach an Anypoint VPC from the Transit Gateway
You might need to detach a VPC so that you can reattach it.
Detaching a VPC from a transit gateway also deletes the attachment in AWS. Any apps deployed to the VPC continue to run, but they are no longer connected to your Amazon VPCs and VPNs.
To detach a VPC from the transit gateway:
-
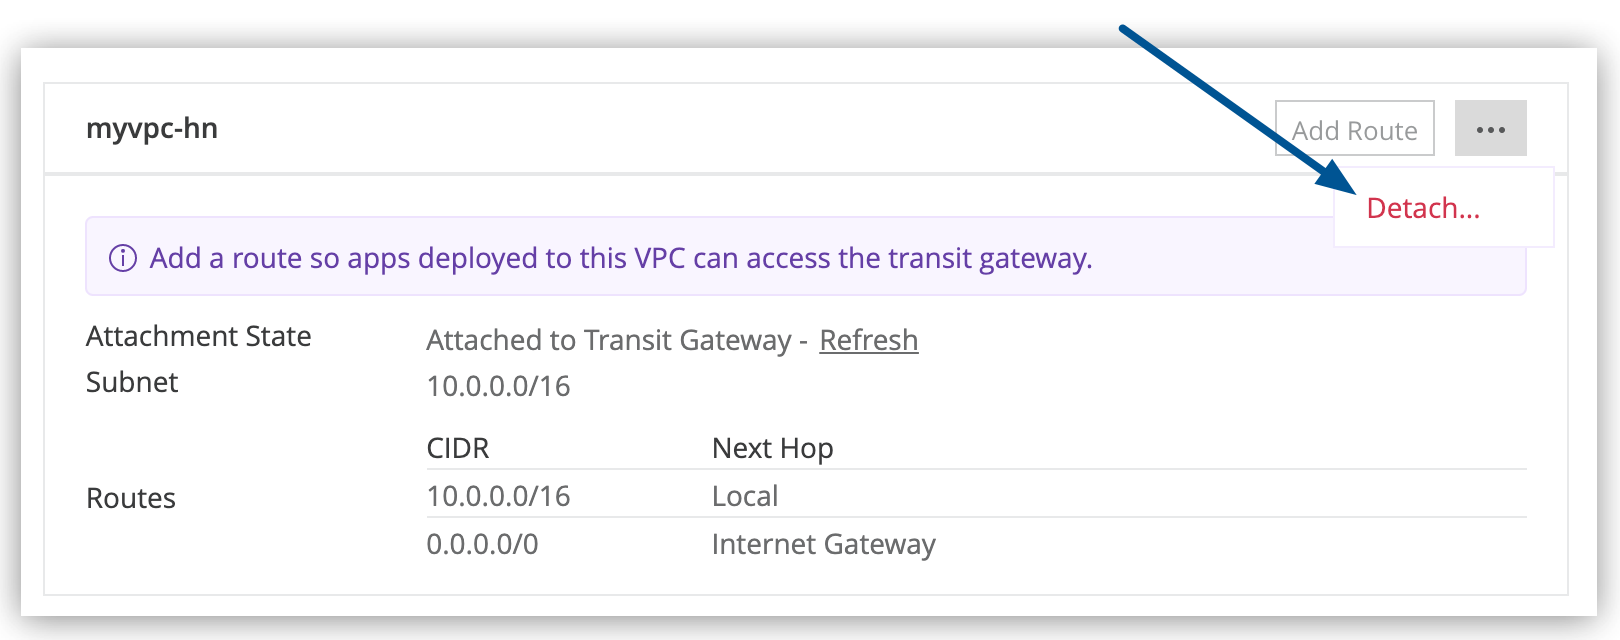
On the Transit Gateways page, click the VPC menu (…) and select Detach:

-
At the confirmation prompt, click Detach.
Detaching a VPC might take several minutes.
Remove an Anypoint VPC from the Transit Gateway
If you reject an attachment in AWS, the VPC attachment appears as rejected in Anypoint Platform.
In this case, you must remove the attachment before trying to attach it again.
To remove a VPC from the transit gateway:
-
On the Transit Gateways page, click the VPC menu (…) and select Remove:
-
At the confirmation prompt, click Remove.
Removing a VPC might take several minutes.
After the VPC is removed, the Attach VPC button becomes available.
Remove a Transit Gateway from Anypoint Platform
You might need to remove a transit gateway if you’ve reached your entitlement limit or you want to switch the connection to a new transit gateway.
If a transit gateway has no VPCs attached, you can remove it from Anypoint Platform.
| Removing a transit gateway deletes the resource share in AWS that Anypoint Platform uses to access the transit gateway. |
To remove a transit gateway from Anypoint Platform:
-
On the Transit Gateways page, click the Transit Gateway menu (…) and select Remove:

Anypoint Platform prevents you from removing a transit gateway if it has VPCs attached.
If the Transit Gateways page doesn’t list any VPCs, but you can’t delete the transit gateway, the transit gateway might be attached to a VPC that belongs to another business group that you don’t have access to.
-
At the confirmation prompt, click Remove.


