Manage Applications on CloudHub
After you deploy an application to CloudHub, you can use the Runtime Manager to manage your application at runtime.
Depending on if your application is deployed to CloudHub or to your own servers, there is a different set of possible actions you can perform.
| This document refers to applications that are deployed through the Runtime Manager console to CloudHub. To view the basic management tools that are common to all types of deployments, see Manage Deployed Applications. See Deployment Options to understand the different deployment scenarios that the platform offers. |
With applications deployed to CloudHub you can handle the following features:
Applications Dashboard
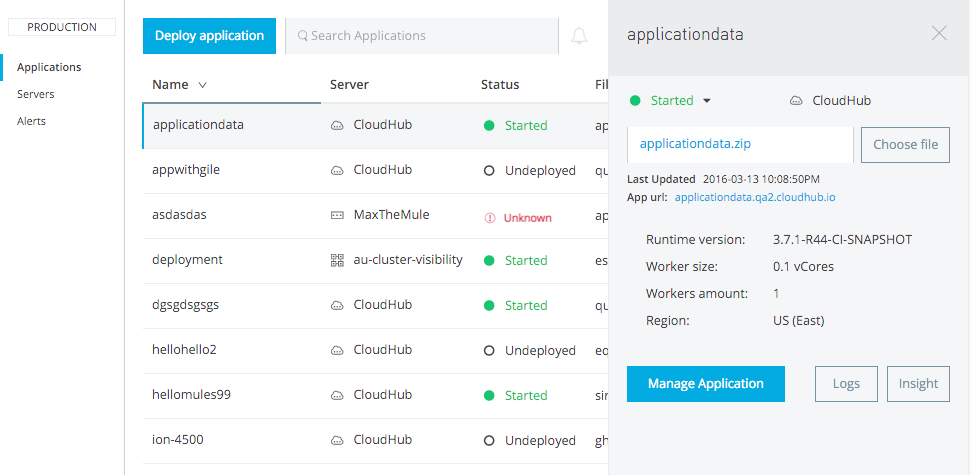
If you select any of the applications on the Applications tab, a panel opens on the right, where you can read additional information about the application and access its settings.

Applications deployed to CloudHub display the status, the time of the last modification, and the deployed application ZIP file, which you can change from this menu through the Choose File button.
They also display additional info about the CloudHub worker they run on, namely the Mule version, worker size, worker amount and region. You will also see buttons that allow you to view logs and insights, and enter the Manage Application menu.
Access App Settings
-
Sign in to the Anypoint Platform and view the Applications tab of the Runtime Manager.
-
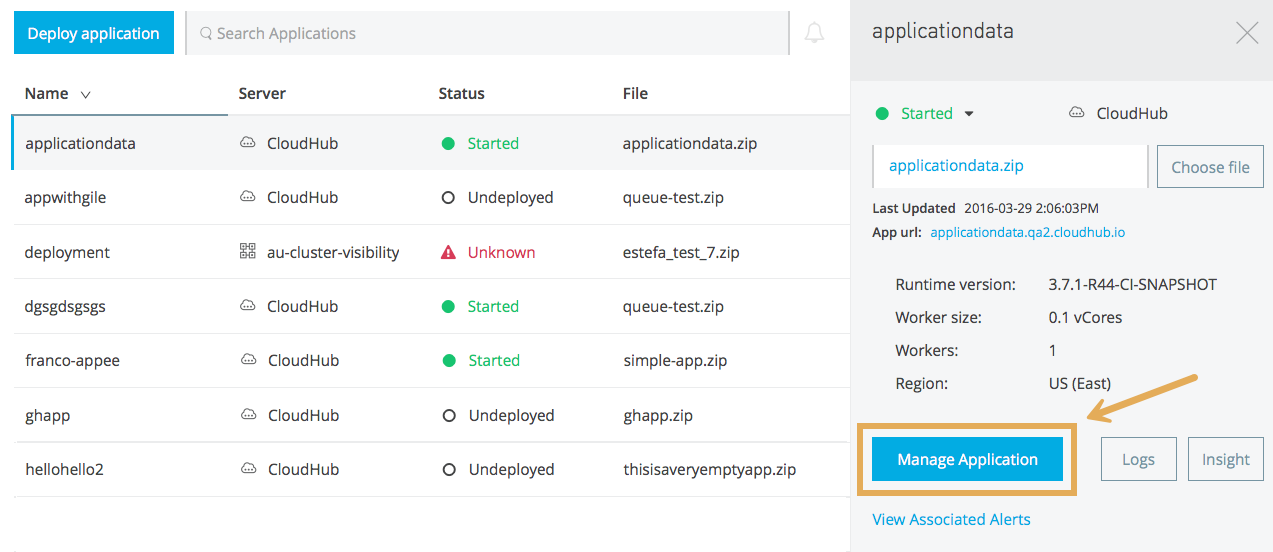
Select one of your CloudHub running applications to open a panel on the right side.
-
In the panel on the right, click the Manage Application button to open up the application’s settings.
In this menu you will be able to change most of the settings you can configure when deploying. For applications on CloudHub, you will also be able to access Log data, Insights, Alerts, queues, set up and manage schedules and application data. You can also see the Alerts History tab, which displays a record of the triggered alerts on the app. See Alerts on Runtime Manager for more on this.
| You cannot change the name of an app after you deploy it. To change the name, you must delete and redeploy the app using the new name. |
Monitor Applications
If your application is deployed to CloudHub, a rich set of tools exists for monitoring events that may occur on your application and the performance of the virtual servers it’s running on. See Monitoring Applications for more details.
Redeploy to a Different Region
If you have global deployment enabled on your account, you can select a different region for your CloudHub deployments. . On the settings page, pick the Runtime section, and then select the desired region from the drop-down menu. . After you select the region, click the Apply changes button, which restarts your application in the new region.
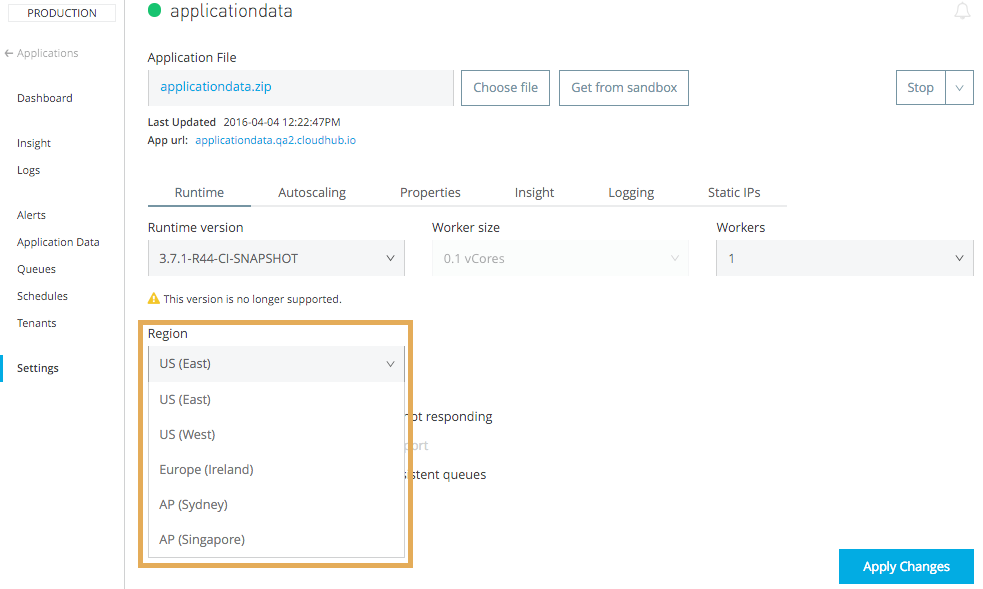
Administrators can set the default region on the Organization tab in Account Settings, but that configuration can be overridden when the application is deployed, if necessary.
Domains for applications deployed to Europe automatically update to http://myapplicationdomain.eu.cloudhub.io.
|
Scale Your Application
You can dynamically scale your applications by selecting options from the Worker size drop-down menu, and clicking the Apply Changes button. Your application uses the worker size and number of workers that you specify. For more information about deploying to multiple workers, see CloudHub Workers.
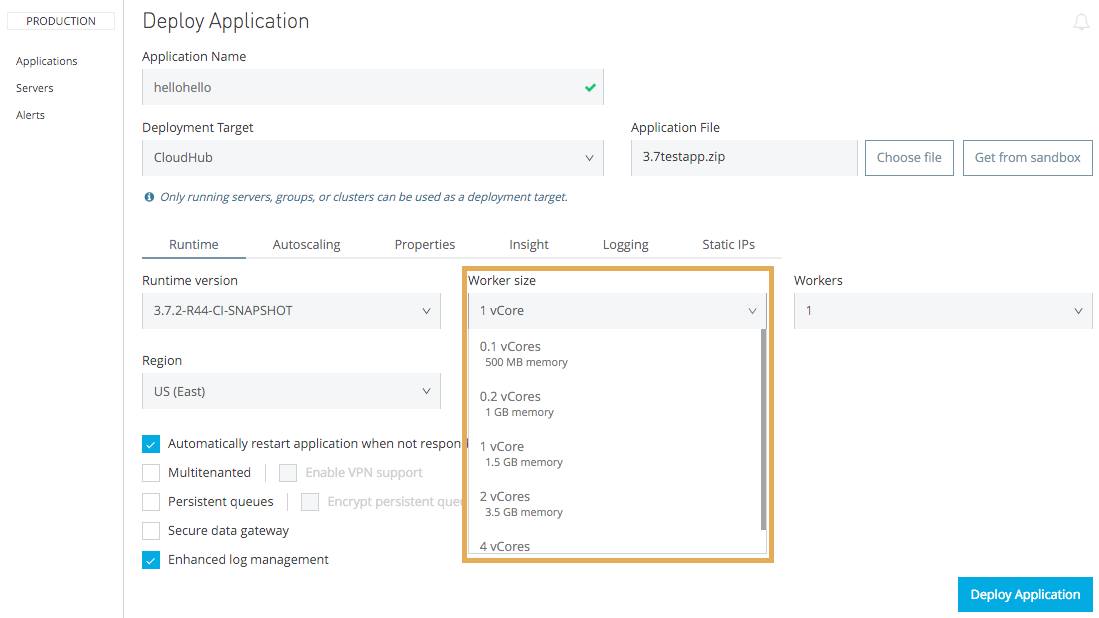
| By default, all applications are limited to no more than four workers of any size. Free and professional accounts are limited to a single worker per app. If you need more workers or more total vCore capacity, update your subscription. If you need more than four workers for a single domain, MuleSoft Help Center directly. |
Download a Copy of Your Deployed Application
The most recently deployed application archive is always available for download from the console. To download the application archive, click the link in Application File on the application Settings page.
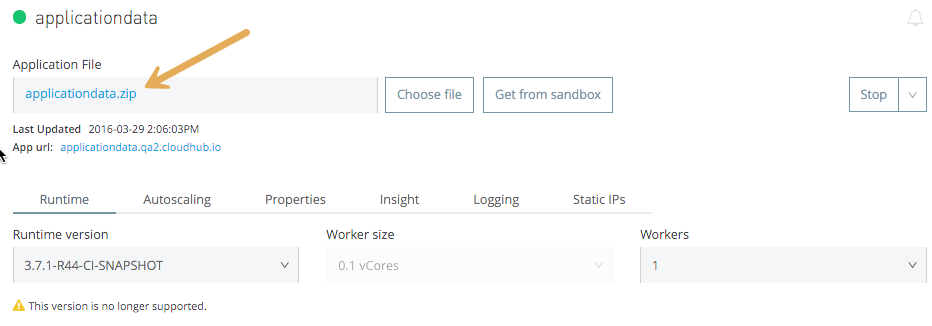
| If you can see the application name, but the name is not a live link, your administrator has disabled application downloads for users with developer and support account types. Contact your administrator if you need a copy of the application. |
Update Your Application
If you made changes to your applications and want to upload a new version:
-
Click Choose file on the Deployment screen for that application. The new filename appears in italicized text.
-
Click Apply changes to use the new file for deployment.
Within a few seconds, your application successfully redeploys. While redeploying, the application status indicator changes to blue, and then turns green after the deployment completes.
-
You can click Logs to see a live redeployment of your application.
After successfully starting a new worker with the application’s latest version, CloudHub overwrites the previous version and you can no longer download the previous archive or revert back to the previous version of application.
Update the Mule Version for an Application
If your application is running on an older version of Mule, you can upgrade your application to use the latest Mule version. To update, click Runtime version, select the version labeled New, and then click Apply Changes.
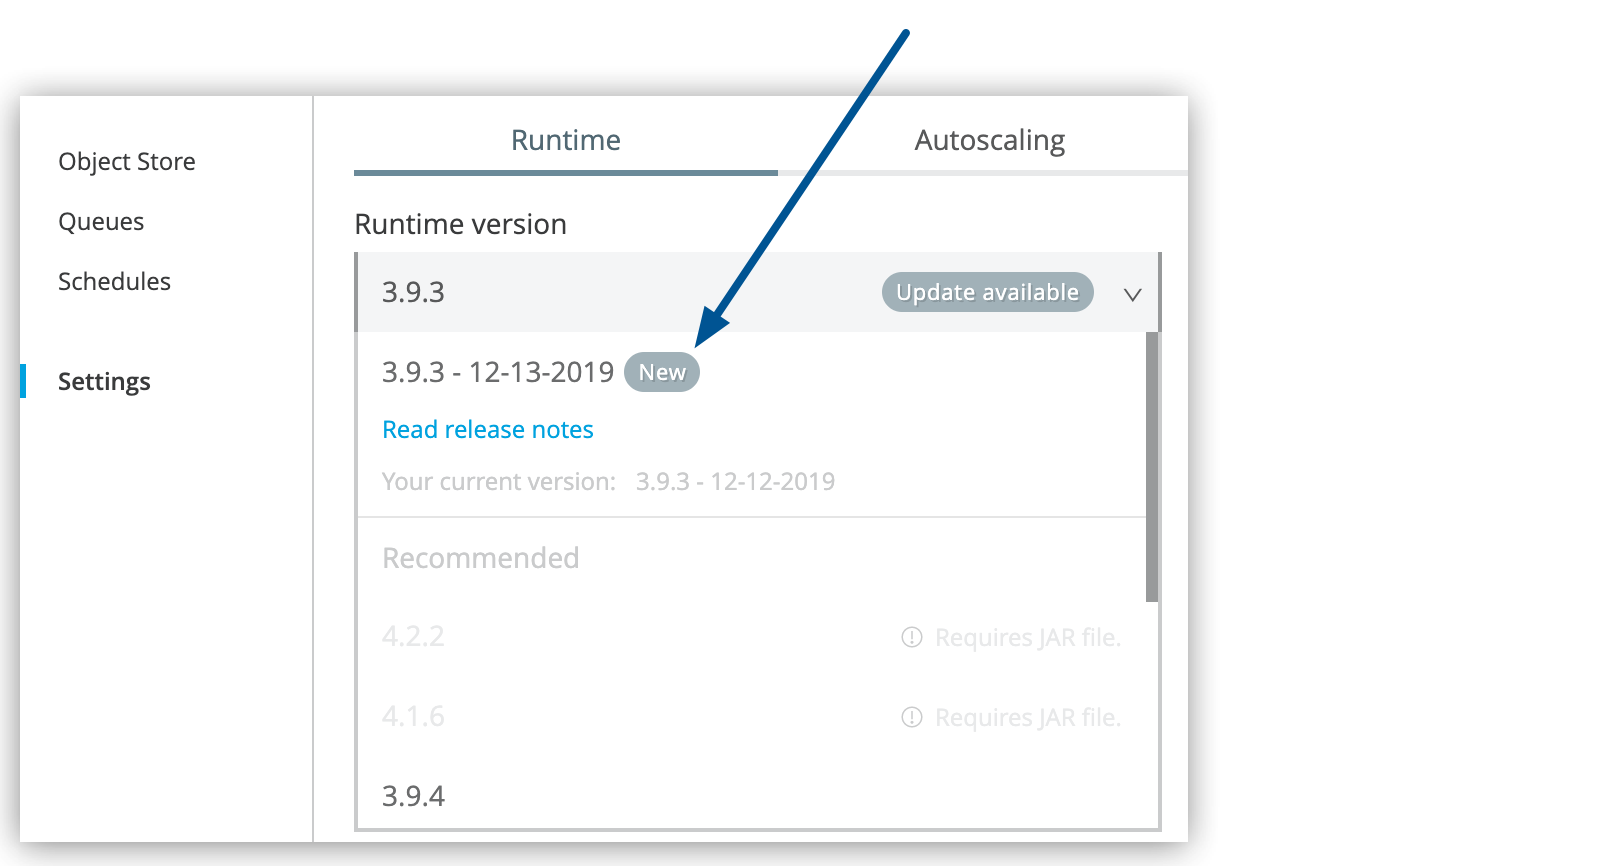
To update multiple apps at the same time, use the CloudHub API Bulk Action operation.
| After End of Extended Support for Mule runtime 4.3 and 4.4, Mule applications deployed to CloudHub or CloudHub 2.0 environments are stopped. |
Zero Downtime Updates with CloudHub
CloudHub supports updating your application so users of your HTTP APIs experience zero downtime. During your application update, CloudHub keeps both the old version and the new version of your application running. Your domain points to the old version of your application until the new version is fully started. This allows you to keep servicing requests from your old application while the new version of your application is starting.
| Icon | Description |
|---|---|
|
The application update is deploying. |
|
The updated version of the application didn’t start correctly. Mule shuts down the new version and leaves the old application running. |
| If an application uses static IPs, updates might cause up to one minute of downtime while CloudHub reassigns the static IP address from the previous version of the application to the new version. Ensure that the client includes the necessary retry mechanisms to account for the downtime. |
| Cancelling a deployment and starting a new one for the same application before the cancellation is complete can lead to a one-to-three-minute downtime. |
Static IPs
CloudHub supports allocating a static IP for applications so that they can be allowlisted for other services. To enable a static IP for your application, go to the Static IPs tab on your application settings page, then enable the Use Static IP checkbox. A static IP is allocated to your application and displayed in the table below; it will be used by the application when it restarts. If your application is not running, you can pre-allocate a static IP before starting the application. For details, see Static IPs Tab Settings.
| If your application is deleted, the static IP will be lost and you must request a new one. |
Create HTTP Services for Your Application
To make HTTP-based services available under your domain, use the ${http.port} variable in your configuration. For example:
<http:listener-config name="HTTP_Listener_Configuration" host="0.0.0.0" port="${http.port}" .../>CloudHub specifies this port for you and automatically load-balances your domain across the number of workers that you specified.


