Deploy to Your Servers
You can deploy a Mule application to a local server using:
When you use Runtime Manager to manage a server, you cannot use other deployment and management methods or tools to manage it.
Prerequisites
Before you can deploy to a local server, you must first:
To copy an application from a non-production (Sandbox) environment to a production environment, ensure that you have permission on both environments.
To avoid compatibility issues, also ensure that:
-
The Mule versions on the servers in both environments are the same or compatible.
-
The deployment target type (single server, server group, or cluster) in both environments is the same.
-
All servers in a server cluster are on the same Java version, and the target Java version matches that of the application. You can check the Java version associated to your target in Anypoint Platform > Runtime Manager > Servers.
Deploy an Application from Runtime Manager
To deploy an app to your local server from Runtime Manager:
-
Sign in to Anypoint Platform.
-
Select Runtime Manager.
-
In the Applications page, click Deploy application.
-
Provide a name for your application.
The application name identifies your application in Runtime Manager and must be unique across environments. Runtime Manager alerts you if the name is already in use.
Application names can contain between 3 and 42 alphanumeric characters (a-z, A-Z, 0-9) and dashes (-). They cannot contain spaces or other characters.
You cannot change the name of an app after you deploy it. To change the name, you must delete and redeploy the app using the new name. -
Select the deployment target.
The target must be a running server, server group, or cluster.
-
Specify the application file:
-
Import a file from Exchange:
-
Click Choose file and then select Import file from Exchange.
-
Select Application for the type.
-
Enter the name of your application in the search box.
-
Select the application to deploy, select a version from the Version menu, and then click Select.
-
-
Upload an application ZIP file:
-
Click Choose file and then select Upload file.
-
Select the file to upload and then click Open.
-
-
Copy an application from a non-production environment:
-
Click Get from sandbox.
This button is available only if a non-production environment exists.
-
Select the environment, such as Sandbox, from which to get the application.
-
If necessary, search for the application to deploy.
-
Select the application and then click Apply.
Only applications that are deployed to a local server, server group, or cluster appear in the list. Applications deployed to CloudHub can only be promoted to run on other CloudHub workers.
-
-
-
Click tabs to configure application options:
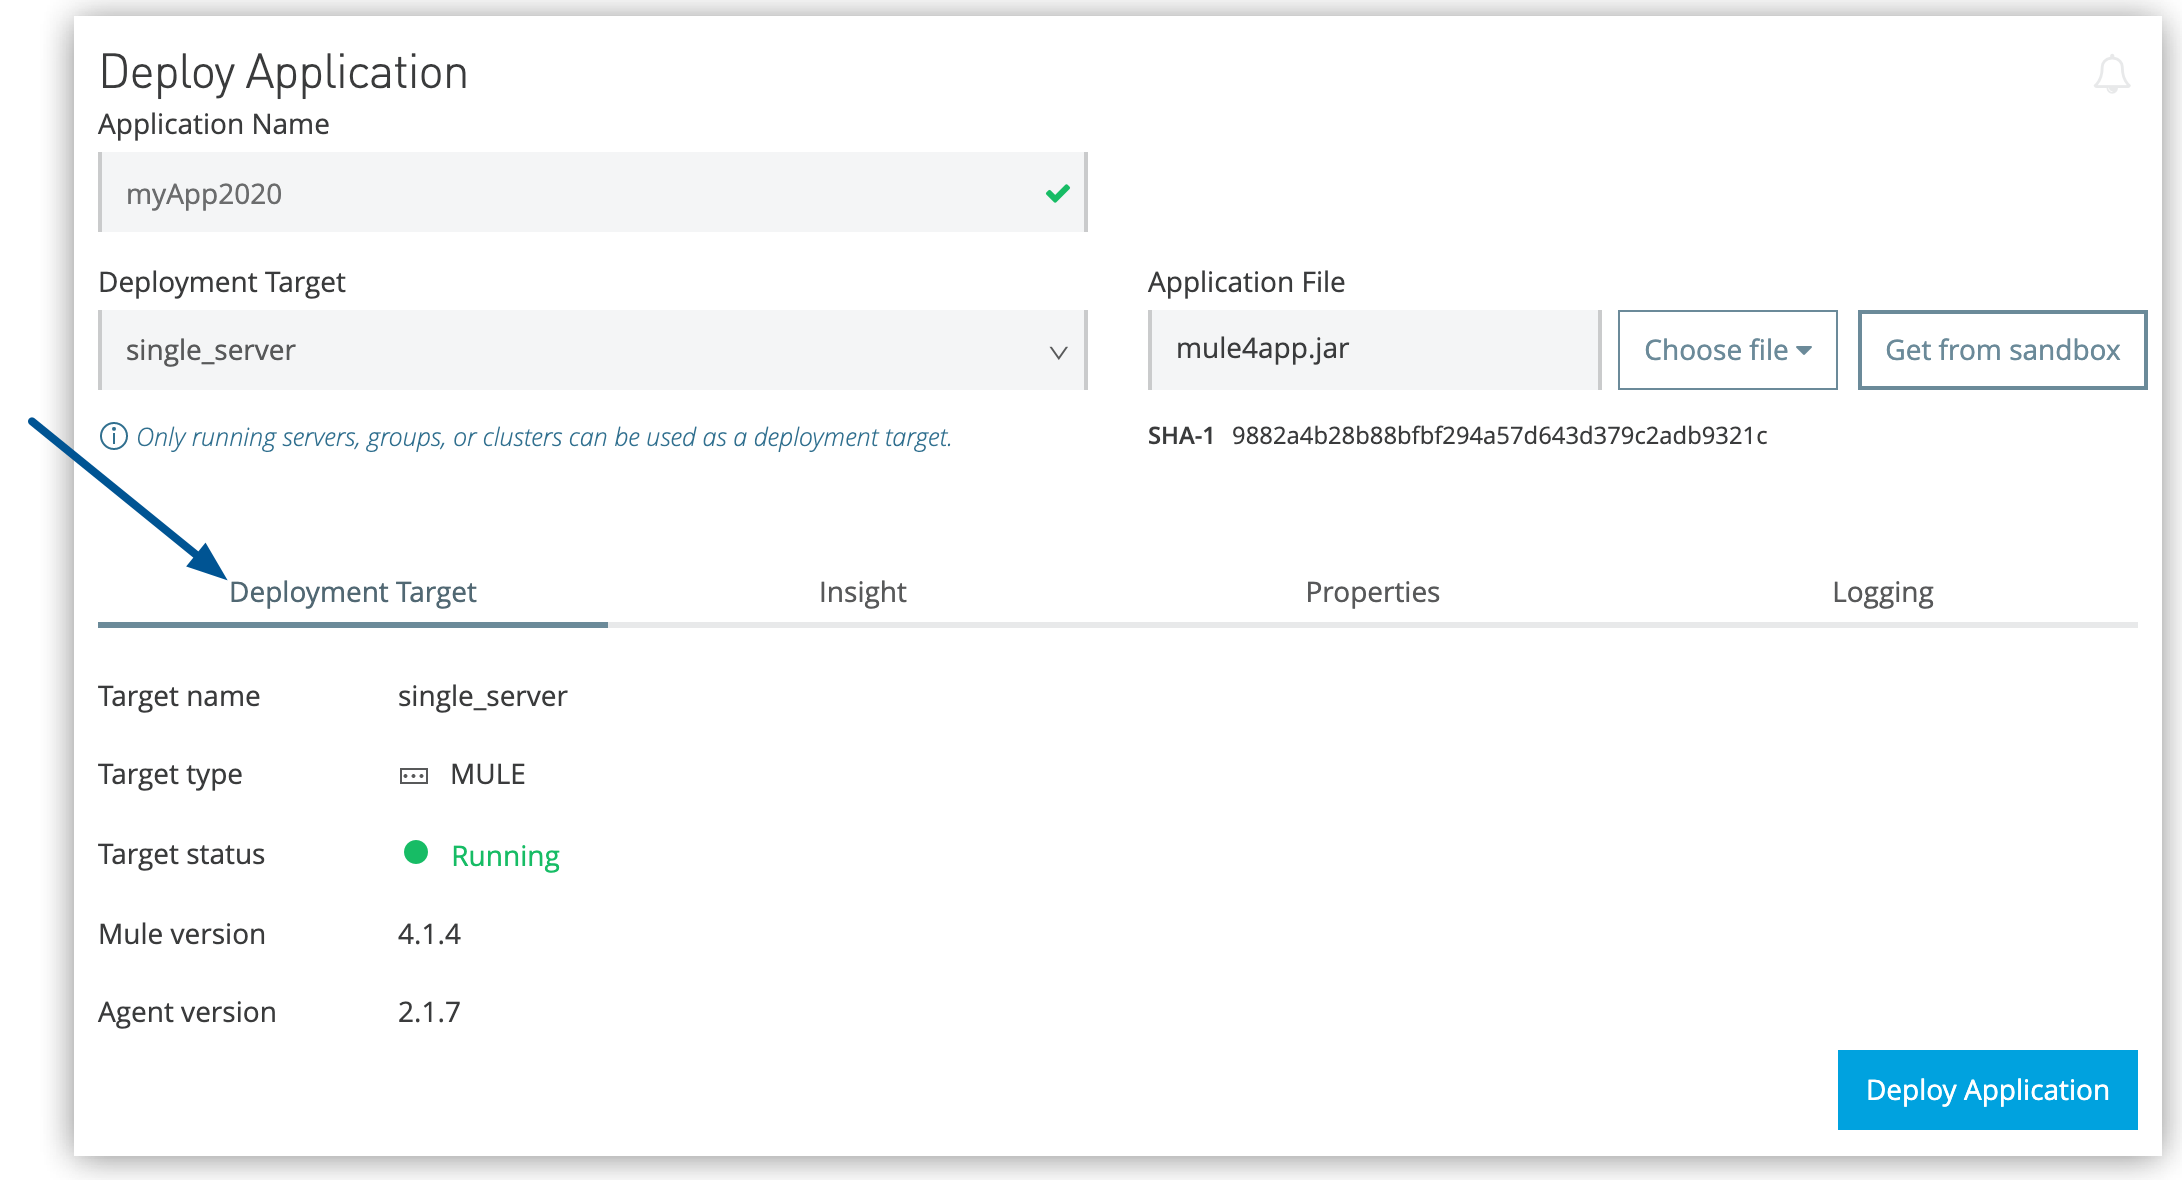 Figure 1. The arrow shows the configuration tabs on the Deploy Application page.
- Deployment Target tab
-
The server, server group, or cluster that you selected determines the Mule version.
Ensure that this Mule version is the same version used to develop your application.
- Insight tab
-
Specify metadata options for the Insight analytics feature. See Insight.
- Properties tab
-
Specify properties (key-value pairs) that the application uses during deployment and while running.
When you deploy an application from a non-production environment (Get from sandbox), the new application inherits any properties defined in the original application. You can update these properties as required on the Properties tab before deploying the application.
- Logging tab
-
Configure the logging level for the application:
TRACE,DEBUG,INFO,WARN,ERROR, orFATAL.Alternatively, you can configure logging by modifying the
levelvalue in thelog4j2.xmlfile. See Configuring Custom Logging Settings and Apache Logging Services.
After you deploy the application, two additional tabs are available:
- Flow Monitoring tab
-
Specify to make flow monitoring metadata available in the applications Flows page.
- Alerts History tab
-
View alerts for the application.
-
Click Deploy Application.
The new application appears in the list of deployed applications in the Applications tab.
Change a Deployed Application
You can change the application file of a deployed application:
-
Select your application in the Applications page to open its corresponding panel.
-
Click Choose File to upload a new file.
Your application might experience a moment of downtime while the new version is launched in the server, server group, or cluster.
Deployment Errors
If an error occurs and the application cannot be deployed, the application status indicator changes to Failed and the status area indicates that an error occurred.
Check the log details for any application deployment errors.
Correct the error, upload the application, and redeploy the application.