CloudHub VPC to CloudHub 2.0 Private Space Upgrade
To migrate your workloads from CloudHub to CloudHub 2.0, you must set up your CloudHub 2.0 infrastructure and network connections. One approach is to create new CloudHub 2.0 private spaces with configurations that differ from your existing CloudHub setup.
To retain your infrastructure configuration, use the in-product VPC upgrade tool to easily migrate your CloudHub dedicated Virtual Private Cloud (VPC) to a CloudHub 2.0 private space.
When your new private space is ready, you can gradually migrate your applications from the CloudHub VPC to the CloudHub 2.0 private space. After moving all your applications, you can decommission your old VPC.
Using the in-product VPC upgrade tool saves you time because you don’t need to acquire new CIDR blocks, set up new network connections, and configure the private space from the ground up.
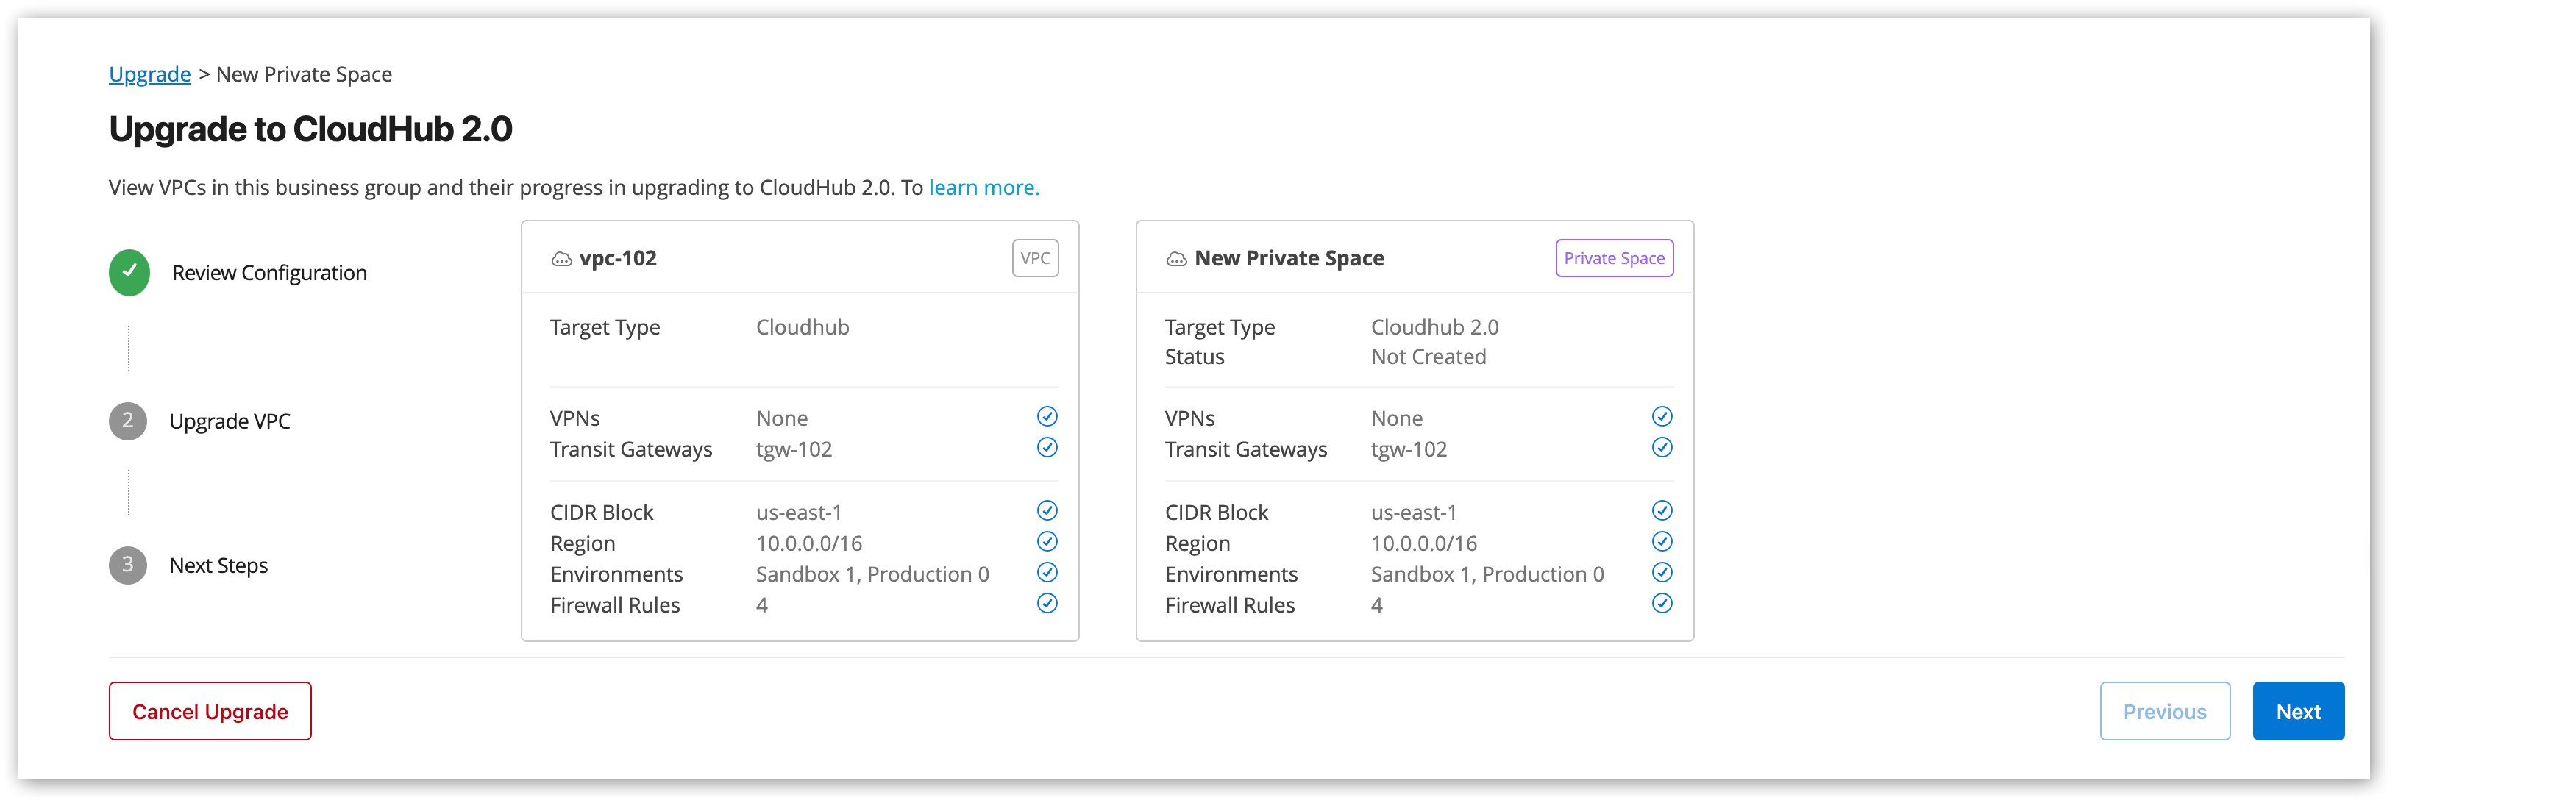
The tool provisions the infrastructure for a CloudHub 2.0 private space by cloning the existing configurations of your eligible CloudHub dedicated VPC, using the same CIDR block.
If your VPC has existing Transit Gateways (TGW) or Virtual Private Networks (VPN) connections, they transfer seamlessly to the new CloudHub 2.0 private space. This migration ensures that any new applications deployed to the new private space can communicate effectively.
The default CloudHub certificates are configured as part of the private space’s default certificates. The DLB custom domains of the migrated VPC are created as part of the private space’s custom TLS certificates.
The VPC upgrade tool migrates the DLB certificates to the new private space on a best-effort basis only. If the migration excludes certificates or your apps require specific TLS configurations, manually add TLS contexts to the private space. In the new private space, use the Domains & TLS tab to ceate DLB certificates.
|
The VPC upgrade tool reuses the same underlying CloudHub VPC, so the new CloudHub 2.0 private space inherits the same number of availability zones (AZs) as the original VPC. The upgrade process does not add or change availability zones. For example, if your CloudHub VPC has only two AZs, the upgraded CloudHub 2.0 private space also has two AZs. |
| During the VPC upgrade process, you use doubled entitlements for your VPC and network connections. Work with your account representative to remain compliant with entitlements and finish the upgrade on time. |
Understand Eligibility
Due to their architectural differences and distinct interfaces, CloudHub 2.0 supports some features differently than CloudHub. Follow this eligibility checklist to confirm which VPCs are eligible for the upgrade:
- Availability of IPs
-
Your VPC must have at least 25% free space, and 100 or more available IP addresses per subnet to be eligible for the upgrade.
- Legacy VPNs
-
VPCs with legacy VPNs configured aren’t eligible for the upgrade.
- Direct Connect or VPC Peering
-
If your VPC has Direct Connect or VPC Peering configured, migrate to Transit Gateway or VPN before upgrading.
- TLS 1.1 ciphers
-
These ciphers can’t be carried over from CloudHub to CloudHub 2.0:
-
ECDHE-ECDSA-AES128-SHA1
-
ECDHE-ECDSA-AES256-SHA1
-
ECDHE-RSA-AES128-SHA1
-
ECDHE-RSA-AES256-SHA1
-
- Limitation for Restricting Outbound Egress Traffic
-
CloudHub VPC doesn’t restrict outbound egress traffic, so removing the default firewall rule that allows this traffic can cause failures in your migrated private space.
- Non-HTTP/S TCP Traffic
-
HTTP and HTTPS traffic can be sent to applications in the migrated Private Space. TCP traffic is not supported.
Understand Environment Association
During the upgrade process from CloudHub VPC to CloudHub 2.0 Private Space, the environments associated with your VPC stay in sync with the environments associated with the upgraded CloudHub 2.0 Private Space to avoid configuration drift.
Environment association works differently in CloudHub 2.0 and CloudHub 1.0. In CloudHub 2.0, an environment can be associated with multiple private spaces, whereas, in CloudHub, one environment can only be associated with one VPC in a given region.
Additionally, doing bulk environment association for an upgraded private space can result in all environments in the same region to get associated with the underlying VPC. If those environments were previously associated with other CloudHub 1.0 VPCs, they get disassociated.
| The upgrade tooling doesn’t support the upgrade of a default VPC. To proceed with the upgrade, disable the default VPC configuration. |
Upgrade your VPC via Anypoint Platform
-
From Anypoint Platform, select Runtime Manager > Upgrade.
Alternatively, from Runtime Manager, open the VPC upgrade entry point when it appears in the console, then click Continue to Upgrade to start upgrading your VPCs.
-
Click Upgrade Now in the Upgrade Status column for the VPC to upgrade.
The Upgrade to CloudHub 2.0 review page displays the configurations currently available in your VPC, as well as the configurations created during the upgrade.
-
Click Next to continue.
-
Provide a name for the new private space.
Optionally, you can specify reserved CIDRs to connect to your new private space.
-
Click Create to create the new private space.
The Upgrade to CloudHub 2.0 review page shows the progress of the VPC upgrade process, which takes about 15 to 30 minutes.
| If you create a VPN to provision your CloudHub VPC, wait until the newly created VPN status shows as available before migrating your VPC to a CloudHub 2.0 private space. |
As soon as the upgrade process starts, the upgraded VPC is locked for any further updates.
You can cancel the upgrade process to revert to your VPC at any time by clicking Cancel Upgrade. In that case, the system deletes the newly created private space, and your VPC is unlocked.
After you provision the private space, the Cancel Upgrade button no longer shows. However, you can still roll back the upgrade by deleting the private space.
Next Steps After VPC Upgrade
Following the VPC upgrade, the CloudHub 2.0 private space is fully provisioned, and you can deploy applications to it.
| Access new apps in the private space via the private space’s public ingress. CloudHub DLB and SLBs can’t route traffic to these apps. |
You have two options for migrating your applications:
- Self-Service
-
Create new versions in the CloudHub 2.0 private space. Then, delete the corresponding application in the CloudHub VPC.
- Runtime Manager Tool
-
Migrate your applications using the application migration tool. See CloudHub to CloudHub 2.0 Application Migration.
After you migrate all the applications in a VPC, delete the VPC and any associated DLBs to release your CloudHub entitlements. This action doesn’t affect your CloudHub 2.0 private space.
For the final steps after VPC upgrade and CloudHub application migration, see CloudHub to CloudHub 2.0 Migration Completion.
| When deploying a new CloudHub 2.0 application, avoid using the CloudHub default domain to prevent issues such as traffic outages. |
During the migration, you can continue to deploy and manage applications in your VPC to maintain business continuity. To prevent configuration drift, after the upgrade, your CloudHub dedicated VPC is locked for any changes to the infrastructure, including environment or business group associations, network connections, and internal DNS. Make any required changes to the newly created private space. The upgrade process applies any CloudHub 2.0 configuration changes to the CloudHub VPC.
If your CloudHub VPC doesn’t have any network connections, and you create new ones in your new CloudHub 2.0 private space after the upgrade, these new connections aren’t reflected in your CloudHub VPC.
The firewall rules configured in your VPC are copied to the private space. After that, you can make additional changes to the firewall rules in the VPC and the private space. To avoid configuration drift, apply any firewall rule changes in both places throughout the migration.
VPC firewall rules that have ports other than 80, 443, and 30500 to 32500 drop during the migration.
|
Enable CloudHub 2.0 Apps to Communicate with CloudHub Apps via DLB
During a partial migration, a CloudHub 2.0 app may need to communicate with a CloudHub app through the CloudHub Dedicated Load Balancer (DLB). Because CloudHub 2.0 uses a separate infrastructure CIDR pool, the DLB doesn’t allow this traffic by default.
To allow a CloudHub 2.0 app to reach a CloudHub app via the DLB, add the following CloudHub 2.0 infrastructure CIDR ranges to the DLB allowlist:
-
100.64.0.0/16 -
100.66.0.0/16 -
100.67.0.0/16 -
100.68.0.0/16
For more information about CloudHub 2.0 infrastructure CIDR ranges, see Infrastructure CIDR Pool.