Running Queries and Mutations
The unified schema resolves into a single GraphQL endpoint. To run queries or mutations against the unified schema, you first request access (if applicable) and then write and run a GraphQL query in the query editor.
Before You Begin
-
You must have the Consume, Contribute, or Admin permission.
Request Access to Run a Query
Before you can run a query or mutation, you must request access.
If you’re using an external client provider, refer to Request Access to Environments Using an External Client Provider
-
Click Run Operation.
-
In the Request access to run queries dialog, select how you want to get access to run your queries.
If you want to use an existing client application or client ID and secret pair, you can find them in Exchange. Open Exchange in a new tab, navigate to My applications and select an application from the list to find relevant information.
Choose one of the following options:
-
Use one of my existing applications: Choose an existing client application from the list, and click Request Access.
-
Create a new application and use it immediately: Click Next, provide an application name and an optional description and application URL, and click Create and Request Access.
-
I already have credentials…: Click Next, provide an existing client ID and secret pair, and then click Authenticate & Request Access.
-
-
To change your access method from the query editor, from the actions menu (…), select Switch Current Credentials.
Run a Query
Use the query editor to write, run, and troubleshoot queries.
-
If any of the APIs in the unified schema require pass-through authentication, click Add HTTP Headers, and:
-
Select a header name.
-
Enter a header value.
-
To specify additional header name and value pairs for other APIs, click +Add Header x
-
Click Save.
-
To edit the HTTP headers, click Edit HTTP Headers.
-
-
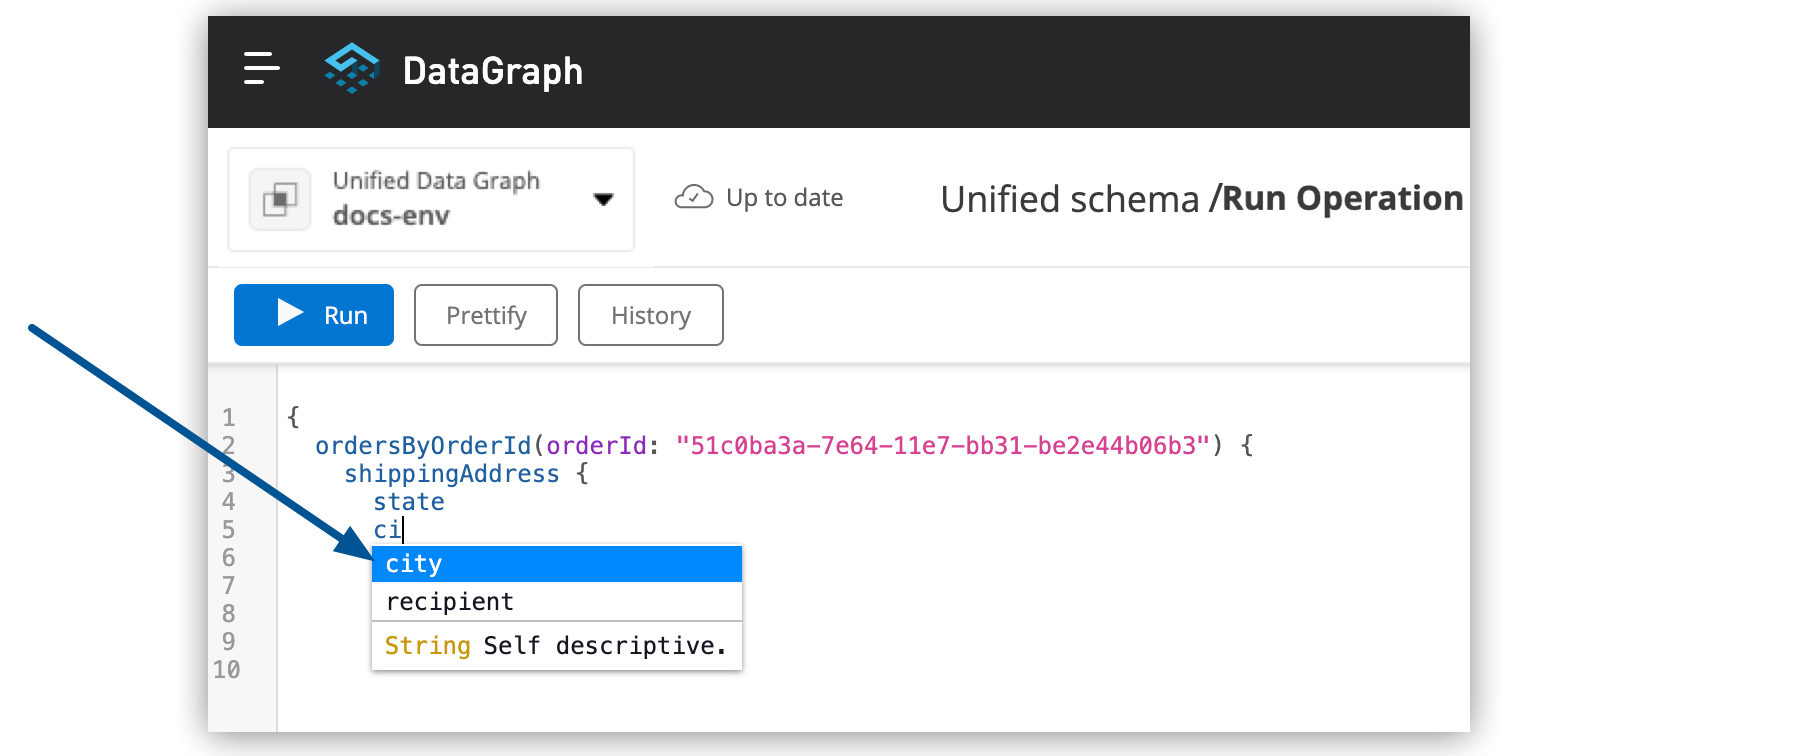
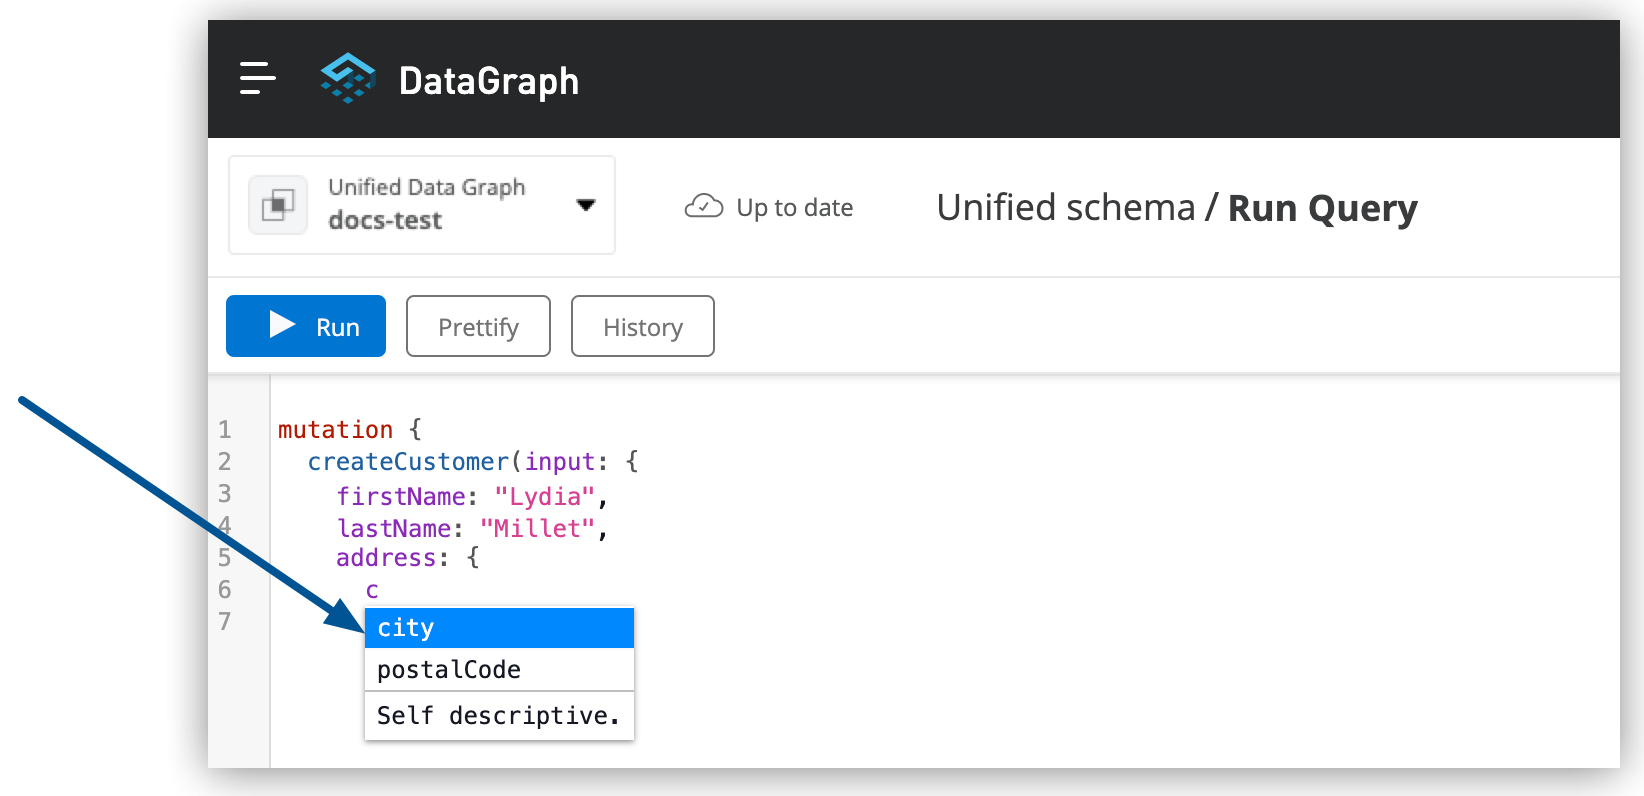
In the query editor, start typing your query using the in-line autocomplete function or type Option/Alt + Shift + Space to open the autocomplete menu.
-
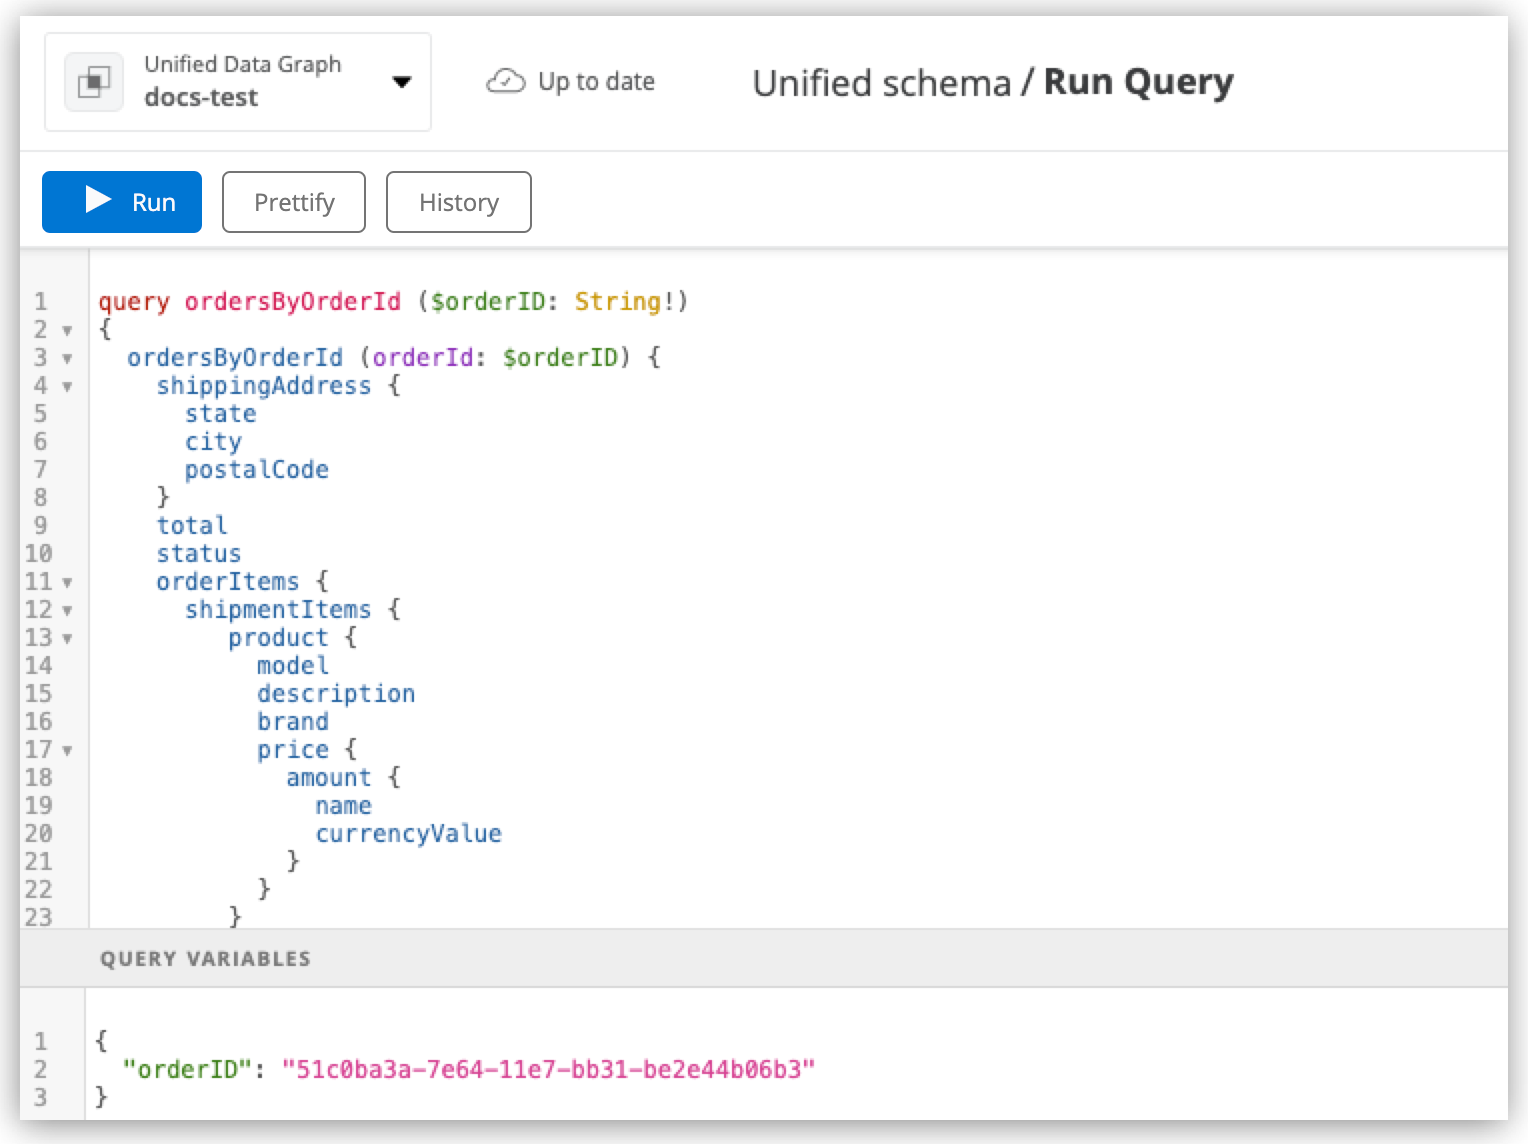
Optionally, in the Query Variables pane, add any query variables you want to use.
-
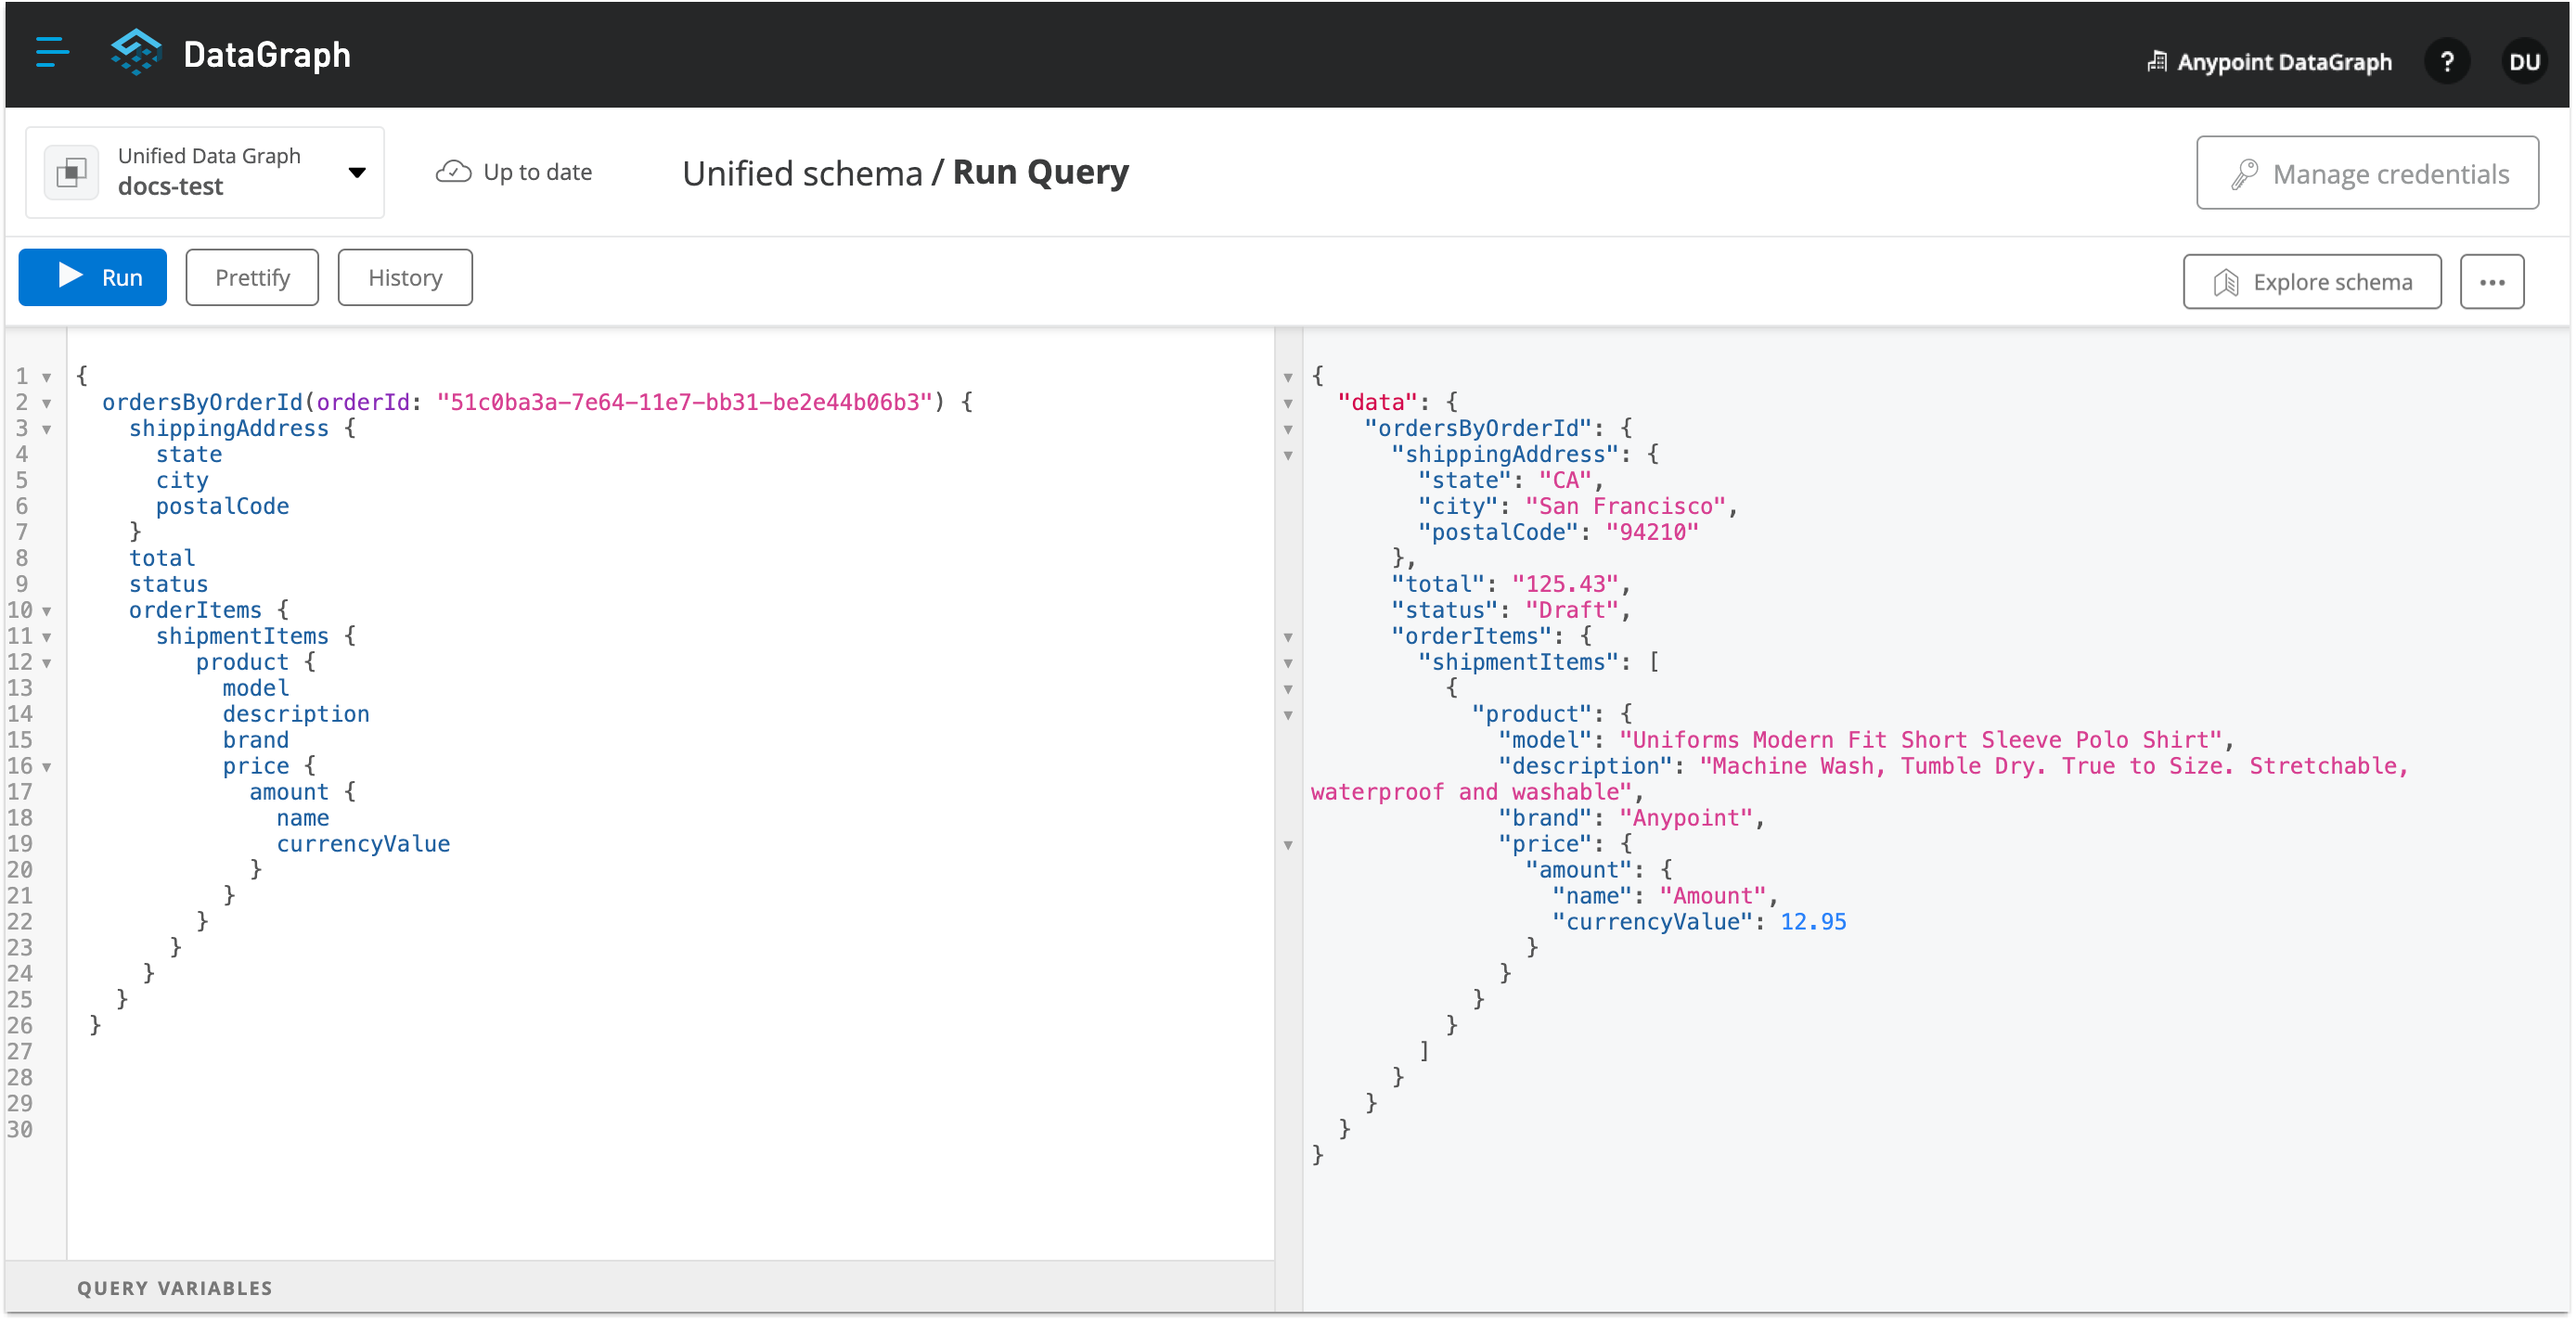
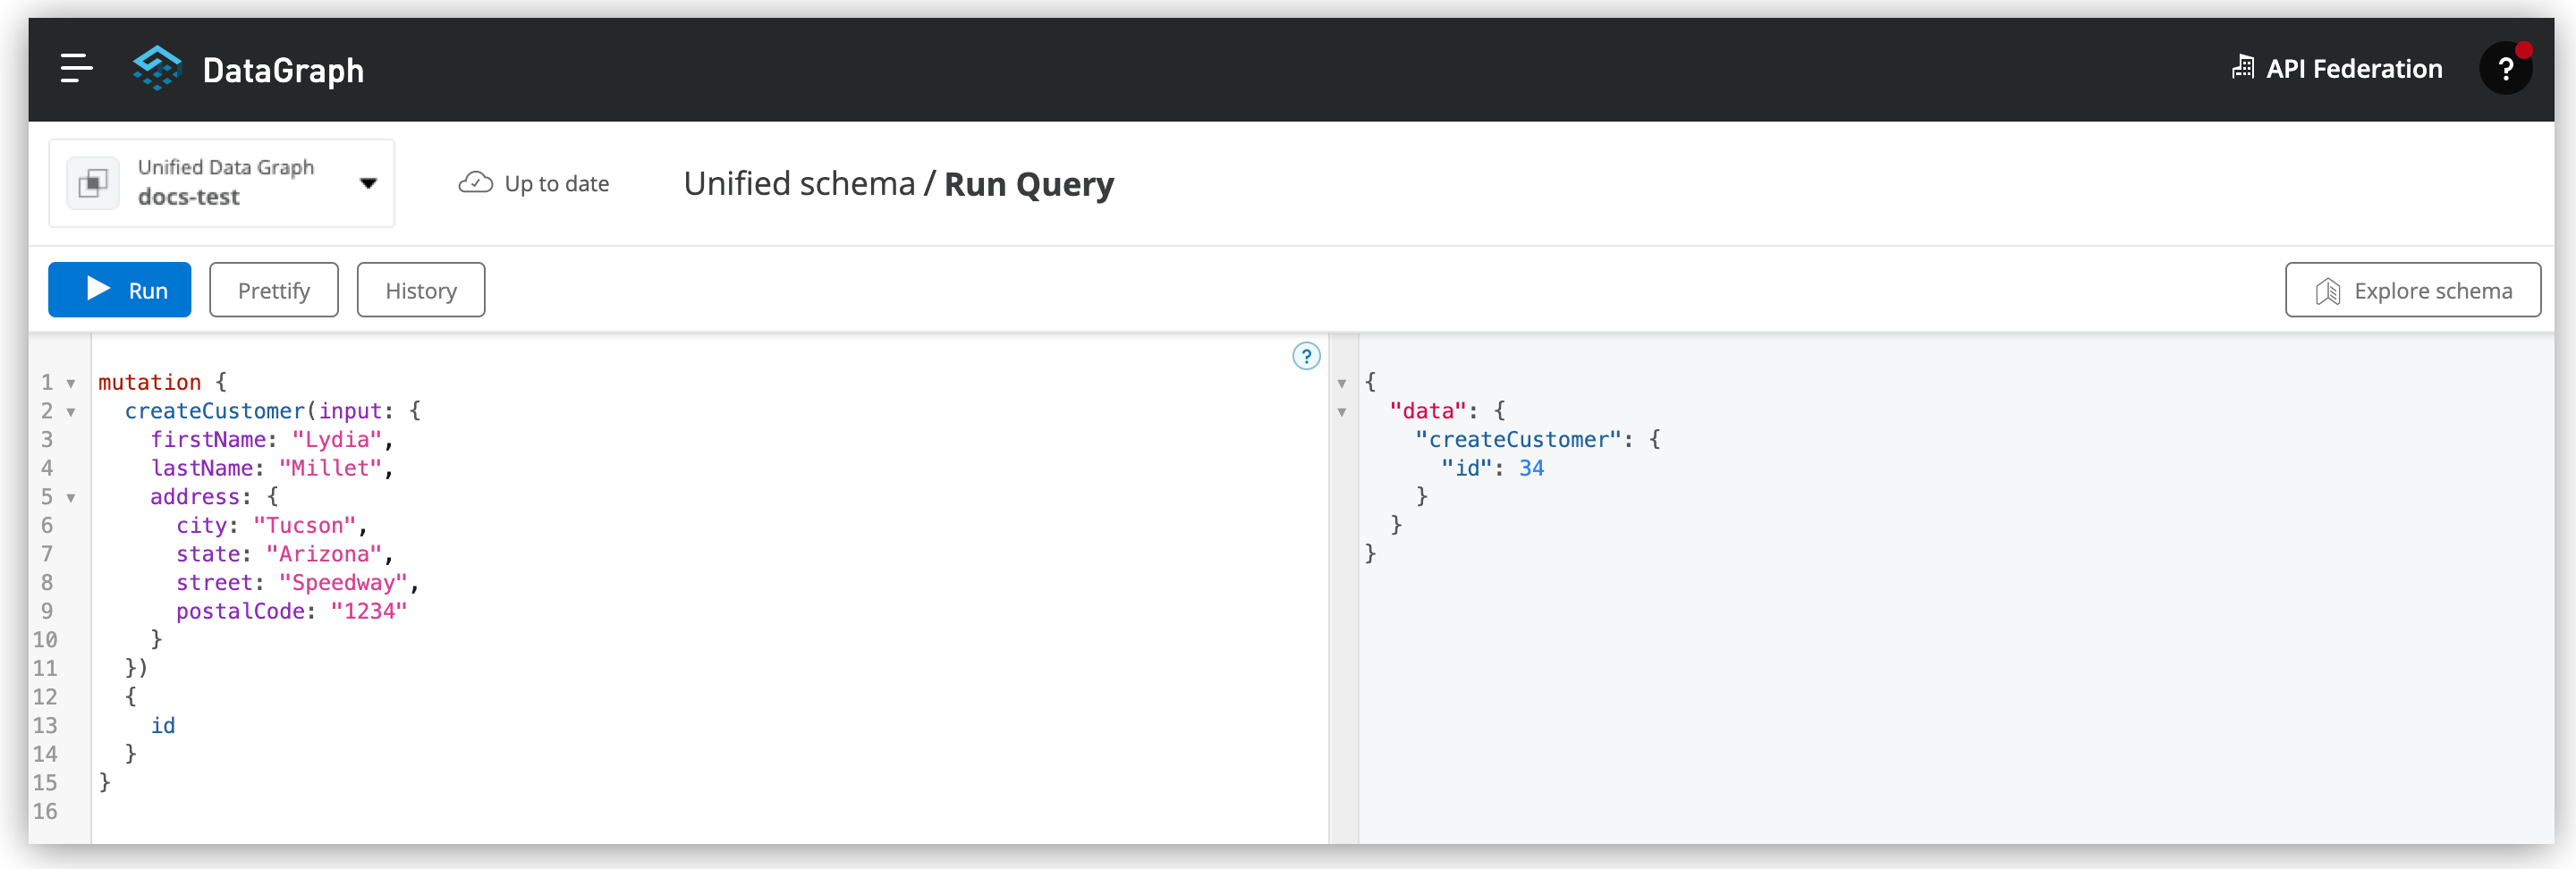
Click Run.
-
To see results with query tracing, from the actions menu (…), select Trace Query, and then click Run.
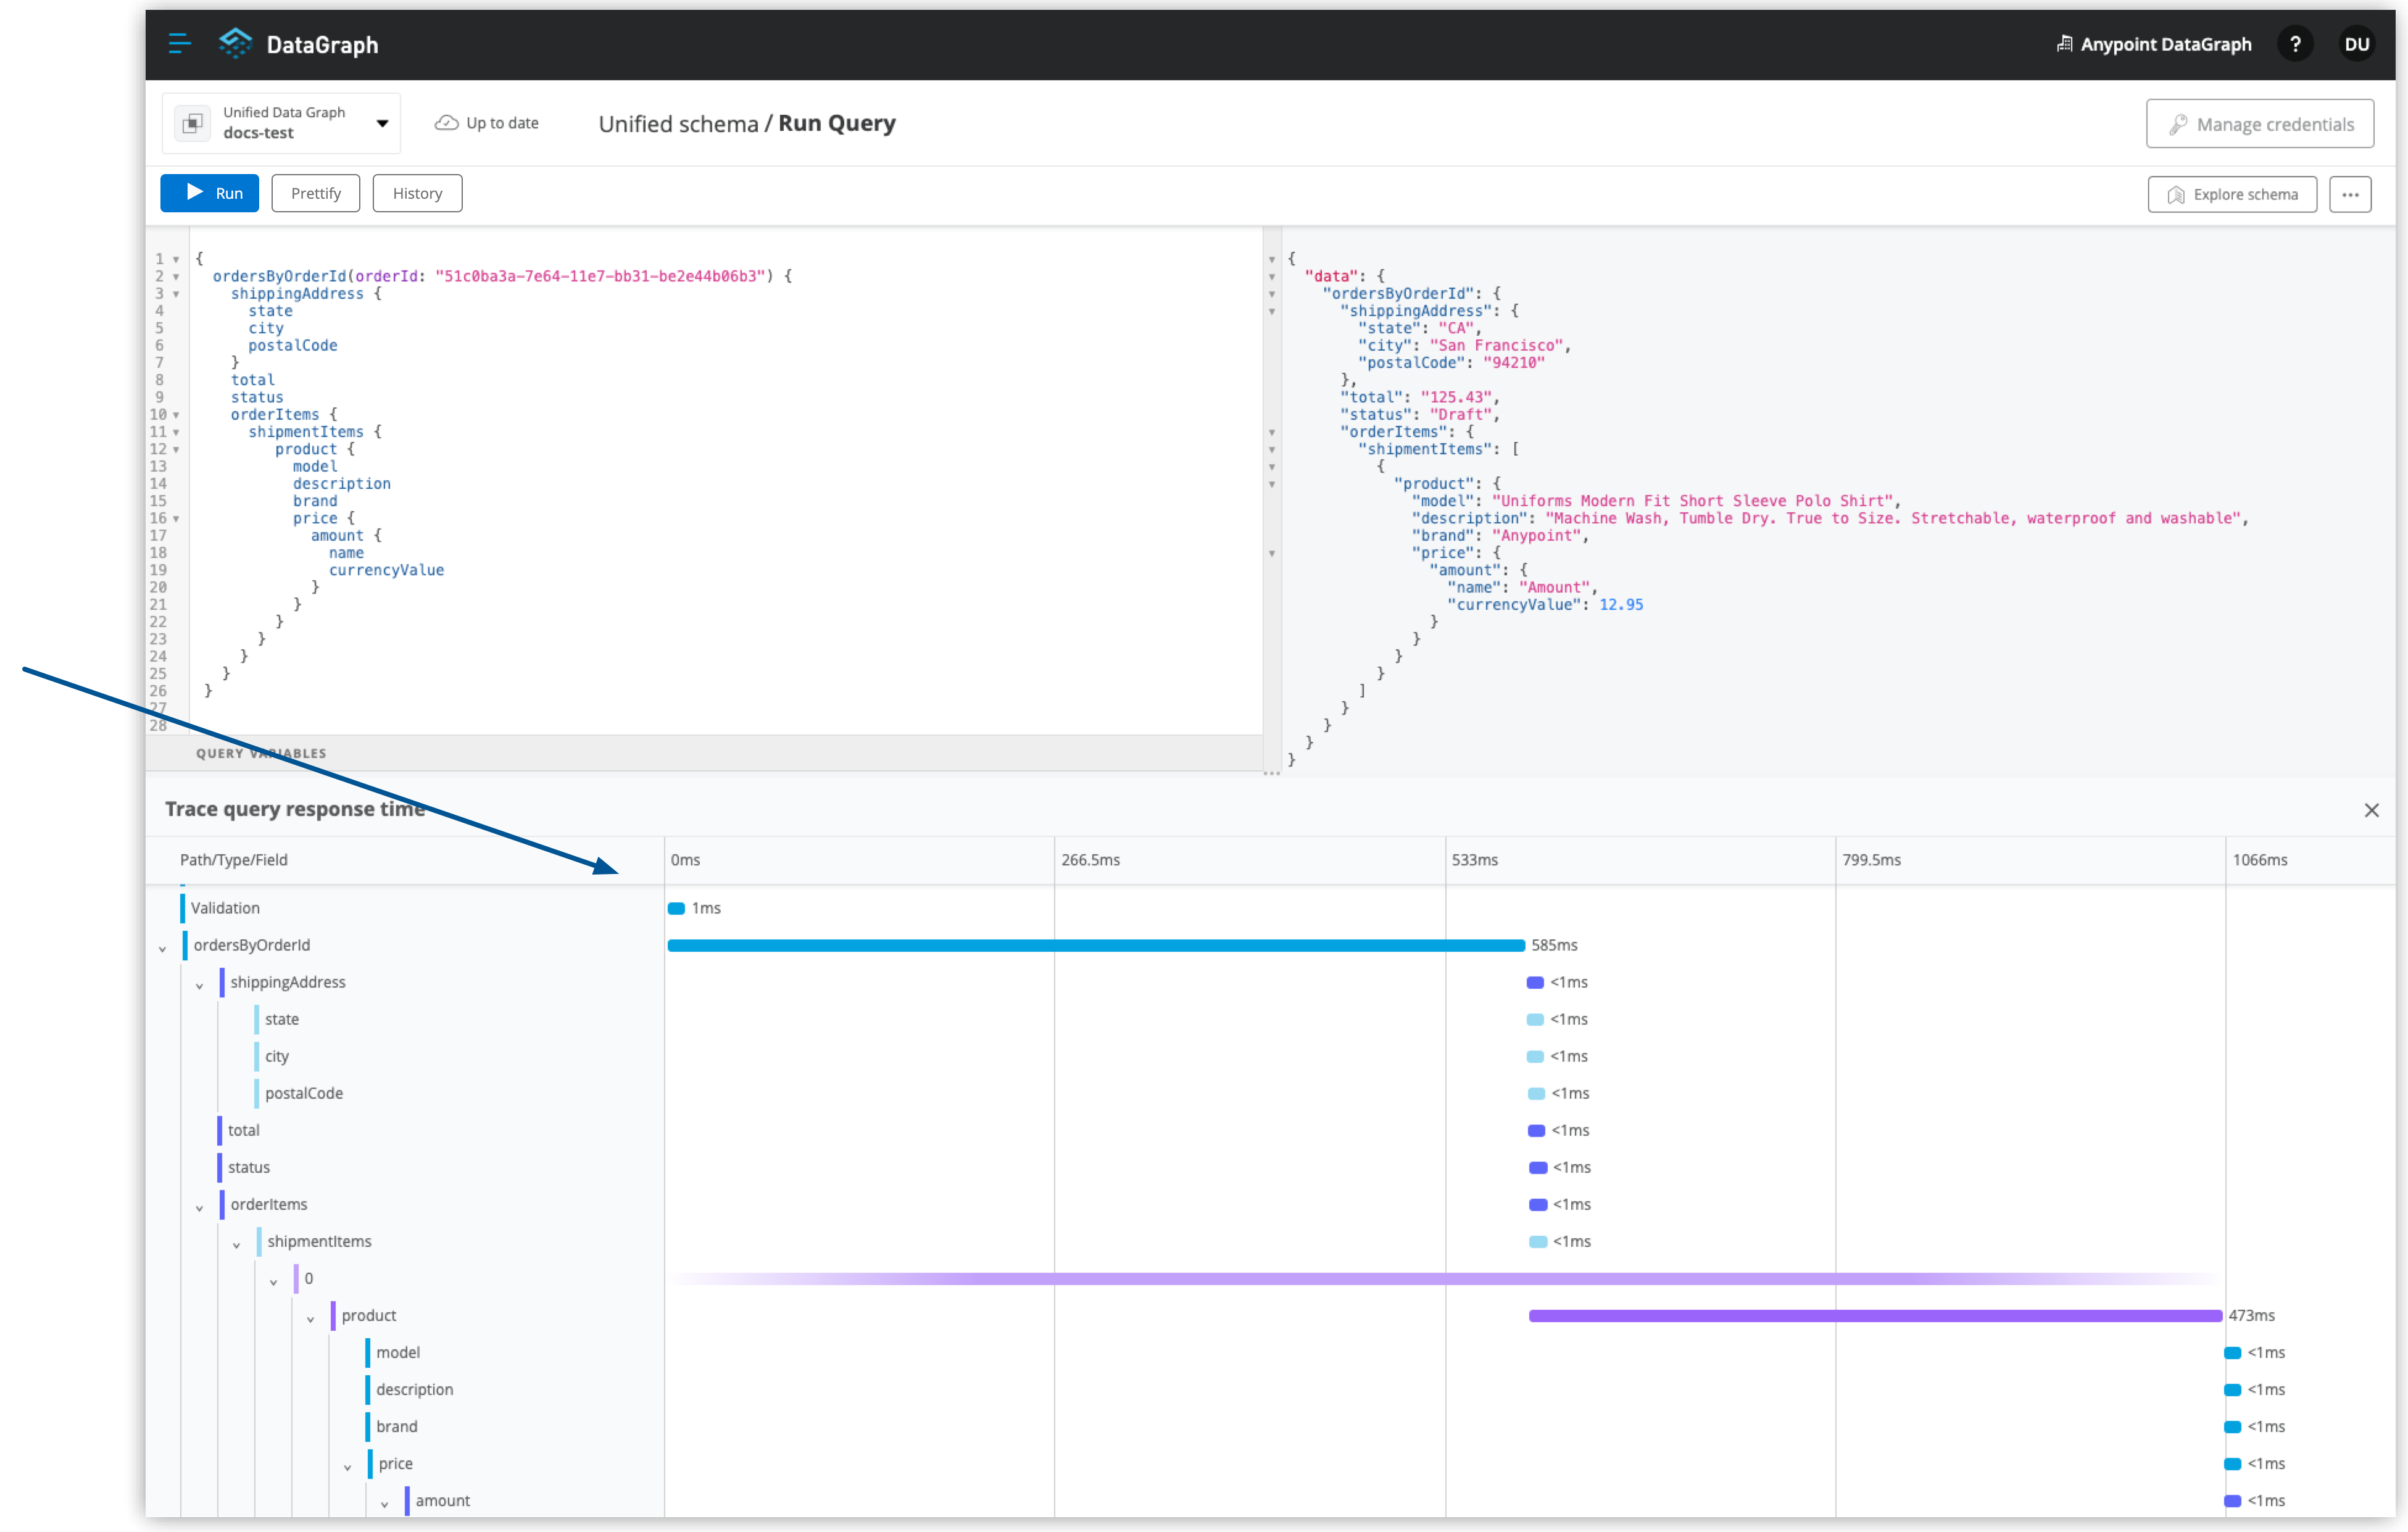
Query trace results for DataGraph provide the following information:
-
Time taken by DataGraph to parse and validate the query
-
Total response time for the entire query
-
Duration of requests to each source API in the query
-
-
To see response logs associated with the query, from the actions menu (…), select View Response Logs.

Log levels for DataGraph include DEBUG, INFO, WARN, and ERROR.
-
Click View History to access this same query (or others) later.
-
To use this query in your application, click Copy endpoint to copy the query and the automatically generated GraphQL endpoint. You can also copy the query as a curl snippet.
Run a Mutation
Use the query editor to write and then run mutations. If needed, you can also troubleshoot mutations in the query editor
-
If any of the APIs in the unified schema require pass-through authentication, click Add HTTP Headers and:
-
Select a header name.
-
Enter a header value.
-
To specify additional header name and value pairs for other APIs, click +Add Header.
-
Click Save.
-
To edit the HTTP headers, click Edit HTTP Headers.
-
-
In the query editor, start typing your mutation using the in-line autocomplete function, or type Option/Alt + Shift + Space to open the autocomplete menu.
-
Optionally, in the Query Variables pane, add any variables you want to use.
-
Click Run.
-
To see results with query tracing, from the actions menu (…), select Trace Query and then click Run.
-
To see response logs associated with the query, from the actions menu (…), select View Response Logs.
-
Click View History to access this same mutation (or other) later.
-
To use this mutation in your application, click Copy endpoint to copy the query and the automatically generated GraphQL endpoint. You can also copy the query as a curl snippet.
Query Editor Shortcuts
The following table provides shortcuts you can use in the query editor:
| Function | Shortcut |
|---|---|
Prettify query |
Shift+Ctrl+p |
Run operation |
Ctrl+Enter |
Autocomplete |
Ctrl+space |
Comment-out line |
Cmd+/ |
Jump to end or start of current scope |
Cmd+m |
Highlight current word |
Cmd+d |
Regex search |
Cmd+f |
Search and replace |
Cmd+h |
Bring next line up to current line |
Cmd+j |
Delete rest of line past cursor |
Cmd+kk |
Highlight current line |
Cmd+l |
Outdent current line |
Cmd+[ |
Indent current line |
Cmd+] |
Request Access to Environments Using an External Client Provider
API Manager enables you to configure different client providers for each one of your environments. Depending on the environment where your data graph runs, your client applications might need to authenticate using either the default Anypoint Platform native client provider or any of the supported external client providers. See About Client Management for more information.
If you don’t configure any specific client provider for an environment, Anypoint Platform uses its default and native client provider.
When your environment uses an external client provider, the Request access pop-up shows the required and optional fields defined in the external client provider implementation.
For example, when querying the /api-federation/xapi/organizations/{organizationID}/environments/{environmentID}/type/federation/api/clientProvider/ endpoint, returns the configured grant types for that environment:
{
    "id": "aaaaaaaa-1a1a-1a1a-1a1a-aaaa1111aaa1",
    "name": "OpenAM",
    "typeName": "openam",
    "grantTypes": [
        {
            "name": "password",
            "label": "Resource Owner Grant",
            "depends": [],
            "exclude": [],
            "required": true (1)
        },
        {
            "name": "implicit",
            "label": "Implicit Grant",
            "depends": [],
            "exclude": [],
            "required": true (1)
        },
        {
            "name": "client_credentials",
            "label": "Client Credentials Grant",
            "depends": [],
            "exclude": [
                "authorization_code" (2)
            ],
            "required": false
        },
        {
            "name": "authorization_code",
            "label": "Authorization Code Grant",
            "depends": [],
            "exclude": [
                "client_credentials" (2)
            ],
            "required": false
        }
    ]
}
Those grant types properties are reflected in the UI when configuring access for a client:
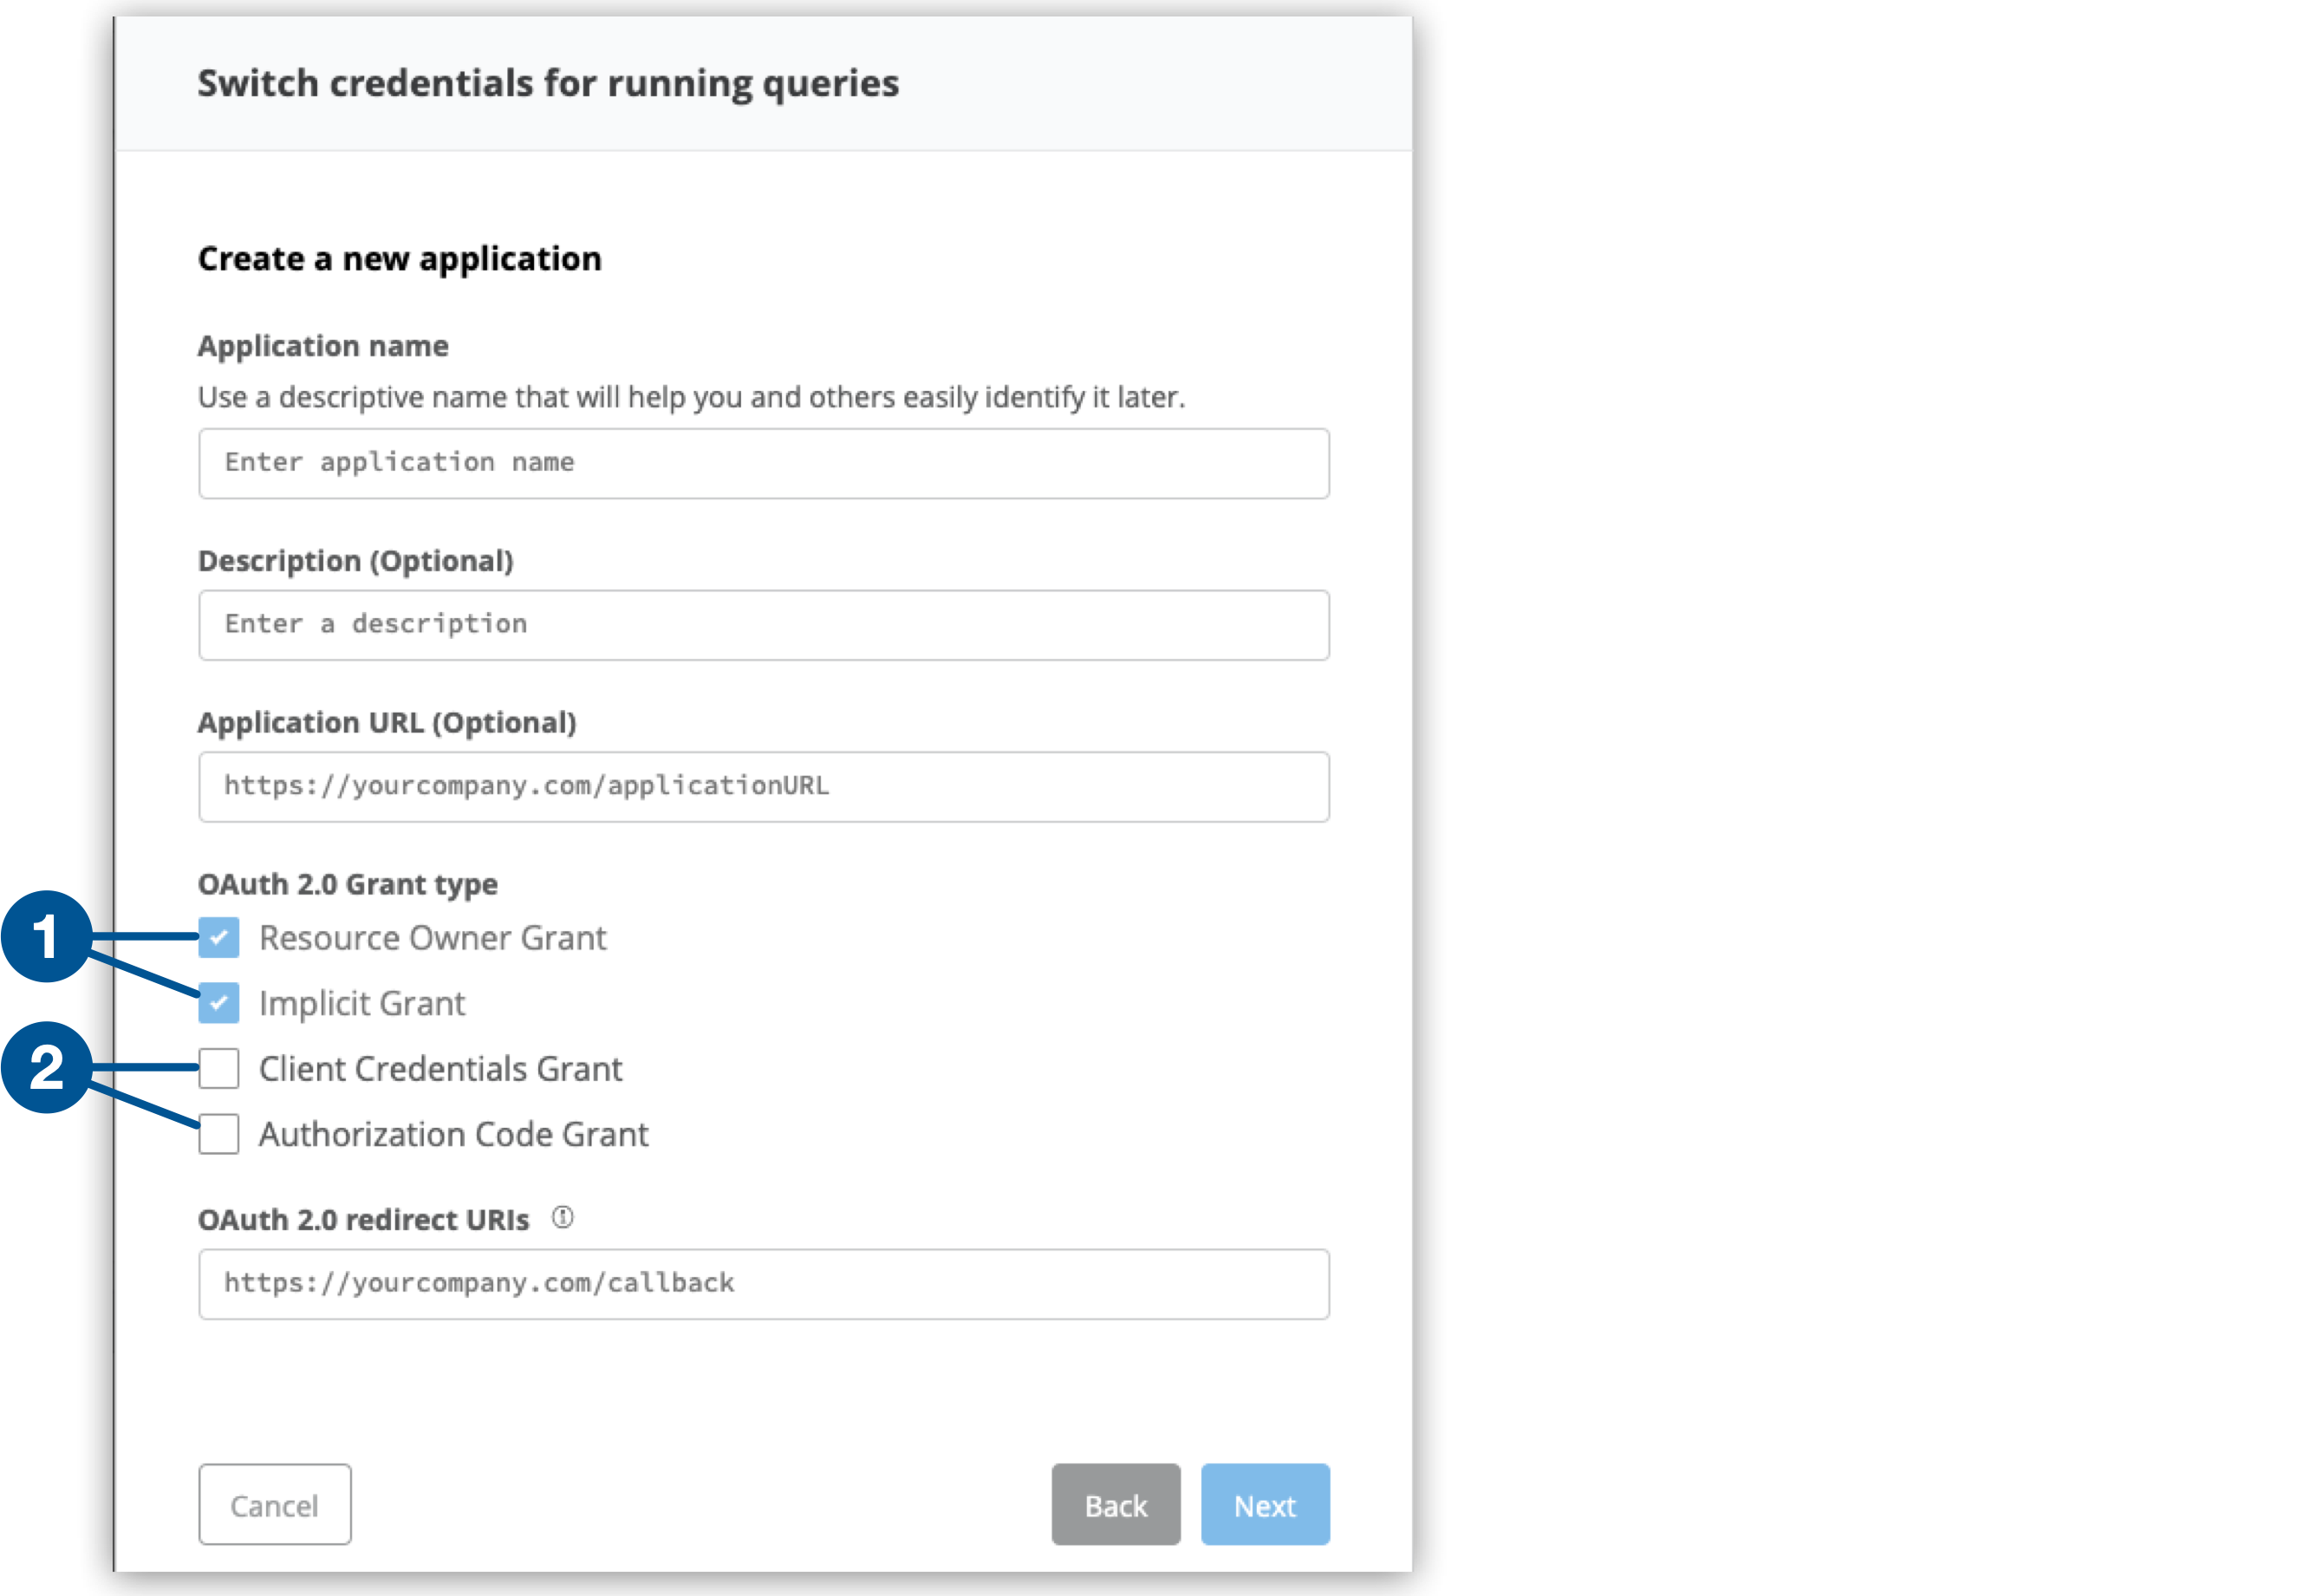
| 1 | Both Resource Owner Grant and Implicit Grant are marked as required in the UI. |
| 2 | Both Client Credentials Grant and Authorization Code Grant are mutually exclusive in the UI. |