Image Search
The Image search Action Step searches for a user-defined image, waits until it appears or disappears, and can also be used as a relative anchor point for mouse clicks. Image in this case does not only mean picture, but also includes the visual representation of lettering or control elements like buttons.
The most common use cases for Image search are:
-
Calculating loading times
To compute the loading time of a webpage or an application loading data from a distant server, it is not sufficient to wait for the window to appear. In such cases, the webpage or application can only be said to be loaded when the content is also visualized; that is, when an image can be seen.
-
Checking for feedback from remote applications
When the measured application is running on a distant system and the Workflow has to use a Citrix client, VCN, or a similar remote connection tool that only displays the user interface graphically but does not give back handles, Image search is the only way to ascertain that the desired content has appeared onscreen.
-
Positioning the mouse relative to an image
Finally, the position of the image can be used to place a mouse click relatively to the image, for example to enter a URL in the address bar of a web browser, or to enter login information into user and password fields.
What the Image search actually does is compare the recorded Pattern image to the whole Search area. During execution, it takes a screenshot of the Search area, applies the selected Image search algorithm to it, and then compares it to the Pattern image. The Search area adjusts automatically if the executing computer has a different screen resolution to the computer the Workflow was originally created on. Also, uses the lowest common color depth setting, so for example, if you created an Image search with a color depth of 32 bits, but the executing computer only has a color depth of 16 bits, the original Pattern image is converted on the fly to match the current system’s color depth. You can adjust this within the Workflow Properties.
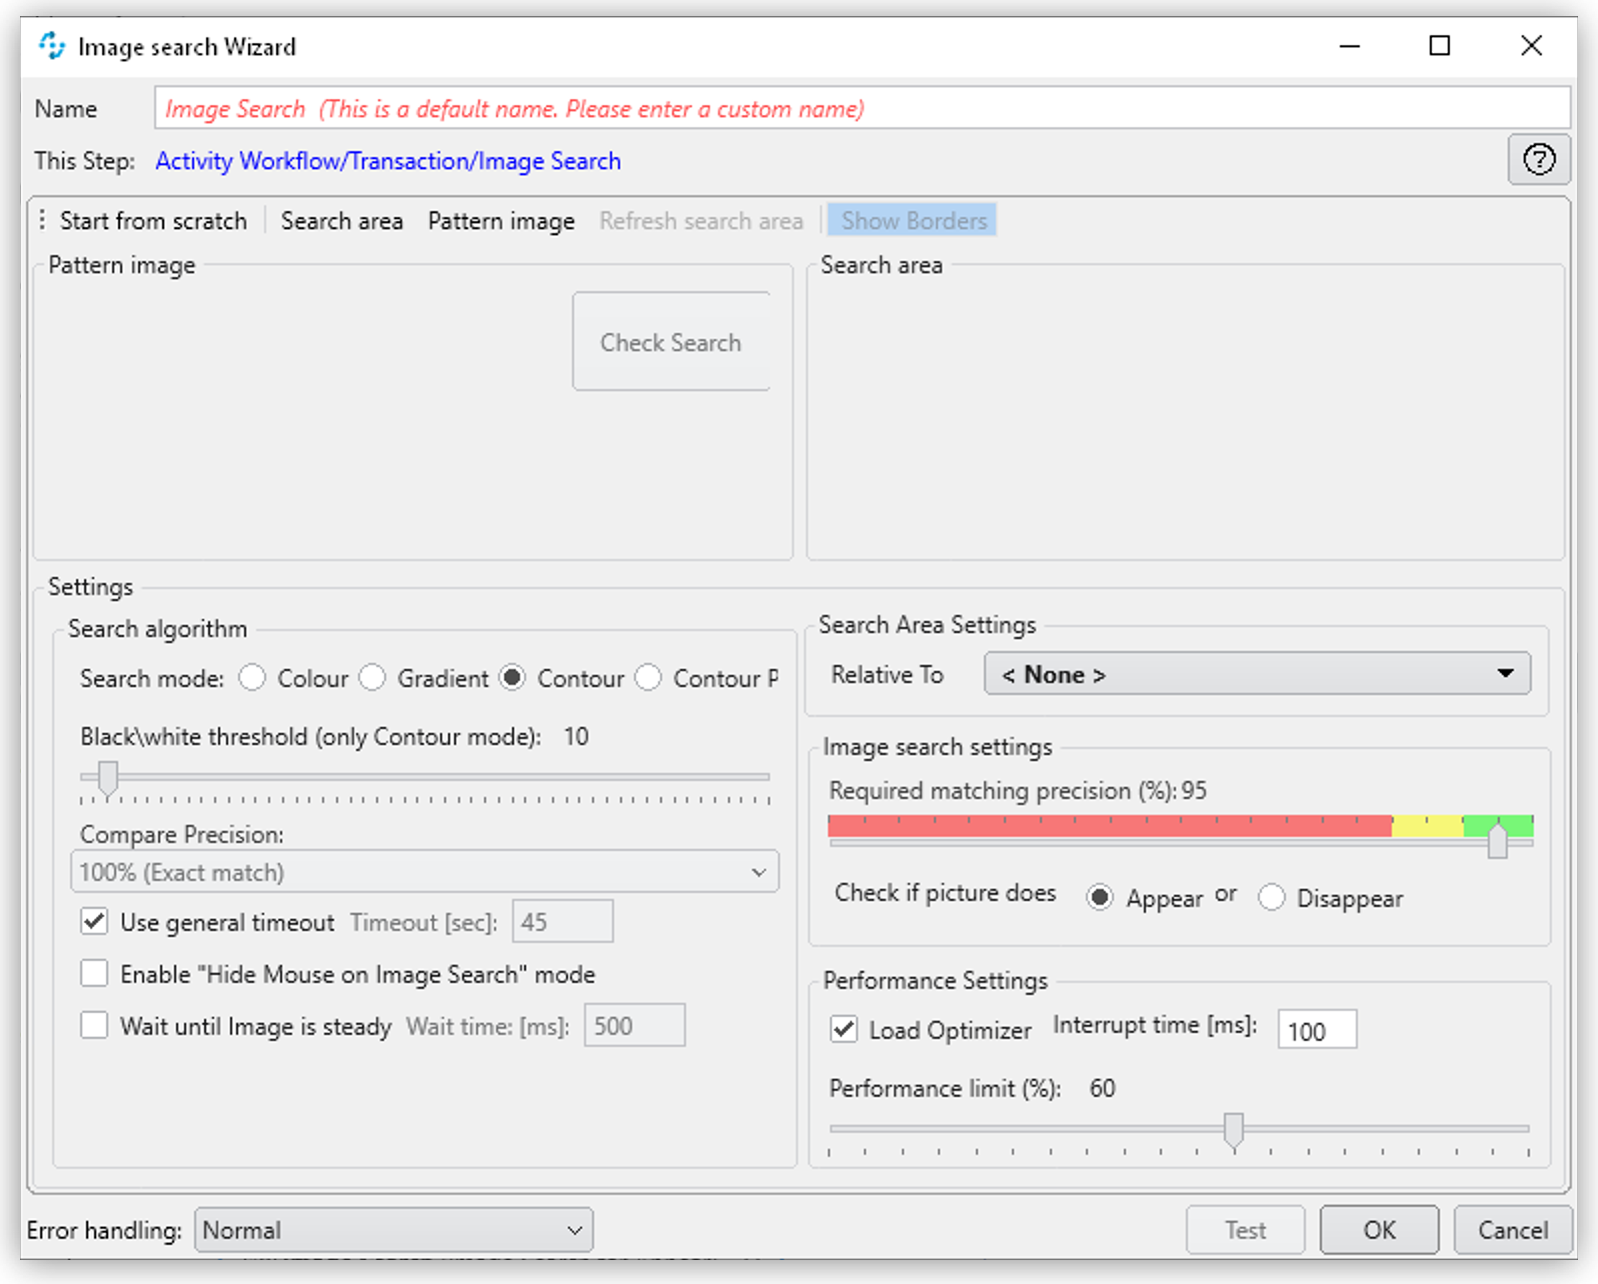
Properties
-
Compare Precision
This is an additional setting for the search algorithm modes Color and Gradient. In these modes the actual color value of a pixel is recorded. The result is not the exact same value every time a pixel value is calculated by the GPU. By lowering the compare precision to 98% or 97%, you can allow the value to vary a little in the least significant bits.
-
Edge detection threshold
Threshold for the difference (distance) between colors that leads to the detection of an edge. A low threshold leads to many detected edges because even a small difference in a pixel’s color value in comparison to its neighbors' is detected as an edge. Conversely, a high threshold leads to fewer edges in the Pattern image the algorithm is searching for.
-
Hide Mouse
If this option is enabled, the mouse pointer is moved to the upper left corner of the desktop during the Image search. Enable this to avoid triggering hover effects in applications and on websites. This is to ensure that the mouse pointer is not partly covering the image searched for. Afterwards it is moved back to the previous position.
-
Image search algorithm
Image search algorithm to use. Available options are Color, Gradient, Contour, and Contour Plus.
See The Different Search Modes for a descriptions of these modes.
-
Image search type Search for picture appear
Search for the picture until it appears. As soon as it can be detected, the Image search is considered successful.
-
Image search type Search for picture disappear
The Image search is considered successful as soon as the image cannot be found. An image does not have to be found first, so if finding the image is necessary an Image search with search type Appear must be performed first.
-
Original desktop color depth
(Properties grid only): Color depth in bits at the time the image was recorded.
-
Original desktop height
(Properties grid only): Desktop height in pixels at the time the image was recorded.
-
Original desktop width
(Properties grid only): Desktop width in pixels at the time the image was recorded.
-
Pattern Image File Path
(Properties grid only): File location of the recorded image.
-
Pattern image rect
(Properties grid only): Original coordinates (upper left corner, lower right corner) of the rectangular area on the desktop enclosing the image to be searched.
-
Percentage required
Determines tolerance of the Image search, i.e. the minimum quality percentage threshold needed for successful identification of an image. A lower value means a higher tolerance, but also increases the likelihood of a false positive. To avoid false positives, do not set this value below 90%.
-
Relative To
Makes the Search Area relative to a previous Image search, in the same way as for the Mouse Clicks Action Step.
-
Search area rect
(Properties grid only): Original coordinates (upper left corner, lower right corner) of the rectangular area on the desktop enclosing the Search area.
-
Wait time [ms]
The pause between two subsequent image searches (only used if Wait until image is steady is activated).
-
Wait until image is steady
This function is used to perform a second Image search after the image is detected and introduces an additional Wait time. The result of this second run compared to the previous one is to ensure that the image is still there and has not changed its position. If the results are equal, then the Image search is considered successful. If not, additional Image searches are performed until two subsequent ones have the same result or until the timeout is reached.
-
Interrupt time [ms]
Mainly used for Java Applications: time in milliseconds the service stops searching for a picture to provide CPU resources to an application with bad performance (only applicable if Load Optimizer is activated).
-
Load Optimizer
If enabled, there is a pause between every attempt to find the image onscreen, as defined by the Interrupt time setting. This pause allows time for other programs to do something when running on a single core computer.
-
Performance Limit (%)
Defines how much of the CPU performance can be used for the Image search (only applicable if Load Optimizer is activated).
Wizard
-
Start from scratch
Starts the configuration using all steps.
-
Search area
Only reconfigures the Search area, using a previously captured image.
-
Pattern image
Only recaptures the image to search for
-
Refresh Search area
Refreshes the Search area frame on the right-hand side of the wizard with the current desktop situation, so you can check if the defined Search area still includes the image.
-
Show borders
If active; the Pattern image is marked with a blue border and the Search area is marked with a red border in the Search area frame.
-
Pattern image
Shows the recorded image that is used in searches.
-
Check search
Evaluate the probability the captured image is found. The result shows in a box before the Pattern image frame and comprises the position of the image found, as well as the match precision in percent (this feature uses the current desktop and not the image shown in the Search area frame).
-
-
Search area Shows the desktop situation when the image was captured onscreen. If Show Borders is active, borders of the search image are shown in blue and borders of the Search area are shown in red. If you performed a Check search and the image could be found, its position is marked by a green border.
Starting the Capture Process
To start configuring Image search using the wizard:
-
Click Start from scratch.
-
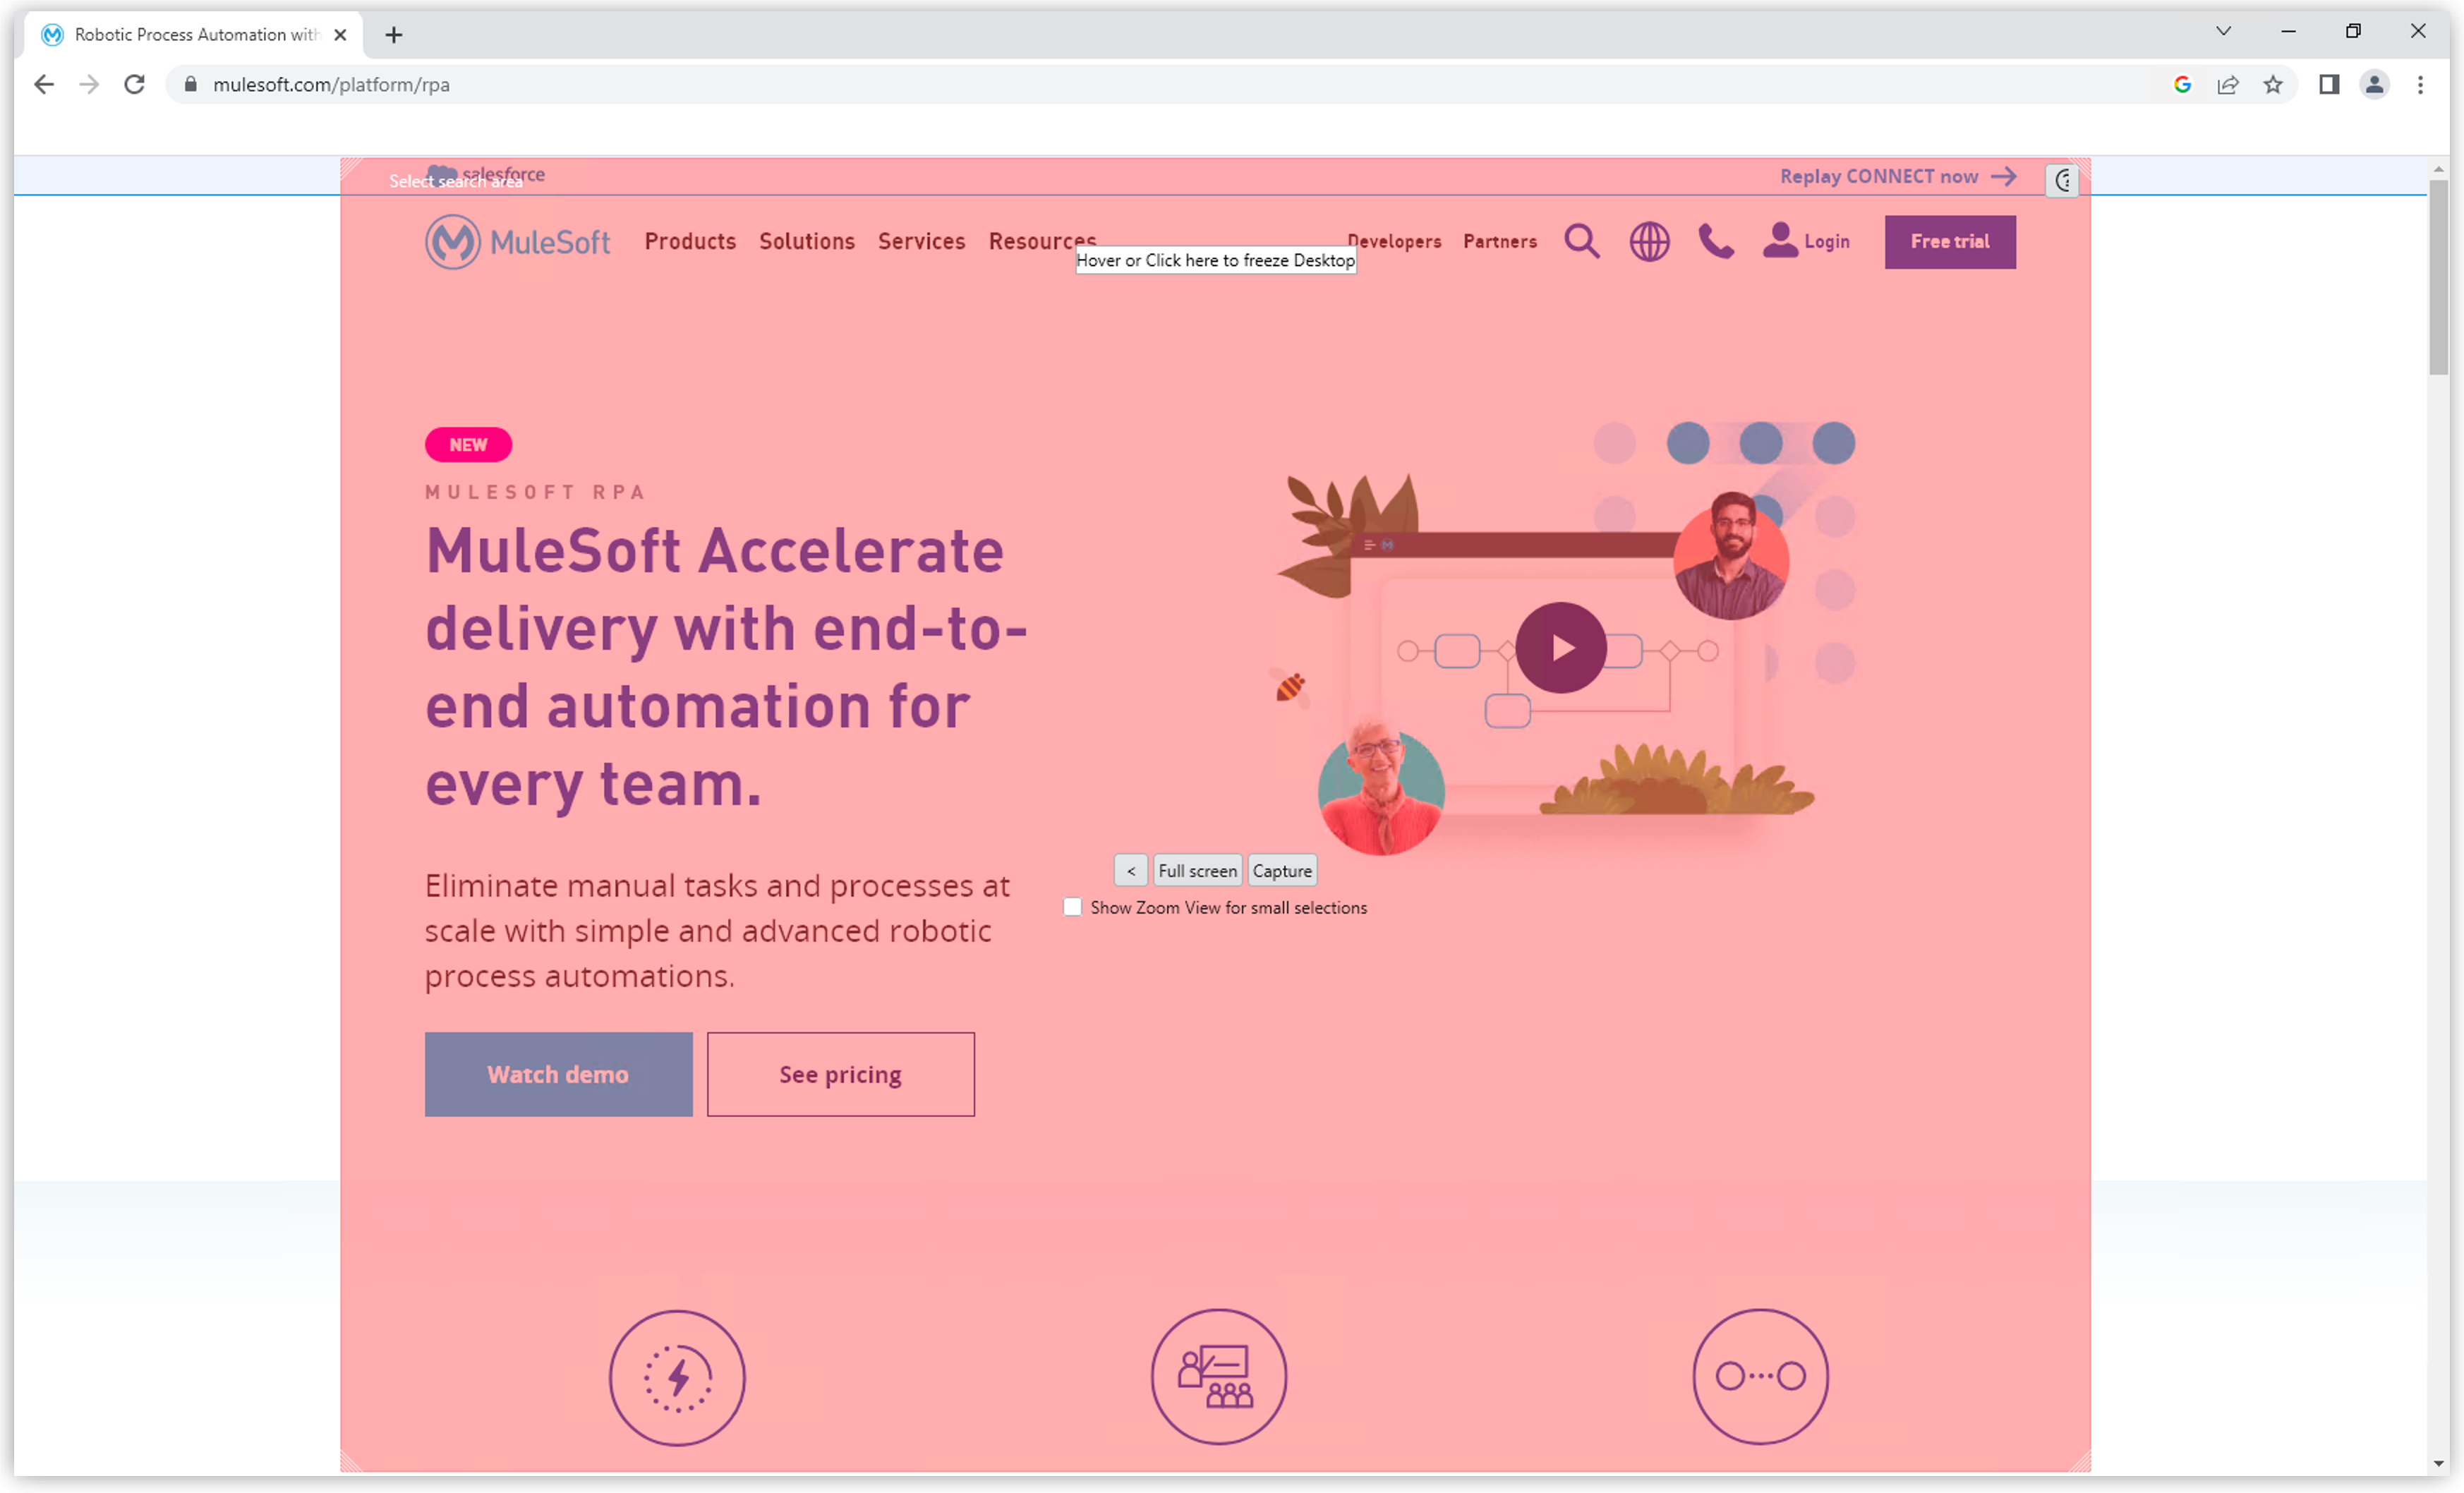
Drag the blue selection frame onto the desktop section that contains the image you want to search.
This selection frame always lies on top of the desktop view, so you can switch to any desktop section containing the image without losing sight of the selection frame.
-
Adjust the size of the selection frame to match the content.
To narrow the selection frame down to the relevant content, grab the edges and resize it. You can also fine-tune the frame by pressing the arrow keys on your keyboard, which moves the frame by 1 pixel at a time; if you press Ctrl + arrow key, the frame moves by 5 pixels at a time. Pressing Shift + arrow key resizes the frame 1 pixel at a time.
Choosing and capturing the correct pattern is essential for creating a stable Workflow. You need to select a pattern that does not change, is unique, is initially visible at all screen resolutions the Workflow will run with, and (ideally) does not change its position much.
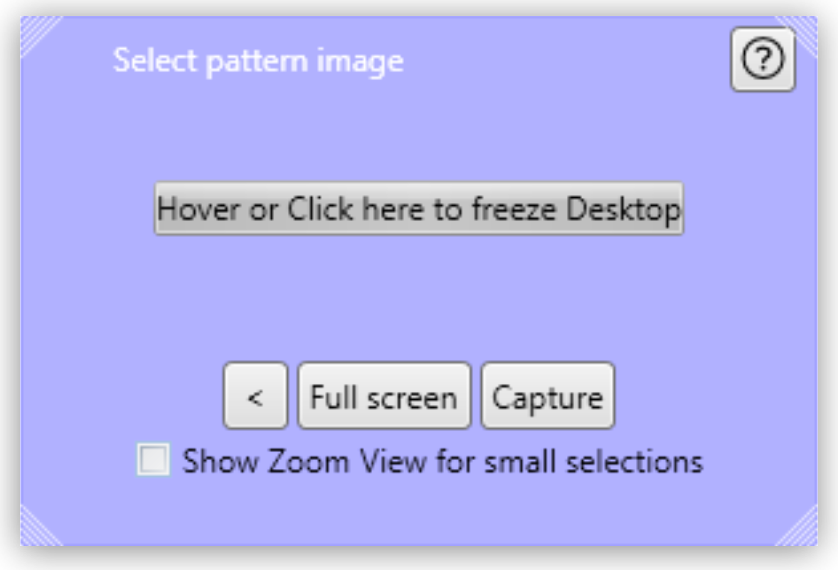
Freezing the Desktop
If you want to capture a Pattern image that is only visible for a short time or under specific conditions, you can freeze the desktop in its current state to select the Pattern image. To freeze the desktop, press Pause on your keyboard. You can also click on the bar Hover or click here to freeze Desktop to start a timer. Then you have five seconds to create the situation on the desktop that you want to capture. Use the freeze function to capture things that only show with direct mouse input, such as hover effects.
Once the desktop is frozen, a big Unfreeze button appears on the selection frame. Click it to unfreeze the desktop again.
Using Zoom View for Small Selections
If you have to capture a very small part of the screen (which is always a good thing if this part is unique enough to be used for identification), you might need an enhanced view of the Pattern image content. Enable the checkbox Show Zoom View for small selections in the blue frame to make a zoom view window appear onscreen. This window only appears for small selections and disappears if your selection gets too big.
Capturing the Image
Make sure the image contains as many contours as needed to identify the
desired part of the screen with 100% certainty. Try to keep images as
small as possible, because smaller images can be found faster and do not
need as much CPU performance. Avoid leaving too much empty space around
the image. If you are satisfied with the selection either press F10,
click Capture or double-click anywhere on the frame to save the
selected area as the Pattern image.
Your Pattern image size should always follow the rule "as big as necessary, as small as possible" to ensure a good, steady search performance.
Capturing the Search Area
After you captured the Pattern image, a red frame appears to define the search area.
This is the area of the screen that will later be searched for the Pattern image. Again, this selection should be "as big as necessary, as small as possible" – it needs to be large enough to always contain the Pattern image, but as small as possible to reduce the CPU load during the search. A larger Search area always means a higher CPU load and higher response times. However, keep in mind that the Pattern image to be identified may be displayed in different desktop positions, so do not narrow the Search area down too much.
You can save the Search area the same way you saved the Pattern image.
After selecting the Pattern image and the Search area, RPA Builder evaluates the accuracy with which the defined image is currently found.

A newly recorded image search should always be found with 100% accuracy.
The Different Search Modes
The Image Search Action Step supports the following search modes:
-
Color
The simplest and fastest search algorithm. In the default configuration, the color of the image searched must exactly match the color of the recorded image. However, because the color values of images can differ on the machines the Workflow will run on (depending on the graphics hardware used), you may downscale the Compare Precision settings to stabilize the image search. The color match precision can be downscaled from 100% (exact match) to 88% (ignoring the least significant four bits of the color value).Use the Color search algorithm only if the hardware the Workflow runs on does not differ from the hardware it was created on.
-
Gradient
Uses edges to detect the Pattern image, but checks gray values before the actual edge search is performed. Thus it can detect the presence of an image faster than contour mode using a similar precision. Using gray values has the side effect of being less tolerant regarding color variations than in contour mode. Also, colors leading to the same gray value cannot be distinguished from one another. -
Contour
The default and recommended search algorithm. It is very stable regarding color variations and can handle changes in color depth and different desktop resolutions. It creates a contour search image based on the transitions between the different color values in the Pattern image by reducing all colors to black areas while edges become white lines. -
Contour Plus
This search algorithm was created specifically to identify characters and writing. It uses the same technique as Contour mode, but with additional compensation for font smoothing.
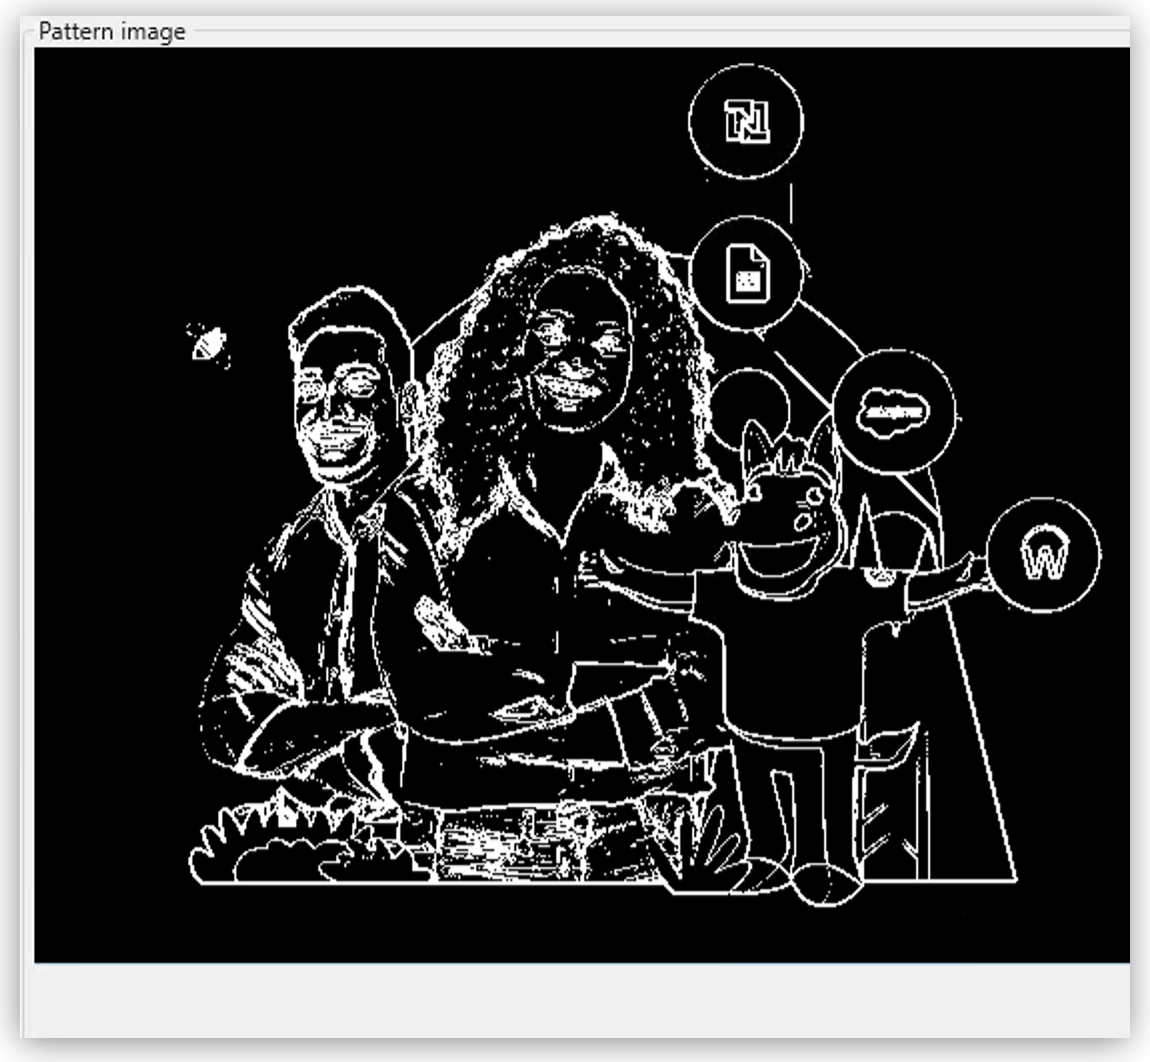
Adjusting Threshold for Contour and Contour Plus Mode
When you use one of the contour modes, you can adjust the black/white threshold. The default value, 10, is usually the optimal setting for images with high contrast; you should not need to adjust it, particularly if you are searching for text. However, when searching for low contrast Pattern images and actual pictures, you might need to adjust the slider until you see a clear contour.

For example, consider that we want to use the two people in this image as a Pattern image in Contour mode:

After recording the image, the default value of the threshold produces this Pattern image:
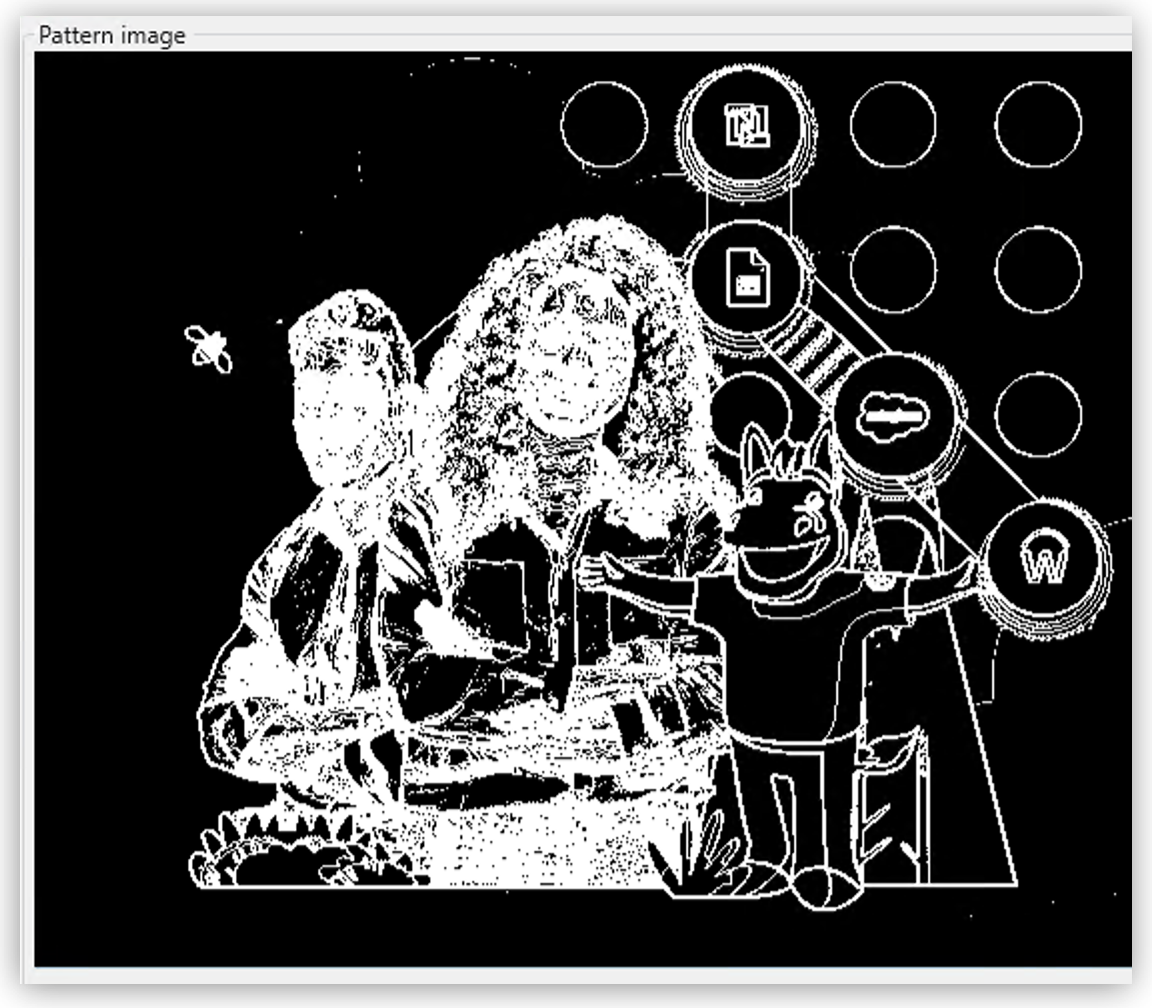
In this image, you can see that a lot of the subtle variations in the colors created edges in the contour picture.
By increasing the black/white threshold, the Image Search ignores the subtle color variations, resulting in a clear contour that allows for more reliable picture detection:
Troubleshooting
If you have problems finding the same picture on different machines, ensure that the system parameters of these systems are all the same.
If you are still having problems, you can decrease the required match precision. But be careful, if the required percentage is too low, the Image Search Action Step might find the Pattern image even though it does not exist.
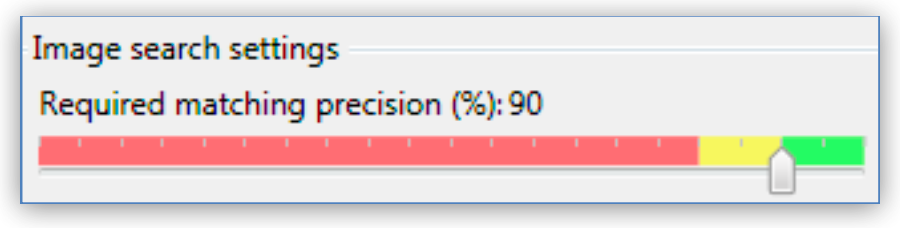
| To avoid false positives, do not set the match precision below 90%. |