Create an API Specification Project in Studio
Studio enables you to create a RAML API specification, an OAS 2.0 or 3.0 API specification, or an API fragment, and automatically sync it with MuleSoft VCS.
| Studio uses the EGit plugin to edit API specifications offline. Studio doesn’t support the EGit plugin for Mule application projects tracked with your own VCS. |
To start creating an API specification project in Studio, log in to Anypoint Platform. See Adding Anypoint Platform User Accounts.
-
In the taskbar of the Anypoint Studio display, select File > New > API Specification Project.
-
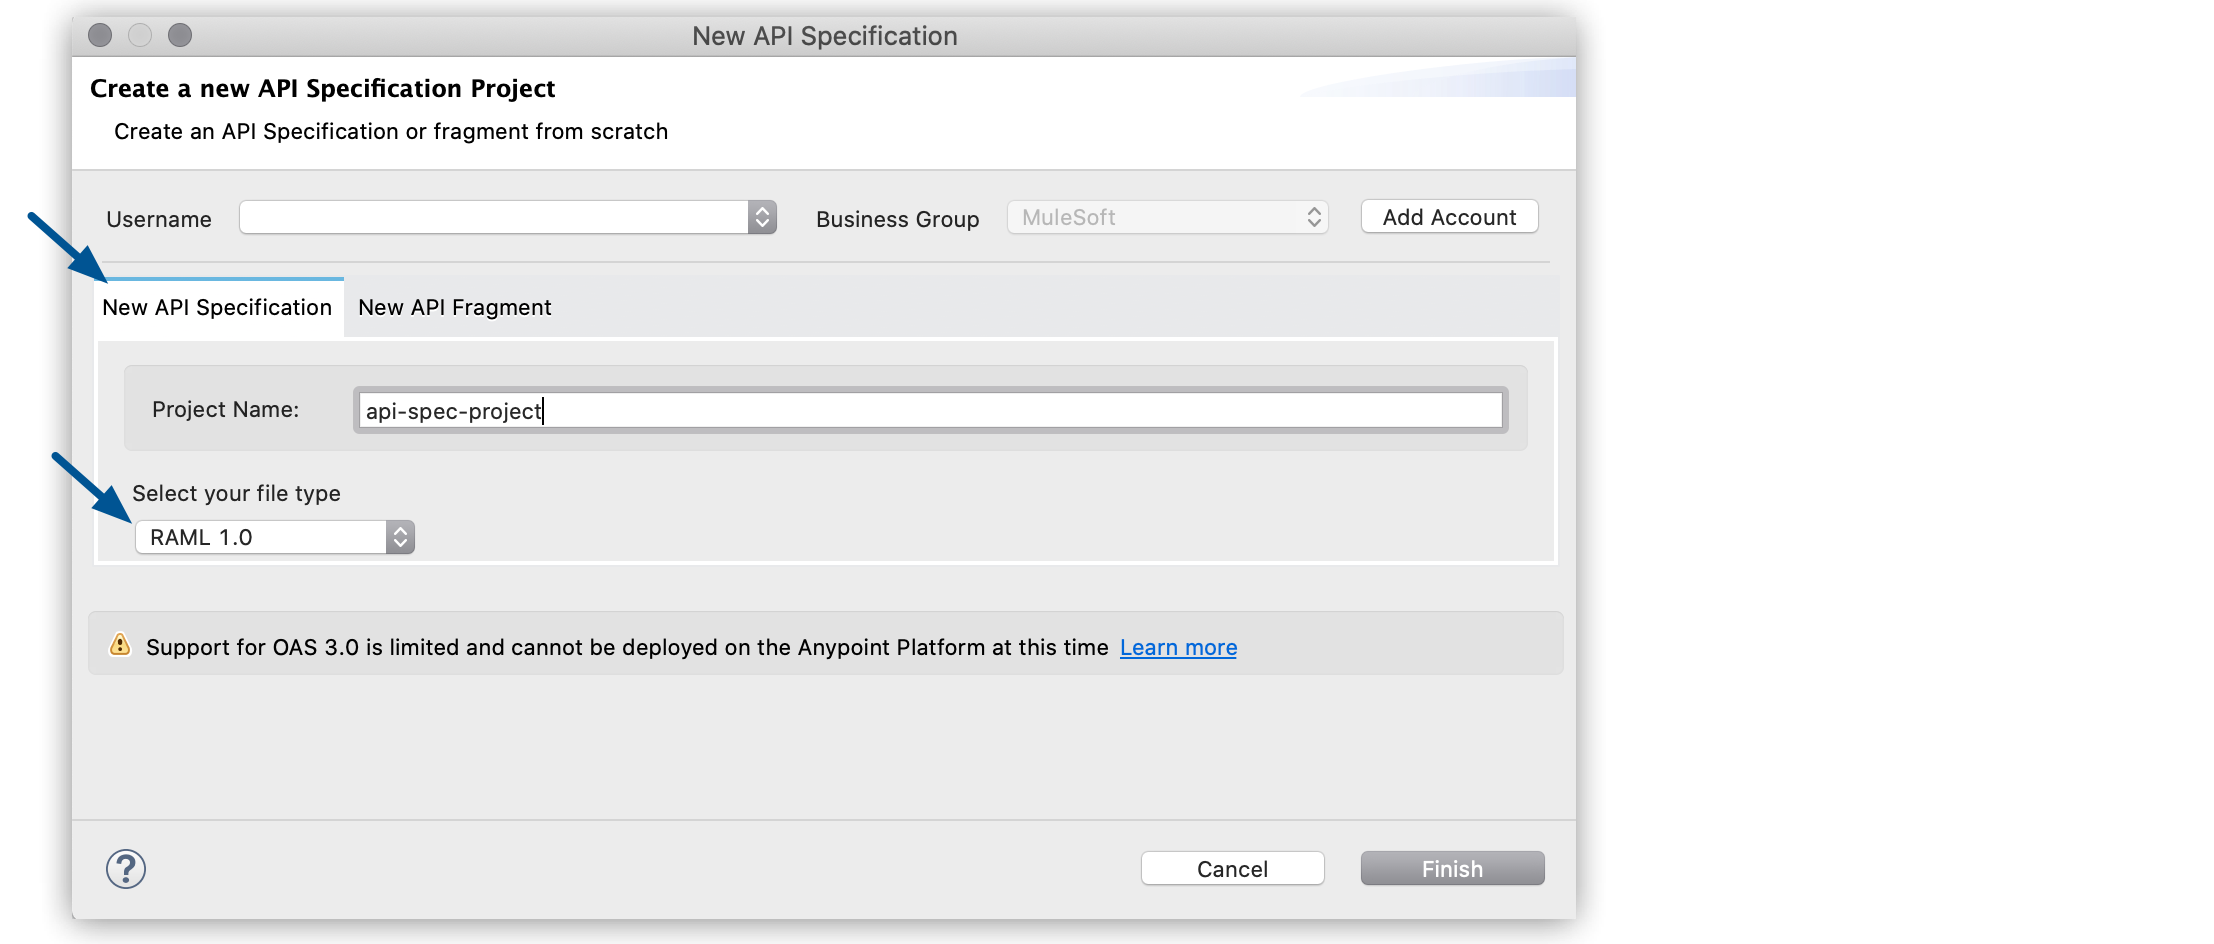
Select the tab of type of API specification project to create:
-
Create a new API specification by selecting the New API Specification tab and the type of API.
-
To create a new API fragment, select the New API Fragment tab, and then select the type of API fragment.

-
-
Type a name for your project.
-
Select Finish.
Studio prompts you to switch to the API design perspective.
In the API design perspective, use the API editor to write your API specification or API fragment. Additionally, you can use the API Console view to mock a live service so you can test your API specification.
Studio uses VCS to track the development of your API specification project and keep it synchronized with MuleSoft VCS.
Create Branches
Using a different branch enables you to use a modified API definition in certain cases, without modifying the main branch in MuleSoft VCS.
To create a different branch in Studio:
-
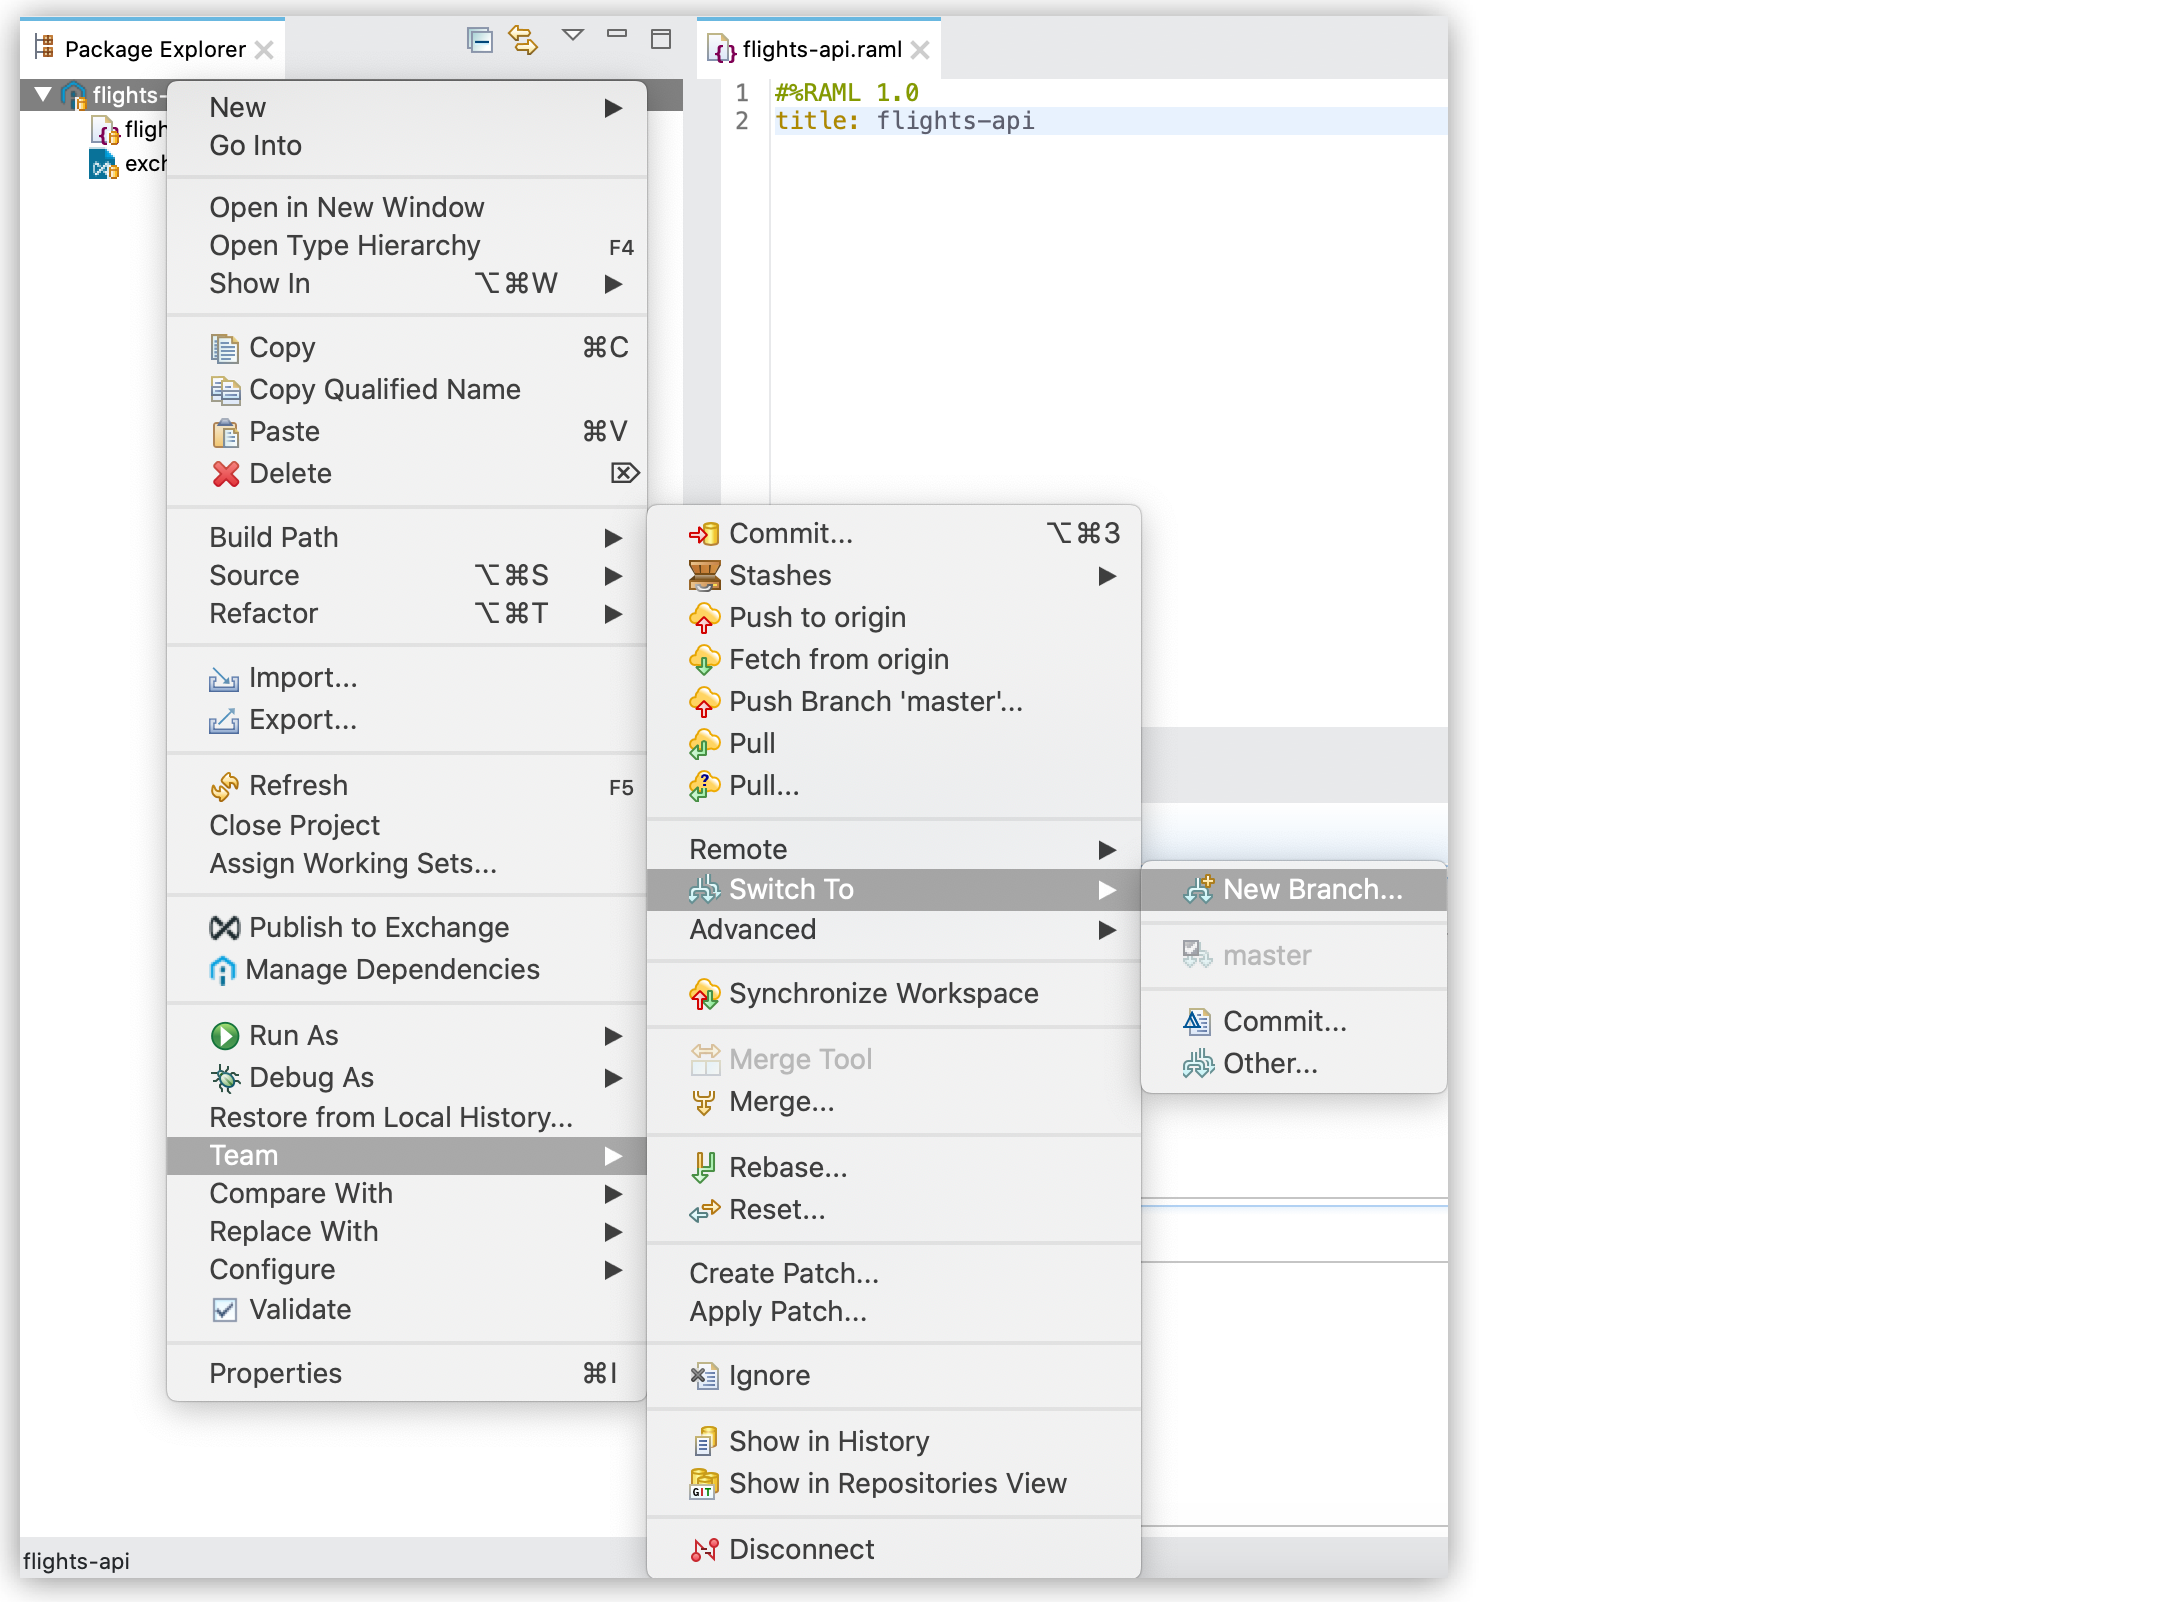
In the Package Explorer view, right-click your API specification project and select Team > Switch To > New Branch.
-
In the Create Branch window, configure your new branch:
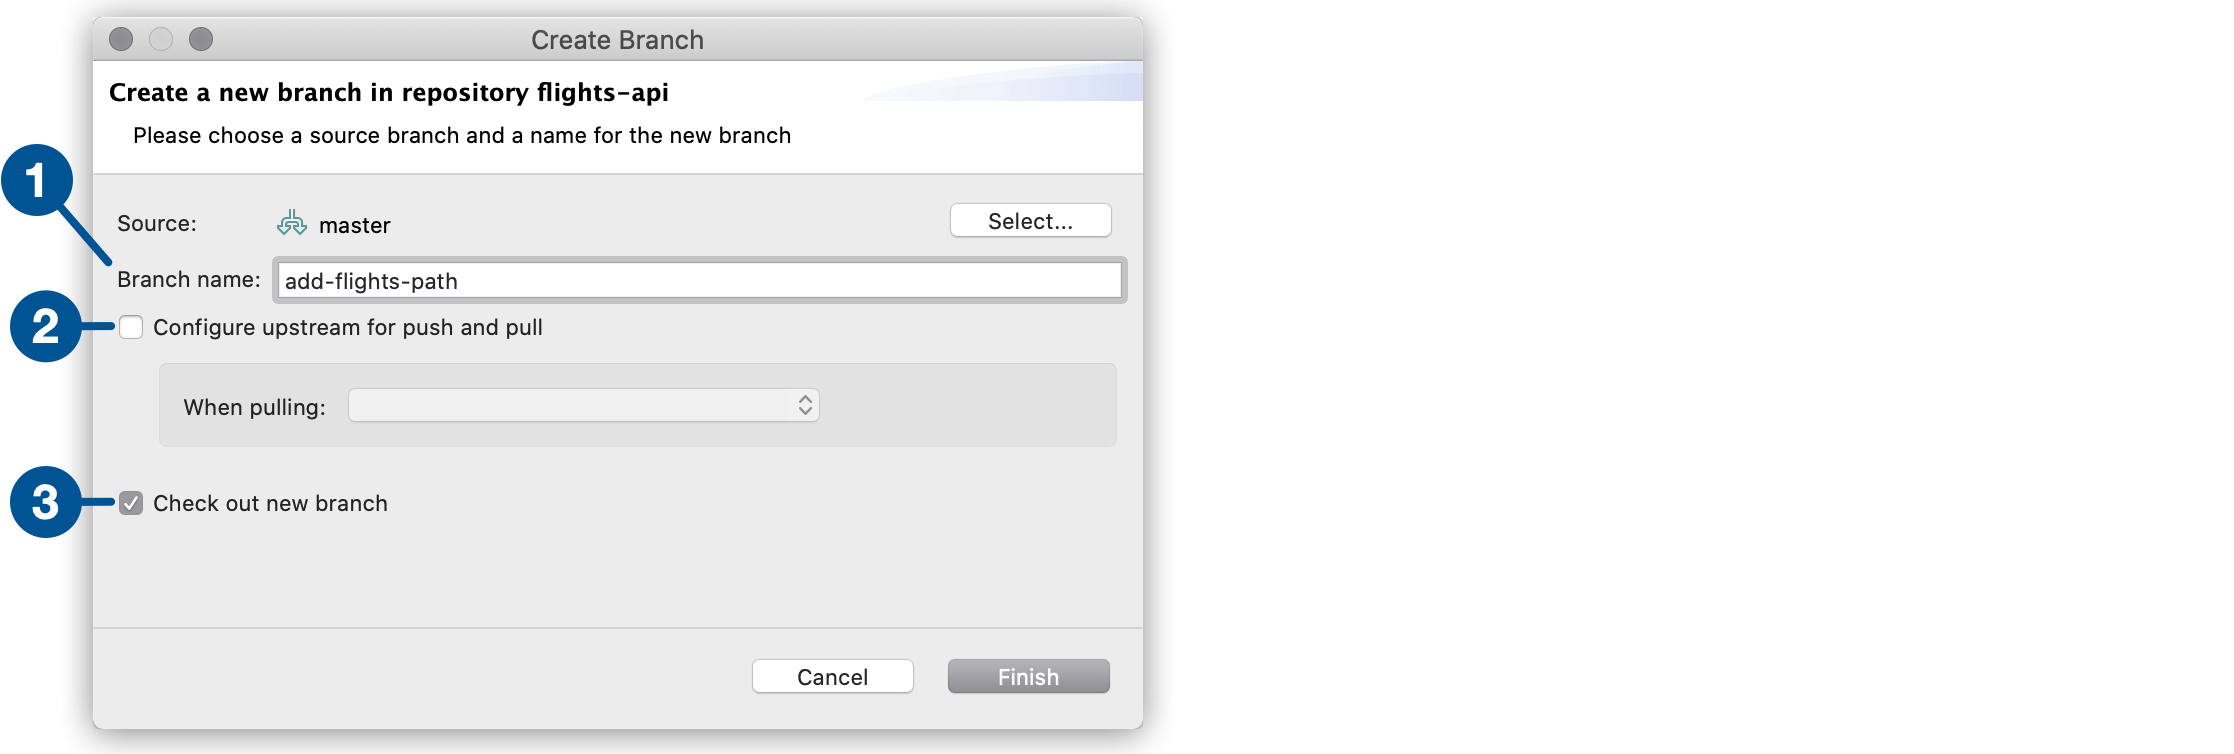
| 1 | In the branch name field, type the name of your new branch. |
| 2 | You can select the Configure upstream for push and pull option if you want to also pull changes from MuleSoft VCS into your local branch.
When configuring this option, you must select the behavior you want Git to have when it pulls the changes from MuleSoft VCS. |
| 3 | Select the Check out new branch for Git to switch to this new branch as soon as you create it. |
-
Select Finish.
With a newly created branch, you can start committing your changes.
Commit Changes to Your API Specification Project
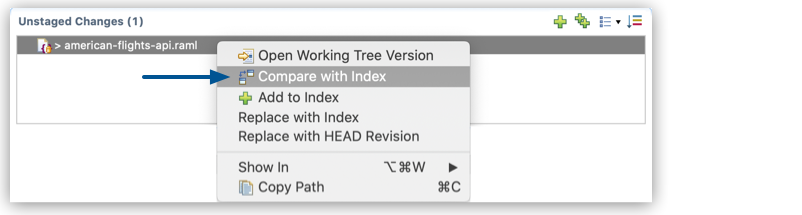
The VCS in Studio tracks every change you make to your project and shows them in the Unstaged Changes area of your Git Staging view.
You can track your changes to a file by right-clicking it in the Unstaged Changes section and selecting Compare with index:
After applying your changes, add them to your index:
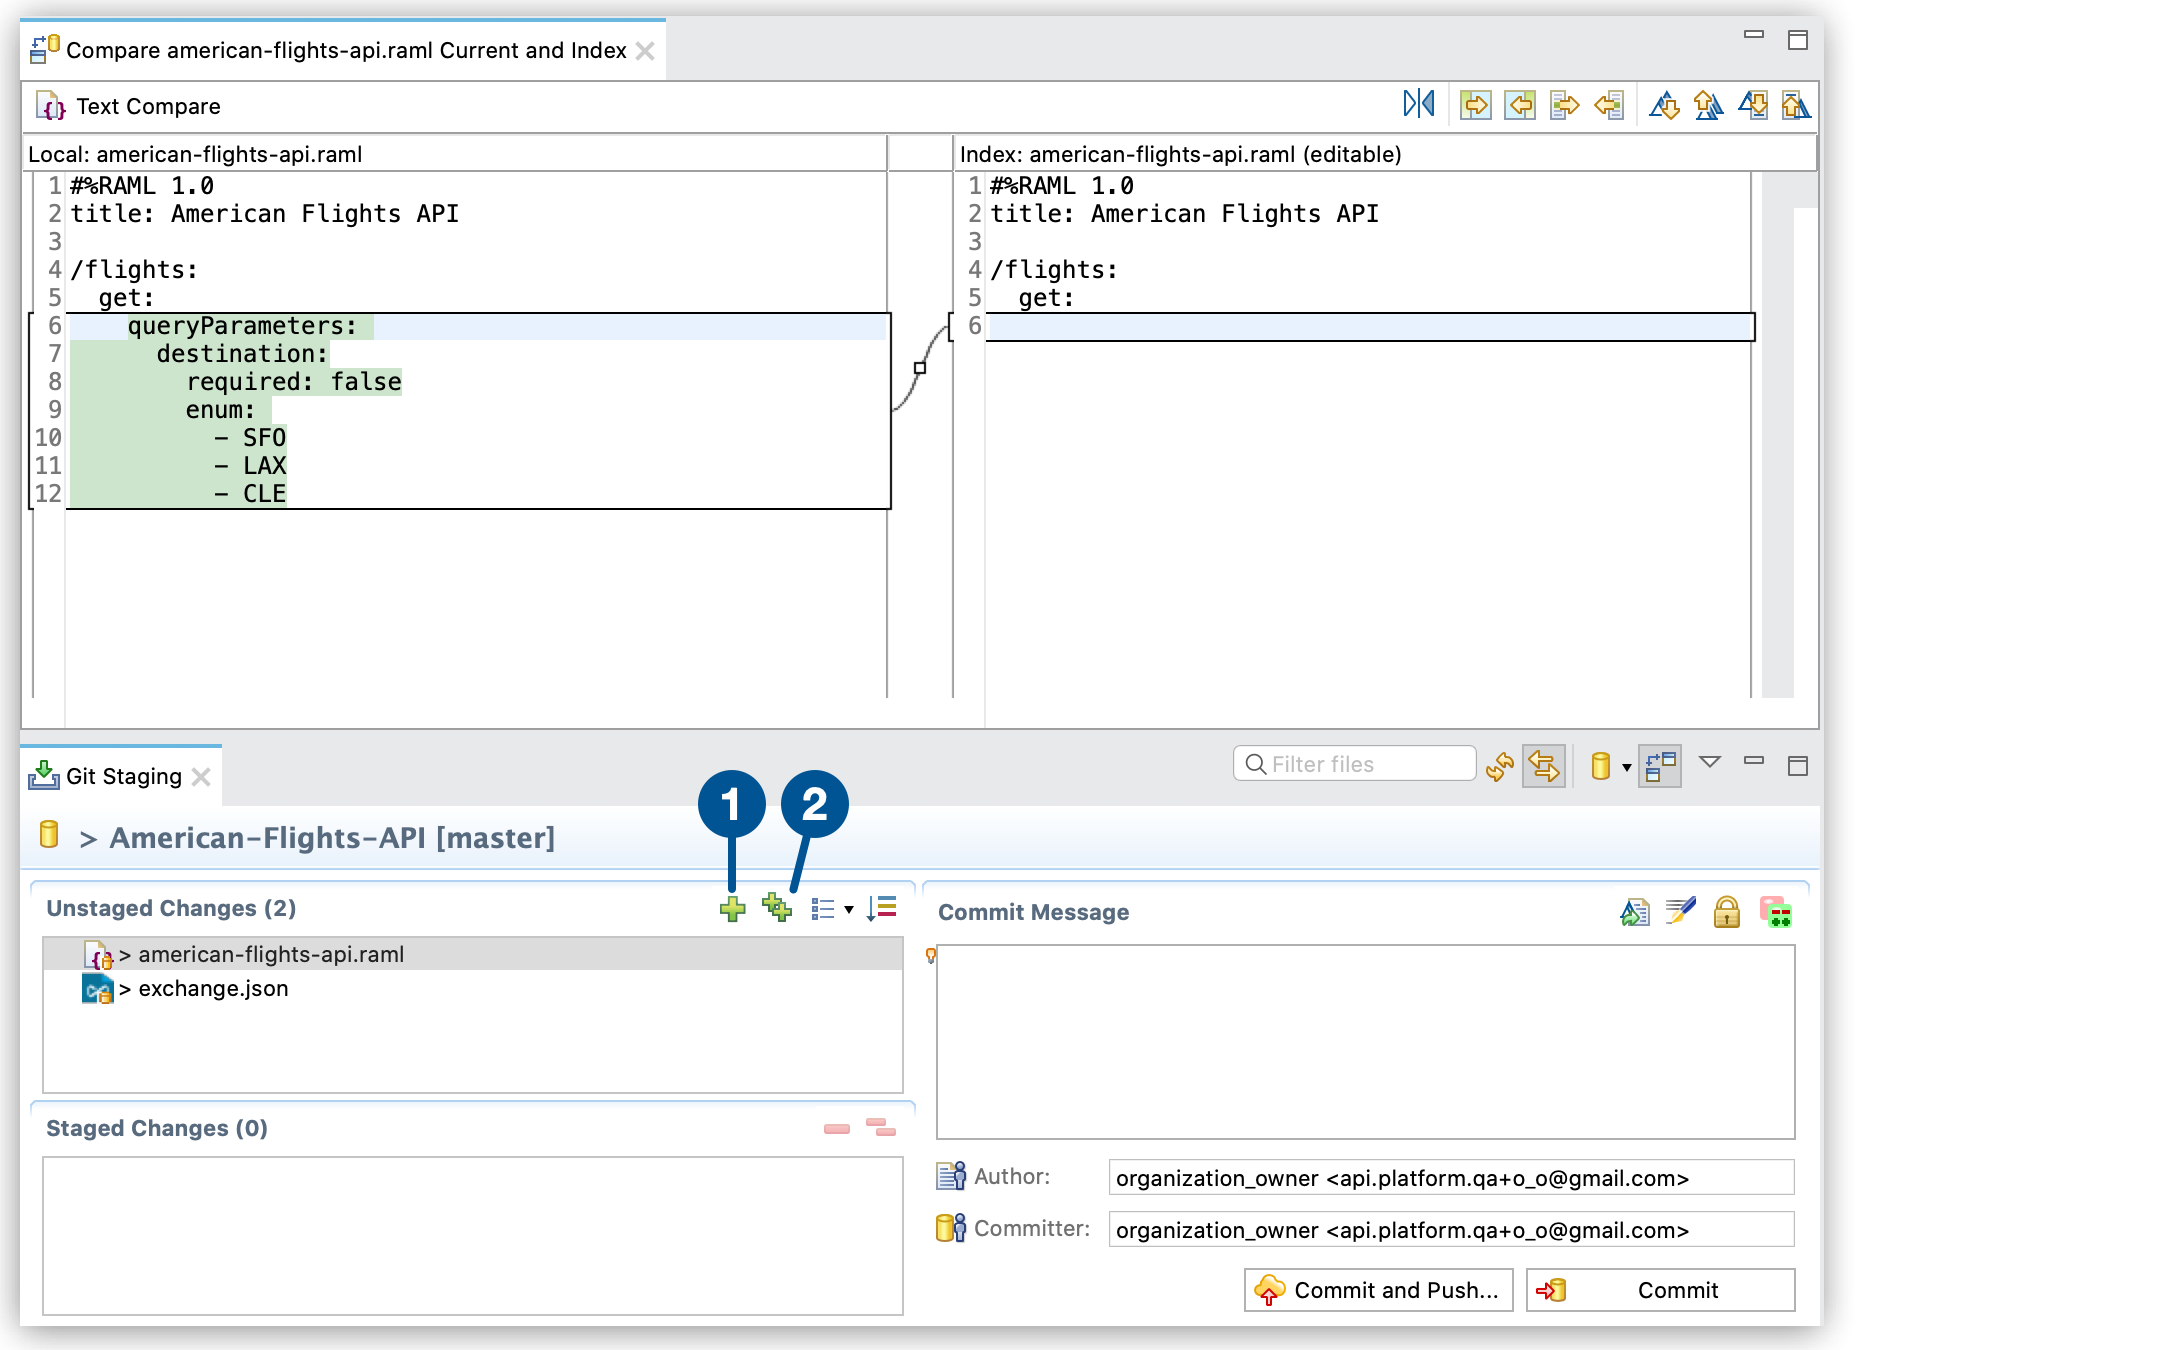
| 1 | Use the Add selected files to the index icon to stage for commit the files that you selected. |
| 2 | Use the Add all files including not selected ones to the index icon to stage for commit all unstaged changes. |
When you staged the changes that you want to commit, write a commit message in the Commit Message section:

| 1 | Select Commit and Push to also push the change to MuleSoft VCS.
See Push Your Branch to MuleSoft VCS below for more information. |
| 2 | Select Commit to add the commit to your local copy. |
See Git Staging View Reference for more information about this view.
Merge and Push Your API Specification Project
Merge the changes made to your API specification to your main branch and sync it with MuleSoft VCS.
-
In the Package Explorer view, right-click your API specification project and select Team > Merge > Push Branch.
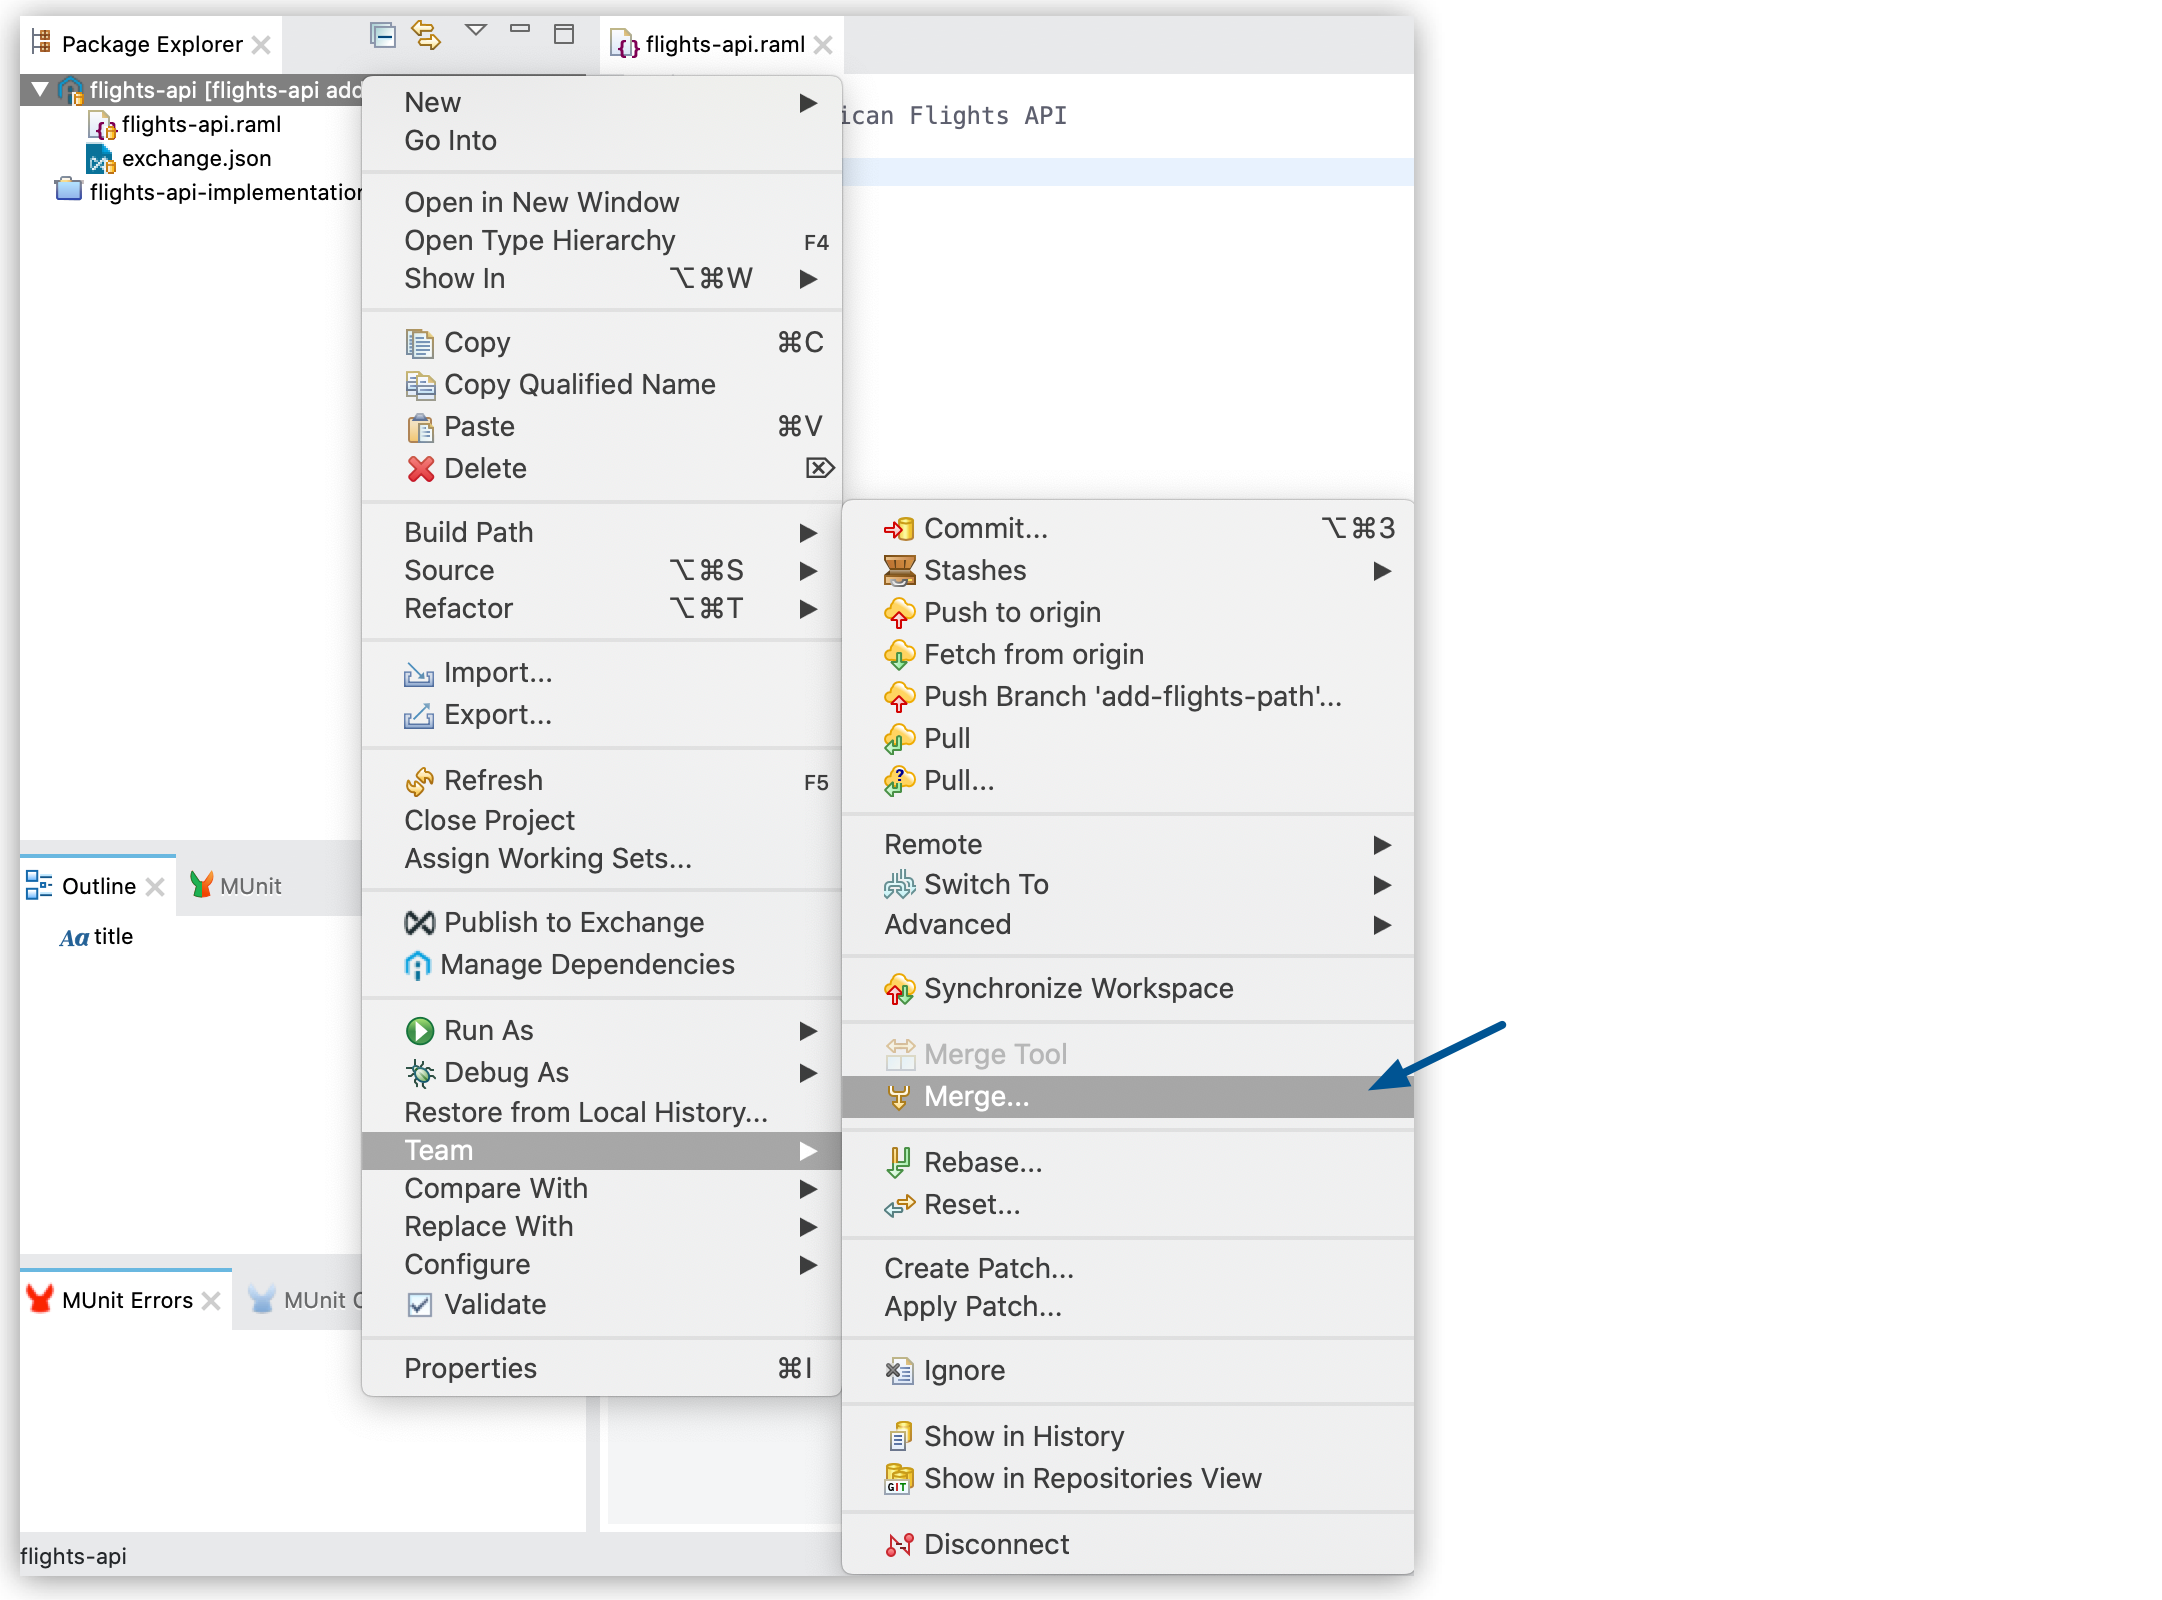
-
Select the local branch to which you want to merge your changes:
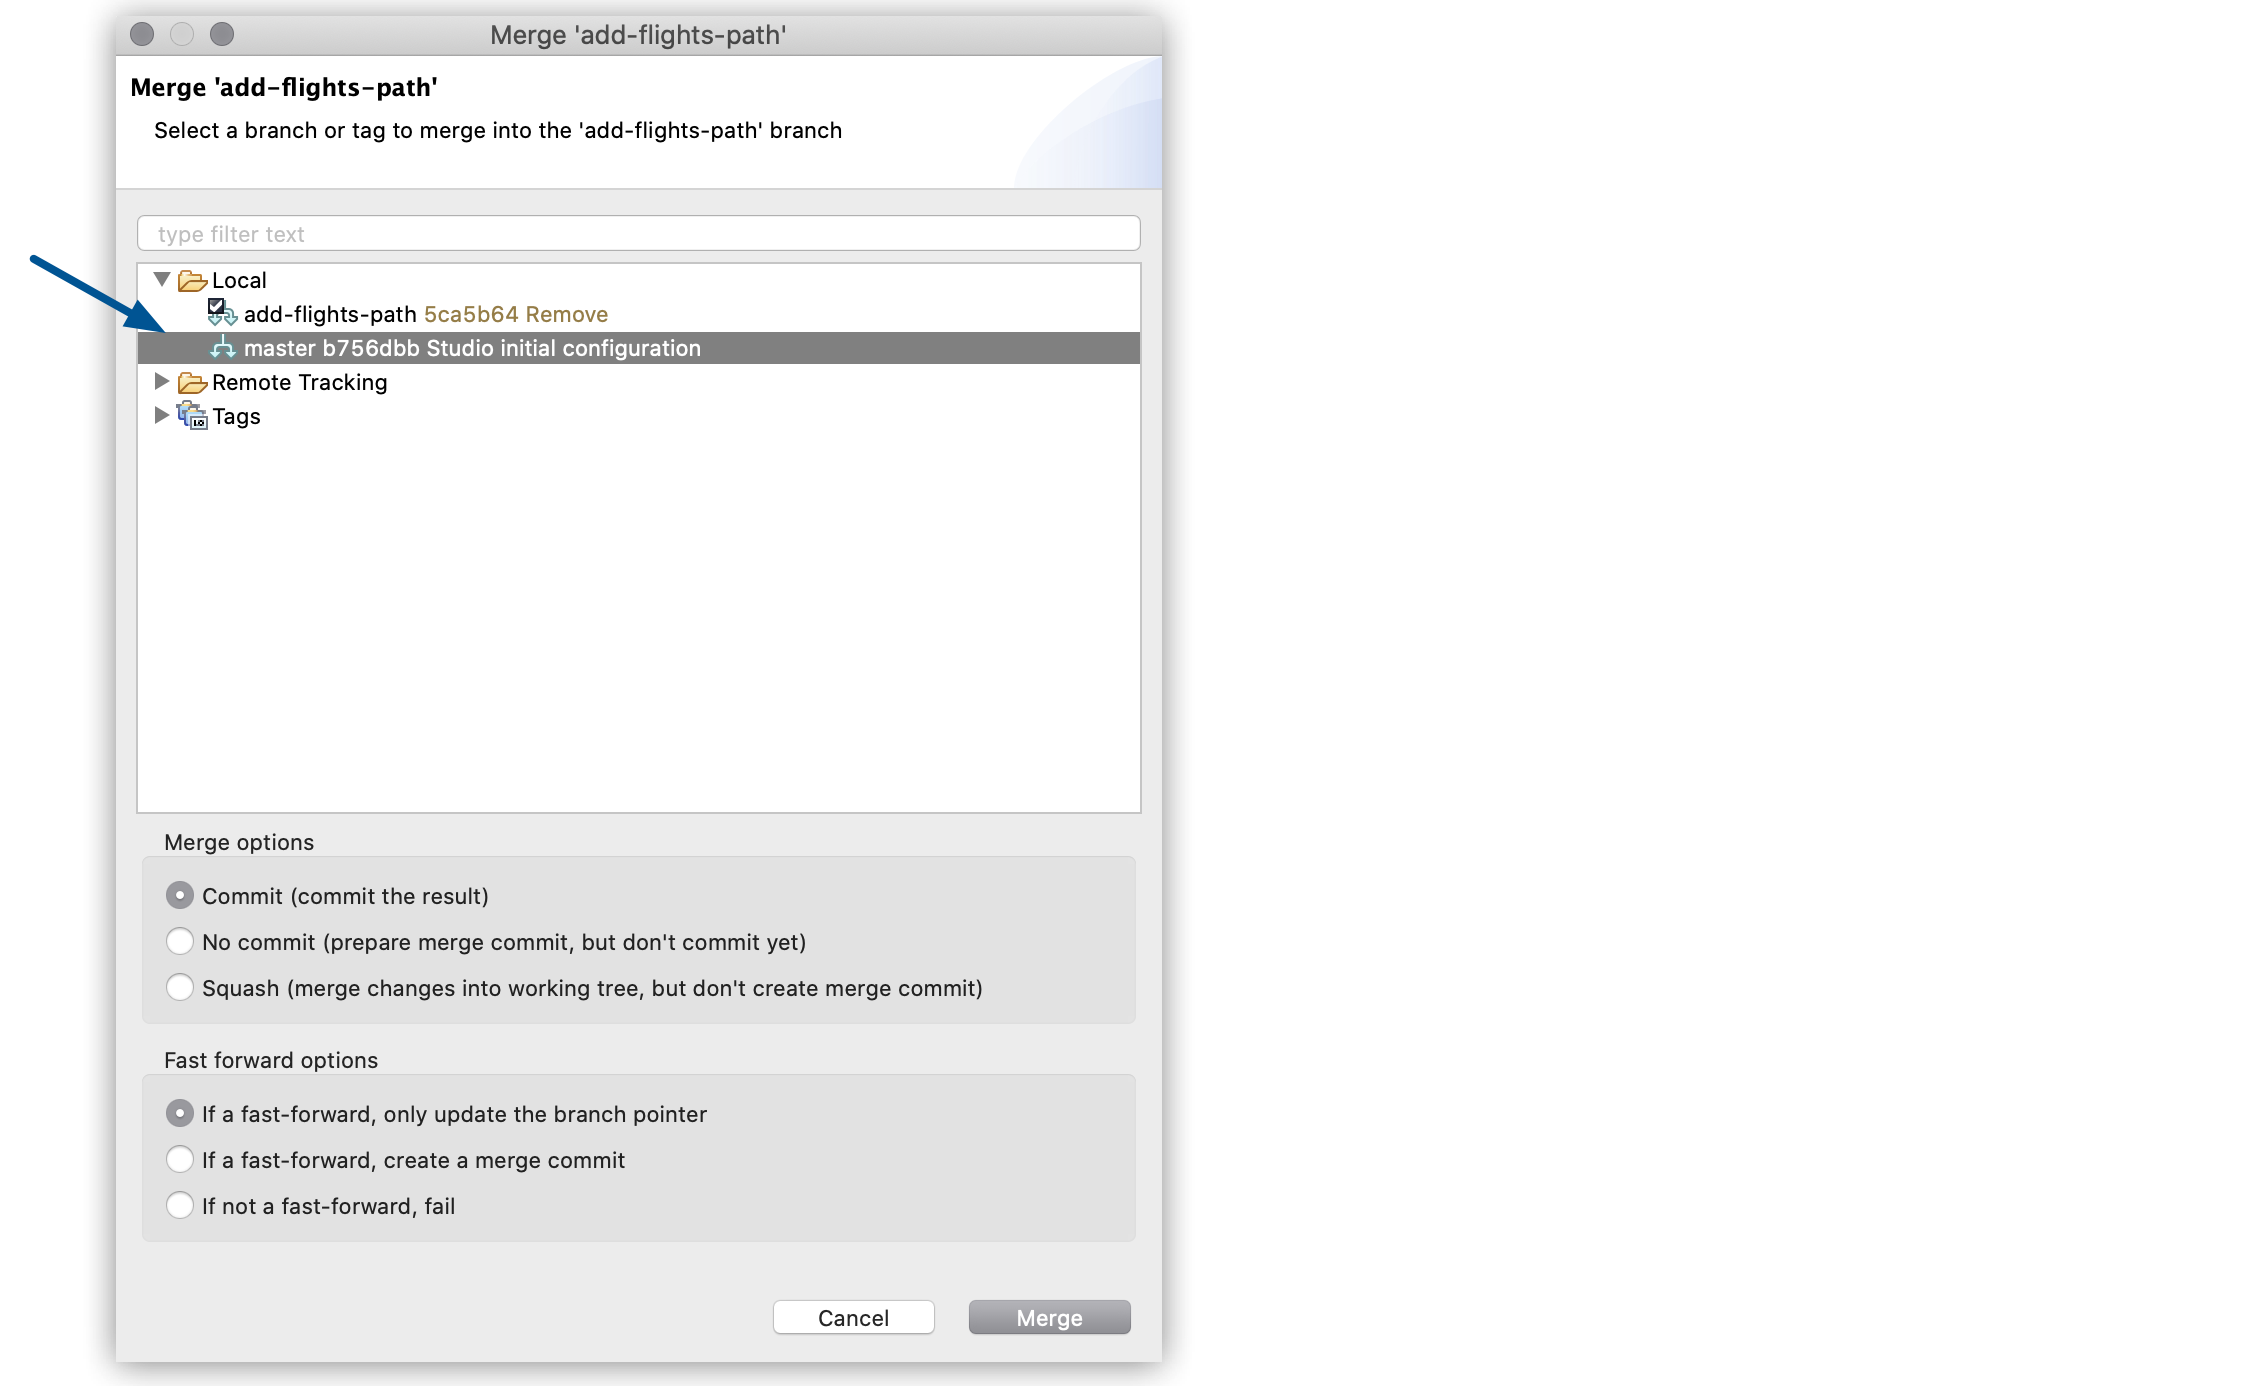
-
Select Merge.
Push Your Branch to MuleSoft VCS
You can choose to publish your local branch to MuleSoft VCS after you committed all your changes to your local branch:
-
In the Package Explorer view, right-click your API specification project and select Team > Switch To > Push Branch.
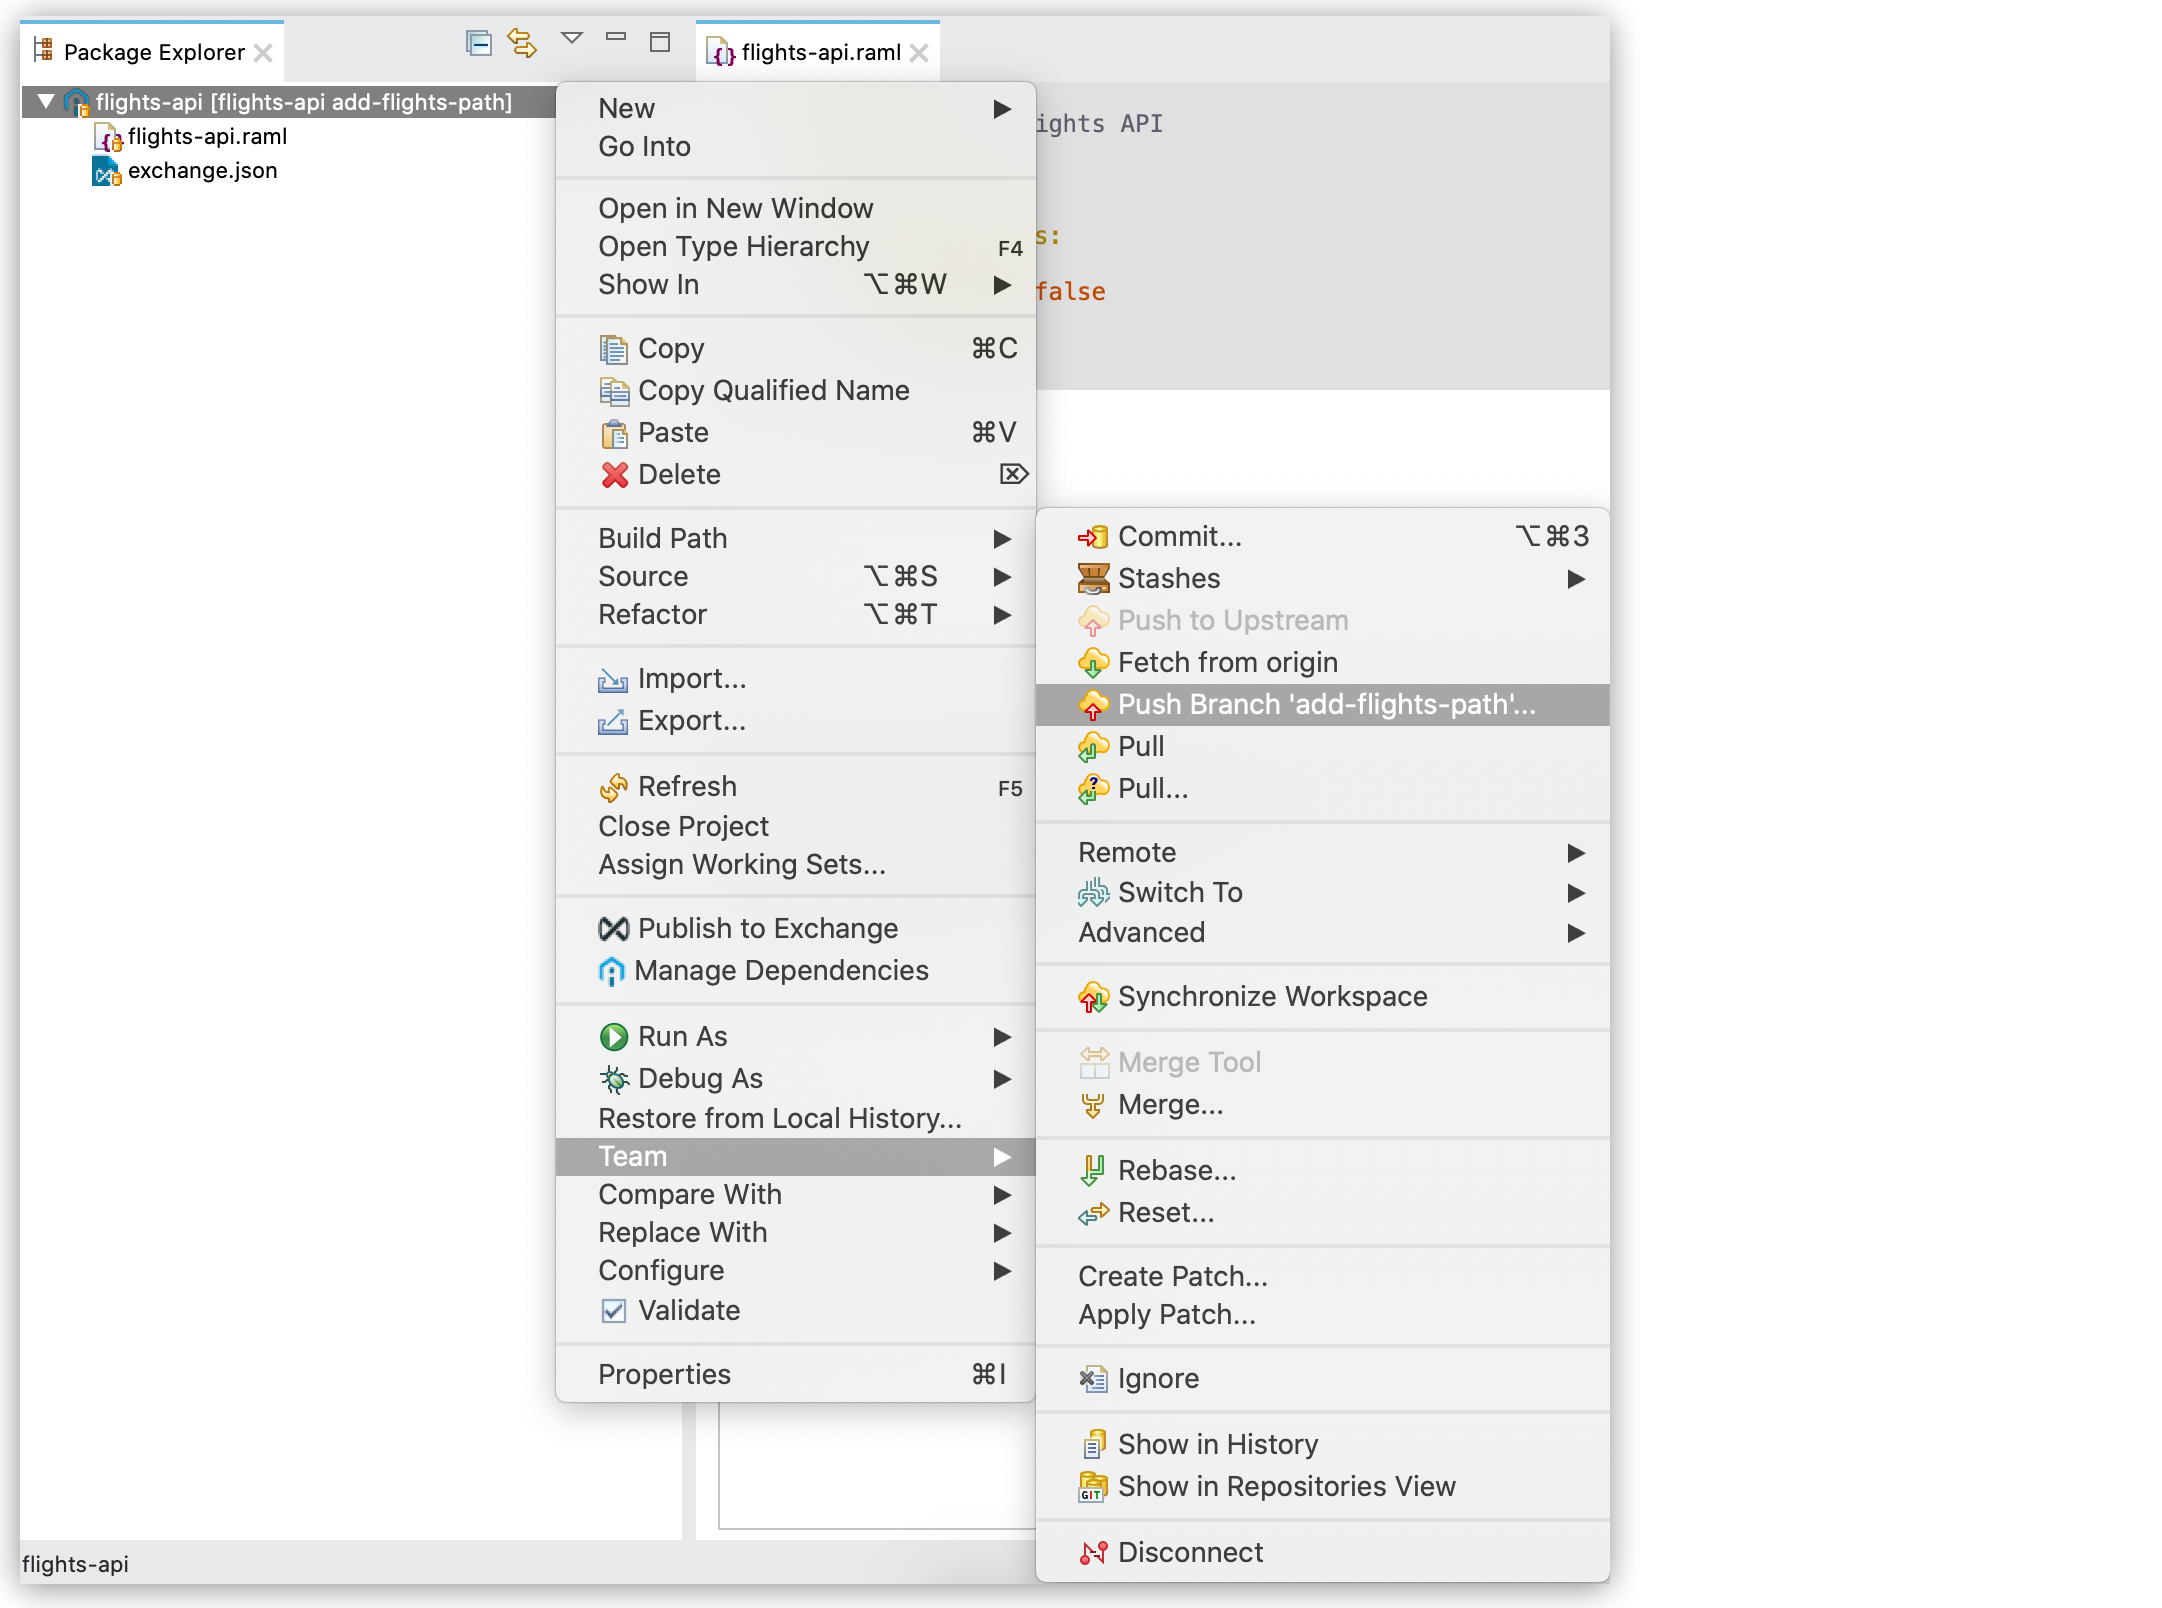
-
Verify the changes that you are pushing to MuleSoft VCS.
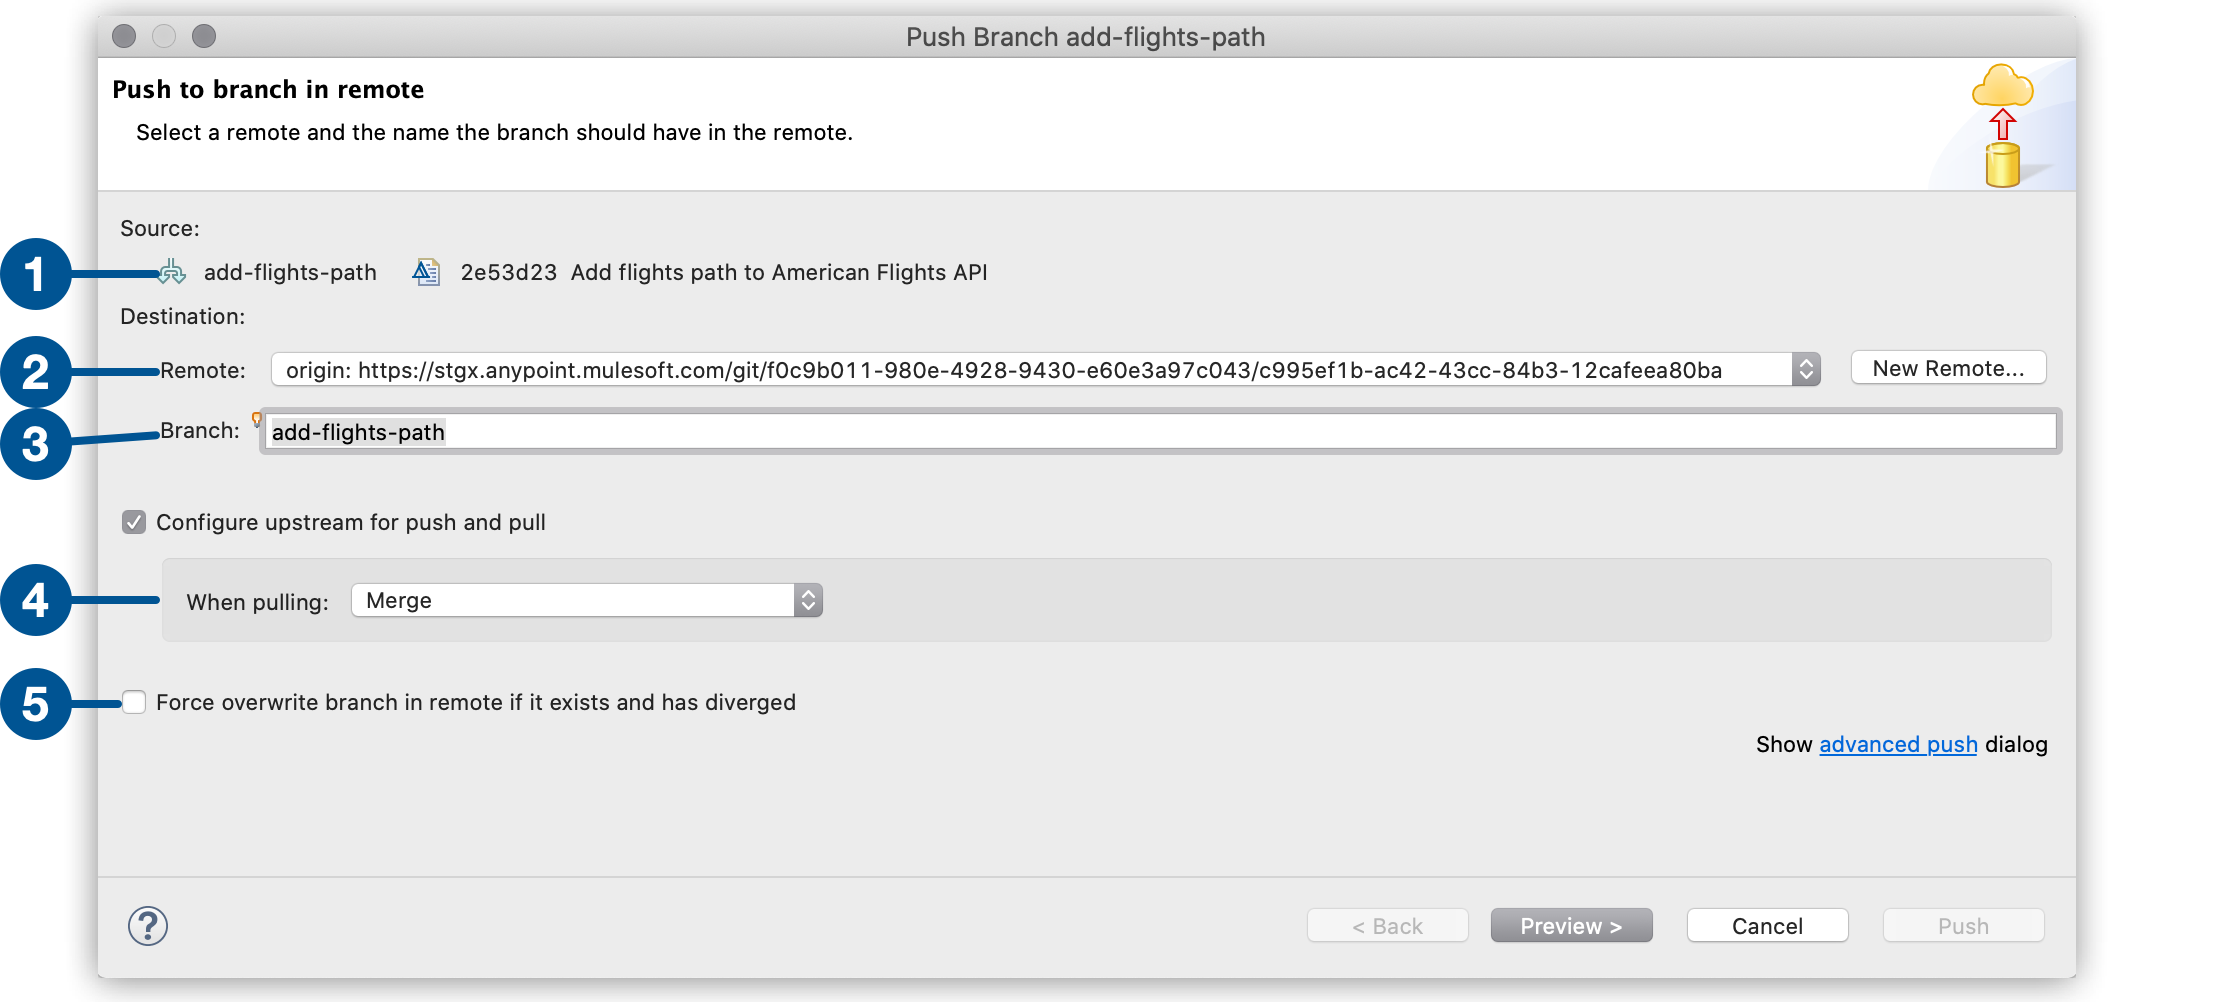
| 1 | The Source section shows the changes that you are pushing to MuleSoft VCS. |
| 2 | The Remote section shows the coordinates to the remote you are pushing to. |
| 3 | The Branch section shows the local branch that you are pushing. |
| 4 | You can select the Configure upstream for push and pull option if you want to also pull changes from MuleSoft VCS into your local branch. When configuring this option, you must select the behavior you want Git to have when it pulls the changes from MuleSoft VCS. |
| 5 | Select the Force overwrite branch in remote if it exists and has diverged only if you know that your local changes must overwrite the changes in MuleSoft VCS. This option force pushes your changes to the branch in MuleSoft VCS. |
-
Select Preview to see a summary of the changes you are pushing.
-
Select Push
In certain scenarios, someone else might have modified the version in MuleSoft VCS while you modified the same version locally. This triggers conflicts in Git.
See Solve Conflicts for more information.