Configure Private Cloud Edition in Studio (macOS)
Anypoint Studio 7.4 through 7.7 support native integration with Anypoint Platform Private Cloud Edition (PCE) versions 1.6 and 2.0 and 3.0
Anypoint Studio 7.8 and later only support native integration with PCE version 3.0.0
Starting with Anypoint Studio 7.17, the default JDK version for Studio is Java 17. To ensure proper functionality, add the certificate to the default JDK version that Studio supports.
-
If you use an external JDK, add the certificate to the external JDK that you use with Studio.
-
If you use the default JDK Studio provides, add the certificate to the default JDK, regardless of the JDK version you use in your project. After installing the certificate, if you have Studio open, restart it.
Configure Your PCE Certificates into Studio
Follow these steps to integrate your Studio installation with the Anypoint Platform components in a PCE deployment:
-
Extract your CA certificate using OpenSSL:
openssl s_client -connect <dsm-name>:443 -showcerts > <certificate_name>.pem-
Where
<dsm-name>is the domain name of your PCE instance. -
And
<certificate_name>.pemis the name that you define for the file to which you exported your certificate.For example:
openssl s_client -connect your.dsm.name.com:443 -showcerts > my-certificate.pem
-
-
Add your
.pemfile certificate to your Studio embedded Java cacerts keystore:keytool -importcert \ -keystore <cacerts_path> \ (1) -storepass <pass> \ (2) -alias <alias> \ (3) -file <certificate_name>.pem (4)1 cacerts_pathis your Anypoint Studio artifact.
For example:-
Java 11:
AnypointStudio.app/Contents/Eclipse/plugins/org.mule.tooling.jdk.macosx.x86_64_1.1.5/Contents/Home/lib/security/cacerts. -
Java 8:
AnypointStudio.app/Contents/Eclipse/plugins/org.mule.tooling.jdk.v8.macosx.x86_64_1.1.5/Contents/Home/jre/lib/security/cacerts.
2 passis your cacerts keys store password.
Java default cacerts password ischangeit.3 aliasis the name your certificate gets when you save it in the keystore. For example,my-certificate.4 certificate_nameis the path to the.pemfile generated and saved in the previous step. -
-
Add your certificate to your macOS keystore and set it as always trusted:
security add-trusted-cert -r trustRoot -k "${HOME}/Library/Keychains/login.keychain-db" \
<certificate_name>.pem
Optionally, you can use the KeyChainAccess UI:
-
On your computer, open your
KeychainAccess.app. -
In the left navigation bar, select System.
-
Drop the
.pemfile that you generated in the previous task into the list of certificates. -
Double-click your imported
.pemfile and select Always Trust from the When using this certificate drop-down menu.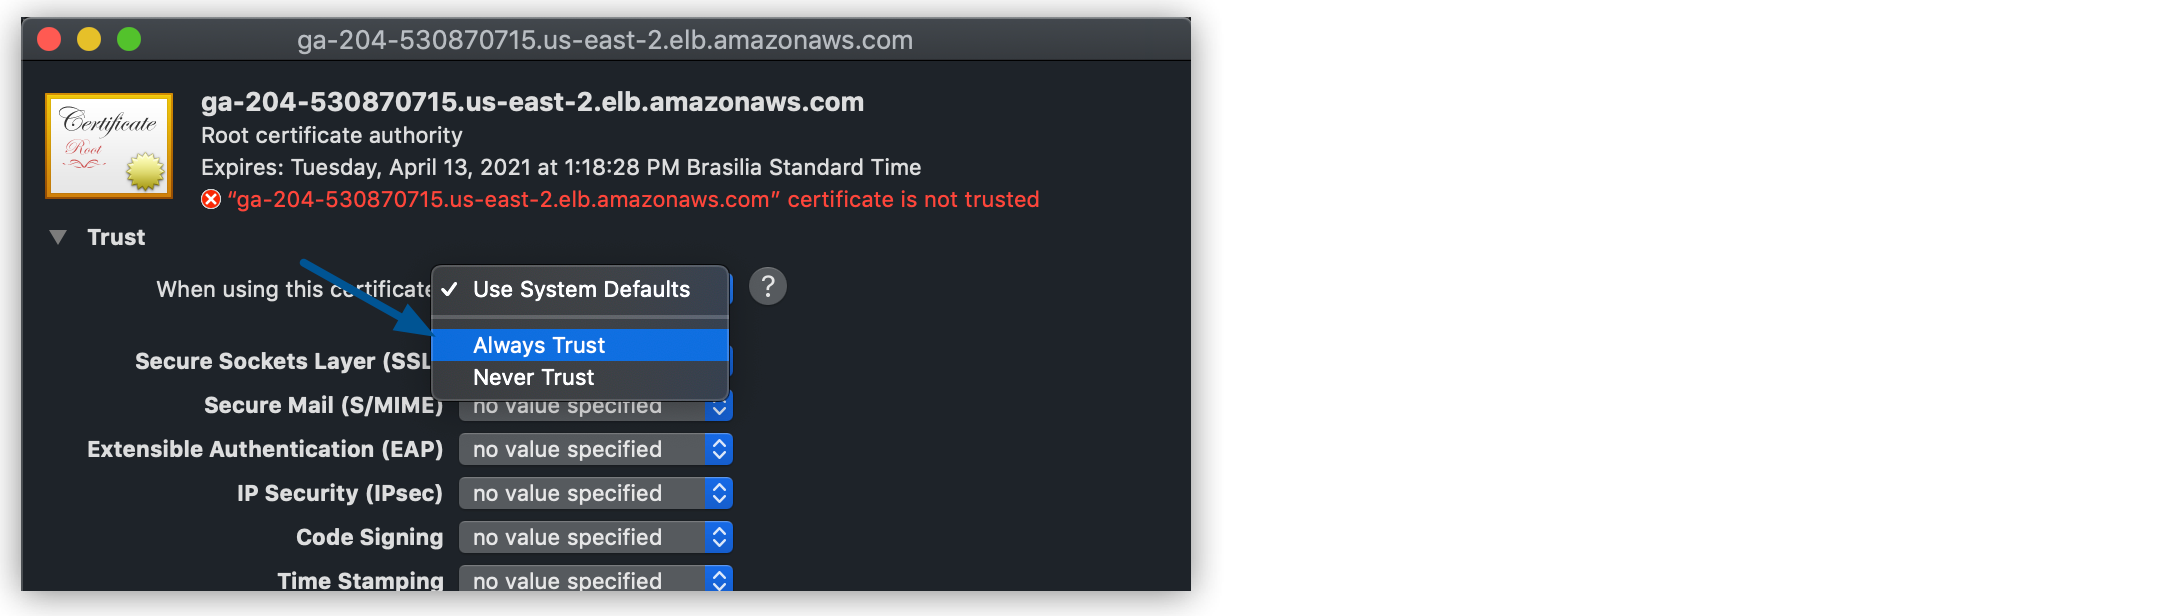
-
-
In Studio, open the preferences view.
Navigate to Anypoint Studio > Preferences… or presscmd + ,. -
Expand Anypoint Studio in the left navigation bar, and select Anypoint Platform.

-
Select the Use a Private Cloud Instance URL.
-
Type the URL of your PCE installation in the Private Cloud Instance URL field.

-
Click Apply and Close.
-
Restart Studio.
Configure your PCE User Login
The first time you configure your user’s login, Studio asks you to confirm your PCE certificate:
-
Open the preferences view.
Either navigate to Anypoint Studio > Preferences… or presscmd + ,. -
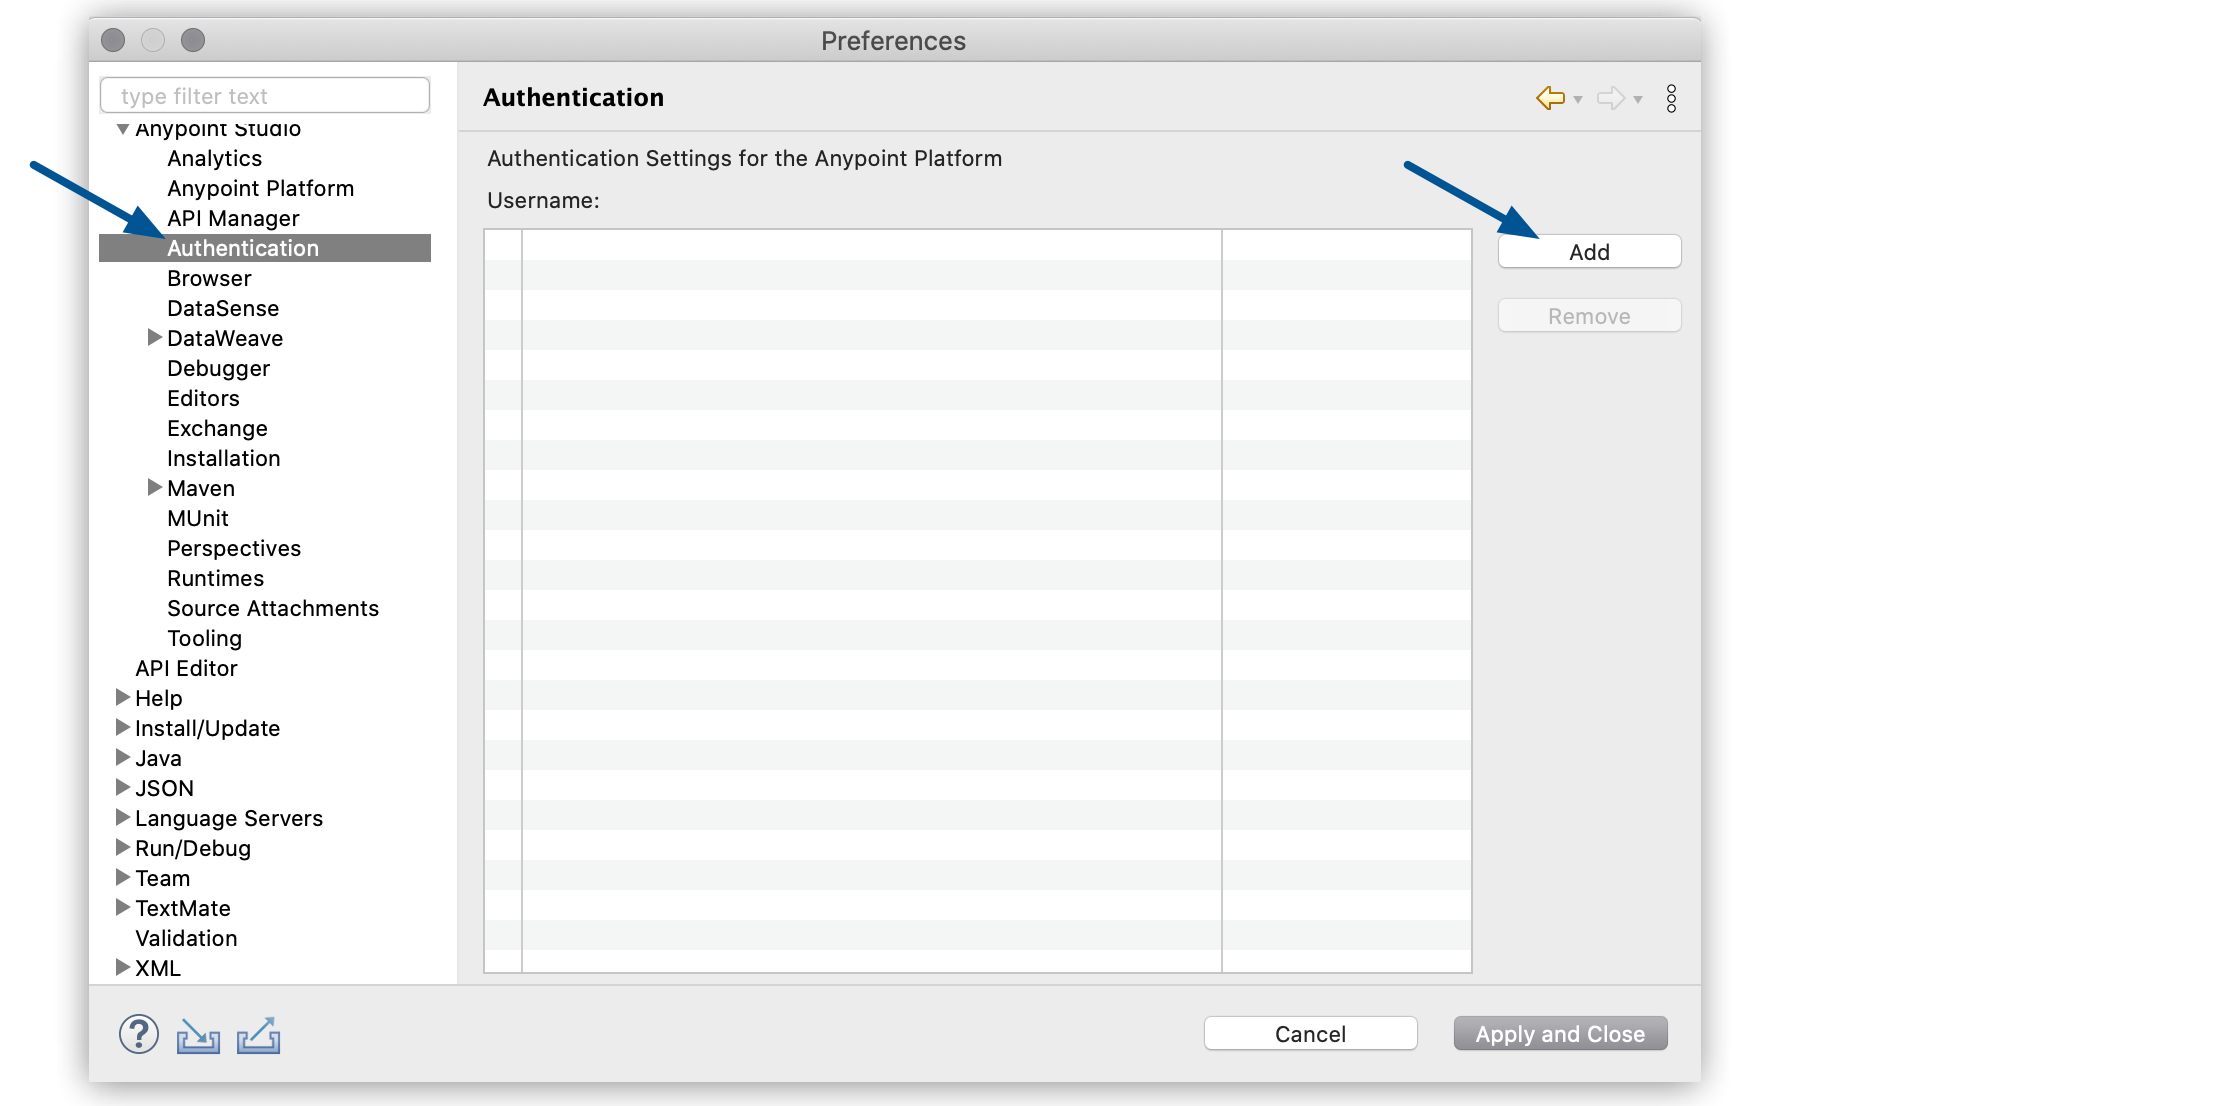
Expand Anypoint Studio in the left navigation bar, select Authentication > Add.
-
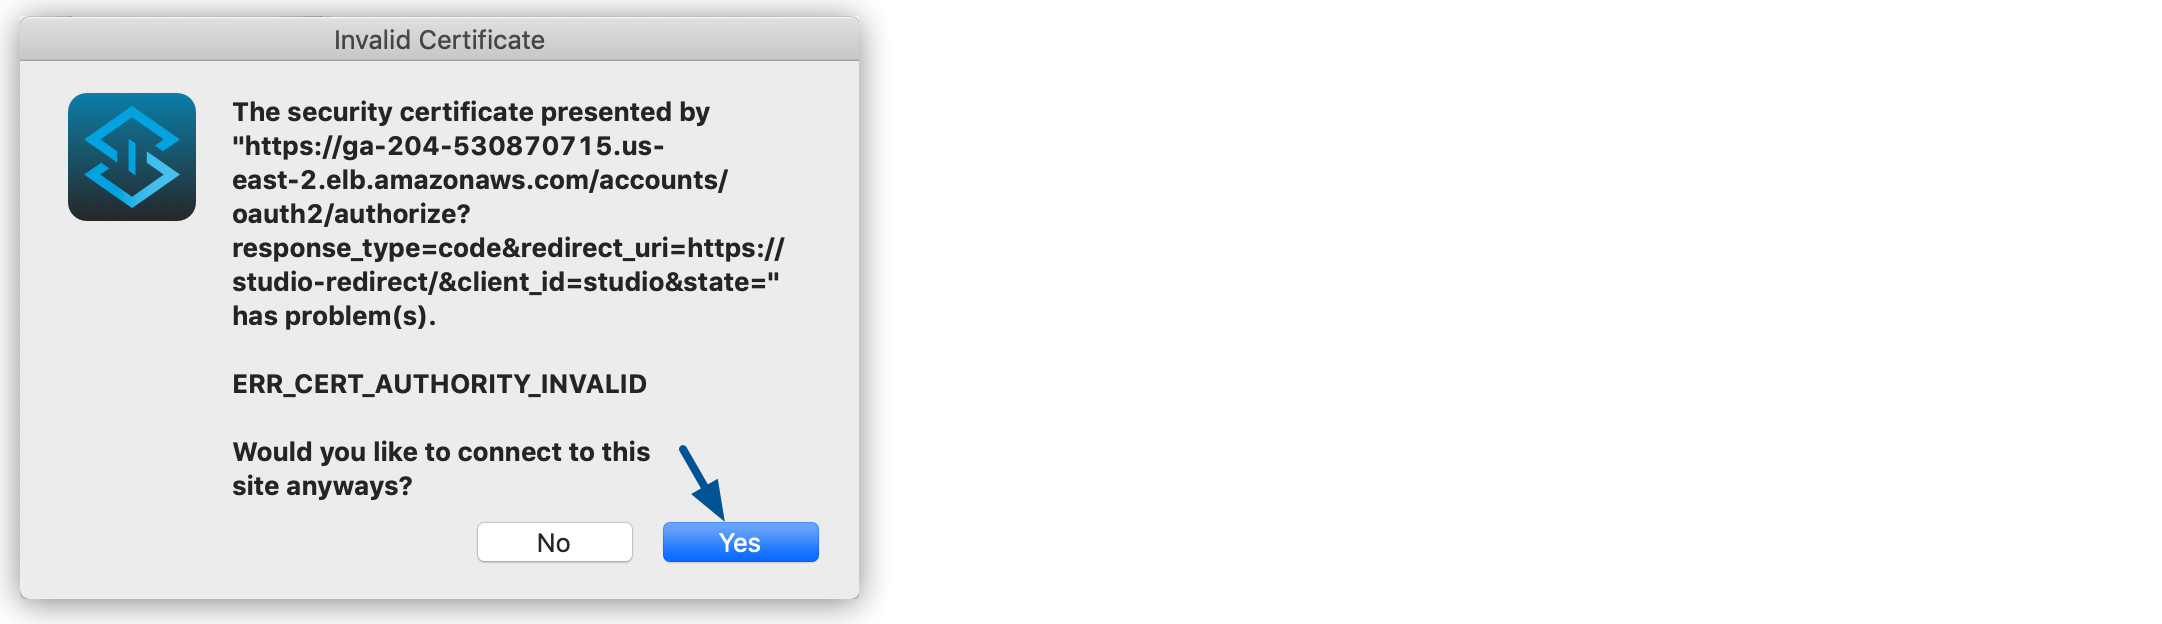
Select Yes in the Invalid Certificate message that appears.
-
Add your PCE credentials and sign-in.
-
Select Apply and Close.
-
Restart Studio.