Publish a Project to Exchange
Anypoint Studio enables you to write documentation for your new projects and to connect to Exchange to publish your project as a new asset.
Publish Assets with Documentation
When you create a new project in Anypoint Studio, Studio includes an exchange-docs folder with a home.md file. You can document the front page of your new asset in Markdown format after publishing your asset to Exchange.
| Learn more about Markdown at https://www.markdownguide.org/. |
Studio enables you to add more pages, images, and an icon:
-
Create a new project in Anypoint Studio.
-
In the Package Explorer view, open Exchange-docs > Home.md.
-
Use the default Studio text editor or choose an external editor by right-clicking on Open with… > Other and selecting an external app.
-
Optionally, create additional pages to add to your asset documentation by right-clicking on the Exchange-docs folder and selecting New > File.
The name of the file will be the name of the page in Exchange. -
If you have more than two pages, create a
config.jsonfile using the following format to provide a page order:{"pageOrder": ["home","page1","page2"]}If no format is provided, the home page will be followed by the other pages in alphabetical order.
-
Assign an icon to your project by adding an image (.jpg, .png, .bmp) with the name icon (for example, icon.png) before publishing your project for the first time.
-
Create a Resources folder in the Exchange-docs folder to add extra resources to your documentation, such as images, or other types of files (size limit of 2MB).
-
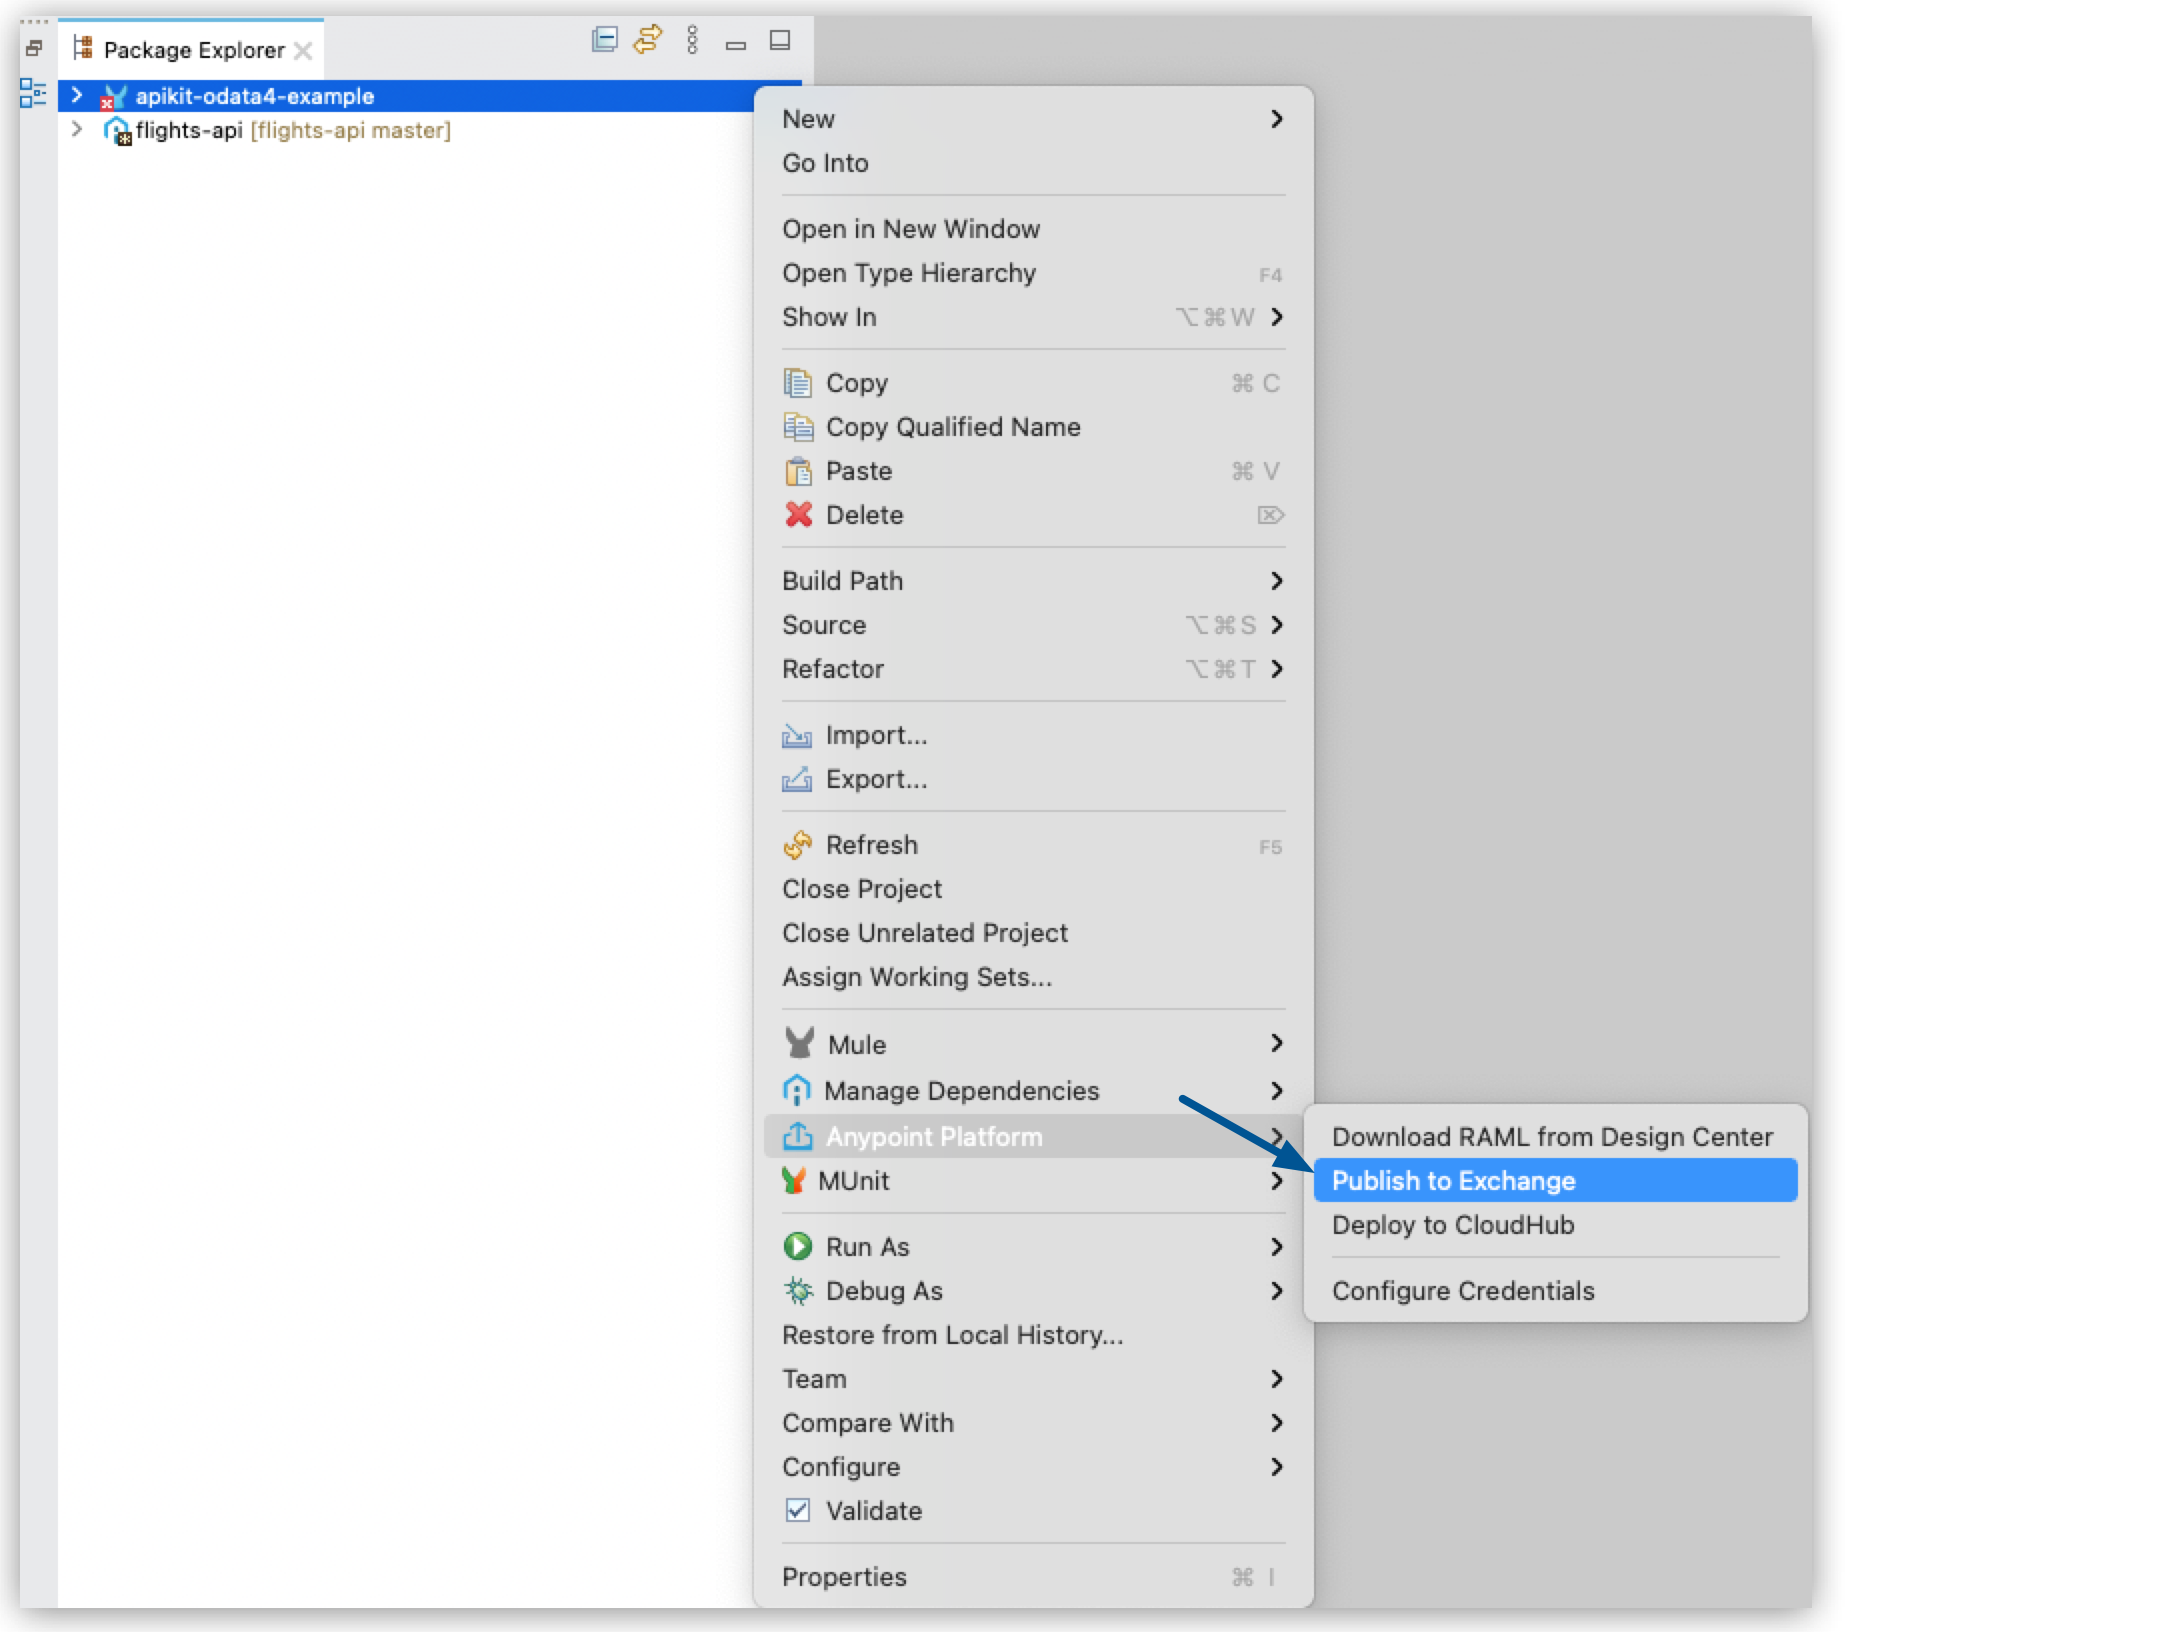
To publish your project, right-click on your project in the Package Explorer, and click on Anypoint Platform > Publish to Exchange.
-
Log in to the platform if needed, fill in the required fields, and click Finish.
-
After uploading the asset, click on the link provided to verify that your asset and documentation are available in Exchange.
Publish a Project to Exchange
-
Right-click your project folder in your Package Explorer view.
-
Select Anypoint Platform > Publish to Exchange.
-
Either select your Anypoint Platform user and business group or create a new Anypoint Platform account by clicking Add Account.
Additionally, you can click the Add Account button to use a new Anypoint Platform account. -
Verify that the required identification and version information for your project is present and correct:
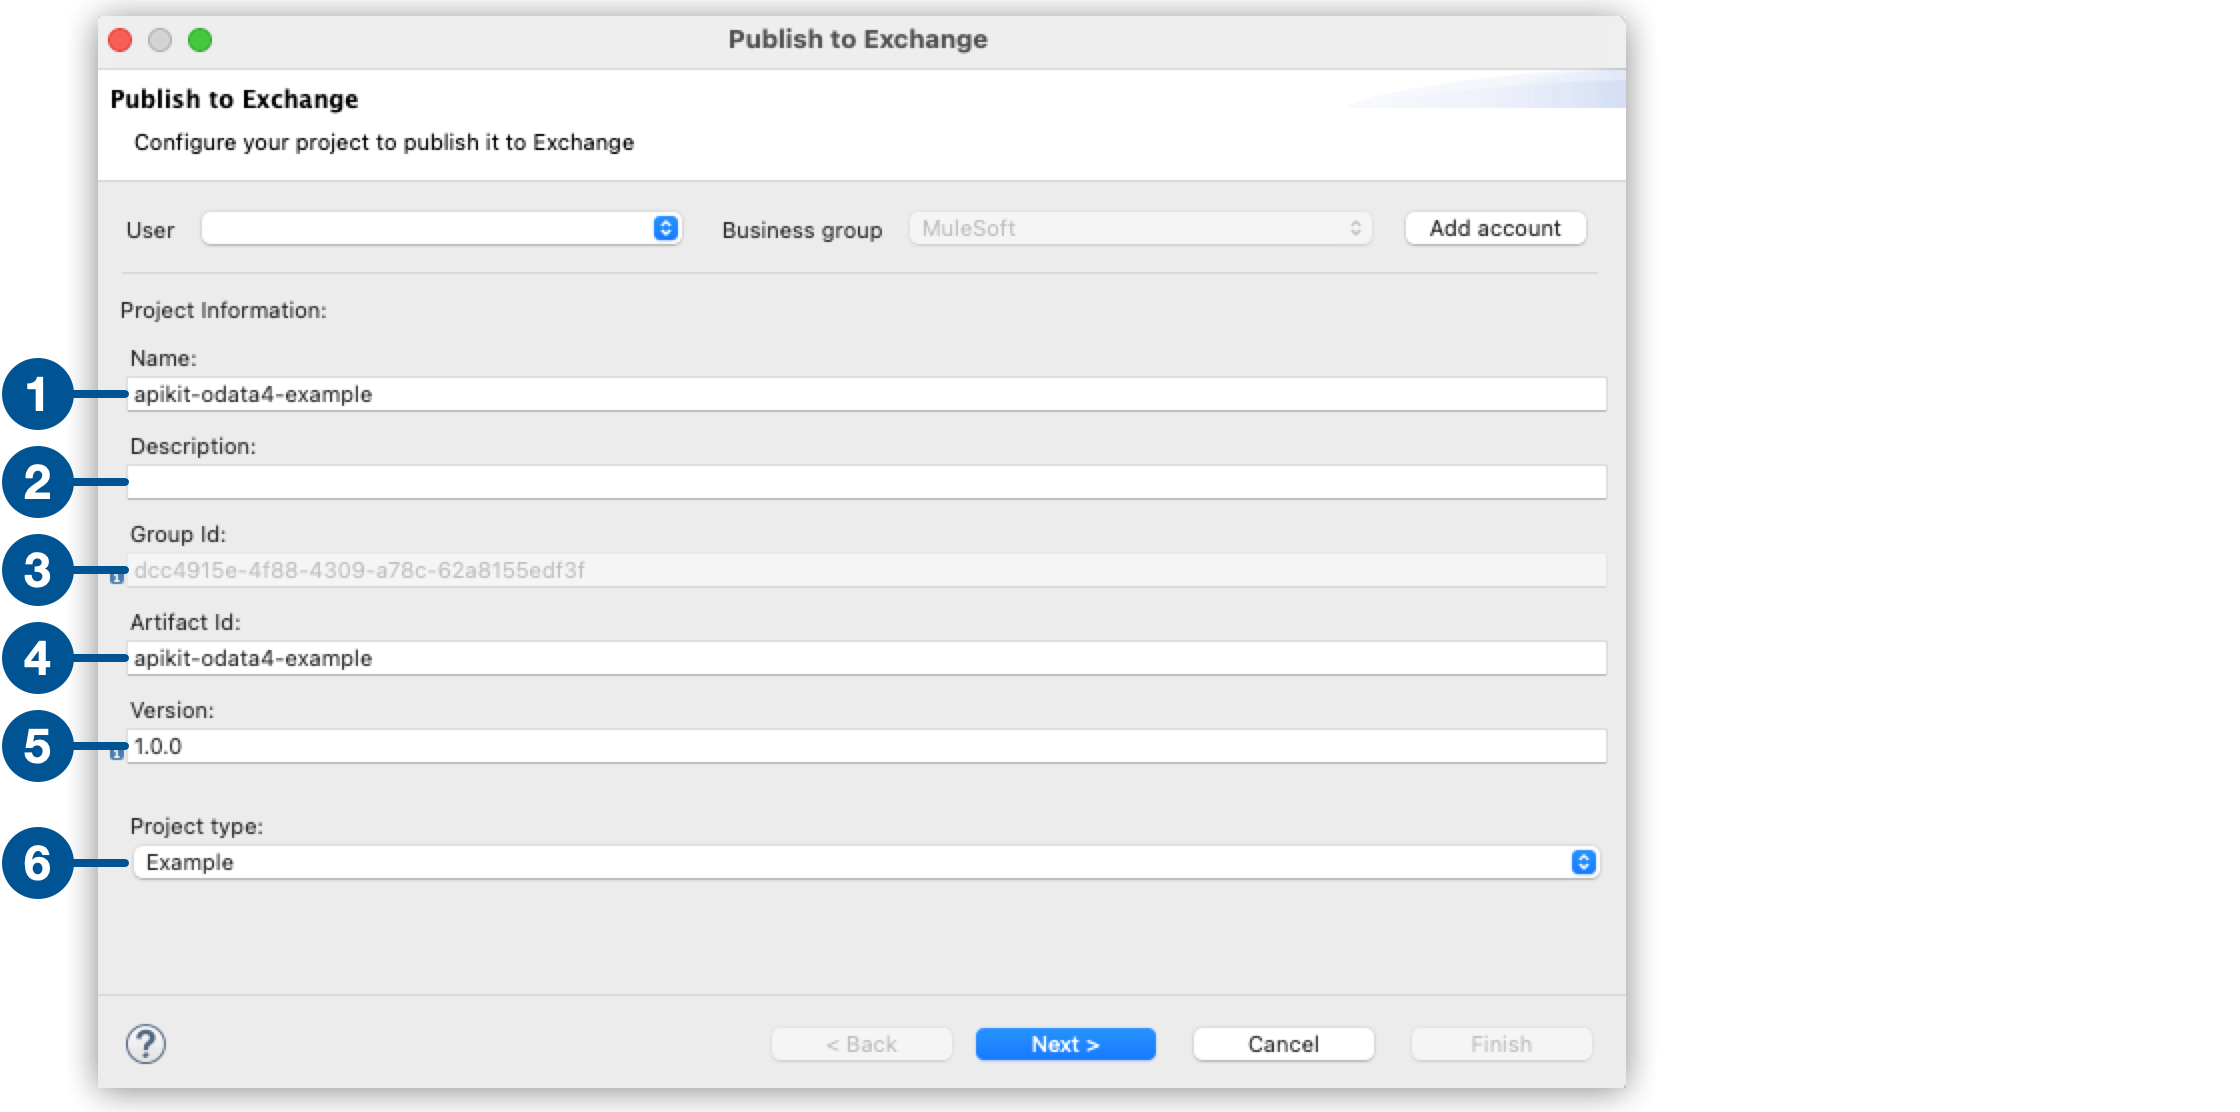
| 1 | Name: The name of your API specification. |
| 2 | Description: (optional) A description of your API specification. |
| 3 | Group ID: The organization ID of your Anypoint Platform organization. |
| 4 | Artifact ID: The name of your project, minus its version. By default, Studio uses the artifact ID configured in your pom.xml file. |
| 5 | Version: The version of the asset you are publishing. |
| 6 | Project type: If you are publishing a new version of an already published asset, you cannot change the project type. |
-
Select Next.
-
Configure the tags, categories, and custom fields for your project:
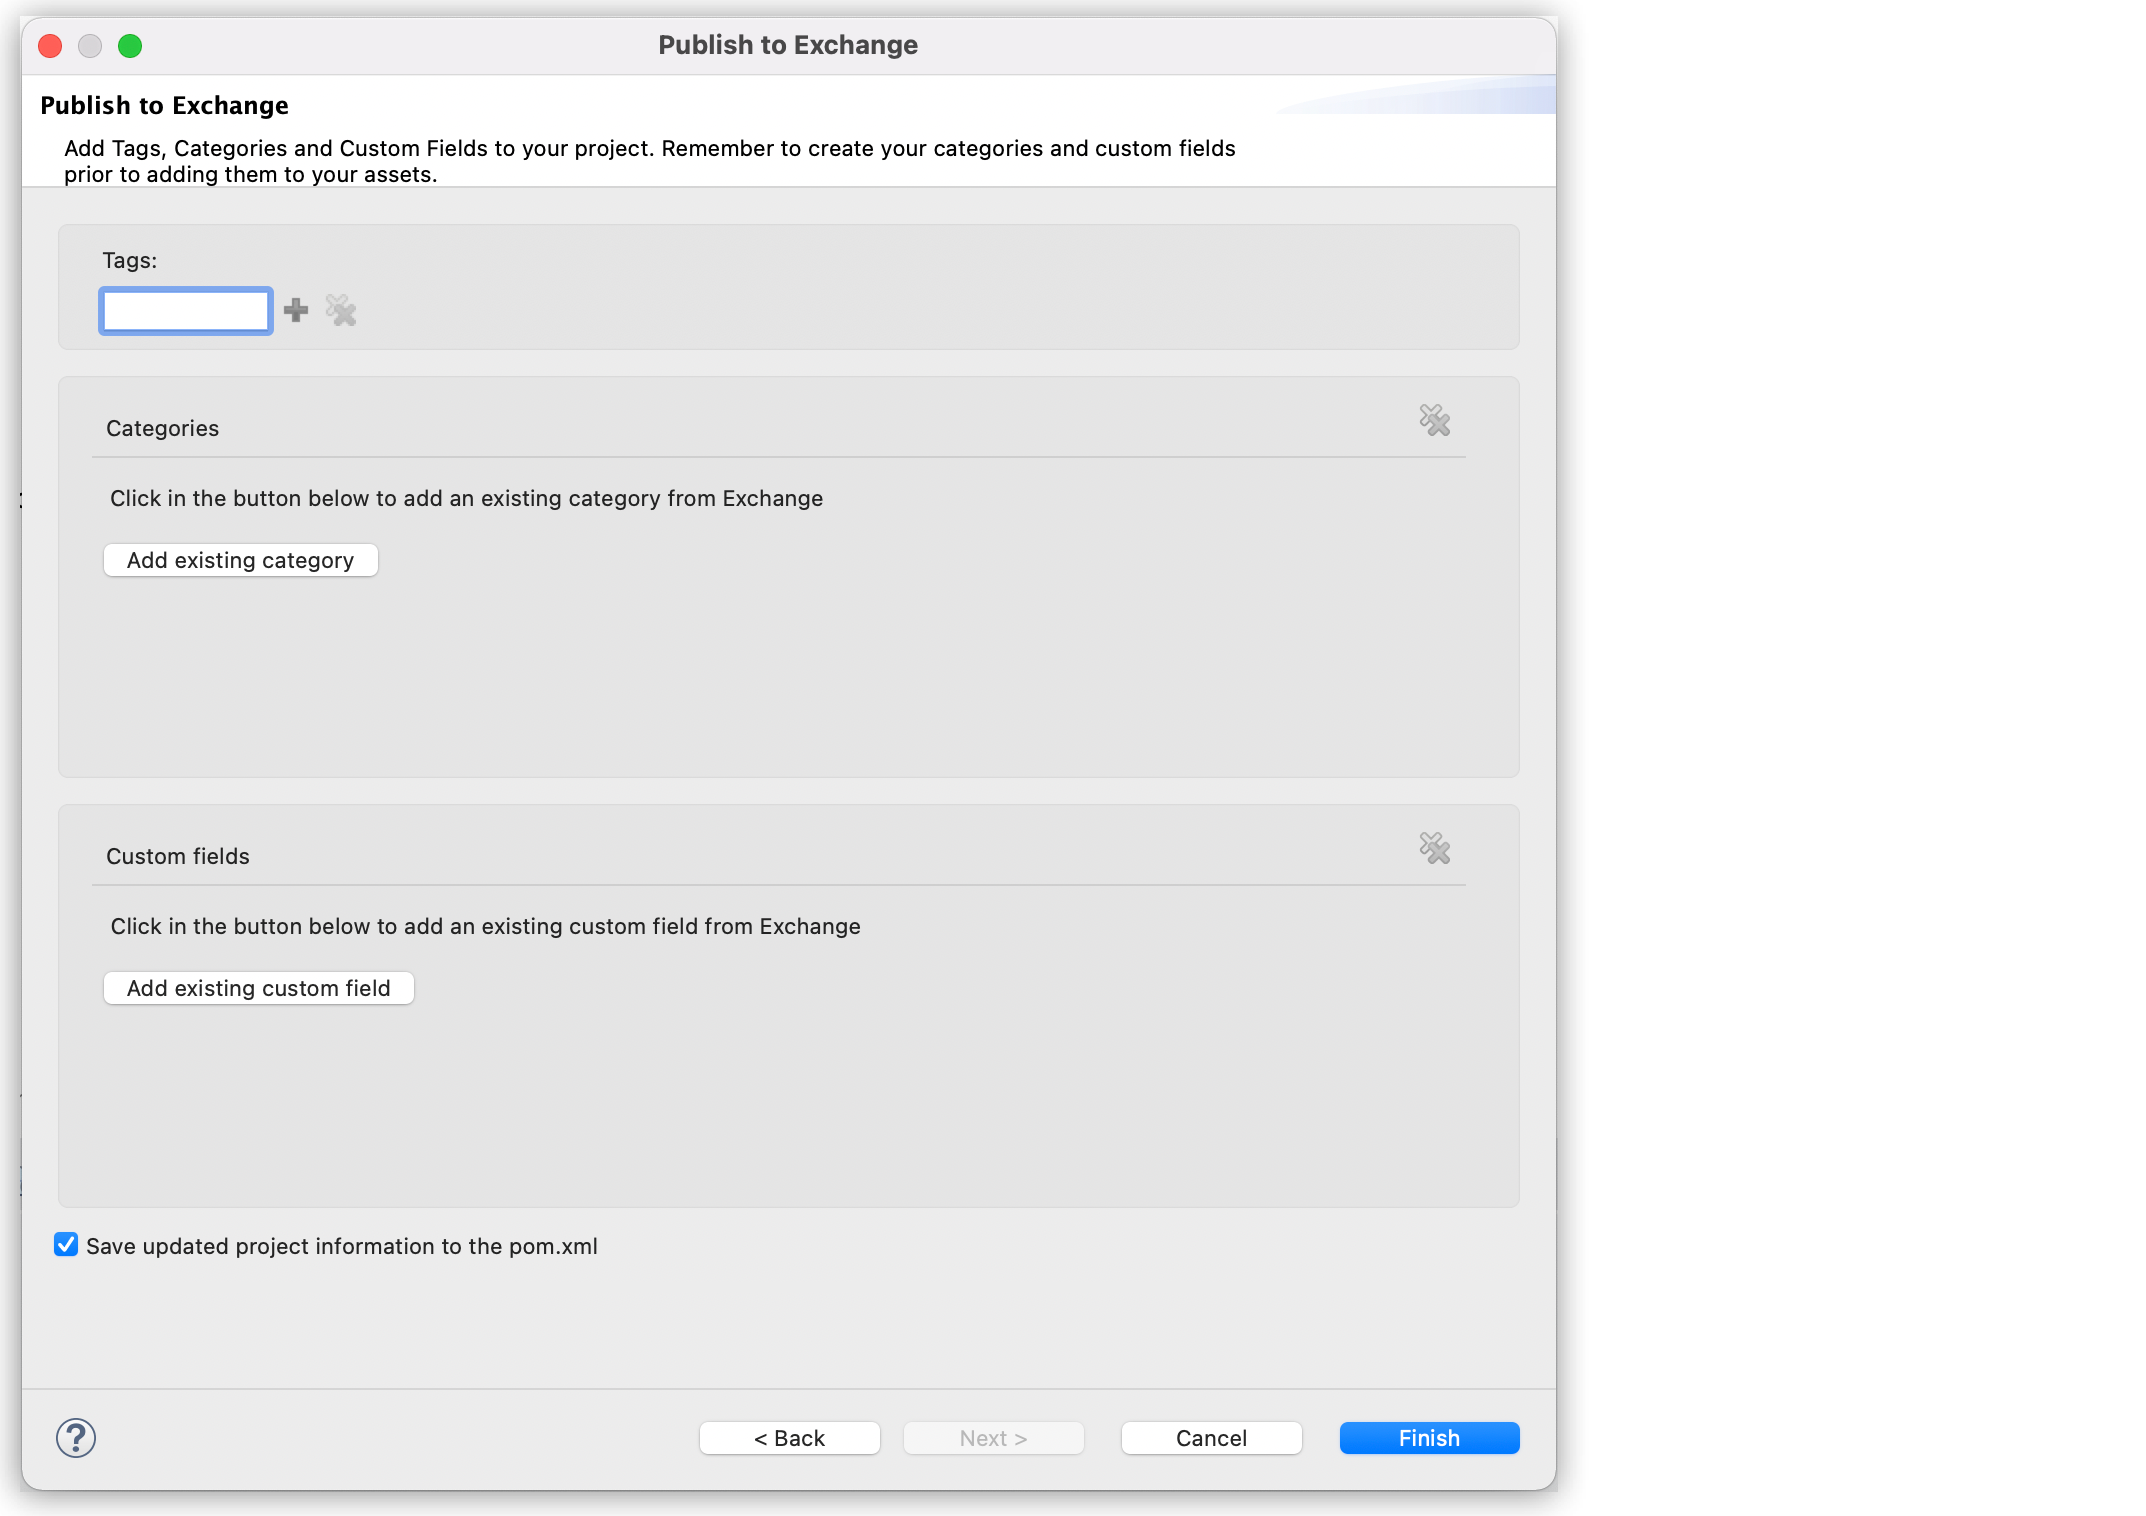
Categories cannot be created from Studio directly. Refer to the Manage Categories documentation to learn how to create Categories for your organization.
Custom fields cannot be created from Studio directly. Refer to the Manage Custom Fields documentation to learn how to create custom fields for your organization.
-
Check the Save updated project information to the pom.xml box to update your
pom.xmlfile with the data provided. This option syncs your local project information with the data you entered. If not checked, your project is deployed with the provided data, but your local project remains with the original information and is not updated. -
Select Finish.
Once you select Finish, the publication of your project as a new asset in Exchange begins. You can follow the progress of this publication process in the Console view, but you cannot cancel it.