Synchronize API Specifications with MuleSoft VCS
Anypoint Studio enables you to import a RAML, OAS 2.0, or OAS 3.0 API specification from MuleSoft VCS to an API specification project in Studio so that you can edit it offline and then stage and push your changes as you would do with any version control system (VCS).
This feature only works when importing an API from MuleSoft as shown in the following process.
To import an API specification to write a Mule application implementation see Import and Implement an API Specification from MuleSoft VCS.
Your API specification project must have a different name than any other project in your workspace.
| Studio uses the EGit plugin only for the VCS feature of editing API specifications offline. Studio does not support the EGit plugin for Mule application projects that you might track using your own VCS. |
Import an API Specification From MuleSoft VCS To Edit Locally
-
Ensure that no other project in your workspace has the same name as the API project you want to import.
-
In the taskbar at the top of the Anypoint Studio display, select File > Import.
-
Select Anypoint Studio > API Specification from MuleSoft VCS.
-
In the Import From MuleSoft VCS window, select your Anypoint Platform username and the Anypoint Platform business group where the API specification is located.
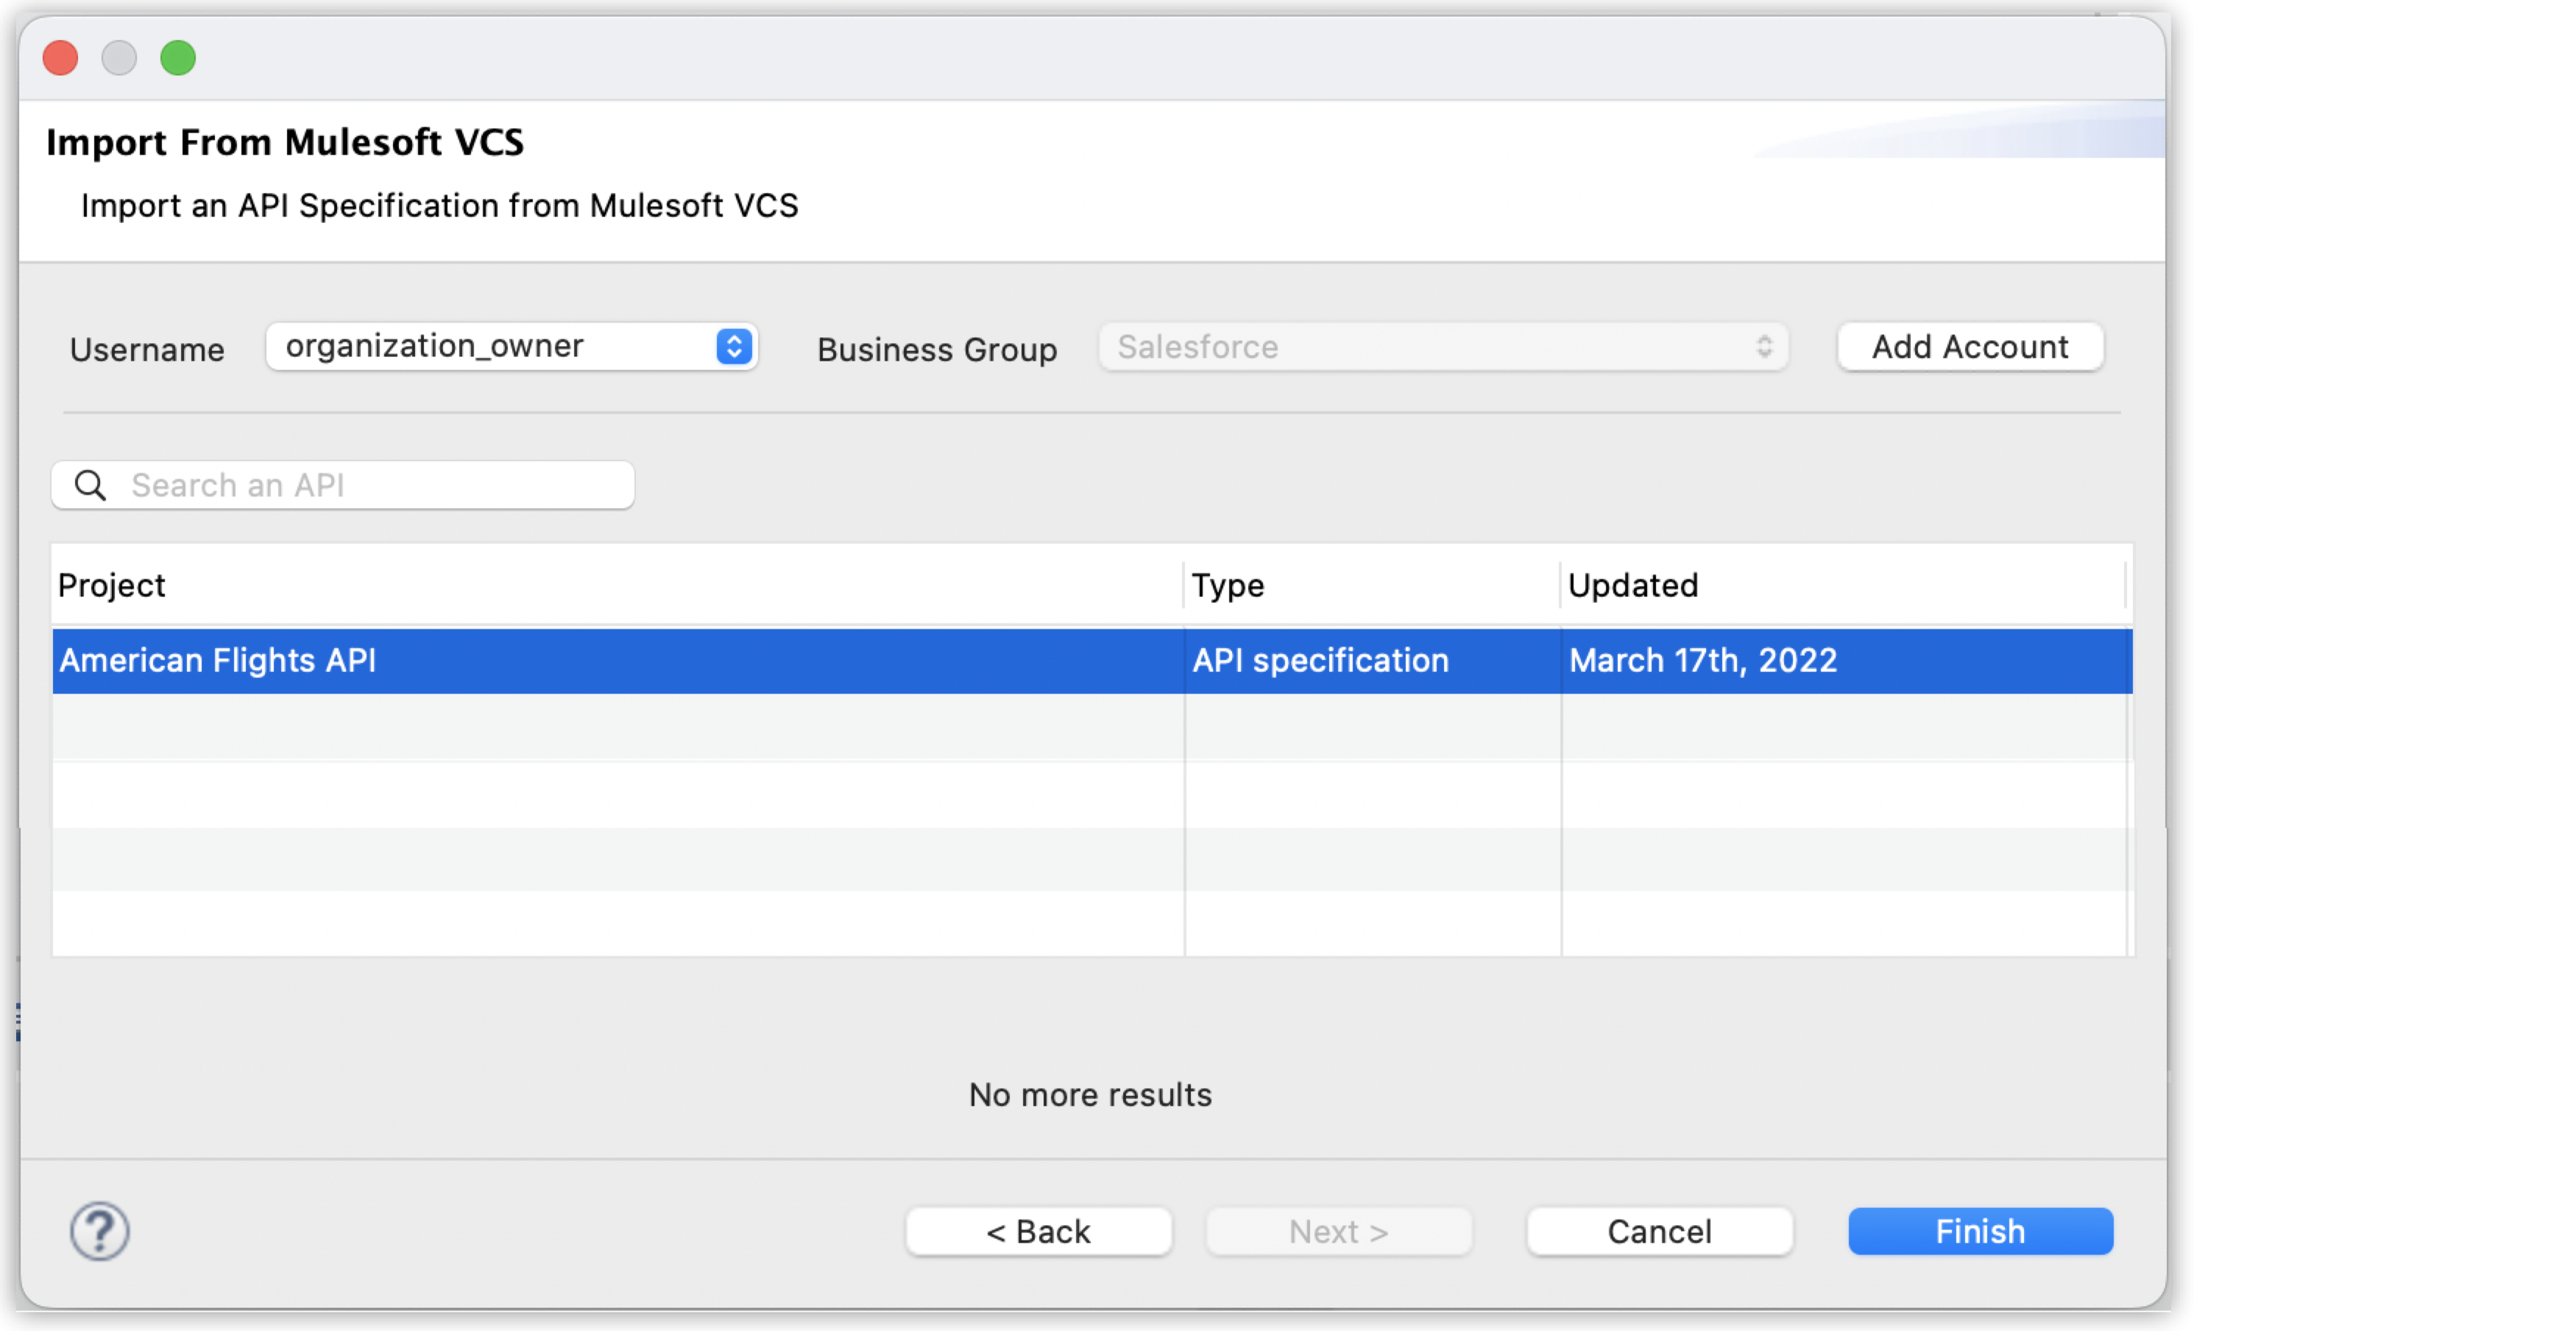
If you are not logged in, click the Add Account button to add your Anypoint Platform account. If you have not configured your Anypoint Platform credentials, the username and business group options are unavailable.
If you want to use a different account, click the Add Account button and log in again.
-
From the list of available APIs, select the one you want.
-
Click Finish.
Studio imports the API specification as an API specification project so that you can work on your API specification project offline.
Create Branches
You can create your own branch based on the branch you pulled from MuleSoft VCS.
Using a different branch allows you to modify the API definition without risking pushing those changes to the main branch in MuleSoft VCS.
To create a different branch in Studio:
-
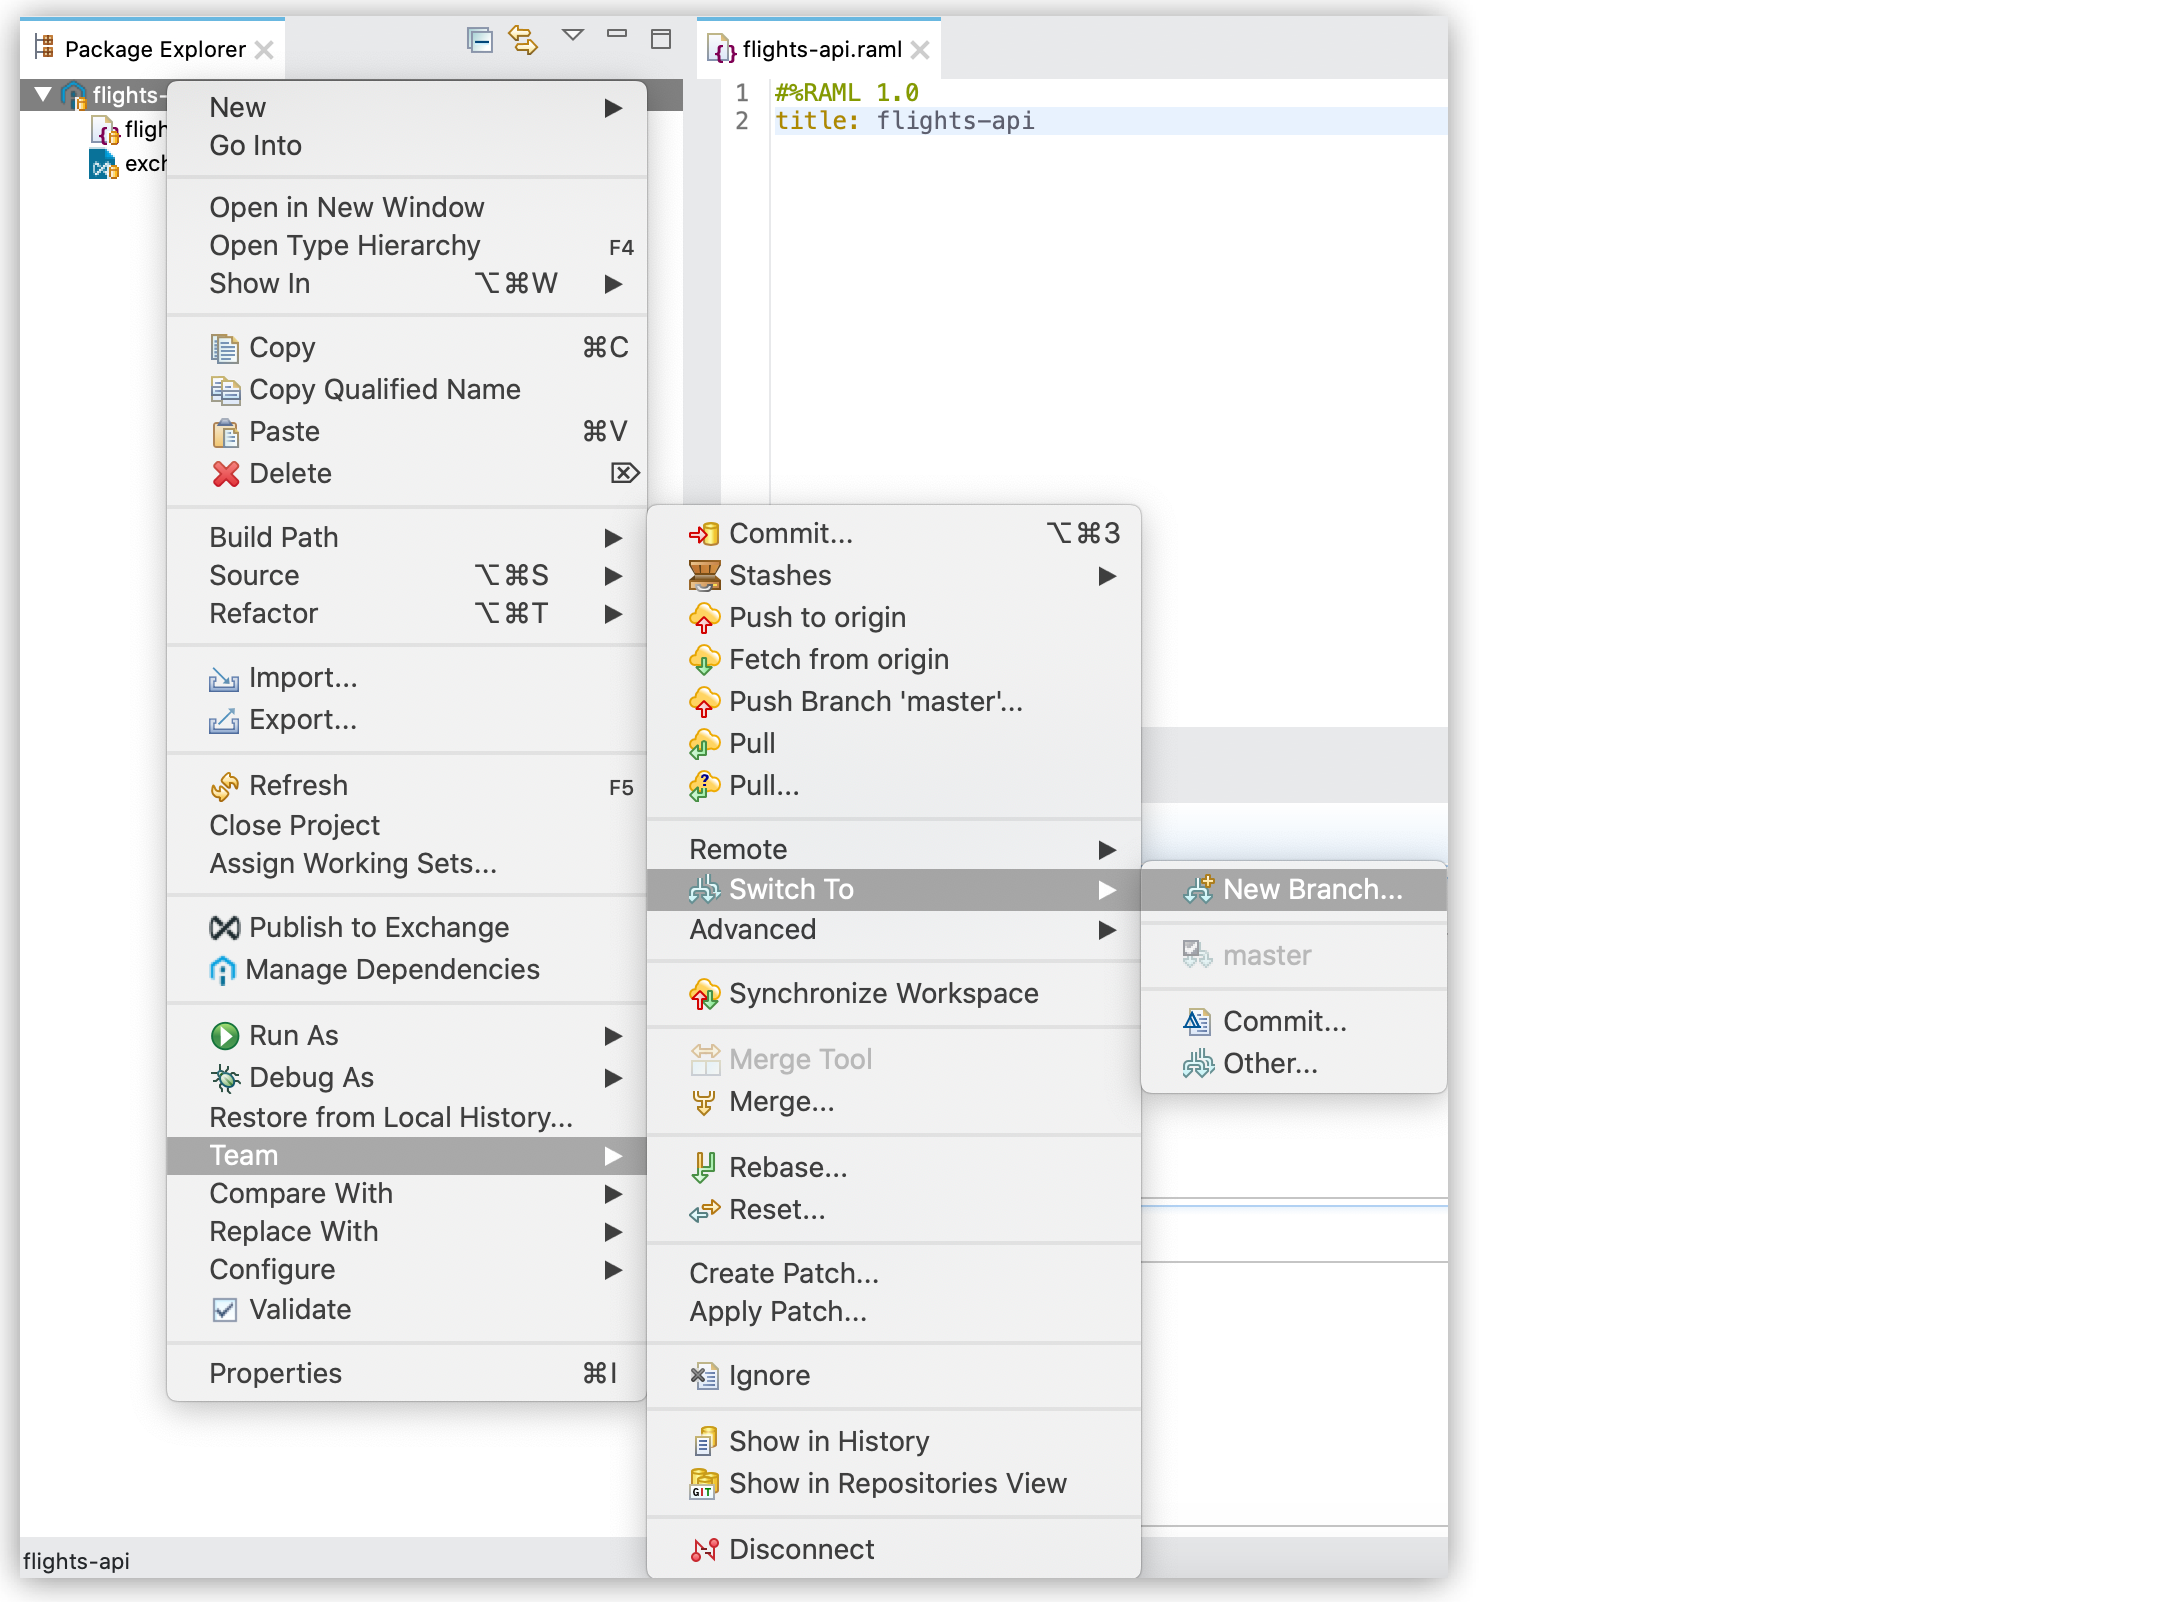
In the Package Explorer view, right-click your API specification project and select Team > Switch To > New Branch.
-
In the Create Branch window, configure your new branch:
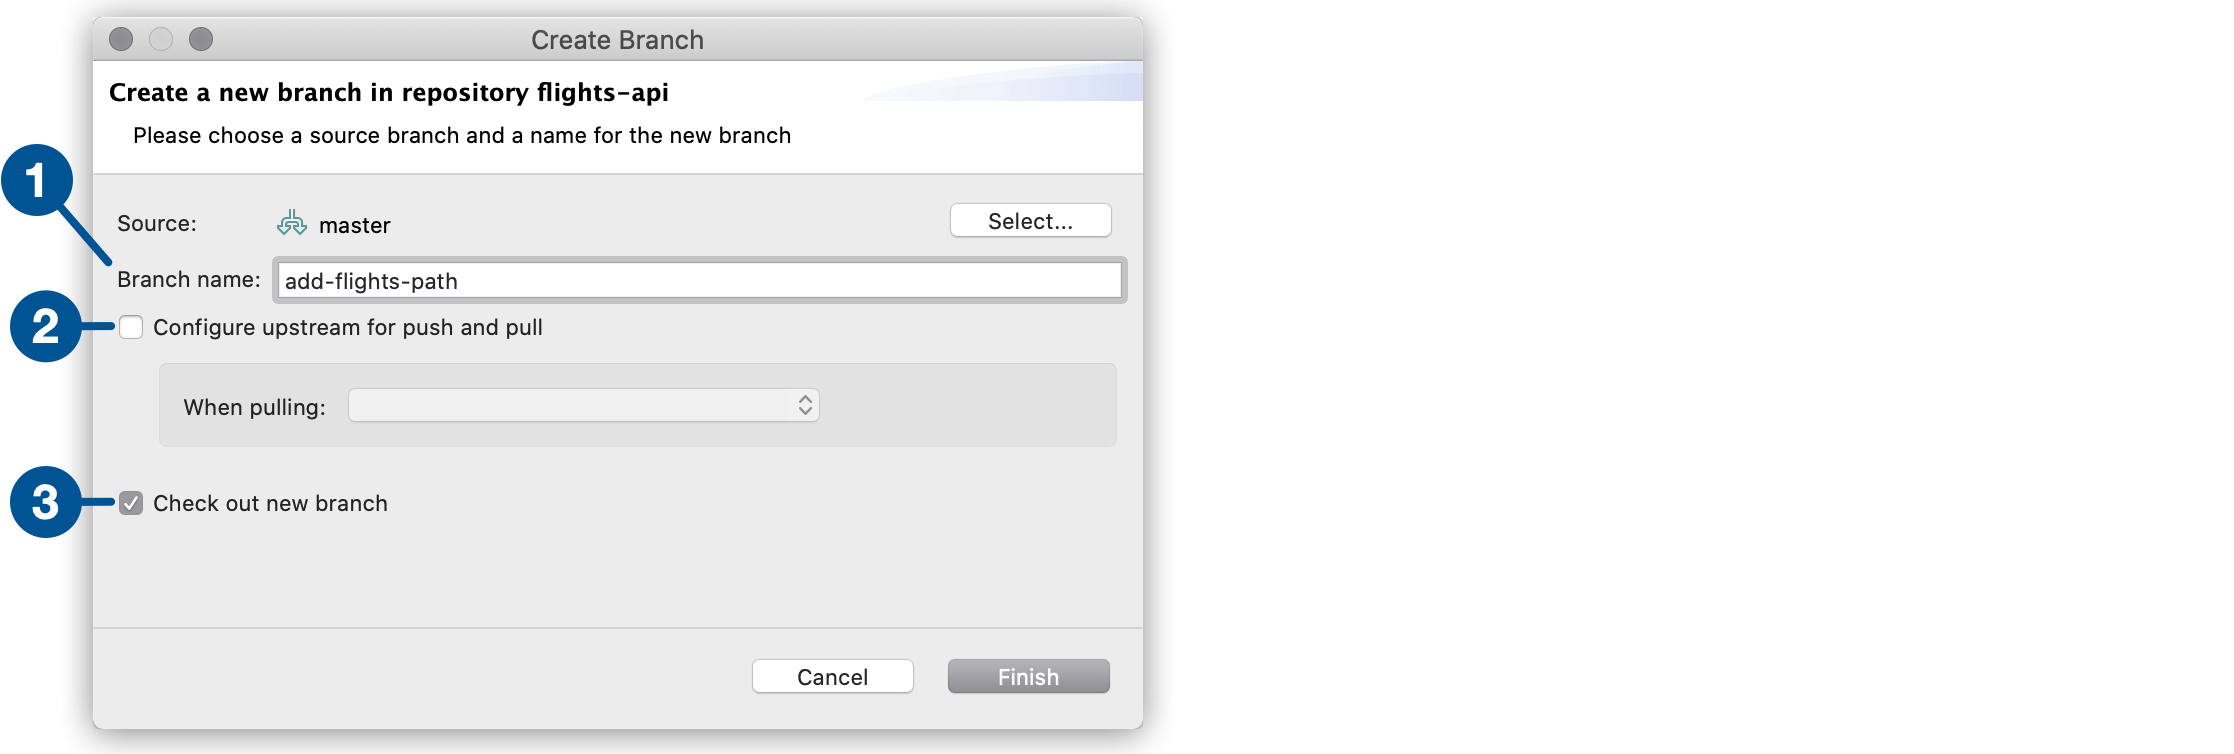
| 1 | In the branch name field, type the name of your new branch. |
| 2 | You can select the Configure upstream for push and pull option if you want to also pull changes from MuleSoft VCS into your local branch.
When configuring this option, you must select the behavior you want Git to have when it pulls the changes from MuleSoft VCS. |
| 3 | Select the Check out new branch for Git to switch to this new branch as soon as you create it. |
-
Select Finish.
With a newly created branch, you can start committing your changes.
Commit Changes to Your API Specification Project
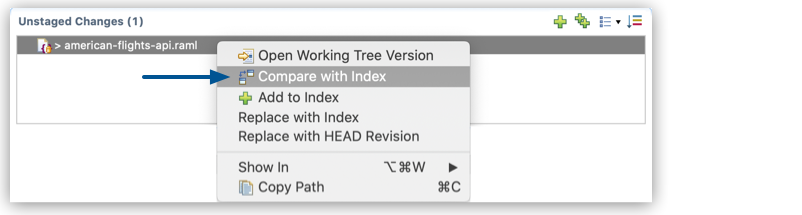
The VCS in Studio tracks every change you make to your project and shows them in the Unstaged Changes area of your Git Staging view.
You can track your changes to a file by right-clicking it in the Unstaged Changes section and selecting Compare with index:
After applying your changes, add them to your index:
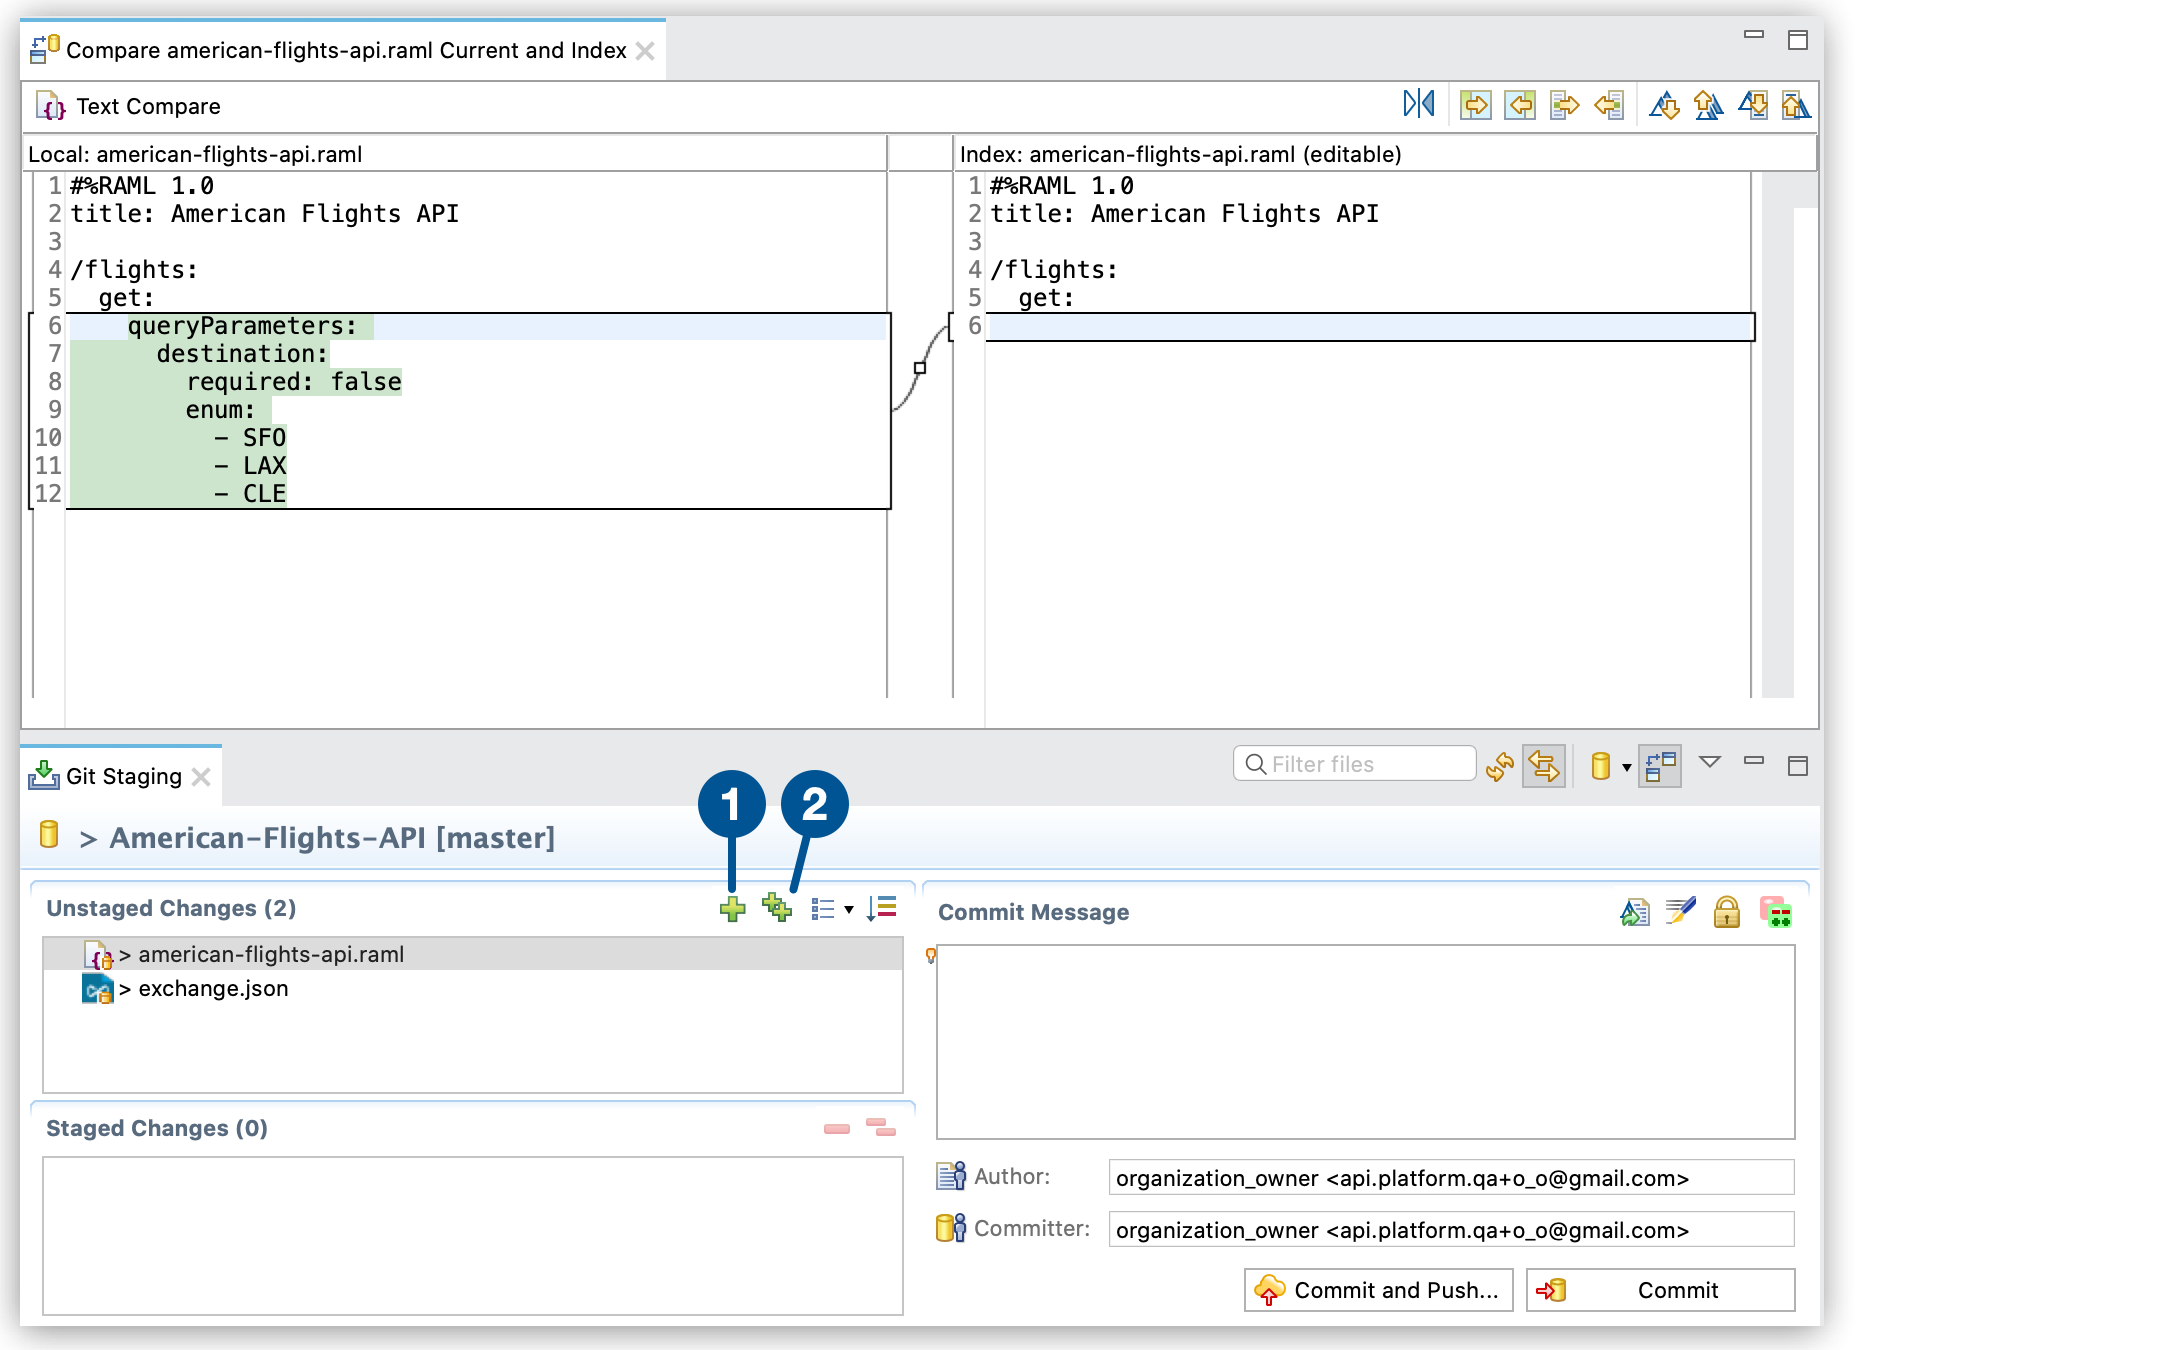
| 1 | Use the Add selected files to the index icon to stage for commit the files that you selected. |
| 2 | Use the Add all files including not selected ones to the index icon to stage for commit all unstaged changes. |
When you staged the changes that you want to commit, write a commit message in the Commit Message section:

| 1 | Select Commit and Push to also push the change to MuleSoft VCS.
See Push Your Branch to MuleSoft VCS below for more information. |
| 2 | Select Commit to add the commit to your local copy. |
See Git Staging View Reference for more information about this view.
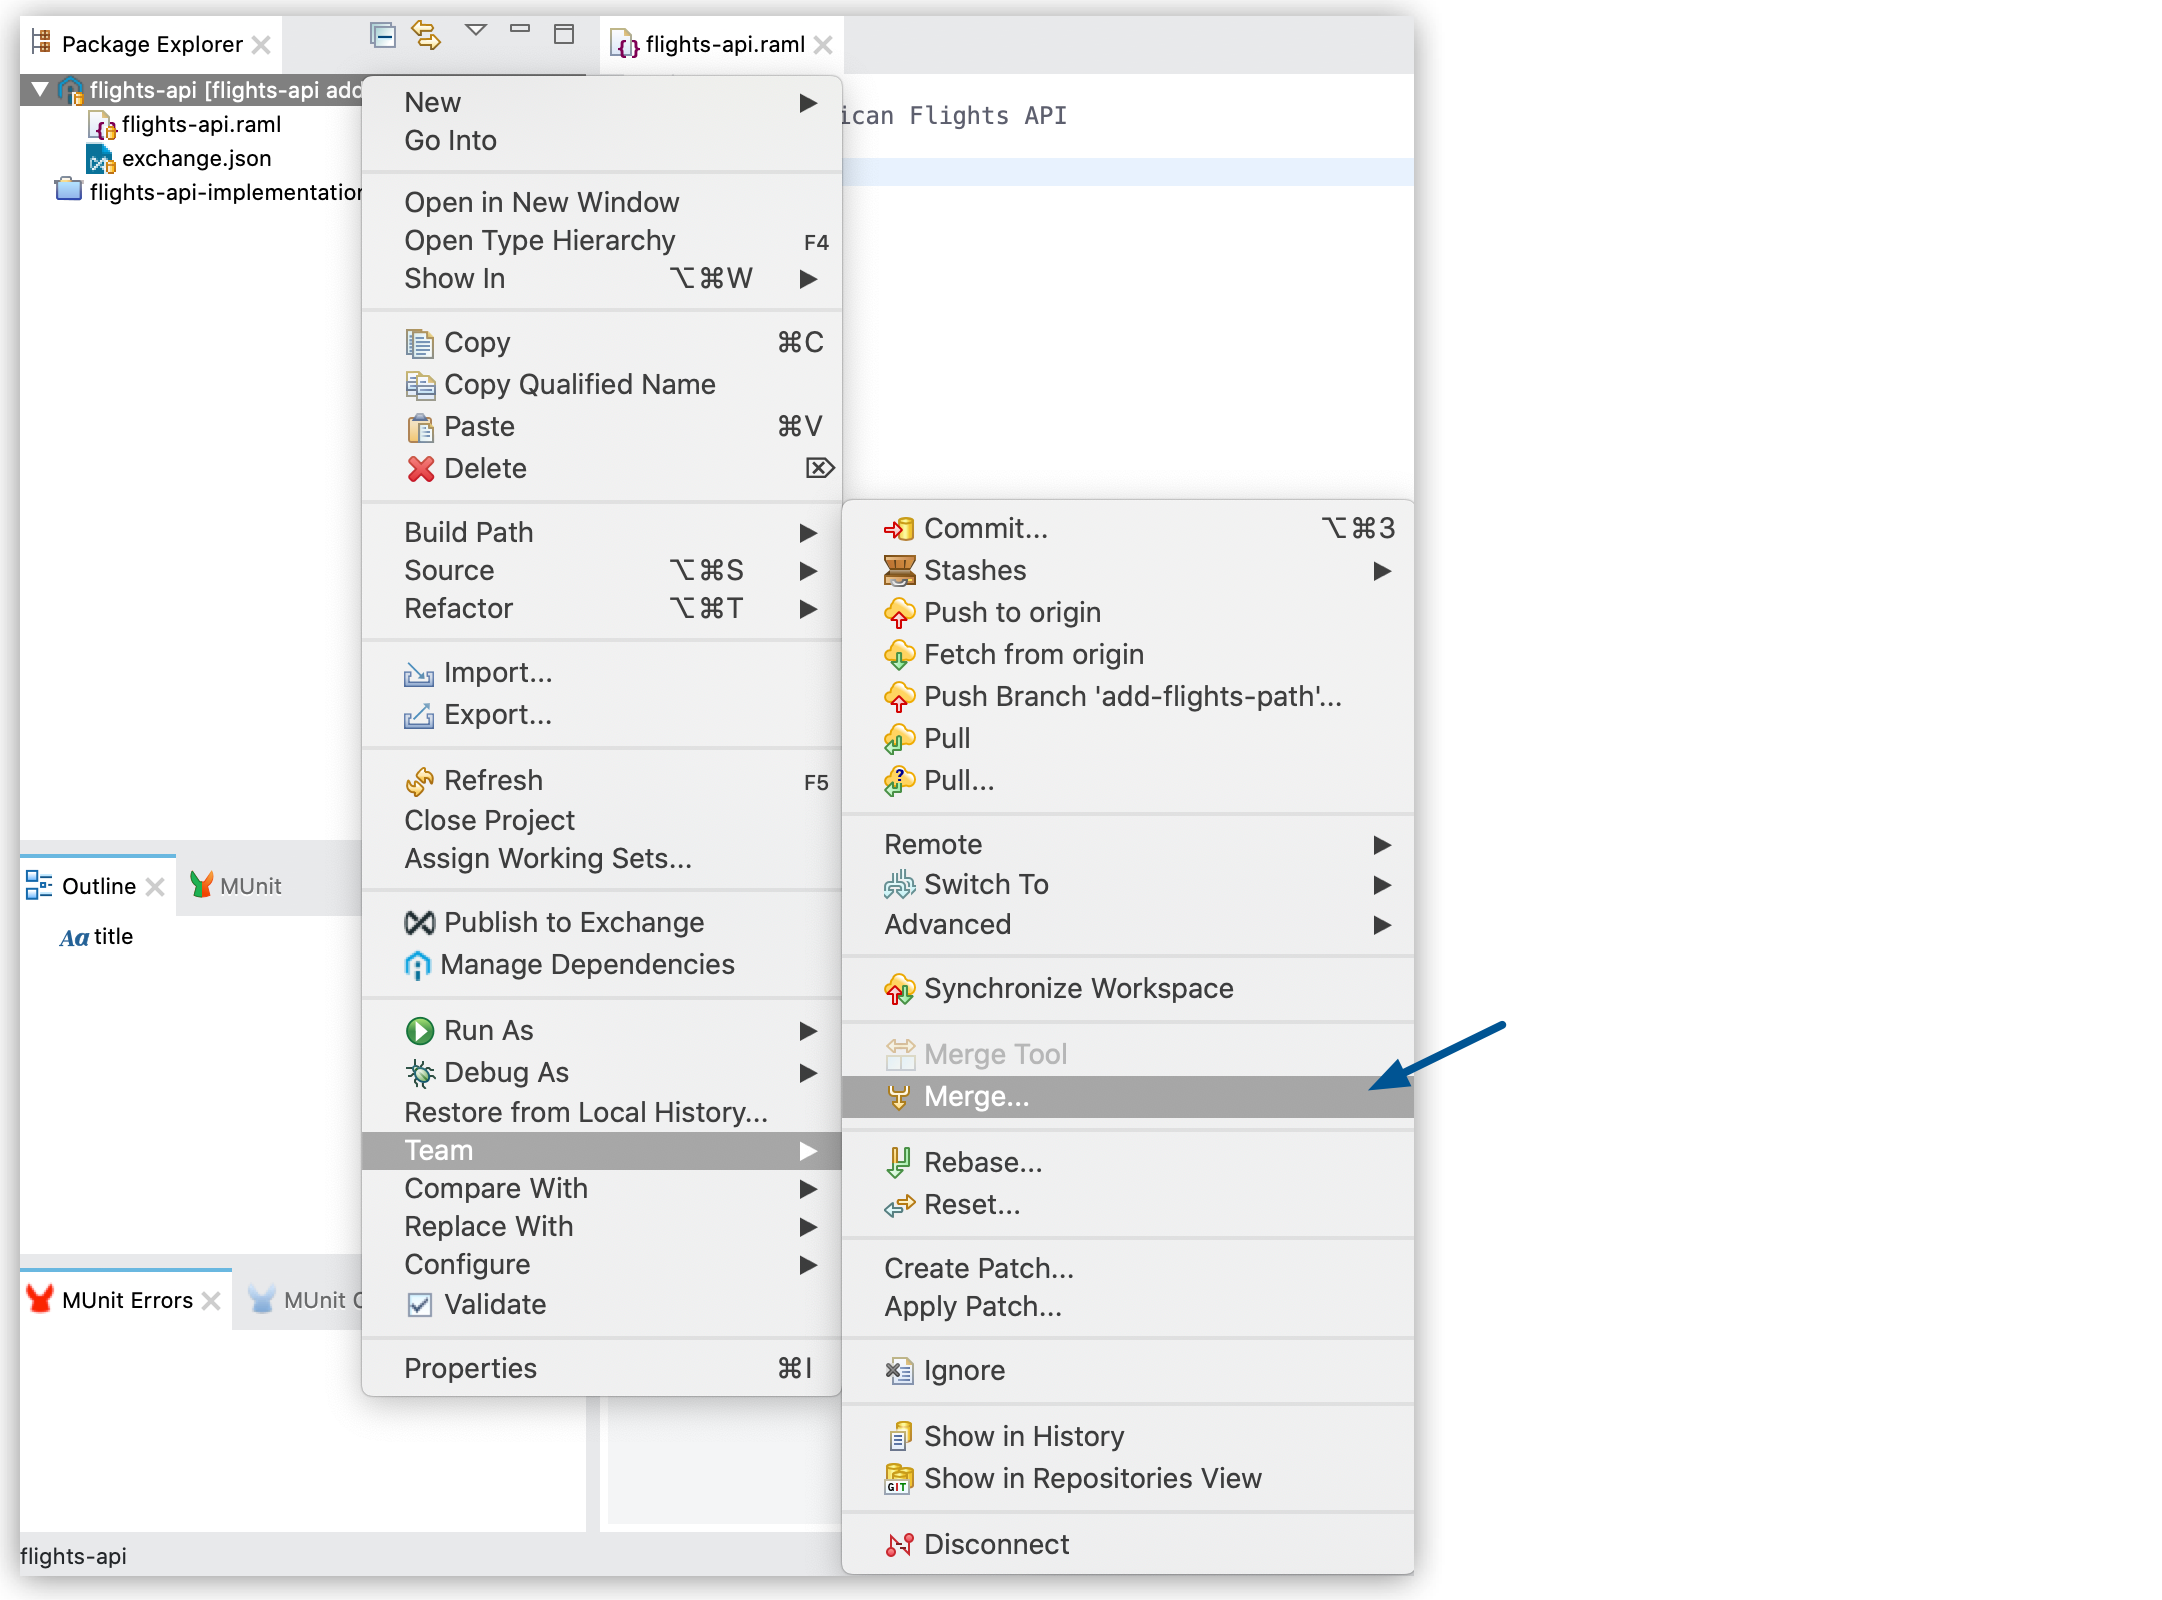
Merge Your Changes into the Main Branch
You can merge the changes made in your local branch to the main branch to push to MuleSoft VCS:
-
In the Package Explorer view, right-click your API specification project and select Team > Merge > Push Branch.
-
Select the local branch to which you want to merge your changes:
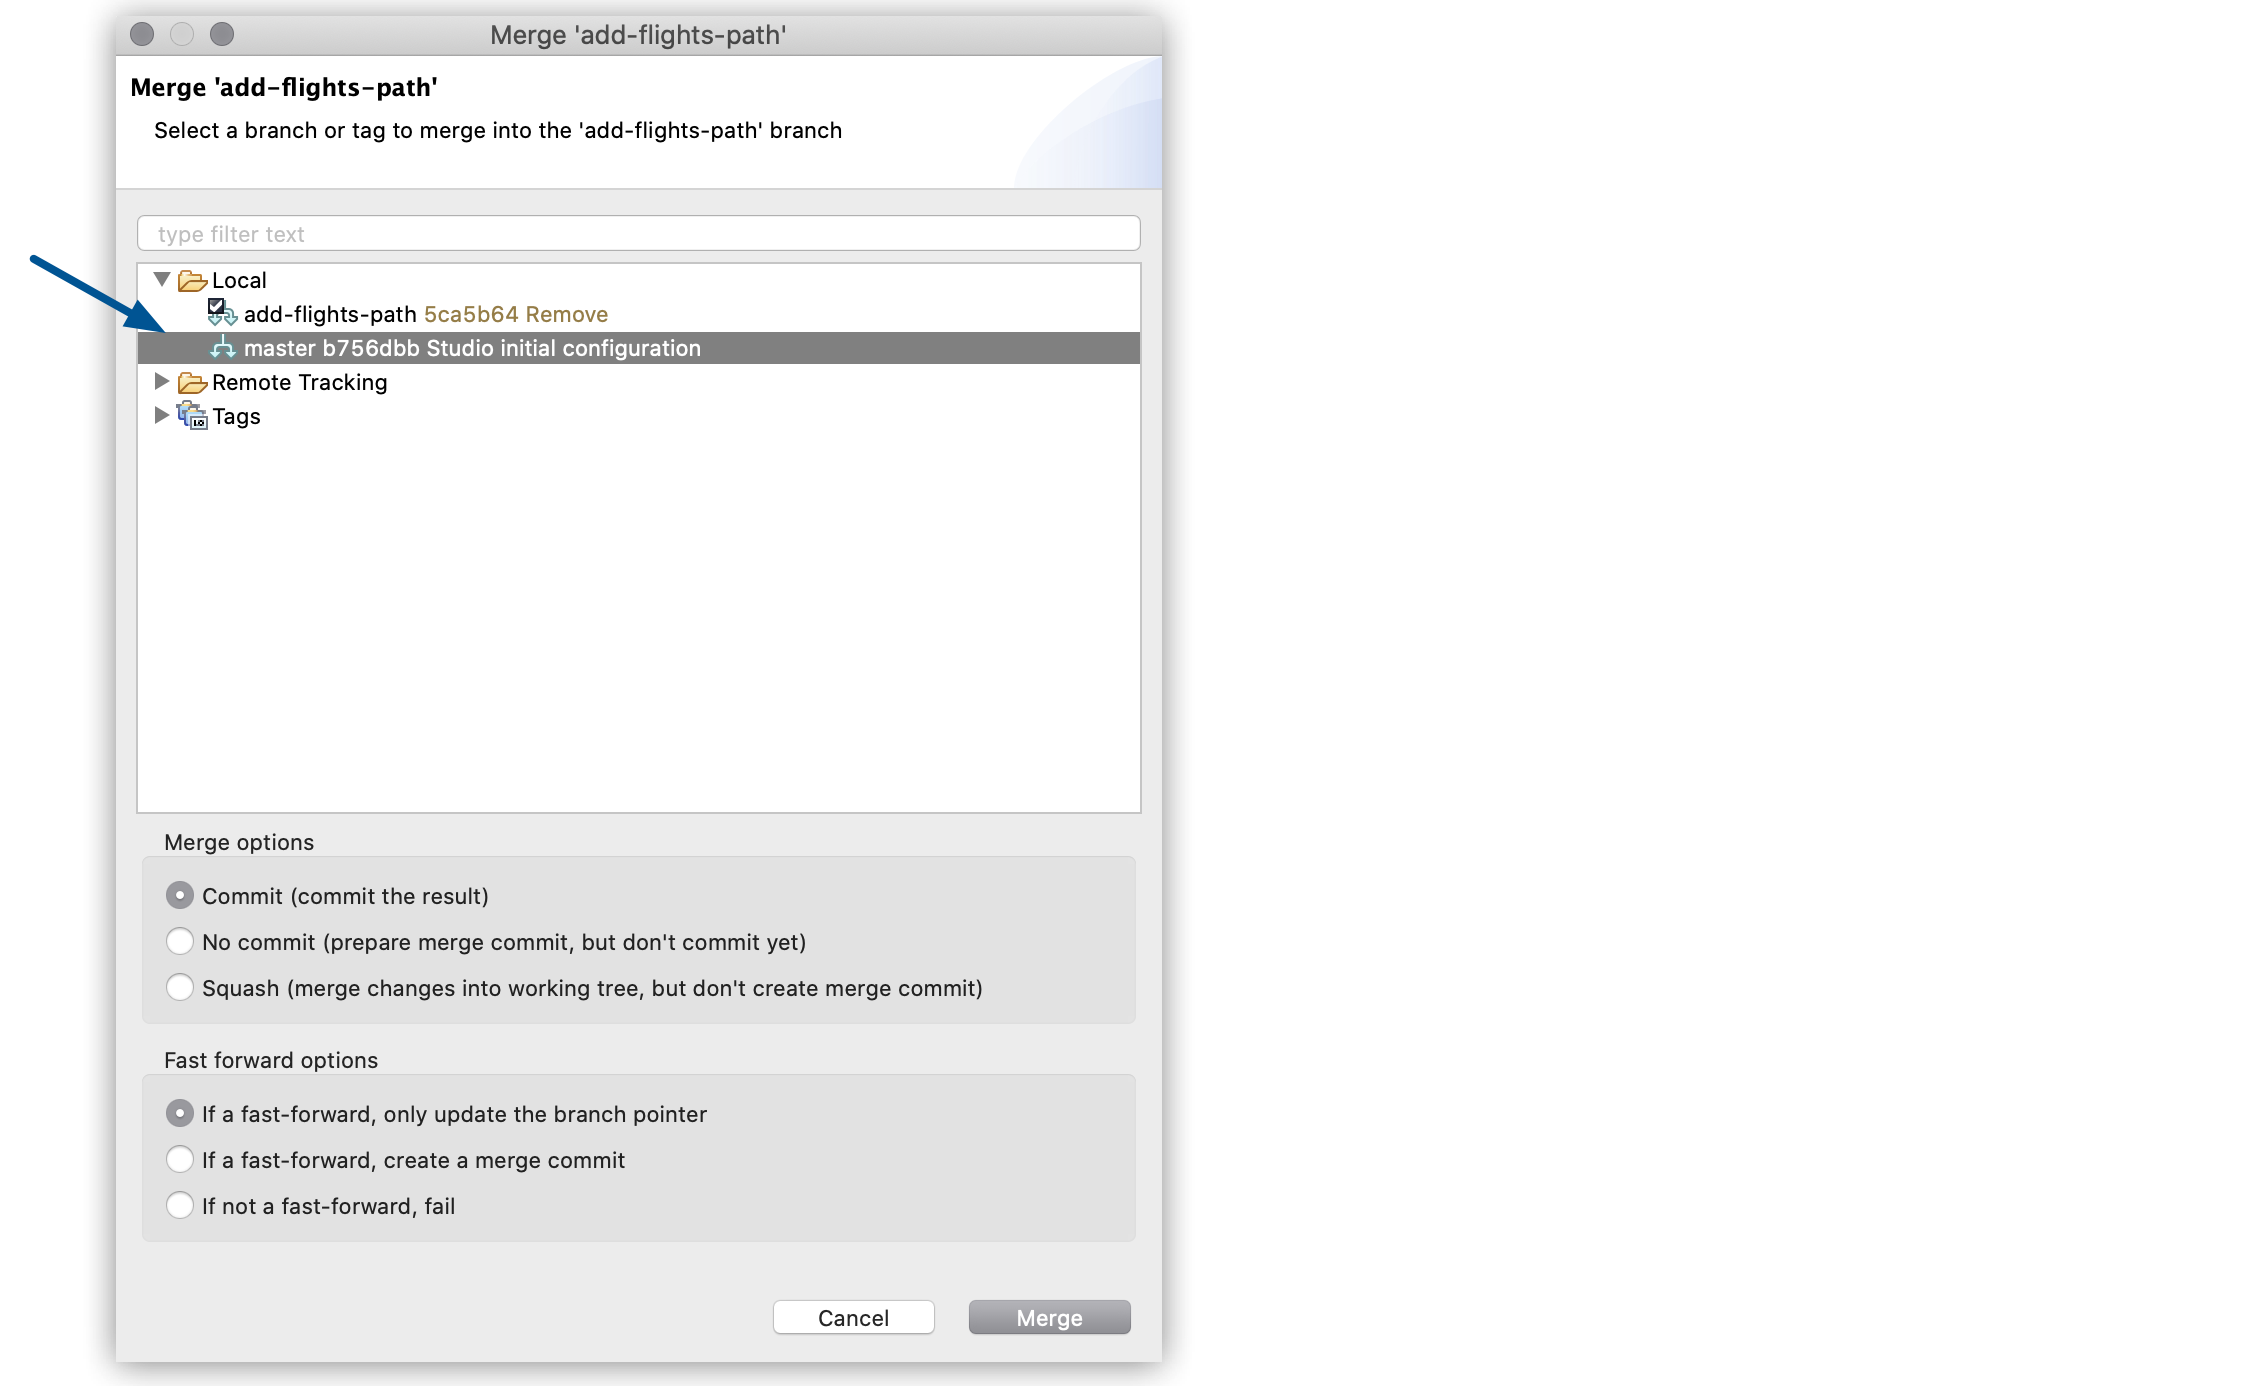
-
Select Merge.
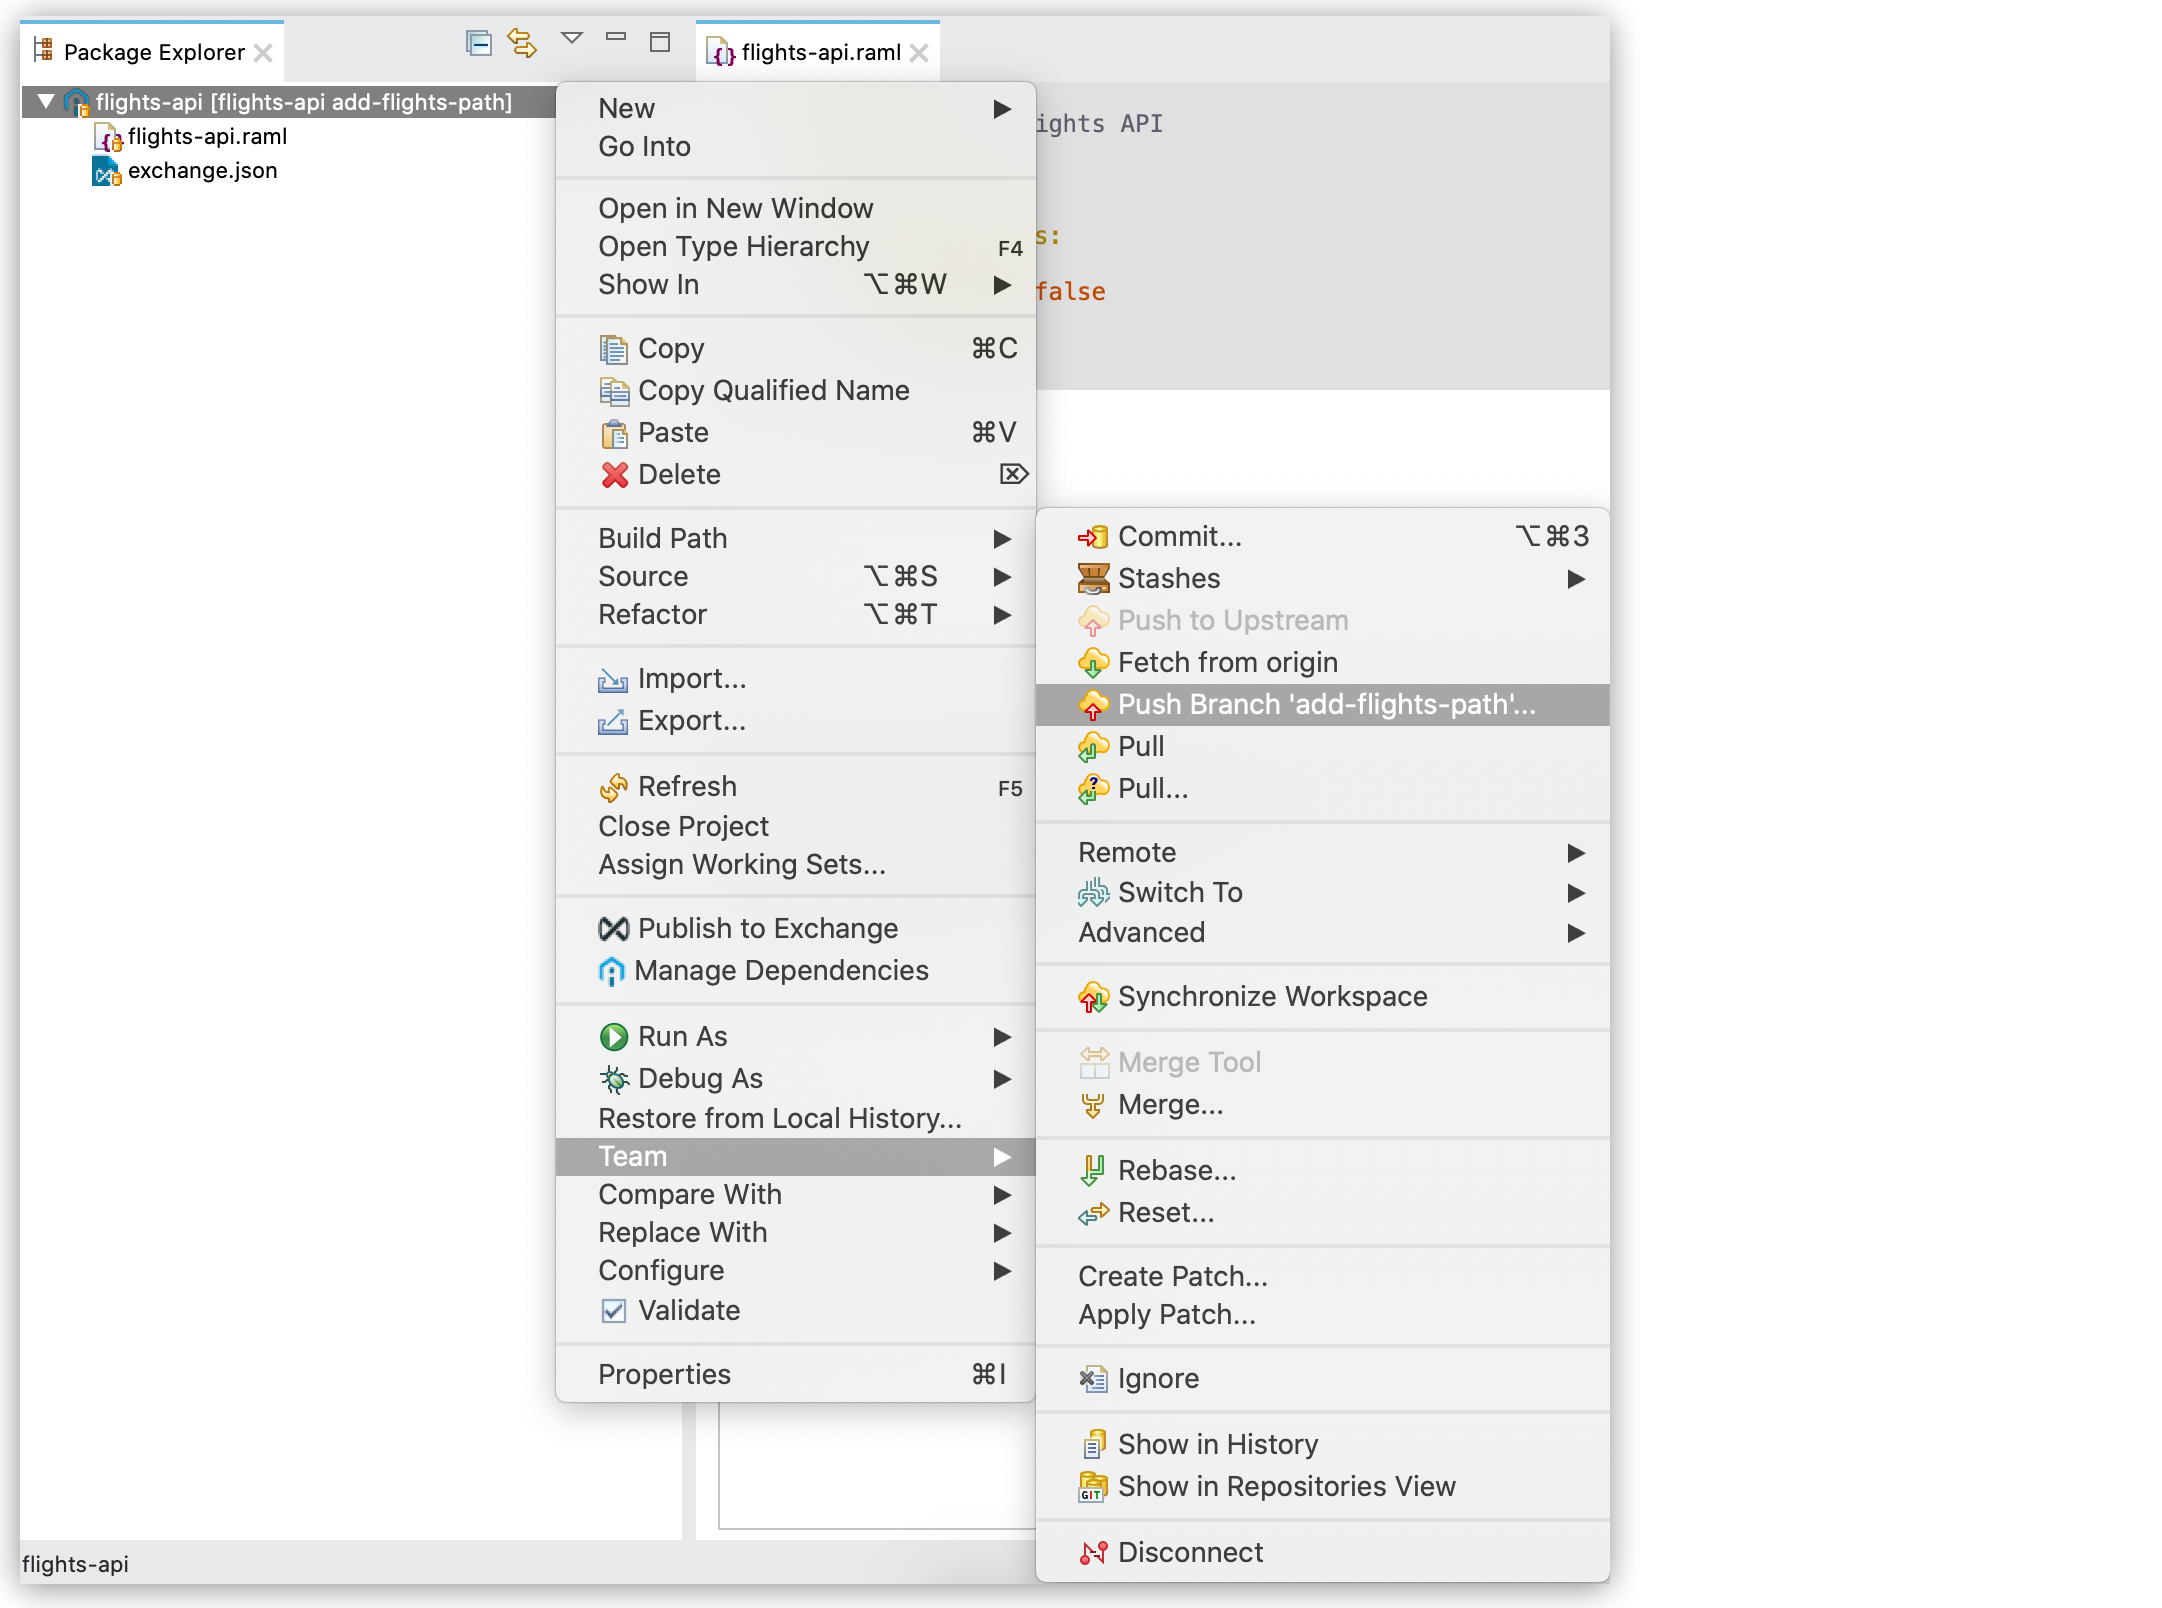
Push Your Branch to MuleSoft VCS
You can choose to publish your local branch to MuleSoft VCS after you committed all your changes to your local branch:
-
In the Package Explorer view, right-click your API specification project and select Team > Switch To > Push Branch.
-
Verify the changes that you are pushing to MuleSoft VCS.
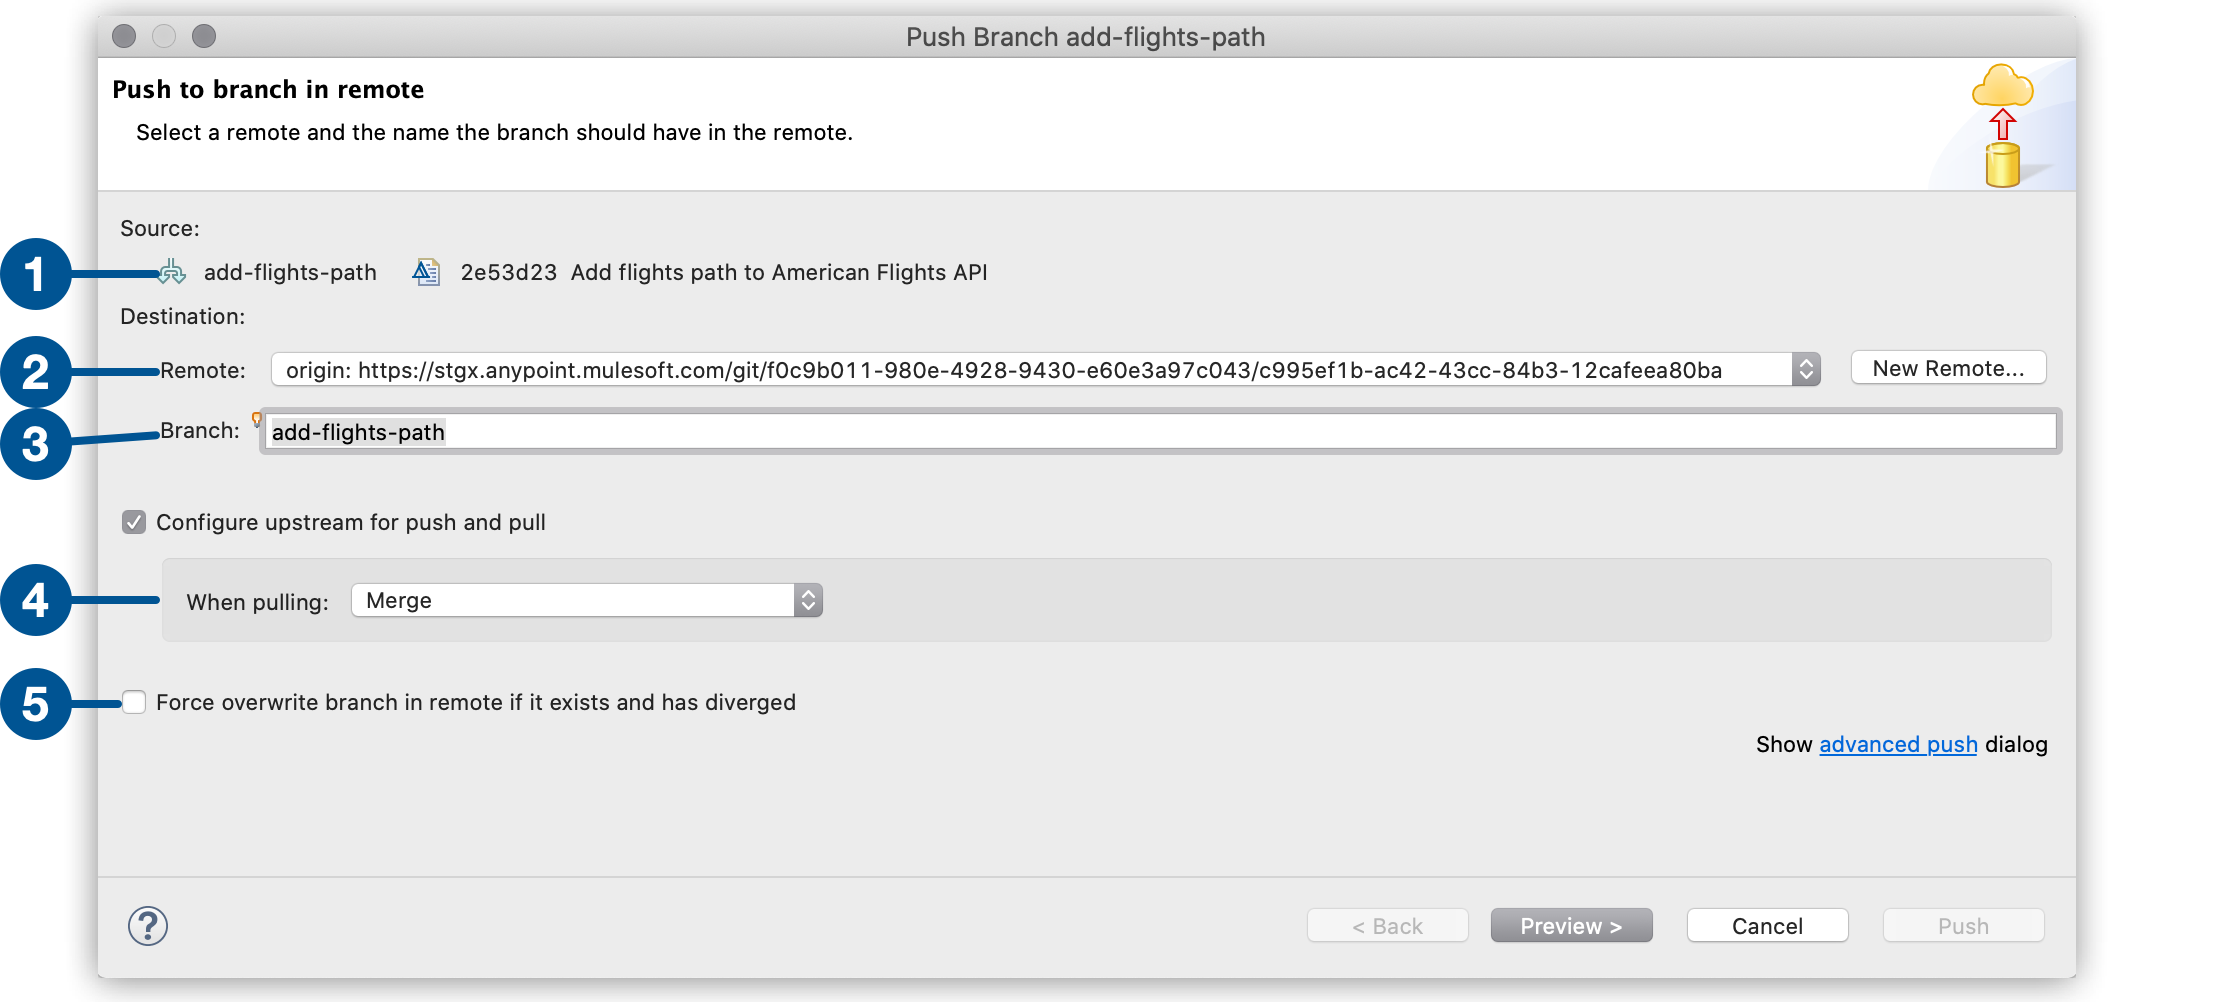
| 1 | The Source section shows the changes that you are pushing to MuleSoft VCS. |
| 2 | The Remote section shows the coordinates to the remote you are pushing to. |
| 3 | The Branch section shows the local branch that you are pushing. |
| 4 | You can select the Configure upstream for push and pull option if you want to also pull changes from MuleSoft VCS into your local branch. When configuring this option, you must select the behavior you want Git to have when it pulls the changes from MuleSoft VCS. |
| 5 | Select the Force overwrite branch in remote if it exists and has diverged only if you know that your local changes must overwrite the changes in MuleSoft VCS. This option force pushes your changes to the branch in MuleSoft VCS. |
-
Select Preview to see a summary of the changes you are pushing.
-
Select Push
In certain scenarios, someone else might have modified the version in MuleSoft VCS while you modified the same version locally. This triggers conflicts in Git.
See Solve Conflicts for more information.