Portal Creation Reference
To engage users who might be interested in your API, use your organization’s developer portal or create your own portal for an API. The Anypoint Platform Developer Portal is an example of a developer portal for APIs that programmatically controls Anypoint Platform activities.
The Anypoint Platform Developer Portal URL is:
API Manager creates a developer portal without user intervention when the organization administrator creates the first API portal for the organization.
After deploying an API, you can create an API portal. You create a portal for users to consume your API and find assets, such as examples and custom policies. On the portal, you set up users to access the private API. From the portal editing environment, you include an API Notebook to convey technical workflows, for example, how to make an authenticated call to your RAML-based API. Include images, attachments, and an API Console for simulating calls to your RAML-based API. Engage the community through interaction with the API to solicit feedback and contributions.
You can customize the content of an API portal, configure privacy, and add an API Console and API Notebook to the portal.
Creating a Portal
From the API version details page, select Create New Portal on the API-Portal drop-down to create a portal.
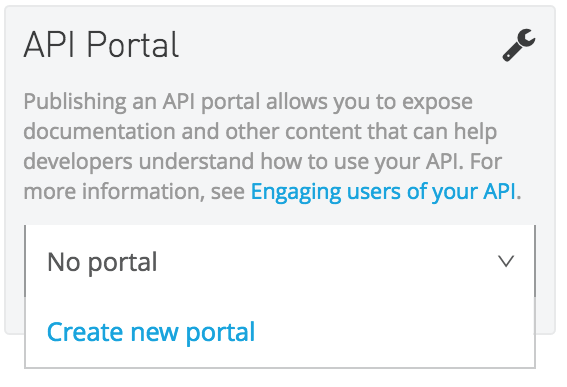
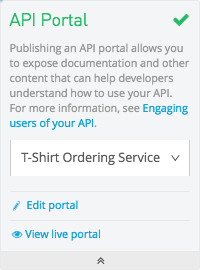
You are prompted to create a portal or attach the API version to an existing portal to reuse its content. When you reuse an existing portal, the portal has a unique URL specific to the API version and displays version-specific content for the API Console and API Notebook. After you create a portal, on the API version details page, a View live portal link appears.
Deleting a Portal
To delete a portal, select No Portal on the API-Portal drop-down.
Customizing The Look of an API Portal
A portal is private until you make the content in it visible and switch the portal to public.
You can add the following content to a portal:
-
Pages: Write GitHub Flavored Markdown text to communicate any other API information users might find useful.
-
API Reference: If the API has a RAML definition attached to it in its API version details page, you can add API Console to simulate API calls.
-
API Notebook: If you make a portal public, using API Notebook, you can add an interactive tool to the portal for writing tutorials about how to use the API or integrate it with other services.
-
Headers, which are displayed on the portal’s left nav bar, separating the various sections of content
-
External links displayed in the portal left nav bar.
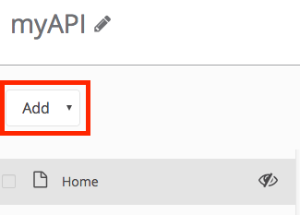
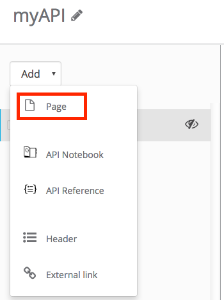
To customize the portal, click the Add button on the left and select what you want to add.
Any changes you make to the left navigation are automatically saved. Changes that you make to the markdown pages need to be saved as drafts and published by toggling Private/Public.
You can drag the section heading or any other left nav item up or down to reorder the items.
Adding Pages
A portal includes a page named Home. This is the landing page for the API Version. Use this space to provide users with API information. Add more pages by clicking the Add button and selecting Page.
Save and make the content visible by checking the checkbox of the nav item that represents the page. Click the visible icon. To preview the page, click Live Portal.
Adding an API Console
If you defined the API using RAML before creating the API portal, API Console is automatically included in the left navigation. Click *API Reference to view it.
If you created the RAML definition after creating the API Portal, the API Console is not automatically included in the left navigation of the portal. However, you can add it at any time by clicking Add New… > API Reference.
Making a Portal Public or Private
A portal is either Public or Private.
-
Public
Can be viewed by anyone, regardless of whether they are a member of the Anypoint Platform organization, whether they are signed in, or what permissions they have.
-
Private Users logged into users your Anypoint Platform organization who have Portals Viewer permissions for the API version can view the portal. Unless you created the API version yourself, you must be explicitly granted Portals Viewer permissions. You inherit Portals Viewer permissions if you are granted Portal Editor permissions for an API version.
When you create a new portal, it is Private by default. Click the Private/Public icon on the top right of the editor to toggle the state of a portal between public and private. When you make the portal Public, it is visible to everyone, including anonymous users, on the organization’s developer portal. Anyone can discover the API, access its portal, and see any documentation that you have published there.
Developer Portal
Users who are not Organization Administrators or API Creators can use the developer portal for their organization at the following URL: anypoint.mulesoft.com/apiplatform/<organization>. To access the developer portal for an organization from the API Administration page, click the hamburger menu and select Developer Portal.
A developer portal has the following tabs:
-
API portals
Users can search for, browse, and sort portals on this page, then go to a specific API. Use the API Name icon to sort portals in ascending or descending alphabetical order.
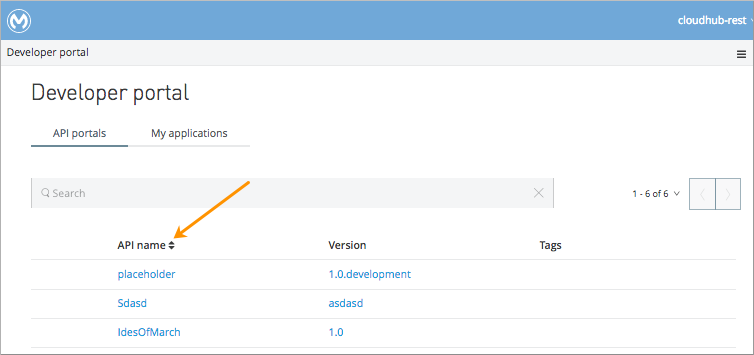
Anonymous users can view any API portals that you make public.
-
My applications
Users can search for and sort the list of their applications approved to access the API. To manage an application, click an application name in the list. The My Applications page appears for the named application.
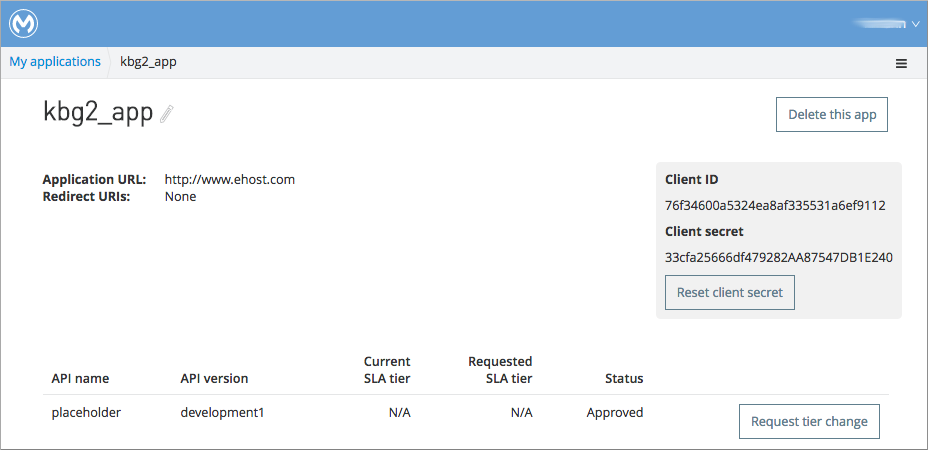
Subject to role and permissions, you can use controls on the developer portal for performing the following tasks:
-
Removing application access privileges
-
Revoking and restoring the access privileges of the application
-
Resetting the client ID and client secret
-
Updating application properties, such as the name and URL
-
Requesting a different SLA tier level of access for your application
-
Viewing information about the application
Skinning the Portal
Adjust the look and feel of an portal by clicking Themes. Add your own logo and choose the colors for the different elements in the top nav bar, either from a palette or by typing Hex color codes. The changes you make are reflected only in the portal.
Setting up a Universal Skin for API Portals
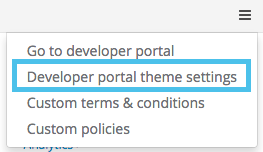
If you have multiple portals, you can set up a universal theme to apply to every portal in your organization and its business group. Go to the API Administration page, click the hamburger icon on the top-right of the screen and select Developer Portal Theme Settings.
If you apply settings at the root organization level, the theme is used in the portals of all your business groups. If you apply settings at the API Administration level for an individual business group, the theme overrides the theme defined at a higher level and affects only the portals of that business group.
Adding Images and Attachments
You can upload attachments and images for display within a portal. For example, to include an image in an API portal, click the image icon.

Images and attachments that you upload to an API portal are removed if you delete the API portal where you uploaded them.
An API portal supports the following types of images:
-
PNG
-
JPEG
-
SVG
-
GIF
-
WEBP
-
BMP
You can add images or attachments up to 5MB in size. Host images larger than 5MB on an external site and link to those images from API portal. Linking to attachments is not supported.
To link to an image, use an absolute URL, including protocol (HTTP or HTTPS) and full path, such as http://example.com/my_image.png.

An API portal displays the linked image but does not store it. If the actual image is deleted from the external host, the API Portal indicates that the image is broken.
Removing Images or Attachments
To remove an image or attachment, hover over it. Click the Trash icon, then click Delete to confirm the operation.
Previewing a Portal
Click Live Portal to preview the portal.
Deleting Elements
To delete any element, such as a markup page, API Notebook, or API Reference, select the checkbox for the element on the left menu, then click the trashcan icon. Confirm that you want to delete the element.
Adding Terms and Conditions
You can define two levels of terms and conditions regarding the use of an API portal by visitors.
-
Portal Terms and Conditions
Must be accepted before any access to the developer portal.
-
API Access Terms and Conditions
Must be accepted before attempting to register an application through the API portal.
After saving a set of terms of conditions, these are applied to all the APIs in your organization.
The current text of the terms and conditions are recorded on the user’s profile. This ensures that, in case these terms and conditions change, the user’s contract remains as agreed.
The sections below describe the types of terms and conditions.
Portal Terms and Conditions
You write portal terms and conditions and globally set the terms and conditions for access to the API developer portals for your entire organization.
To write portal terms and conditions:
-
From the API administration page, on the hamburger menu, click Portal terms & conditions.
-
Use markdown to write the terms and conditions.
When set, an acceptance screen appears when a user initially accesses the organization’s developer portal. Acceptance is requested if and when the terms and conditions change.
Request API Access Terms and Conditions
The terms and conditions for requesting API access are presented to users upon registration of an application for an API through the API’s developer portal.
These terms and conditions can be configured at a global level from API Administration hamburger menu, or as an API owner, you can configure API version-specific terms and conditions. Do the latter from the hamburger menu of the API version details page. These terms and conditions override the global Request API Access terms and conditions.
Organizations with Multiple Business Groups
Applying settings at the root organization level sets the terms and conditions for APIs used by all your business groups. You cannot apply terms and conditions within the API Administration page of an individual business group.