Classifying an API Instance into an Environment
After you upgrade to API Manager 2.x your APIs are placed in an unclassified environment. You need to classify unclassified APIs to govern or otherwise manage the APIs.
Even though API Manager supports tracking APIs with both organization and environment credentials, MuleSoft recommends using environment credentials since the permissions associated to them are more restrictive. You need to restart Mule Runtime after changing credentials. Restarting can cause downtime. See Configuring Mule Servers with Environment Credentials (Advanced Classification: Optional) below for details on how to change them. After doing so, you may classify your API to an environment that API Manager will suggest.
Using credentials from one environment does not allow:
-
Tracking APIs from different environment
-
Tracking APIs from different organizations
If you need to track APIs in either of these ways, use organization credentials.
See Configuring Organization Credentials in Mule Runtime 4.
If you need to track APIs using environment credentials review the advanced section.
Classifying the API Instance on API Manager
-
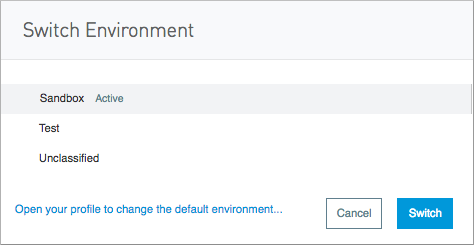
In API Manager, click the environment control, which is labeled SANDBOX in this example:

If you do not have a suitable environment you want to classify the API into, create the environment in Access Management. See To Create a New Environment and Reviewing Environment Concepts for more information.
-
Select Unclassified.
-
Click Switch.
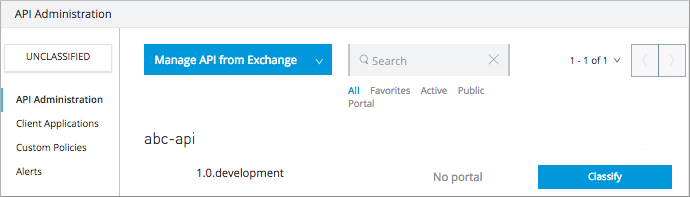
A list of unclassified APIs appears.
-
If the Classify button is disabled, click Reconnect to link the unclassified API with its corresponding Exchange asset.
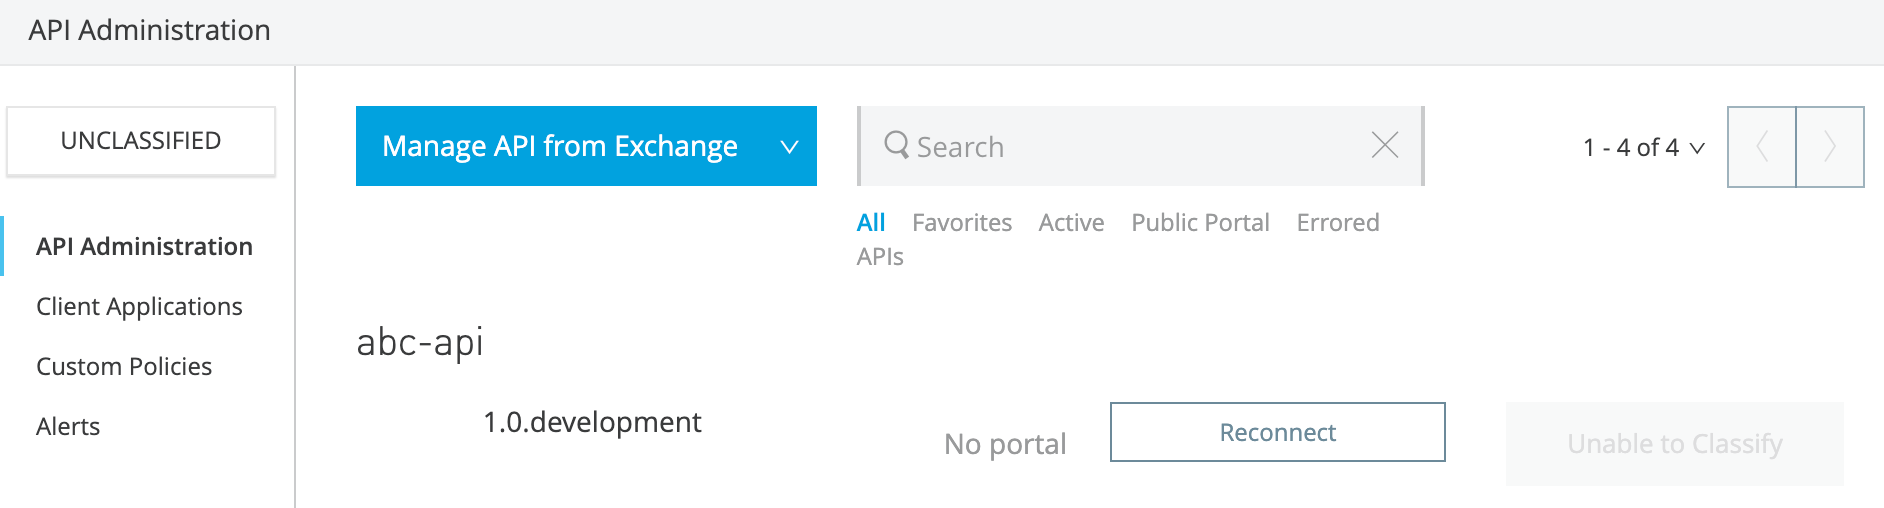
Once the API is successfully reconnected, the Classify button becomes available.
-
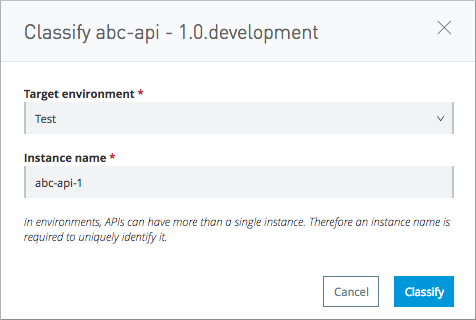
Click Classify.
-
For Target environment, select the environment for the API from the list of environments available to you. For example, select Test.
-
For Instance name, optionally type a unique instance name. For example, type
abc-api-1.For environments, APIs can have more than a single instance. Therefore, an instance name is required to uniquely identify it.
Classifying the API Instance via REST API
You can also classify unclassified APIs using the Anypoint Platform REST APIs. This method is useful for automation, scripting, or bulk updates.
| Customers can continue using the REST APIs for classifying API instances after January 31, 2026. These endpoints remain available and supported for automation, scripting, and operational workflows. |
Before you begin, obtain an authentication token using the Login API.
Logging In
POST /accounts/login
Payload example:
{"username":"myusername","password":"mypassword"}Curl example:
curl --location 'https://anypoint.mulesoft.com/accounts/login' \
  -H 'Content-Type: application/json' \
  --data-raw '{"username":"myusername","password":"mypassword"}'
The response contains the bearer token you must use in subsequent requests.
Getting the List of Unclassified APIs
Use this request to retrieve all API instances that are not yet classified into an environment.
GET /apiplatform/repository/v2/organizations/{organizationId}/apis
Example:
curl --location 'https://anypoint.mulesoft.com/apiplatform/repository/v2/organizations/00000000-0000-0000-0000-00000000000/apis' \
  --header 'Authorization: bearer <token>'
Classifying an Unclassified API
Once you identify the API and version you want to classify, send the classification request.
POST /apiplatform/repository/v2/organizations/{organizationId}/apis/{apiId}/versions/{apiVersionId}/classify
Payload:
{
  "environmentId": "00000000-0000-0000-0000-00000000000",
  "instanceLabel": "mylabel"
}
Curl example:
curl --location 'https://anypoint.mulesoft.com/apiplatform/repository/v2/organizations/00000000-0000-0000-0000-00000000000/apis/0000000/versions/0000000/classify' \
  --header 'Authorization: bearer <token>' \
  --header 'Content-Type: application/json' \
  --data '{"environmentId": "00000000-0000-0000-0000-00000000000","instanceLabel": "mylabel"}'
Notes:
-
environmentIdis required. -
instanceLabelis optional. -
Existing client contracts continue to work after classification.
Connecting the API to an Exchange Asset
An unclassified API must be linked to an asset in Exchange and must have an endpoint configured. To associate the API with an Exchange asset, update the GAV coordinates using the following calls.
Update the API Root Object
PATCH /apiplatform/repository/v2/organizations/{organizationId}/apis/{apiId}
Payload:
{
  "groupId": "{groupId}",
  "assetId": "{assetId}"
}
Update the API Version
PATCH /apiplatform/repository/v2/organizations/{organizationId}/apis/{apiId}/versions/{apiVersionId}
Payload:
{
  "assetVersion": "{assetVersion}"
}
Reference: Exchange Experience API https://dev-portal.mulesoft.com/apis/exchange-experience.html
Deleting an Unclassified API
You can delete an unclassified API using:
DELETE /apiplatform/repository/v2/organizations/{organizationId}/apis/{apiId}
Example:
curl --location --request DELETE 'https://anypoint.mulesoft.com/apimanager/api/v1/organizations/00000000-0000-0000-0000-00000000000/environments/00b16bd4-cb49-4ad4-9357-0e435ad1eec4/apis/0000000' \
  --header 'Authorization: bearer <token>'
If the API has existing contracts in pending or approved state, revoke them before deletion:
POST /apiplatform/repository/v2/organizations/{organizationId}/apis/{apiId}/versions/{apiVersionId}/contracts/{contractId}/revoke
You can obtain contractId via:
GET /apiplatform/repository/v2/organizations/{organizationId}/applications/{applicationId}/contracts
API Analytics Impact
In the Pre-Crowd version of API Manager, all dashboards were organization-wide. In Crowd, each dashboard links to a particular environment.
If you had custom reports for your APIs before migrating, those custom reports would no longer work after you classify all your APIs.
Configuring Mule Servers with Environment Credentials (Advanced Classification: Optional)
You can use this configuration to track APIs that use environment credentials. This configuration requires a server restart.
The sections that follow help you classify your APIs depending on how you deployed proxies before migration.
Managing an API instance by using a Proxy deployed through API Manager
If your API was deployed in Runtime Manager:
-
From API Administration, click the API Name of the API instance.
-
Click Runtime & Endpoint Configuration > Save & Deploy.
-
Select the Runtime version.
-
Click Save & Apply.
If your API was deployed in an on-premises standalone runtime:
-
From API Administration, click the API Name of the API instance.
-
Click Runtime & Endpoint Configuration > Save & Deploy.
-
Specify a runtime version for Mule Agent 1.9 and later.
-
Click Save & Apply.
To update an existing server:
-
Use SSH to access the standalone runtime server.
-
Download the Runtime Agent 1.9 or later.
-
Update the Gateway runtime agent.
-
Restart the Gateway.
Managing an API instance by using a Basic Endpoint or a Proxy deployed through Runtime Manager
If your API was deployed in Runtime Manager:
-
Navigate to Access Manager.
-
Click Environments.
-
Click the environment name you want to use.
-
Copy the Client ID and Client Secret.
To update an application in Runtime Manager:
-
Navigate to the proxy application in Runtime Manager.
-
Click Settings.
-
Click Properties.
-
Change the values of the following properties to the values from the Environment:
-
Anypoint.platform.client_id
-
Anypoint.platform.client_secret
-
-
Click Apply changes.
To update an application deployed in standalone Mule Runtime:
-
Use SSH to access the standalone runtime server where the application is deployed.
-
Download Runtime Agent 1.9.x.
-
Update the Runtime Agent.
-
Restart the Mule Runtime.
Other Deployments
This section explains the manual steps needed to prepare Mule Runtime to use API environments without updating the agent or registering the server with Runtime Manager.
Getting the environment client ID and secret:
-
Navigate to Access Manager.
-
Click Environments.
-
Click the environment name that you want to use.
-
Copy the Client ID and Client Secret.
Updating an application in Runtime Manager:
-
Navigate to the proxy application in Runtime Manager.
-
Click Settings.
-
Click Properties.
-
Change the values of the following properties to the values from the environment:
-
anypoint.platform.client_id
-
anypoint.platform.client_secret
-
Updating standalone runtimes:
-
Use SSH to access the runtime server that you want to update.
-
Edit the
<mule_home>/<conf>/wrapper.conffile. -
Change the values of the following properties to the values from the environment:
-
anypoint.platform.client_id
-
anypoint.platform.client_secret
-
-
Restart Mule Runtime.