Managing App Schedules
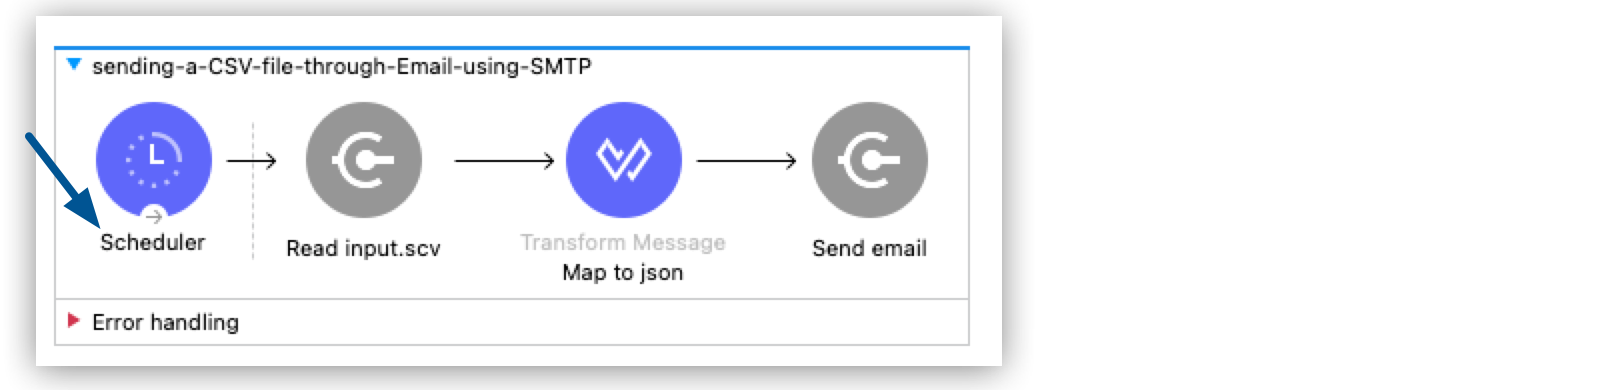
You can use Runtime Manager to view and control the Scheduler components within the flows in your deployed applications, all without changing the running application. For example, you might want to disable a scheduled job while one of the applications is undergoing maintenance.
On the Schedules tab, you can:
-
View the schedules in your running application.
-
Change the schedules in your application.
-
Run the scheduled job immediately, without changing the schedule.
-
Disable or enable the schedule for a flow.
|
The CloudHub schedules REST API doesn’t expose scheduler or domain details for CloudHub 2.0 applications. Manage CloudHub 2.0 schedulers only through the CloudHub 2.0 APIs or the Runtime Manager Schedules tab. |
You configure Scheduler component types as either fixed frequency to trigger at a regular interval or cron to trigger at a date and time based on a specified cron expression.
| To change a schedule type (between fixed frequency and cron or vice versa), you must update and redeploy the app. You can’t change the schedule type on a deployed application. |
| To view the application schedules, you must have the Exchange Viewer permission, in addition to the Read Applications permission. |
Schedule Design Considerations
When designing the schedule, consider the following:
-
Plan for high availability during network failures. The CloudHub 2.0 infrastructure restarts due to hardware issues or scheduled maintenance, and security updates.
During service updates or security patching, CloudHub 2.0 waits five minutes for existing schedules to complete. After a new replica is launched, the schedule runs at its next scheduled time. For more information, see the
shutdownTimeoutattribute in Global Configurations Reference. -
After a security patching, the custom configuration via Runtime Manager takes precedence over the application configuration file.
You can reset the schedulers and delete the custom configuration via API:
DELETE /organizations/{organizationId}/environments/{environmentId}/deployments/{deploymentId}/schedulers/{flowName} -
Because schedules can be triggered more than once, design them to prevent duplicate data processing. If clustering is enabled, CloudHub 2.0 executes the schedule on a single replica, regardless of how many replicas are running. Subsequent schedule executions can occur on a different replica. CloudHub 2.0 distributes multiple concurrent schedules across replicas.
-
For clustered applications, CloudHub 2.0 triggers the schedule exclusively on the primary node.
-
If clustering isn’t enabled, schedules run individually on all replicas.
-
For a fixed-frequency scheduler, the minimum recommended start delay is five seconds. For more information, see Disable or Enable a Scheduler Element.
-
If a schedule isn’t executed because the application isn’t running, CloudHub 2.0 doesn’t trigger it immediately when the application starts. The schedule is executed at its next scheduled time.
-
The CloudHub 2.0 scheduler reads the job configuration every time it runs.
When you update the scheduler configuration, the change takes effect the next time the scheduler runs.
-
Changing the schedule redeploys your application.
-
If you scheduled a job for a time that is in the past while your app isn’t running, the job doesn’t execute when your app is started.
-
Schedules are based in the scheduler’s defined time zone.
-
For multi-replica apps, CloudHub 2.0 runs scheduled jobs on all replicas.
If you run the scheduled job immediately by clicking Run, the scheduler runs on a single replica.
CloudHub 2.0 distributes multiple concurrent schedulers across replicas.
-
You can’t manage CloudHub 2.0 schedules using scripts.
Use the Schedules tab or the CloudHub 2.0 API to manage CloudHub 2.0 schedules.
-
Flow names can contain only upper and lower case letters, numbers, hyphens (
-), underscores (_), and periods (.). The following characters are invalid:/,[,],{,}, and#. -
CloudHub 2.0 schedules run concurrently by default. The Scheduler triggers the execution of a schedule flow while a previously-triggered execution is still running. To run schedules sequentially, set the
disallowConcurrentExecutionproperty astruein the scheduler configuration file. -
By default, schedulers use the same time zone as the machine on which Mule is running. You can change it by adding the time zone you want. For more information, see Cron Expressions.
Fixed Frequency Schedules in Cluster Mode During Rolling Restart
These transition behaviors apply to fixed-frequency schedules when the application runs in cluster mode and undergoes a rolling restart.
- Polling node transition and first trigger
-
During a rolling restart, CloudHub 2.0 starts new nodes before it removes old nodes. The cluster elects a new polling node only after it decommissions the previous polling node. The new node then triggers the schedule. Until this election completes, no node polls the schedule. As a result, the first trigger that would otherwise occur right after a new node starts doesn’t fire. The schedule runs at the next calculated time after the cluster elects the new polling node.
- Schedule timing after restart
-
Fixed-frequency schedules don’t retain the original schedule anchor after a rolling restart. The scheduler calculates the next run time relative to when the cluster elects the new polling node, not the pre-restart cadence. CloudHub 2.0 doesn’t support retaining the original schedule timing for fixed-frequency schedules.
Before You Begin
To use the scheduling feature in Runtime Manager, deploy an application that includes one or more Scheduler elements using Anypoint Studio 7.13 or later.
After you deploy the app, you can manage the schedule in Runtime Manager. The app doesn’t need to be running.
View and Manage Application Schedules in Runtime Manager
After deploying an app to CloudHub 2.0, view and manage the Scheduler elements in Runtime Manager:
-
From Anypoint Platform, select Runtime Manager > Applications.
-
Click the app name.
-
In the navigation menu, click Schedules.
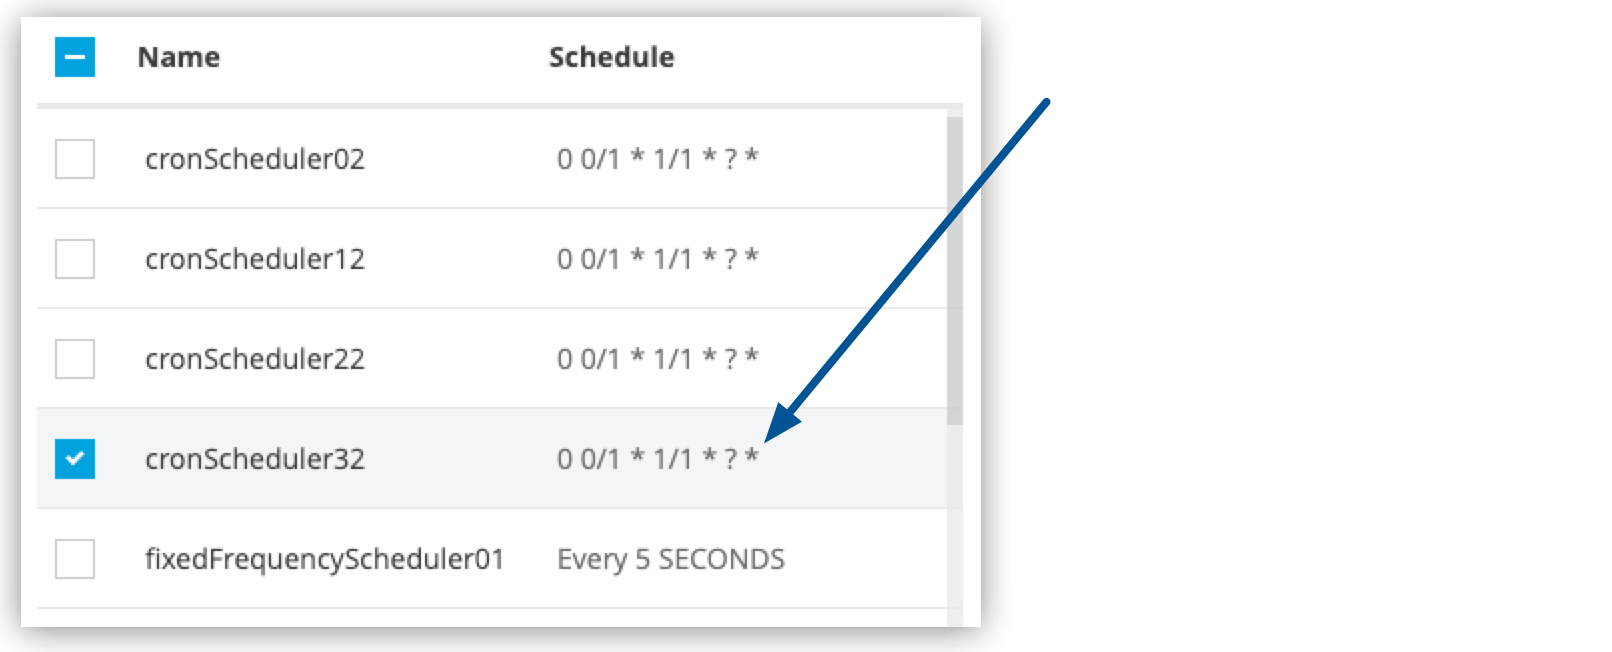
Runtime Manager lists the Scheduler elements in the order they appear in your app:
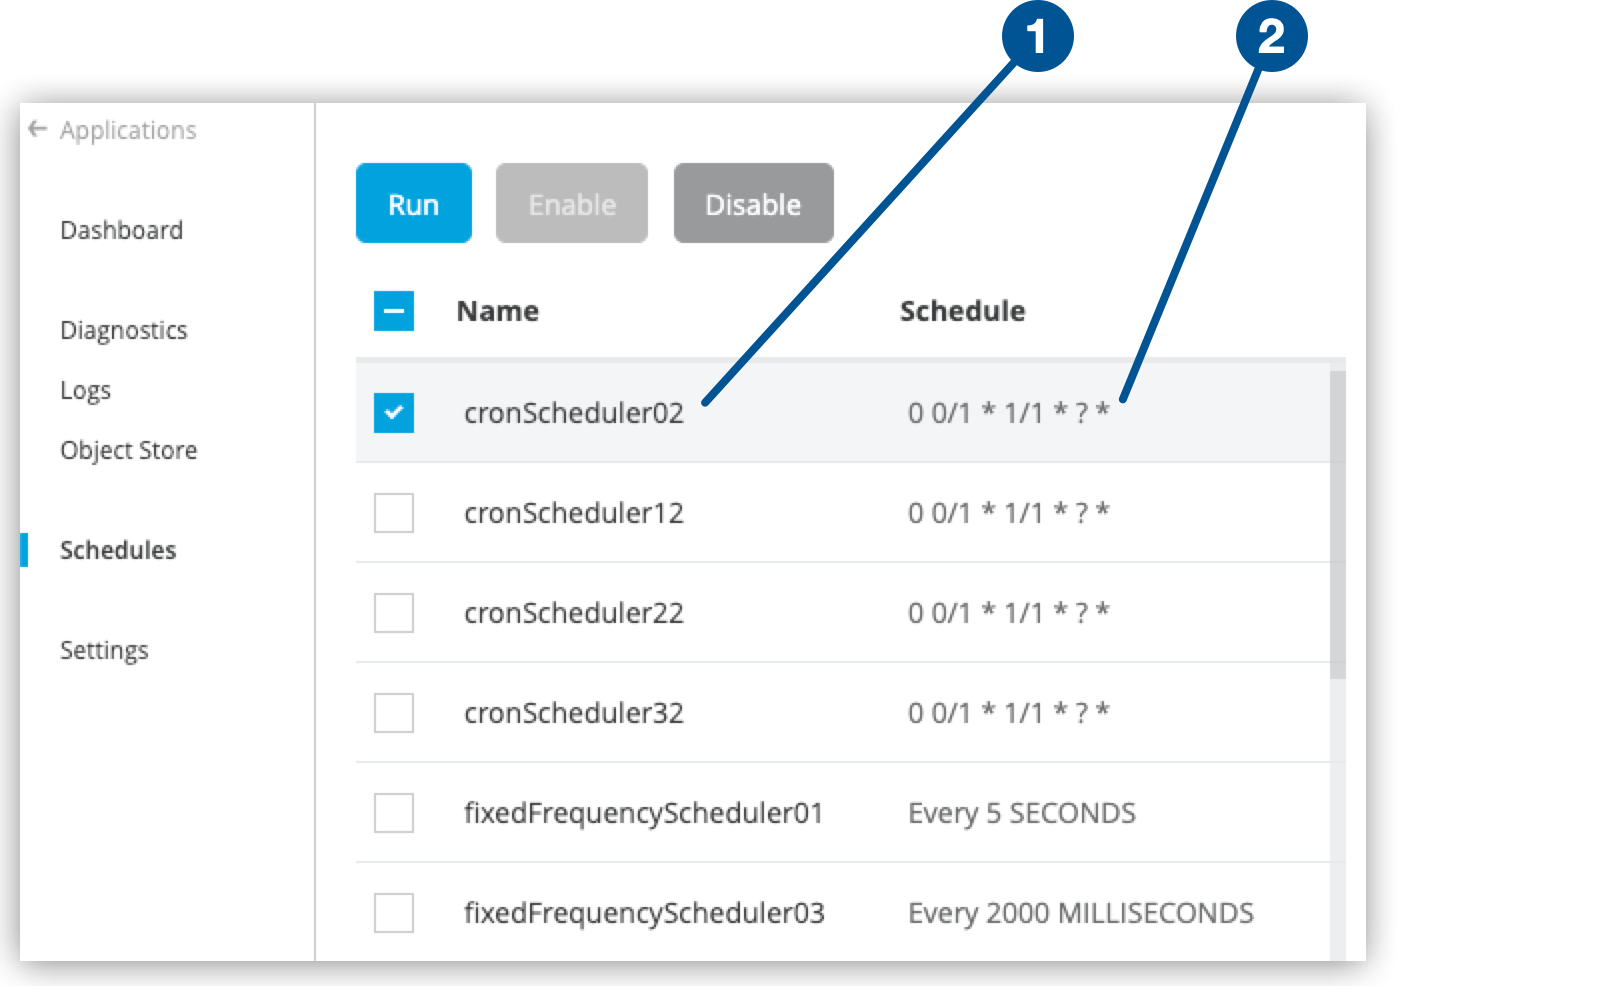
-
The Name column shows the name of the flow (1) that contains the Scheduler element.
-
The frequency link (2) in the Schedule column shows the schedule for the element.
-
-
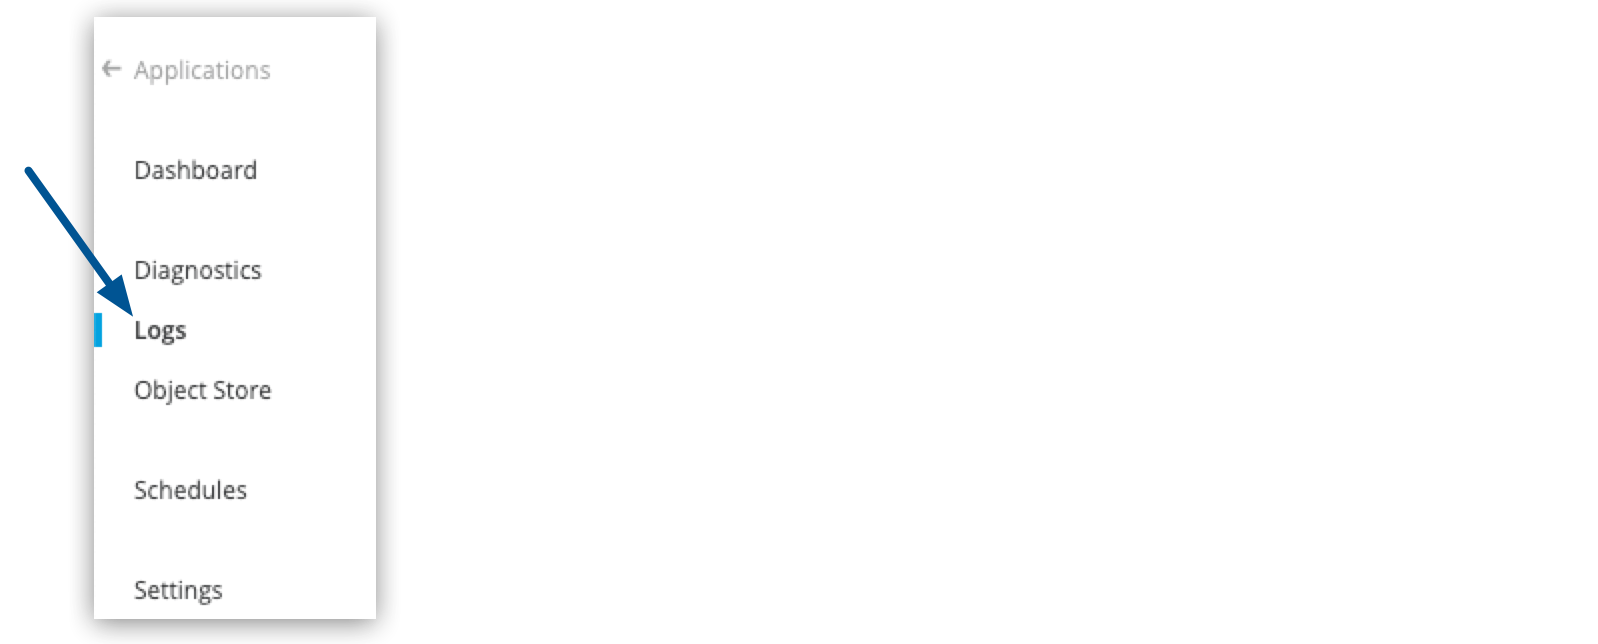
If you want to see more information about when the jobs started and ended, click Logs in the navigation menu:
-
Click the frequency link for an element to open the schedule editor.
The schedule editor you see depends on the schedule type:
-
In the schedule editor, change the schedule or deselect Enabled to disable the schedule.
-
Click Update to save changed settings or click Cancel to exit without saving.
Change a Fixed Frequency Schedule
-
From Anypoint Platform, select Runtime Manager > Applications.
-
Click the app name.
-
In the navigation menu, click Schedules.
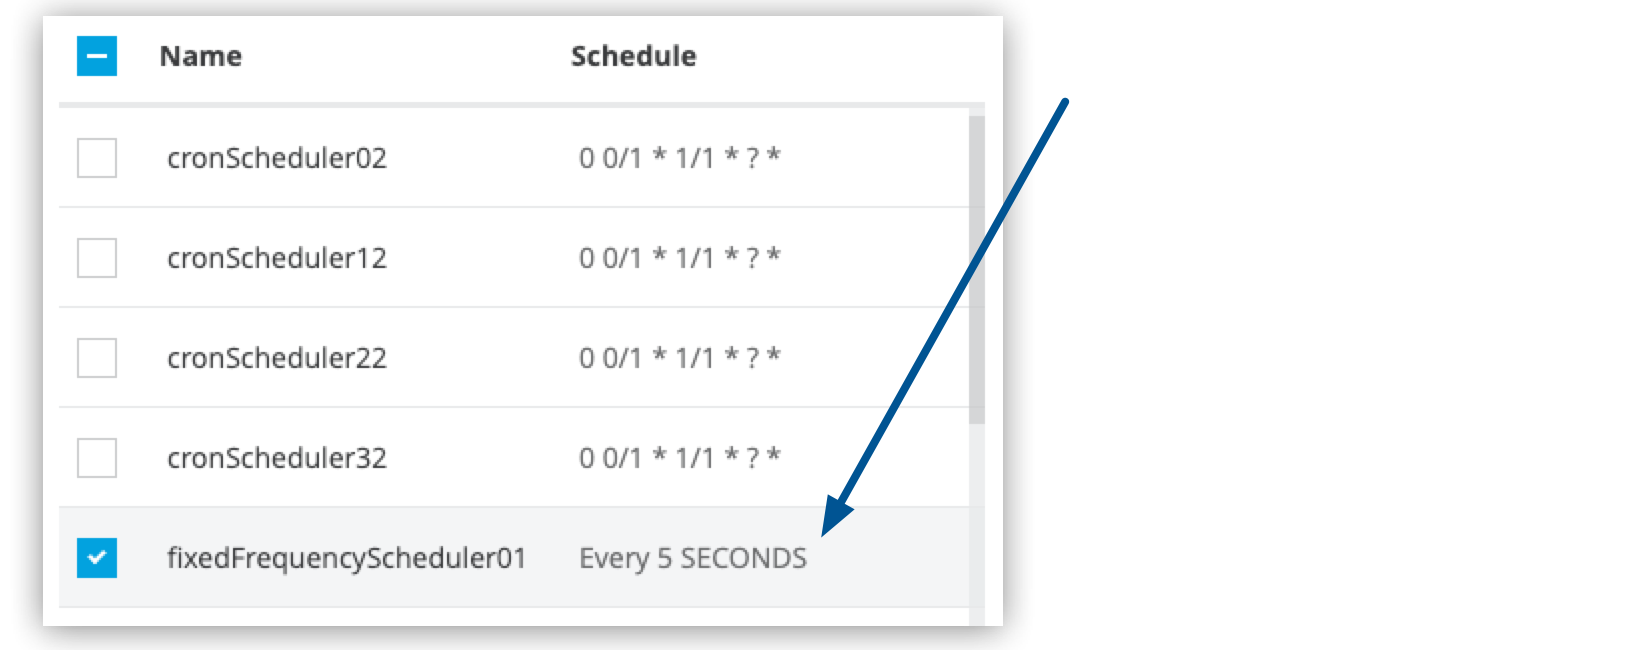
The Schedule column shows the schedule for the element:
-
Click the frequency link for an element to open the schedule editor.
-
In the schedule editor, change the schedule or deselect Enabled to disable the schedule:
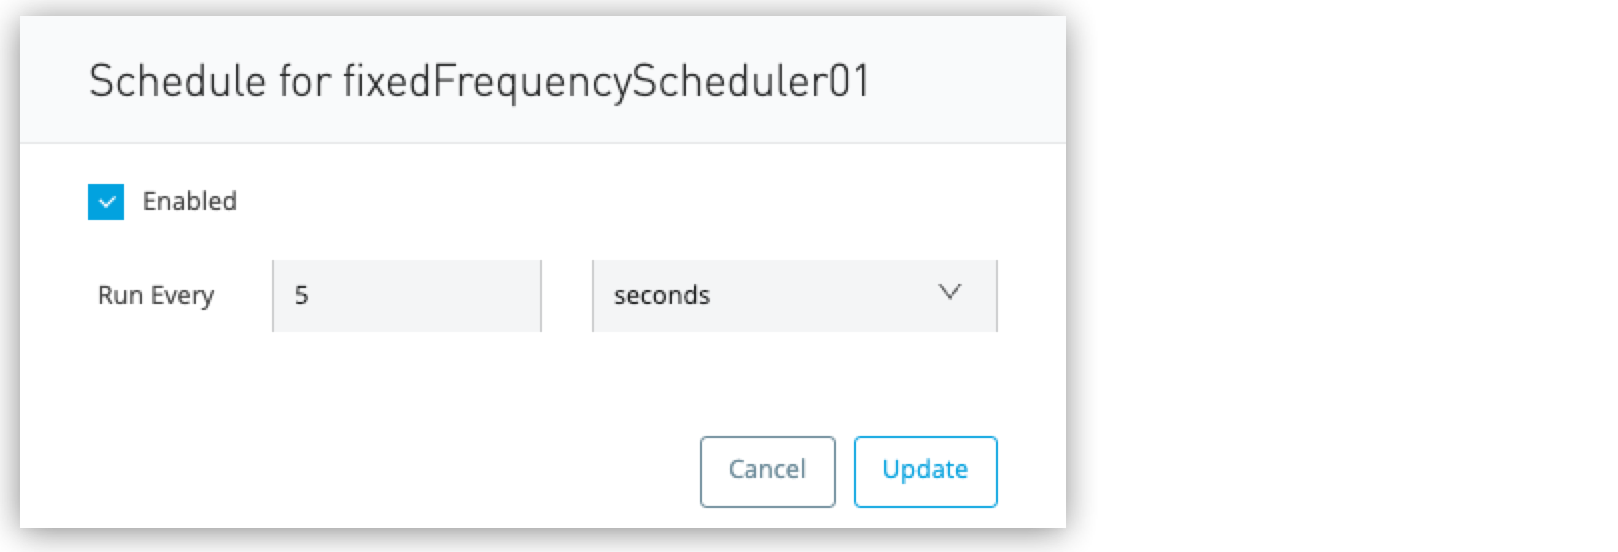
You can specify milliseconds, seconds, minutes, hours, or days for the frequency. The minimum recommended frequency between calls is 10 seconds.
By default, schedules run at the frequency defined in the application. When you change the frequency of a schedule from Runtime Manager, the schedule runs at the frequency configured in Runtime Manager even if you update and redeploy the same schedule in the application JAR file. The
startDelayproperty is not visible or configurable in the Runtime Manager UI. To change thestartDelayvalue after deployment, use the Schedulers API. See Override Scheduler Properties Using the Schedulers API. -
Click Update to save changed settings or click Cancel to exit without saving.
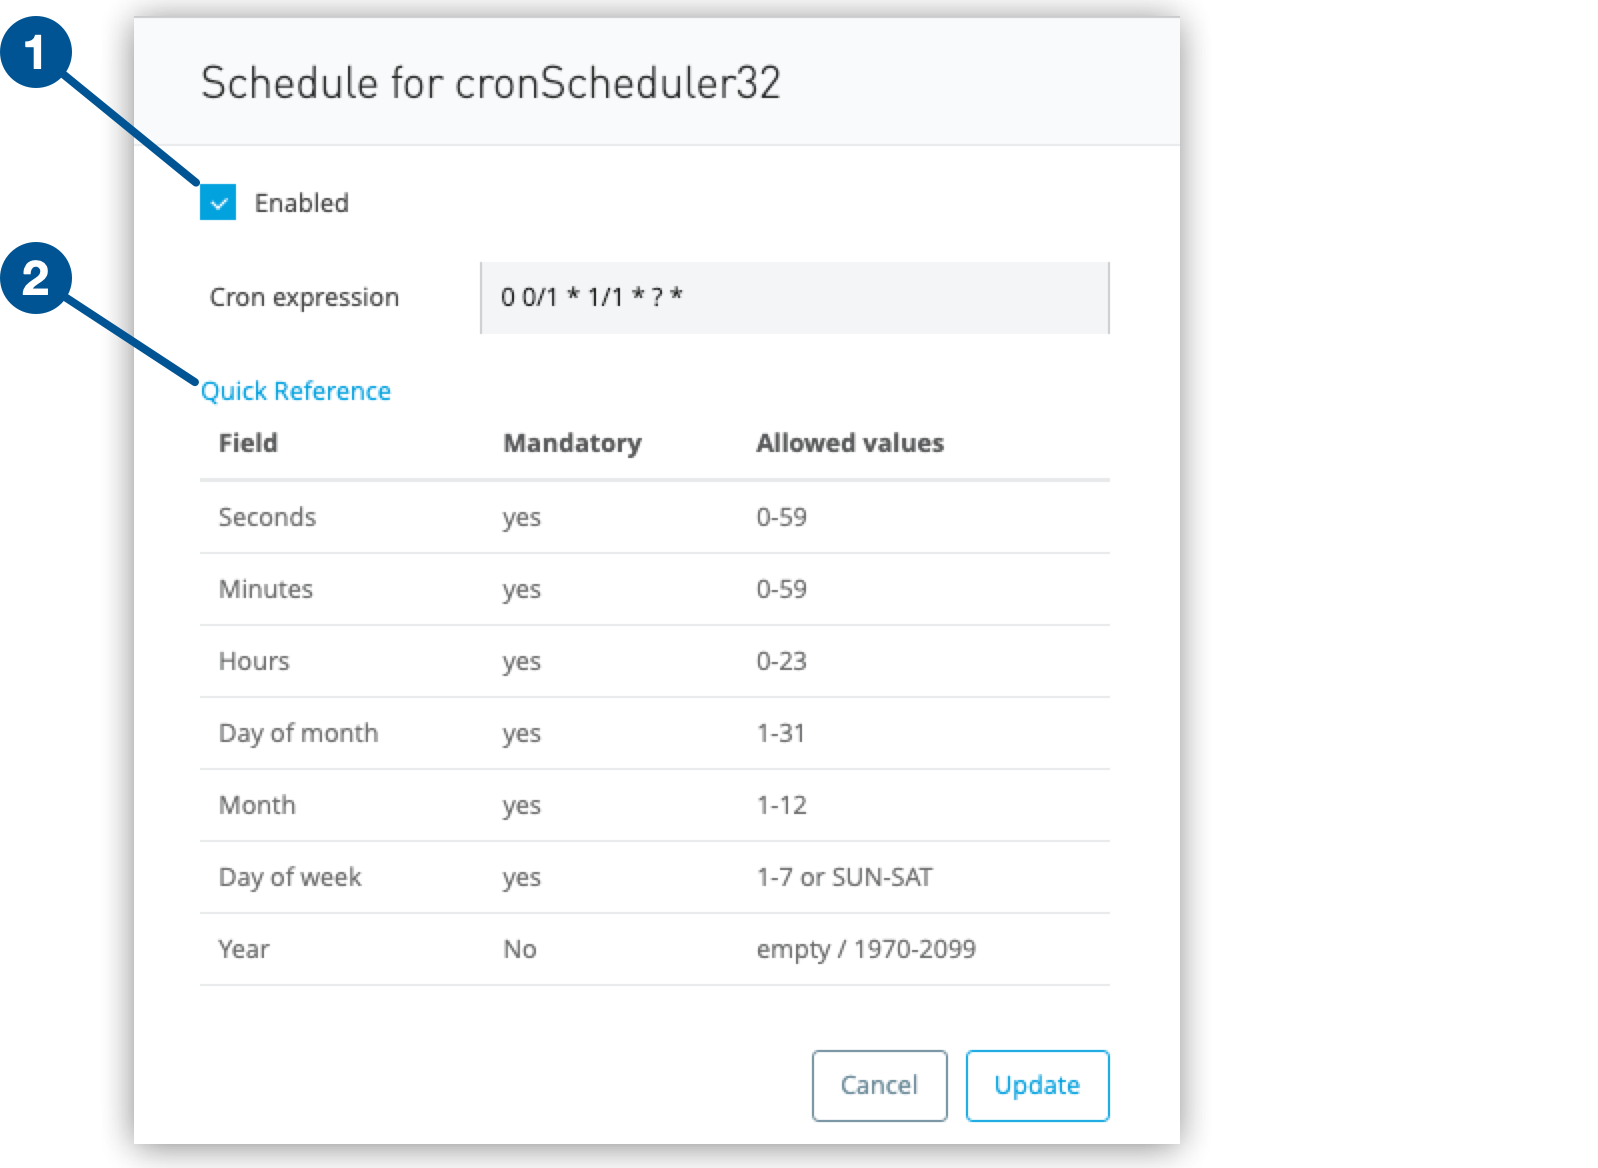
Change a Cron Schedule
With cron expressions, you can create more complex schedule frequencies, such as every 5 minutes between 9:00 am and 10:00 am on Fridays.
To change the frequency of a cron schedule type:
-
From Anypoint Platform, select Runtime Manager > Applications.
-
Click the app name.
-
In the navigation menu, click Schedules.
The Schedule column shows the schedule for the element:
-
Click the frequency link for an element to open the schedule editor.
-
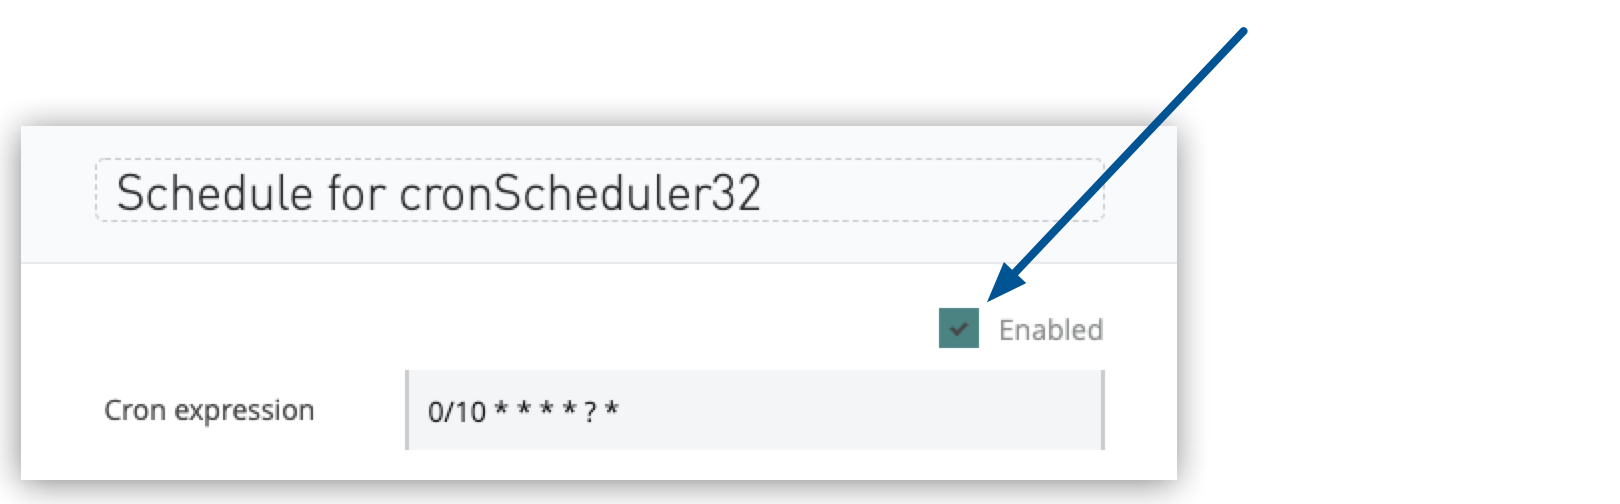
In the schedule editor, change the schedule or deselect Enabled (1) to disable the schedule:
-
In the schedule editor, select the time zone for your schedule from the Time Zone (3) dropdown menu.
-
In the schedule editor, click Quick Reference (3) to expand or collapse the table that lists required fields and allowed values.
The cron expression in this example sets the schedule to every 10 seconds.
For information about building cron triggers:
-
View the Quartz documentation.
-
Select a version, click Documentation > User’s Guide > Tutorial, and then click the CronTrigger lesson.
-
-
Click Update to save changed settings or click Cancel to exit without saving.
Override Scheduler Properties Using the Schedulers API
The Schedulers API enables you to override scheduler configuration properties for a deployed application without redeploying it. This is useful for properties that are not configurable in the Runtime Manager UI, such as startDelay for fixed-frequency schedules.
Overridable Properties
Depending on the schedule type, you can override these properties:
| Schedule Type | Overridable Properties |
|---|---|
Fixed Frequency |
|
Cron |
|
Update Scheduler Properties
To update scheduler properties, send a PUT request to the Schedulers API endpoint:
curl -X PUT \
  https://anypoint.mulesoft.com/amc/application-manager/api/v2/organizations/{orgId}/environments/{envId}/deployments/{deploymentId}/schedulers/{flowName} \
  -H 'Authorization: bearer {token}' \
  -H 'Content-Type: application/json' \
  -d '{
    "startDelay": "10",
    "frequency": "60000",
    "timeUnit": "MINUTES"
}'
Replace these placeholders in the request:
-
{orgId}- Your Anypoint Platform organization ID. -
{envId}- The environment ID where the application is deployed. -
{deploymentId}- The deployment ID of your application. -
{flowName}- The name of the flow that contains the Scheduler element. -
{token}- A valid Anypoint Platform access token.
For cron schedules, use the expression and timeZone properties in the request body instead:
curl -X PUT \
  https://anypoint.mulesoft.com/amc/application-manager/api/v2/organizations/{orgId}/environments/{envId}/deployments/{deploymentId}/schedulers/{flowName} \
  -H 'Authorization: bearer {token}' \
  -H 'Content-Type: application/json' \
  -d '{
    "expression": "0 0/5 * * * ?",
    "timeZone": "America/Los_Angeles"
}'
Run a Scheduled Job Immediately
If a job runs nightly but you want to debug it now, you can trigger the job while it’s running without updating the schedule in your application. When you trigger the job in between instances of the scheduler running, the timer for the indicated time period resets.
| If you run the scheduled job immediately, the scheduler runs on a single replica even for multi-replica apps. |
To override the schedule and run the job immediately:
-
From Anypoint Platform, select Runtime Manager > Applications.
-
Click the app name.
-
In the navigation menu, click Schedules.
-
Select the elements to manage and then click Run.
Disable or Enable a Scheduler Element
You might want to disable a scheduled job if an application you are connecting to is undergoing maintenance and then reenable it after maintenance is complete.
CloudHub 2.0 doesn’t run the scheduled job until you reenable the Scheduler.
|
If you disable the scheduler, it might still run once when the application starts. To prevent this behavior, set the |
|
A disabled scheduler can revert to enabled after an application restart, rolling restart, or maintenance, so it can run again even though you disabled it. This behavior isn’t limited to first startup. After a restart, check the scheduler state on the Schedules tab and disable it again if you need it to stay off. |
To disable the Scheduler element:
-
From Anypoint Platform, select Runtime Manager > Applications.
-
Click the app name.
-
In the navigation menu, click Schedules.
-
Select the elements to manage and then click Disable.
You can also disable or enable the schedule by deselecting or selecting Enabled in the schedule editor.
Schedule Behavior with Rolling Update vs. Recreate Deployment Model
For fixed-frequency schedules in cluster mode, see Fixed Frequency Schedules in Cluster Mode During Rolling Restart for transition behavior during rolling restarts, including the first trigger after node start and schedule timing.
During the initial deployment of an application with cluster mode and rolling update deployment model enabled, the application’s fixed-frequency scheduler runs alongside the application startup. If you switch from rolling update to recreate deployment model, the scheduler is triggered again with the application startup. But if you switch from recreate back to rolling update deployment model, the scheduler no longer runs at startup and instead triggers based on the configured frequency.
This happens because the recreate deployment model turns off the previous instances of the application and starts them again in a new cluster. The previous record of the last run of the scheduler isn’t saved. In this case, Mule runs the scheduler unless it’s a fixed-date frequency. However, the rolling update deployment model saves the previous configuration.