docker pull mulesoft/flex-gateway:latestGetting Started with Self-Managed Flex Gateway
The goal of this tutorial is to quickly get started with Anypoint Flex Gateway. Using Docker, the tutorial describes how to install, register, and run Flex Gateway in Connected Mode. Additionally, the tutorial describes how to publish an API that is secured with a basic authentication policy.
Before You Begin
Before getting started with Flex Gateway, ensure that you have:
-
A username and password for your Anypoint Platform organization. If you don’t have Anypoint Platform yet, create a Trial organization on Anypoint Platform.
-
A Linux machine with an x86 processor. M1 and M2 processors are not supported.
Flex Gateway runs on the following Long Term Support (LTS) versions of Linux:
-
Amazon Linux 2023
-
CentOS 8
-
Debian Bookworm
-
Red Hat Enterprise Linux (9)
-
Red Hat Enterprise Linux (9) on IBM Power (ppc64le)
-
Ubuntu Jammy
-
-
A Docker installation. See Docker Desktop for an example.
Download Flex Gateway
To download the Flex Gateway Docker image, run the following command in a terminal window:
Use sudo if you encounter file permission issues when running this command.
|
Register Flex Gateway
-
Create a new directory by running:
mkdir flex-registration -
Navigate to the new directory by running:
cd flex-registration -
Log in to Anypoint Platform with your Anypoint username and password.
-
Select Runtime Manager.
-
Click Flex Gateways in the side navigation panel.
-
Click Self-managed Flex Gateways.
-
Click Add Gateway.
-
Select Docker.
-
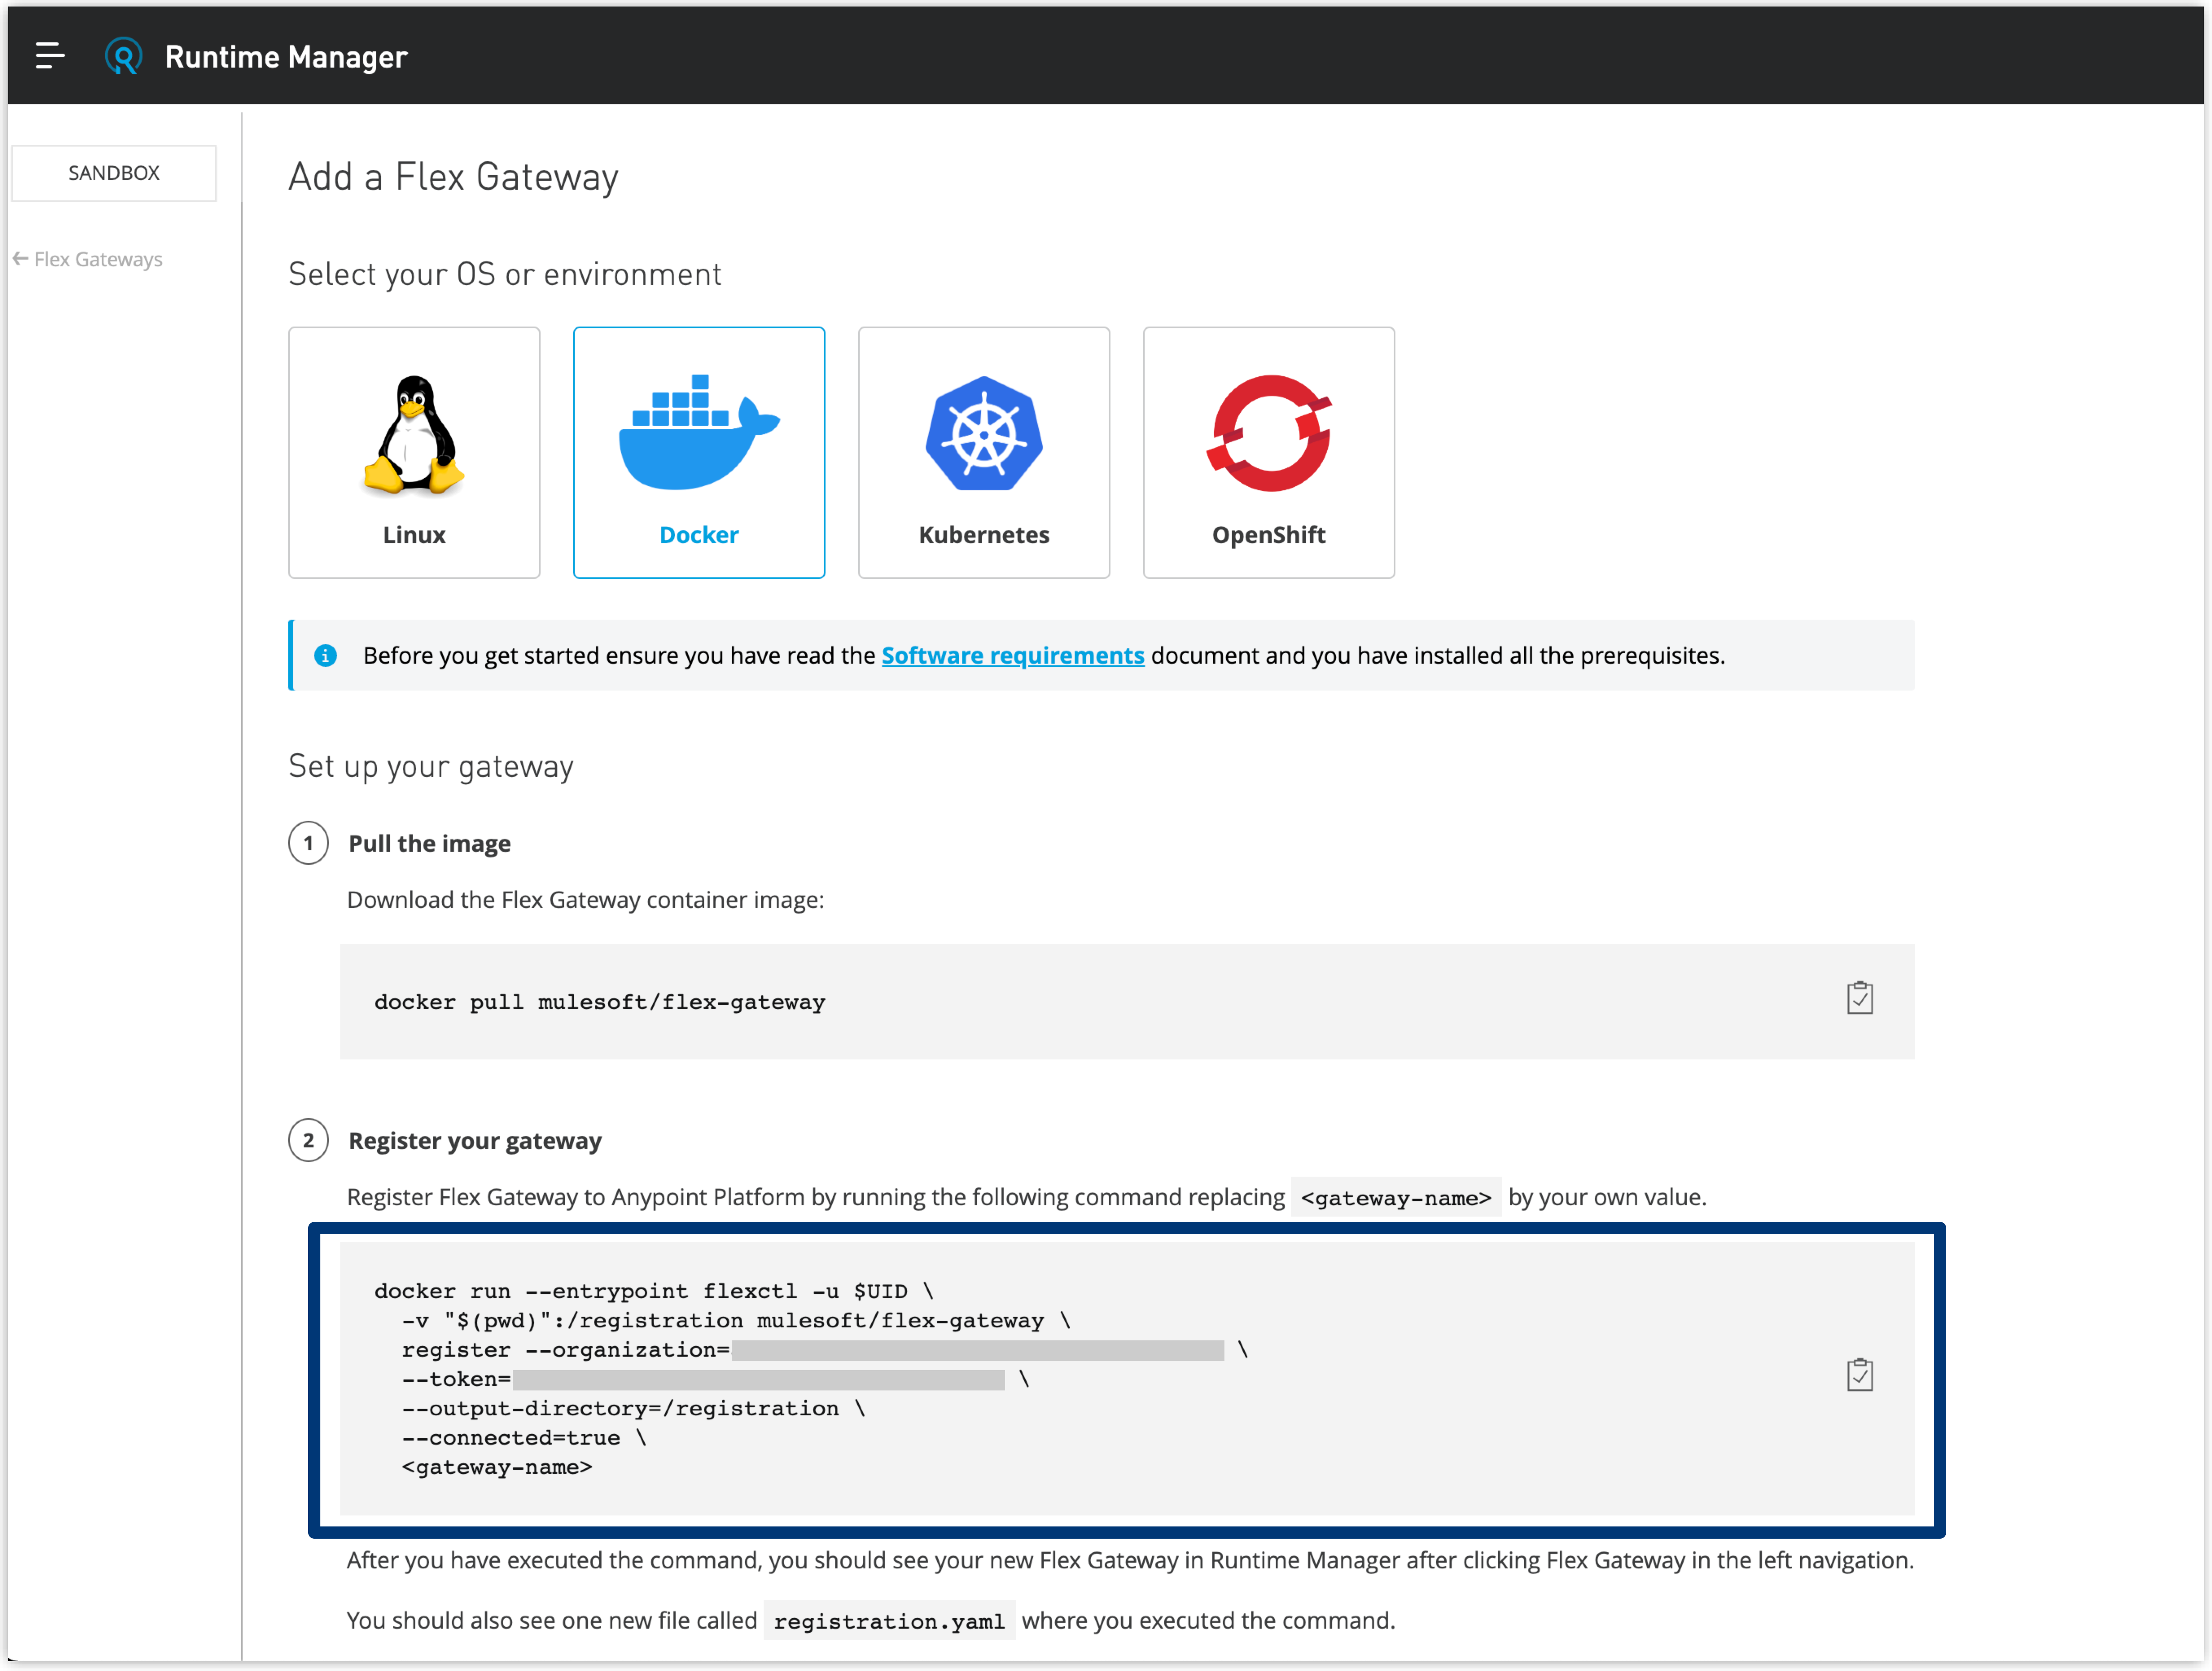
Copy the code block in the Register your gateway section. The code block contains your unique organization ID and token.
The following screenshot of the Add a Flex Gateway page highlights the code block to copy:

-
Run the copied code block in your terminal window, making sure to first replace
<gateway-name>with a name, such asmy-gw.Use sudoif you encounter file permission issues when running this command. -
In Runtime Manager, select Flex Gateways from the side navigation panel.
Your registered Flex Gateway now appears in the list of gateways.
Run Flex Gateway
To run Flex Gateway, run the following in a terminal window:
docker run --rm \
  -v "$(pwd)":/usr/local/share/mulesoft/flex-gateway/conf.d \
  -p 8081:8081 \
  mulesoft/flex-gateway
Use sudo if you encounter file permission issues when running this command.
|
A new Flex Gateway instance is now running in your terminal window.
| The Flex Gateway instance will continue running in the terminal window until the process is stopped, or until the window is closed. |
Publish a Simple API
-
Select API Manager from the Anypoint Platform menu.
-
Click Add API > Add new API.
-
From the Add API page, select Flex Gateway as your runtime.
-
Select your registered gateway in the Select a gateway section.
-
Click Next.
-
Click Create New API.
-
Specify an API name and select HTTP API as the asset type.
-
Click Next.
-
From the Endpoint page, enter the following in the Implementation URI field:
https://jsonplaceholder.typicode.com/ -
Enter
8081in the Port field. -
Click Next.
-
Click Save & Deploy.
Inside the gateway instance Docker container, all HTTP requests made to
localhoston port8081are now proxied to thejsonplaceholderservice. -
To test the API Instance, run the following command in a new terminal window:
curl -s -o /dev/null -w "%{http_code}\n" --request GET 'http://localhost:8081/'The command executes a
GETrequest to the API, and then prints the resulting200status code, indicating success.
Secure Your API Using the Basic Authentication Policy
-
While still in API Manager, select API Instances from the side navigation panel.
-
Select the name of the API created in the previous section.
-
Select Policies from the side navigation panel.
-
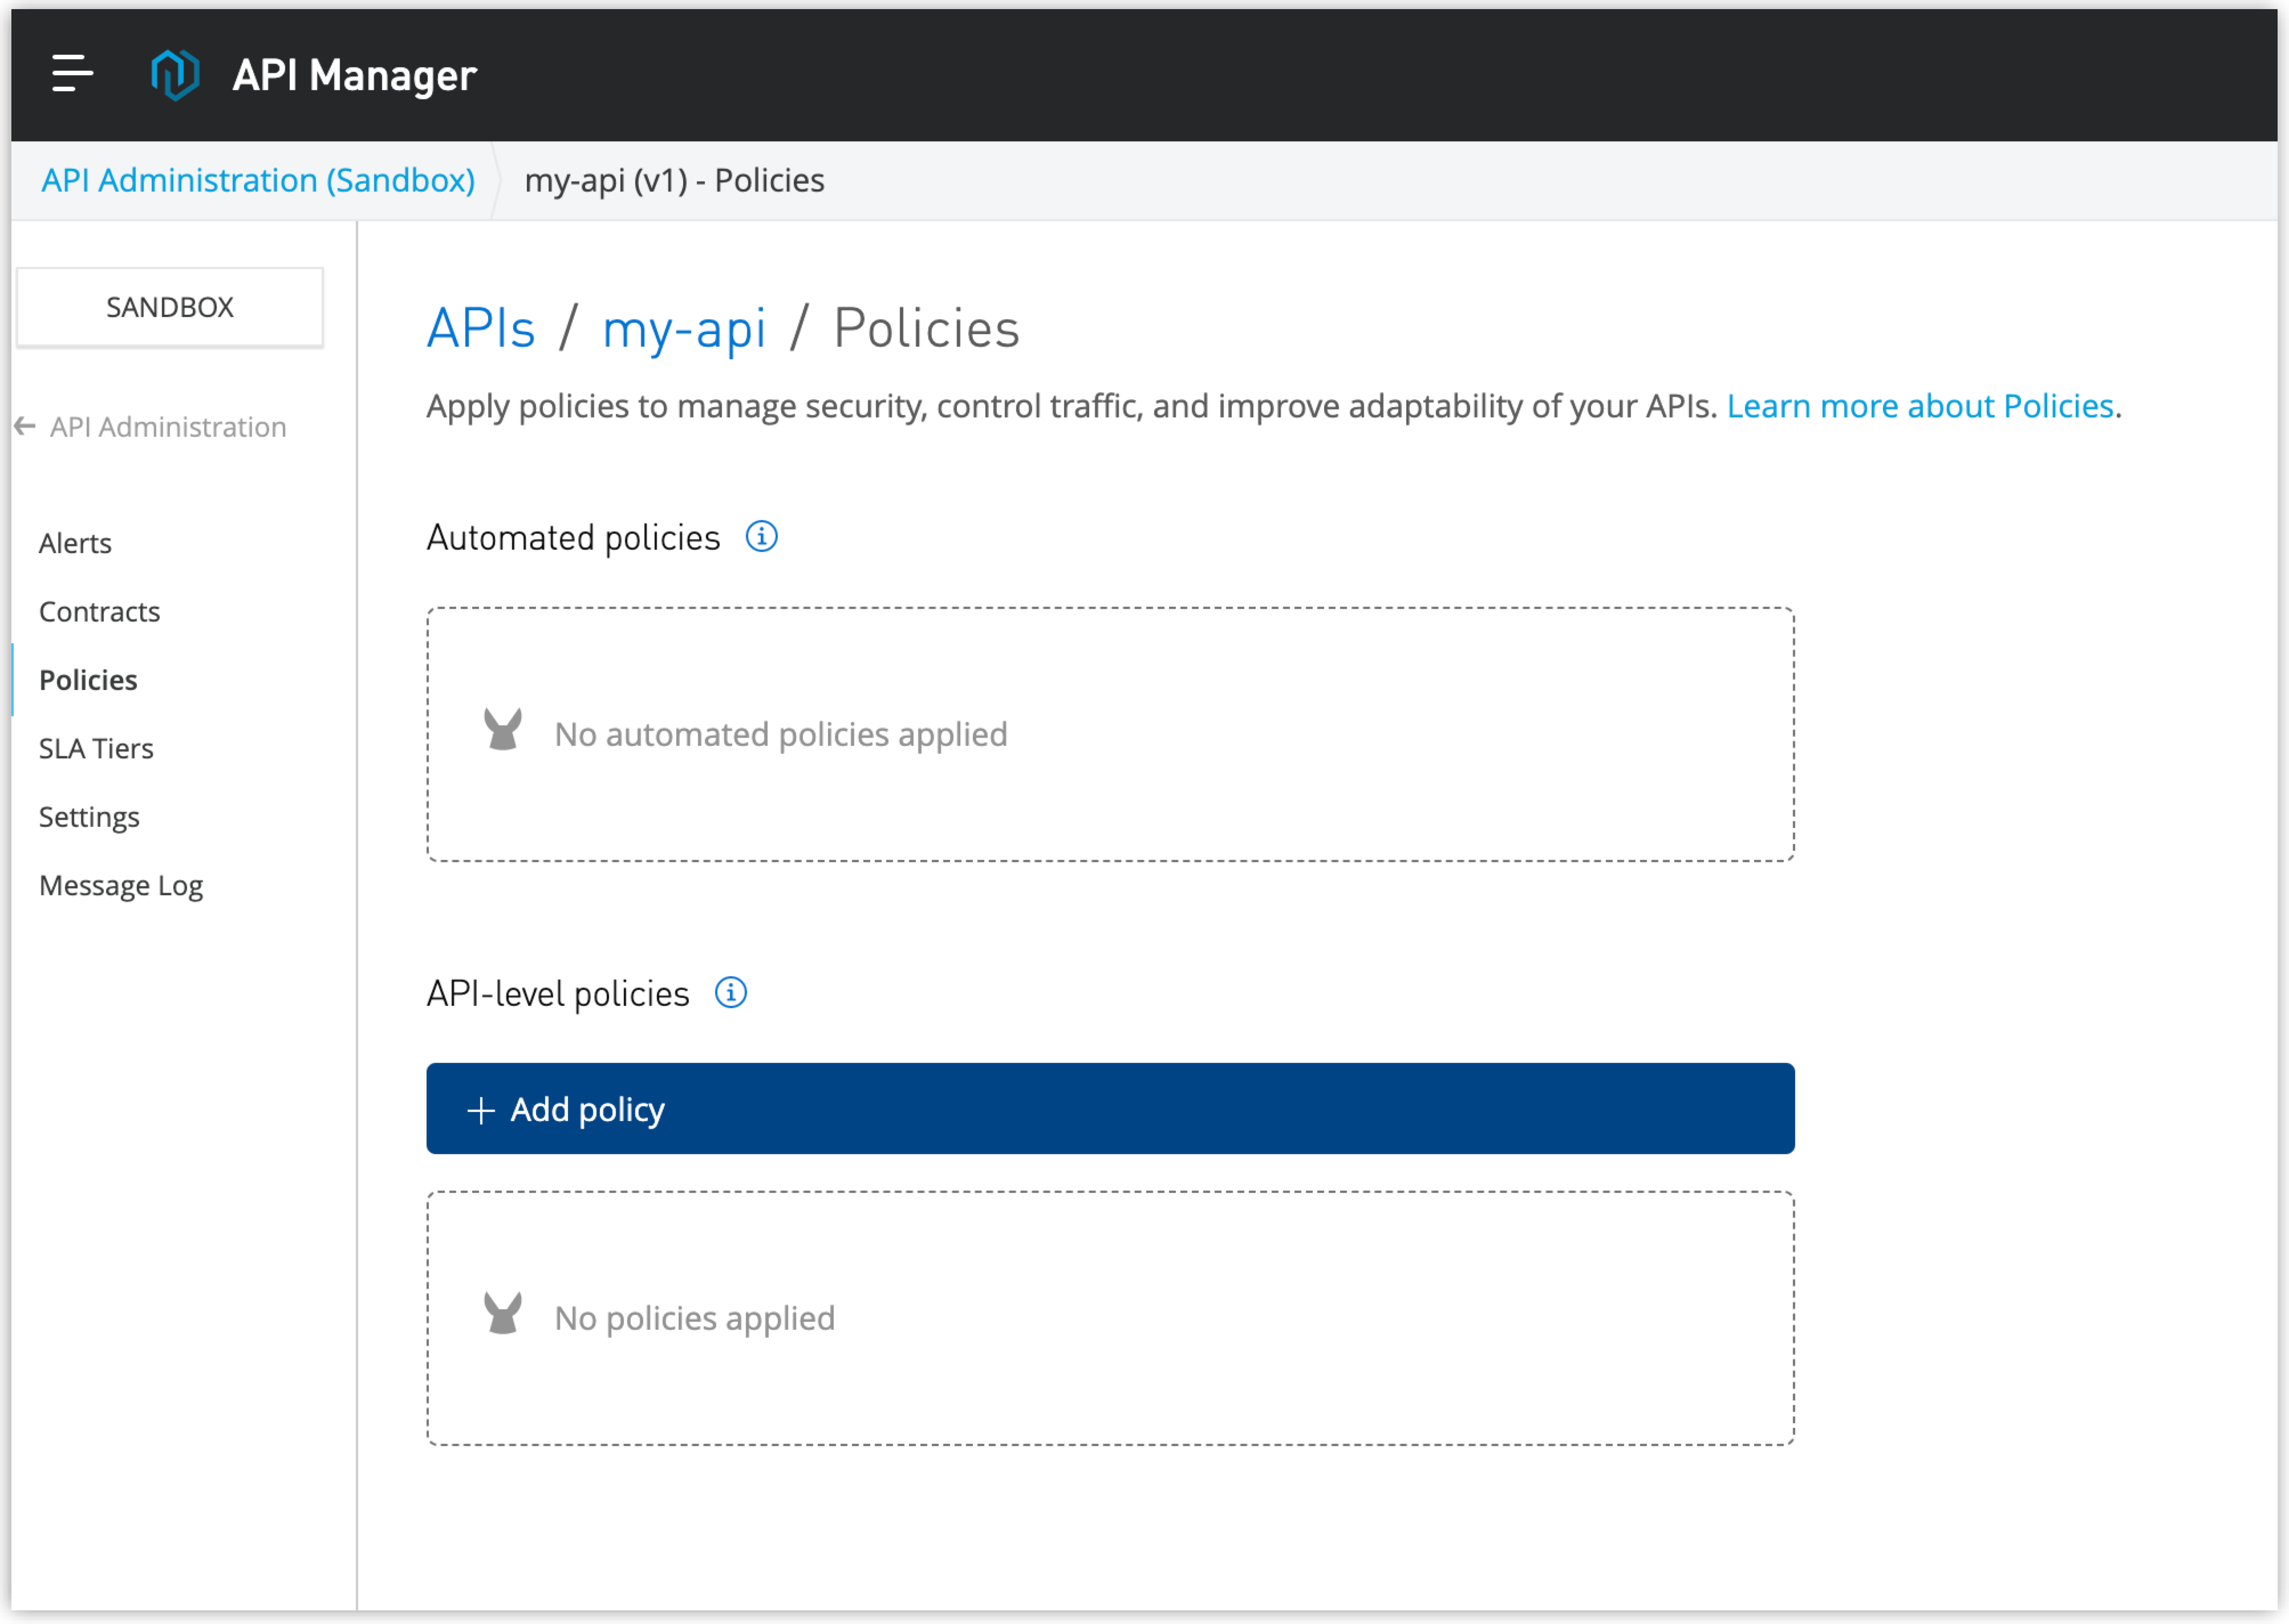
In the Policies page, click Add policy.
The following screenshot of the Policies page highlights the specified options:

-
Select the Basic Authentication - Simple policy.
-
Click Next.
-
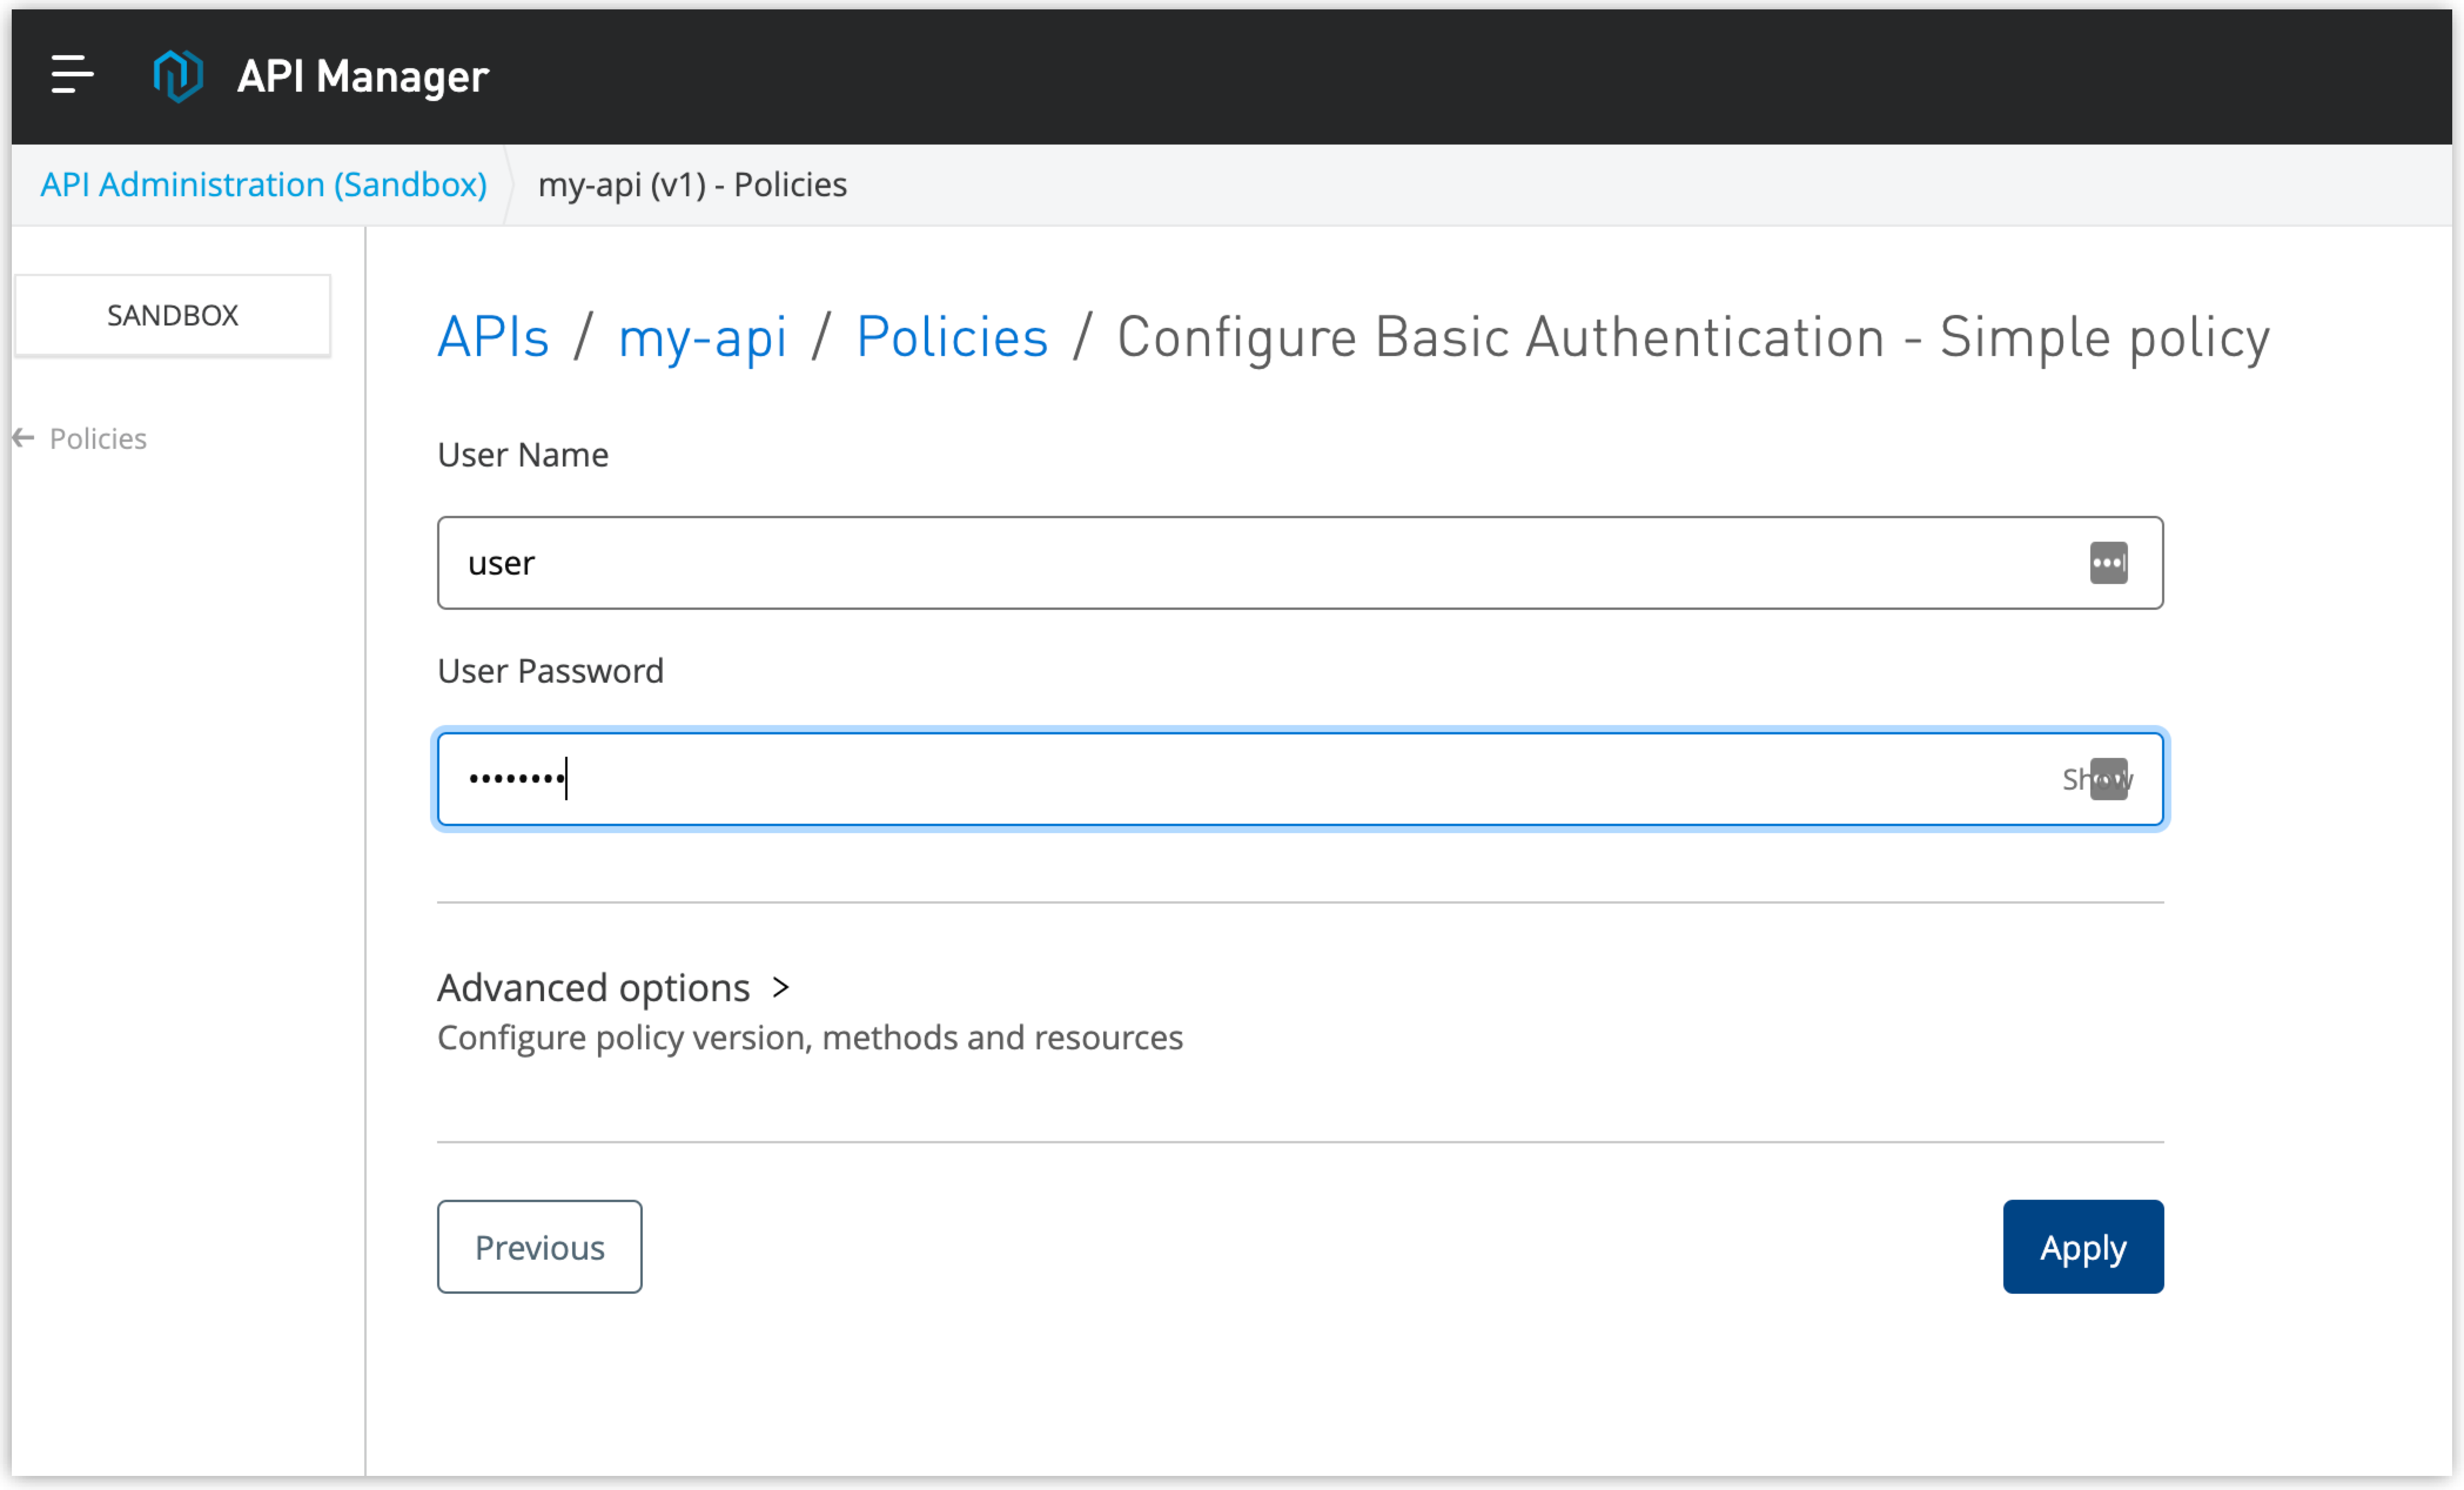
For User Name, enter
user. -
For User Password, enter
password. -
Click Apply.
The following screenshot of the Configure Basic Authentication - Simple policy page highlights the specified options:

-
To test the API Instance without authentication, run the following
curlcommand in the terminal window:curl -s -o /dev/null -w "%{http_code}\n" --request GET 'http://localhost:8081/'The command prints a resulting
401 (Unauthorized)status code, because the request does not include the Authentication context. -
To test the API Instance with authentication, run the following command in the terminal window:
curl -s -o /dev/null -w "%{http_code}\n" --request GET 'http://localhost:8081/' -u user:passwordThe userandpasswordparameters must match what was specified when you applied the policy via API Manager.The command prints the resulting
200status code, indicating success.


