Tutorial: Create a "Hello World" Mule app
To demonstrate how a Mule application interacts with a user in a simple HTTP request-response flow, this example responds with the message "Hello Mule" to requests submitted from a web browser.
Note that this is a very simple example. In a more complex application, you can connect to external servers (such as SAP, Salesforce, a database, or an FTP server), import and implement API specifications directly within a Mule project, set up security, and process and transform the data in programmatic ways. It is beyond the scope of this example to explore such tasks.
You set up and run this application as a project in Anypoint Studio.
Prerequisites
-
Familiarity with the Anypoint Studio UI (palette, canvas, flow), as documented in Anypoint Studio
After Anypoint Studio is installed, you can set up and run the example.
How the Example Works
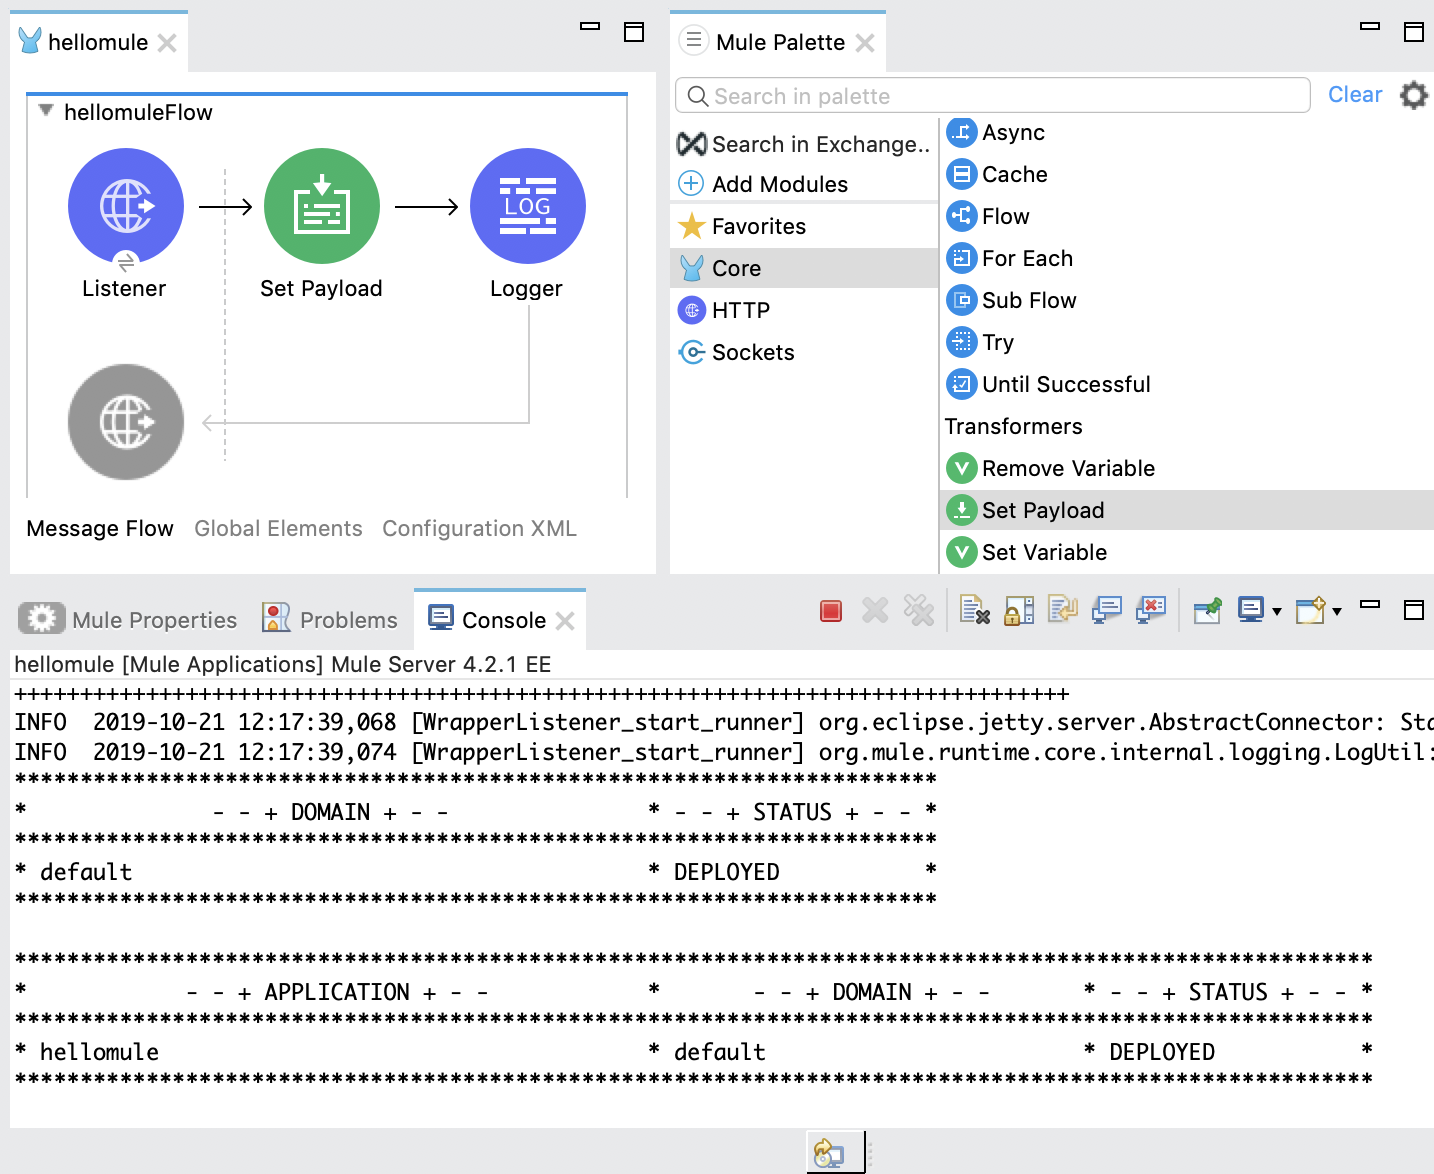
The Hello Mule example consists of one simple Mule flow. This flow accepts an HTTP request, sets a static payload on the message, and then returns a response to you.
The inbound HTTP endpoint receives requests that are submitted to the web service. The HTTP endpoint is responsible for receiving and returning messages because the message-exchange pattern is request-response.
As its name suggests, the Set Payload component sets a value in the message payload. In this example, the value uses a DataWeave expression to set a static string on the payload.
Set Up the Example
Follow these steps to create the example in your own instance of Anypoint Studio. Note that you can create template applications in Anypoint Studio and tweak the configurations of the use case-based templates to create your own customized applications in Mule.
-
Create a project in Anypoint Studio named
hellomule:-
Select File > New > Mule Project, and provide the Project Name "hellomule" in the dialog that opens:
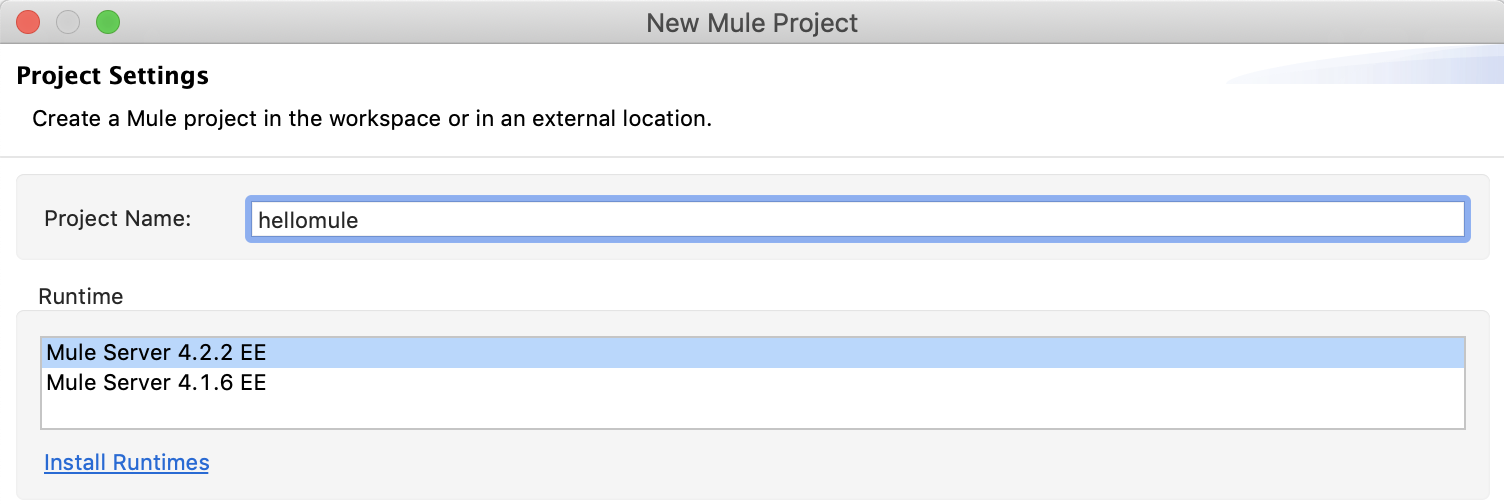
Notice that the project name does not contain any blank spaces.
-
Click Finish.
-
-
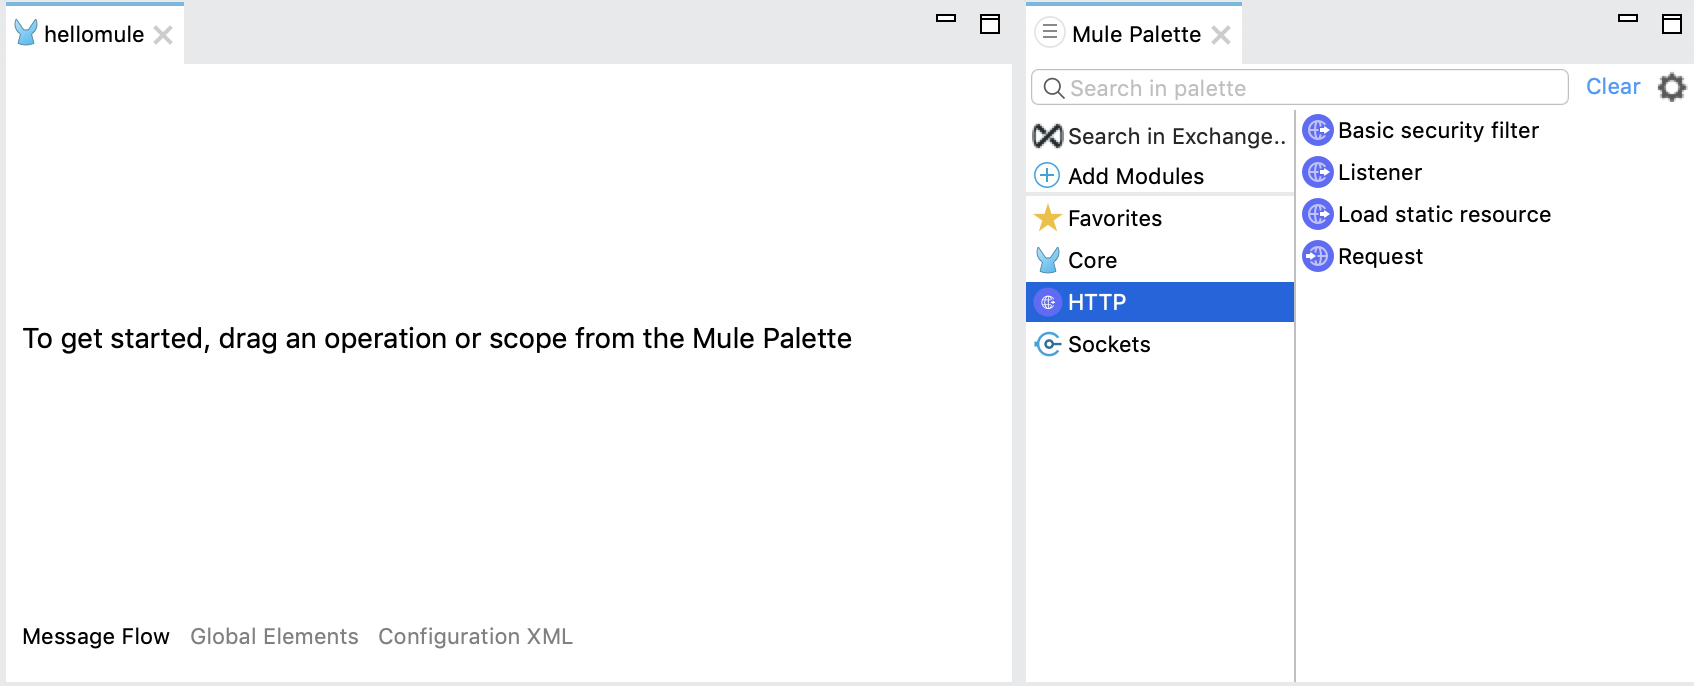
Drag the HTTP Listener component to the hellomule canvas:
-
In the project’s Mule Palette tab, click HTTP:
-
Drag the Listener component into the hellomuleFlow canvas:
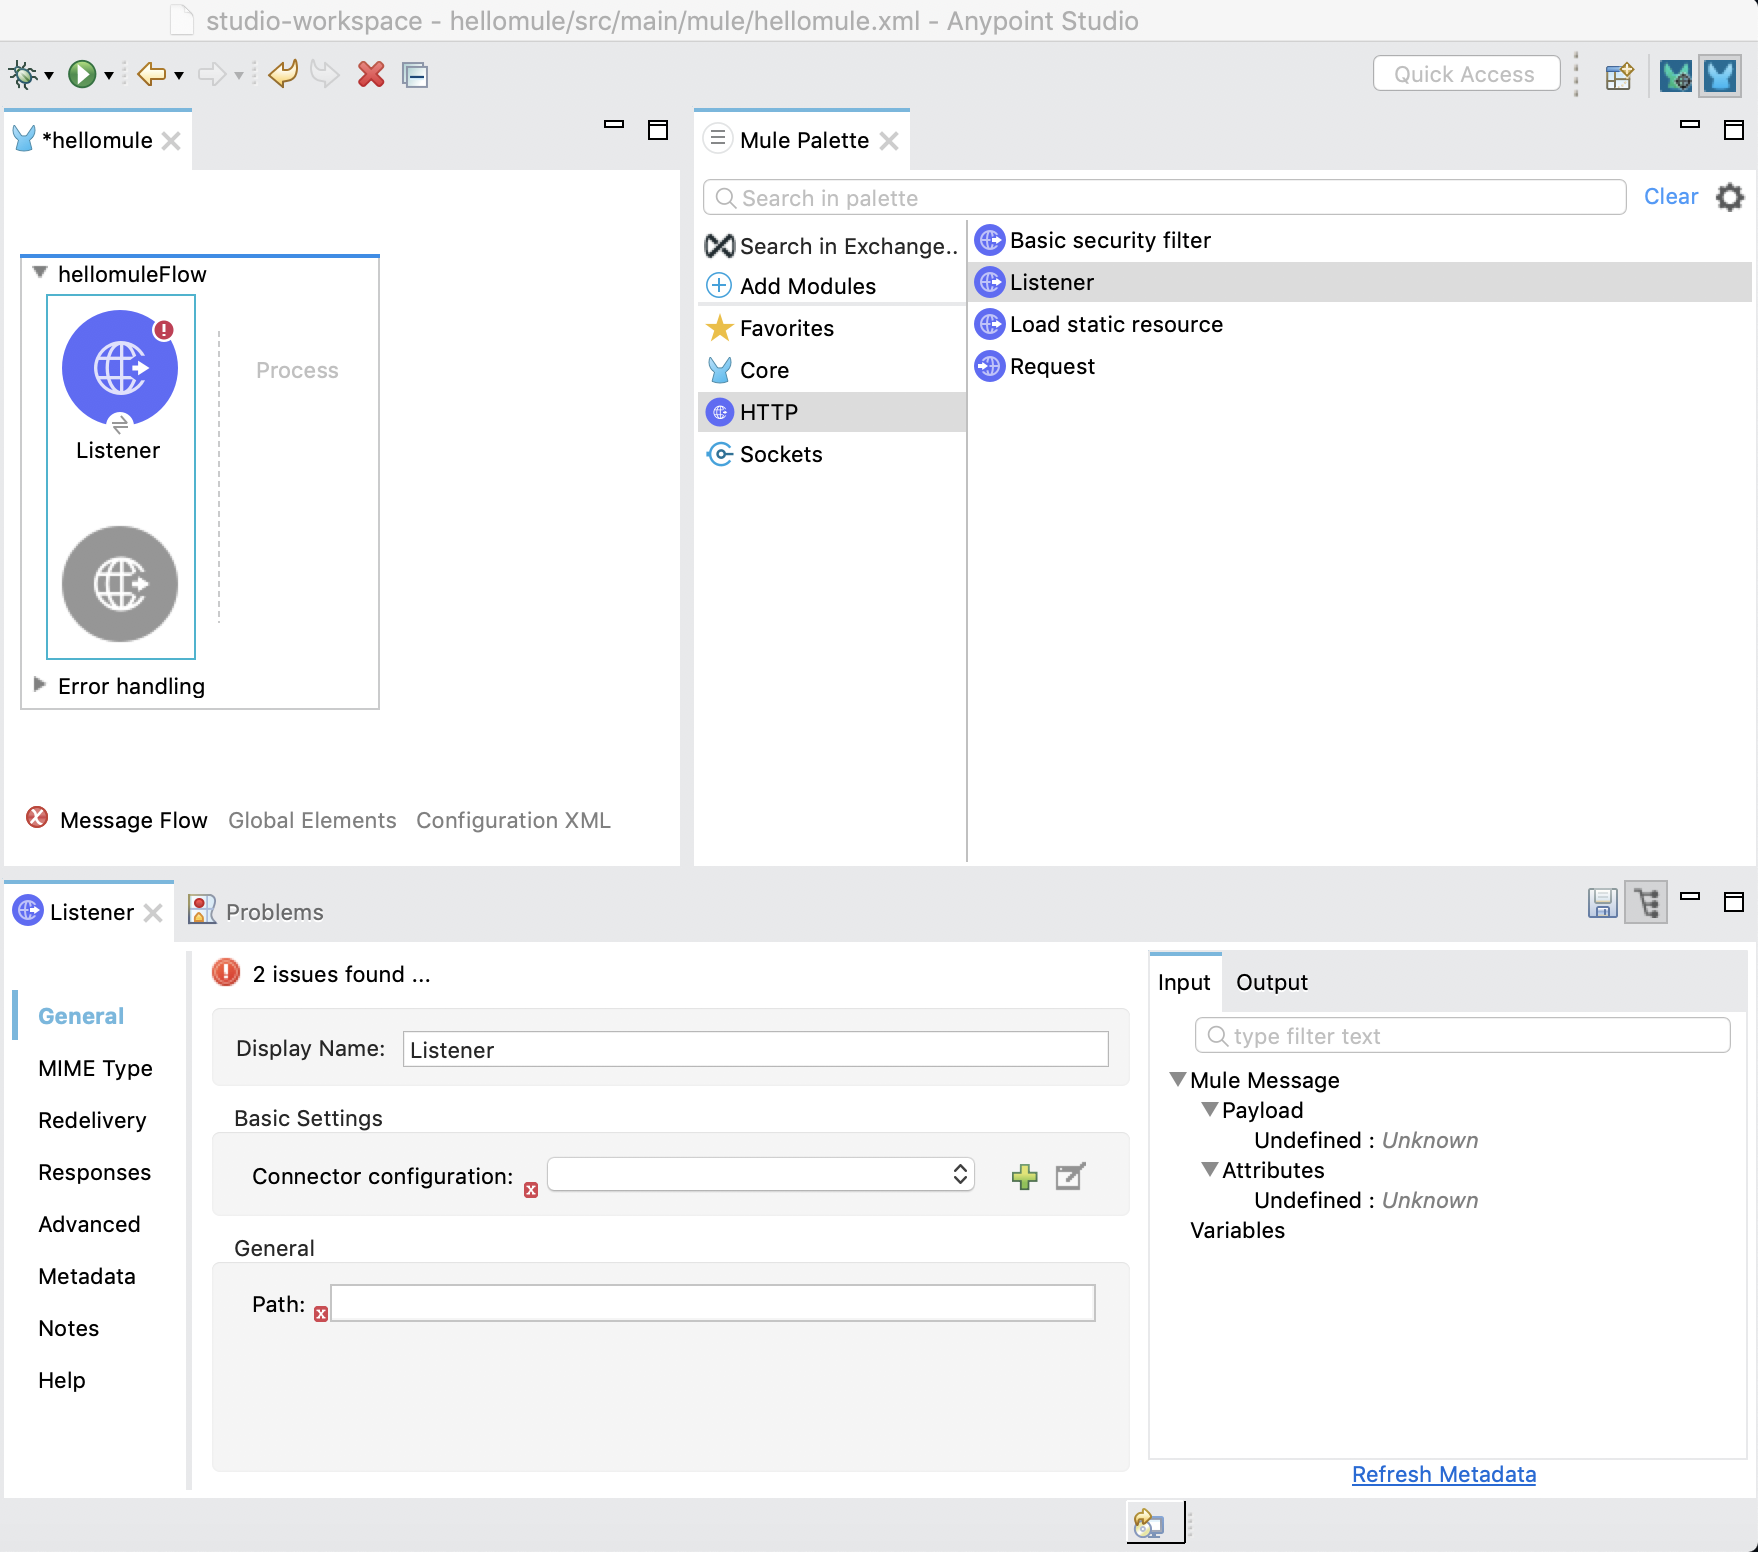
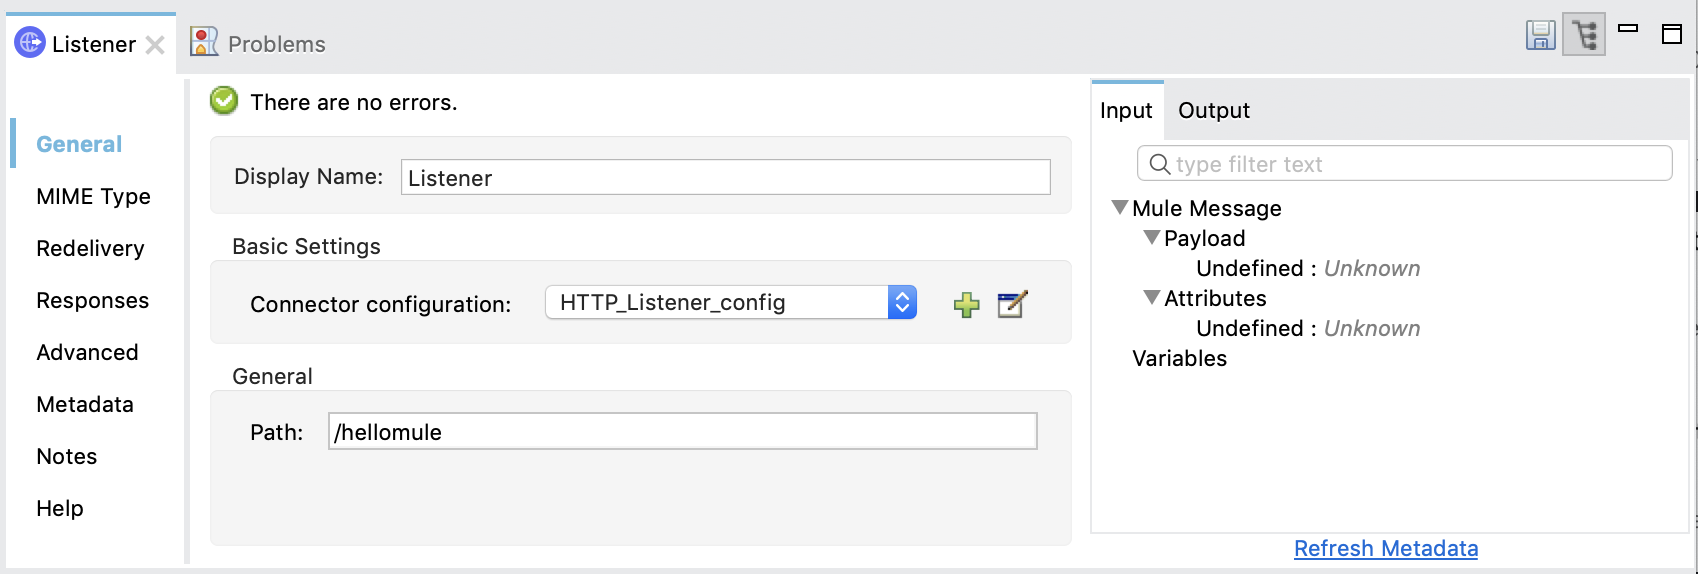
If the configuration UI in the Listener tab is not open, click the Listener component in the canvas to open it.
Note that the red boxes in the tab are present because the Connector configuration and Path fields require values.
-
-
Configure the Listener component from the Listener tab:
-
In the listener’s Path field, type the path
/hellomule. -
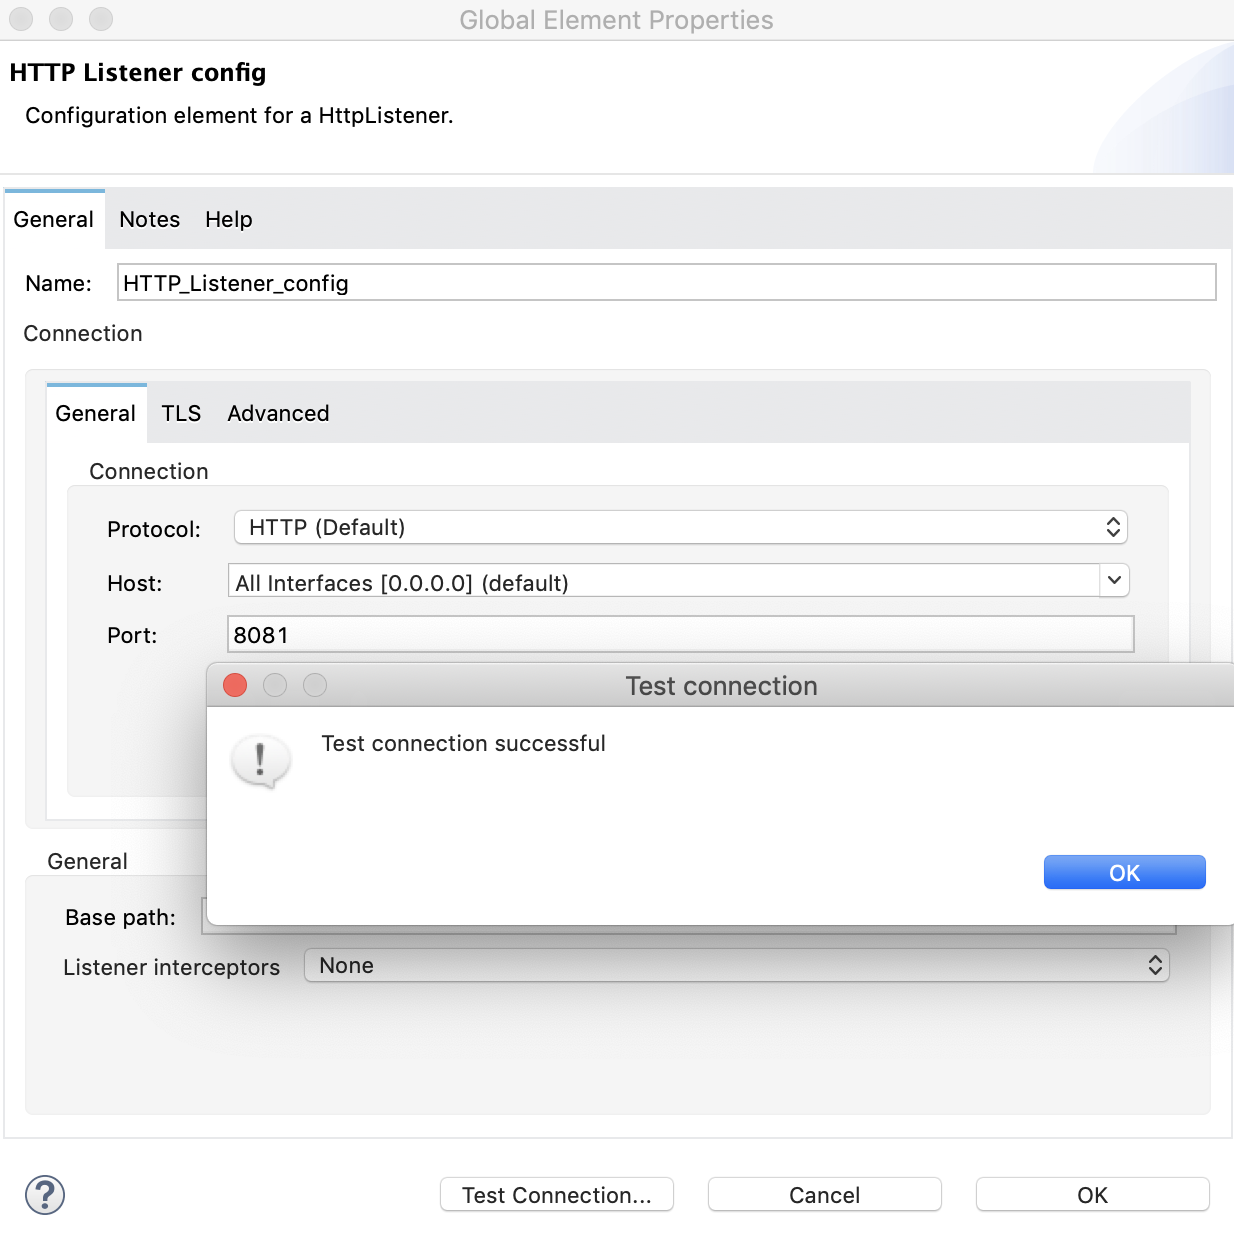
Find and click the green plus icon (+) beside the listener’s Connector configuration field to open the HTTP Listener config dialog.
-
In the dialog, check the default listener configuration by clicking Test Connection:
-
If the connection is successful, you see the message "Test connection successful!" in a Test connection dialog that pops up.
-
If the connection fails, try using a port number that is not in use, such as
8082or8083, retest the connection, and then add the configuration.
-
-
Click OK to add a working configuration to the project.
-
-
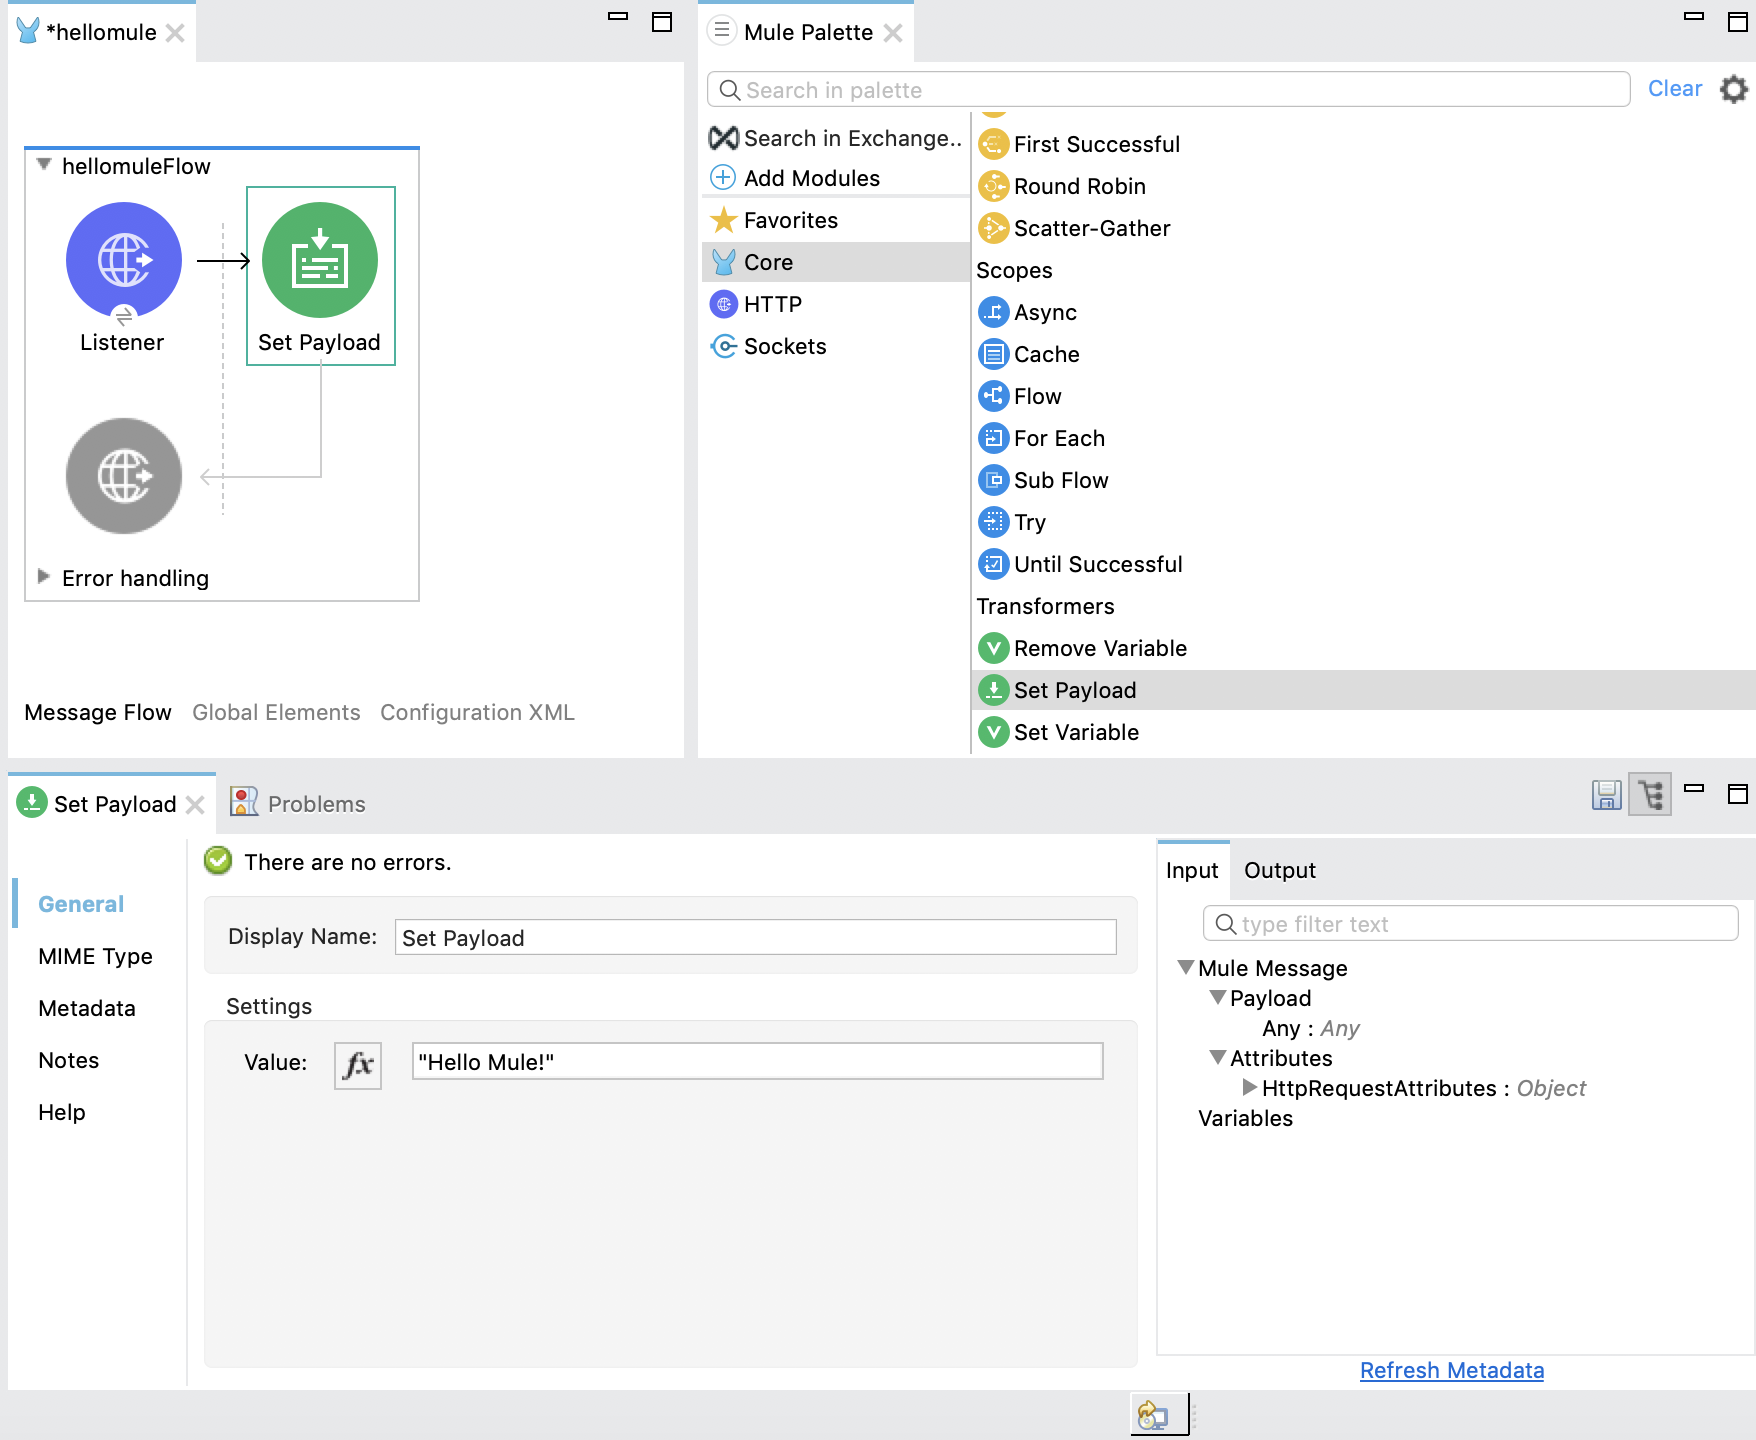
From the Mule Palette tab, click Core, and then find and drag a Set Payload component to the Process area of the canvas:
-
If you do not find the Set Payload component, try the search field at the top of the Mule Palette tab.
-
If the configuration UI in the Set Payload tab is not open, click the Set Payload component to open its configuration UI.
-
-
In the Set Payload component’s Value field, deselect the fx field, and type the string
"Hello Mule!".When you deselect fx, the field contains only the string
"Hello Mule"and does not contain a hash (#) or square brackets ([]). -
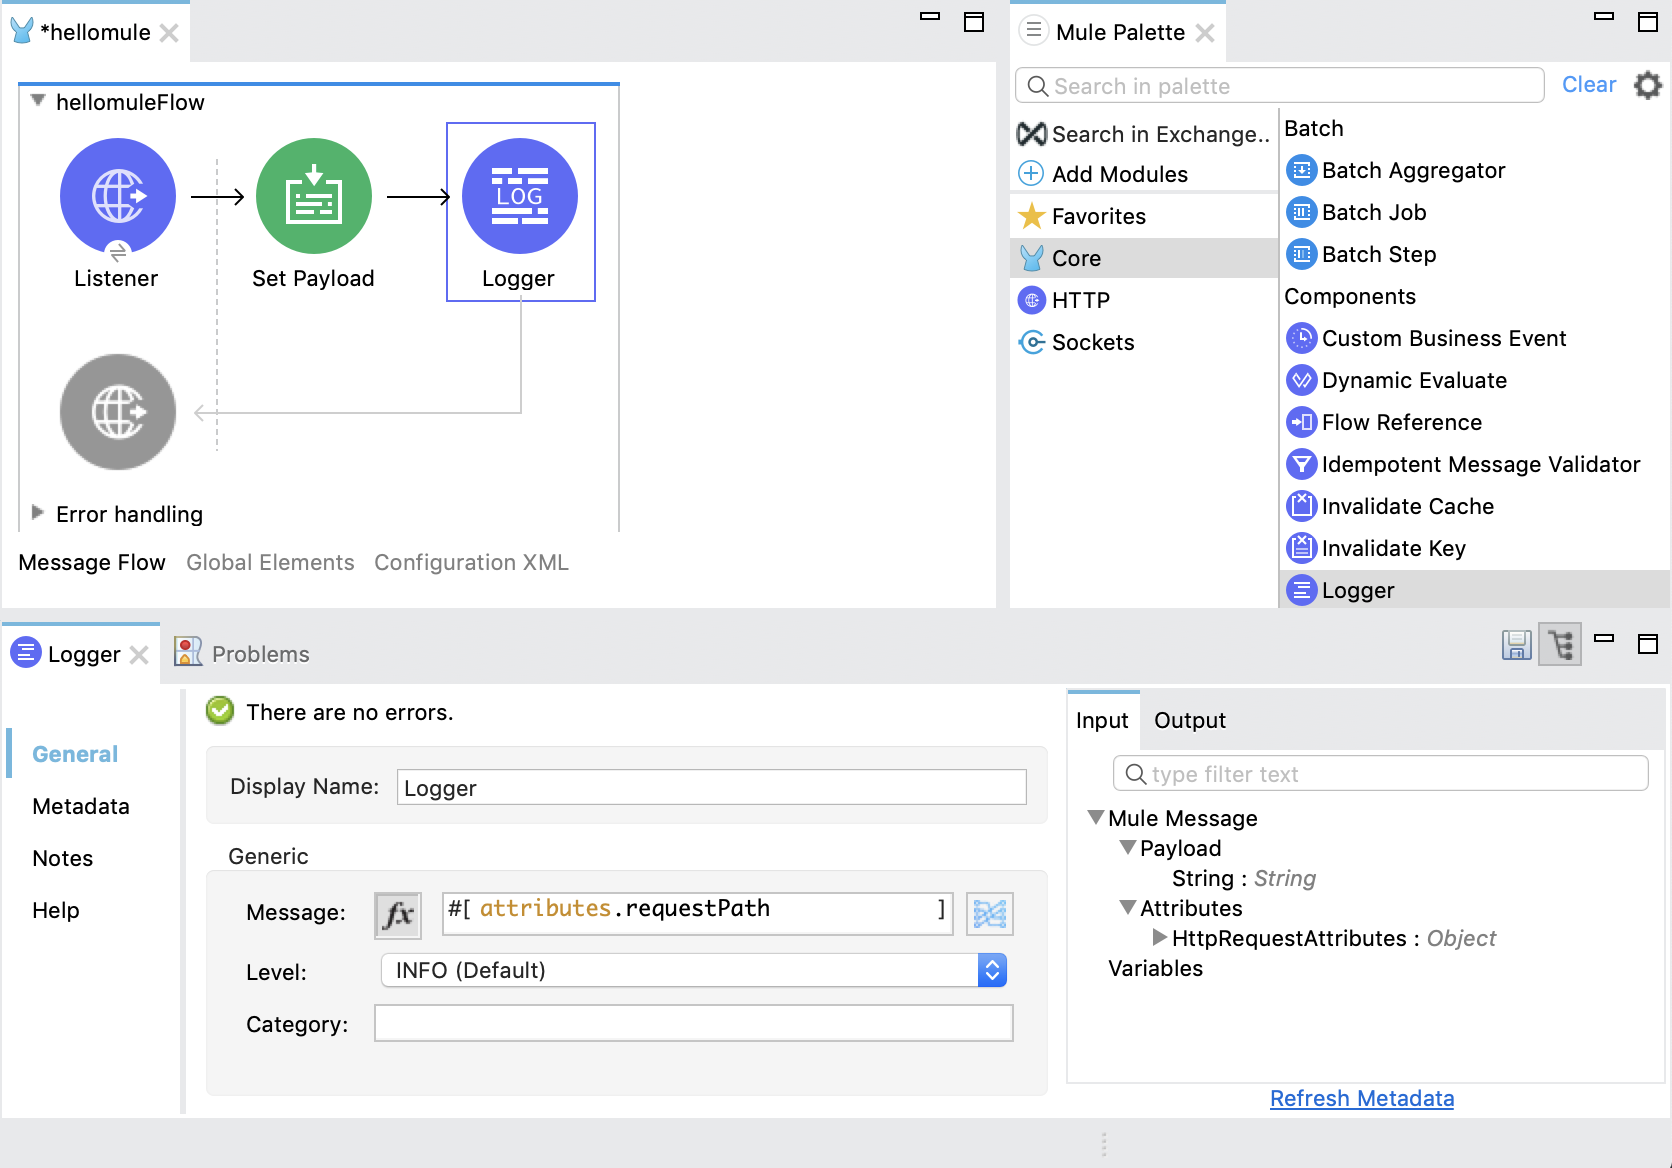
From the Mule Palette tab, click Core, and then find and drag a Logger component to the right of the Transform Message component.
-
If you do not find the Logger component, try the search field at the top of the Mule Palette tab.
-
If the configuration UI in the Listener tab is not open, click the Logger component in the canvas to open it.
-
-
In the logger’s Message field, click the fx button, and add the following DataWeave expression for printing the request path to the Anypoint Studio console:
attributes.requestPath -
Save the project by selecting File > Save from Anypoint Studio.
-
Proceed to Run and Execute the Hello Mule Example.
Run and Execute the Hello Mule Example
After setting up Hello Mule in Anypoint Studio, you can run and test it.
-
Run your hellomule application by right-clicking within the Anypoint Studio canvas and selecting Run project hellomule.
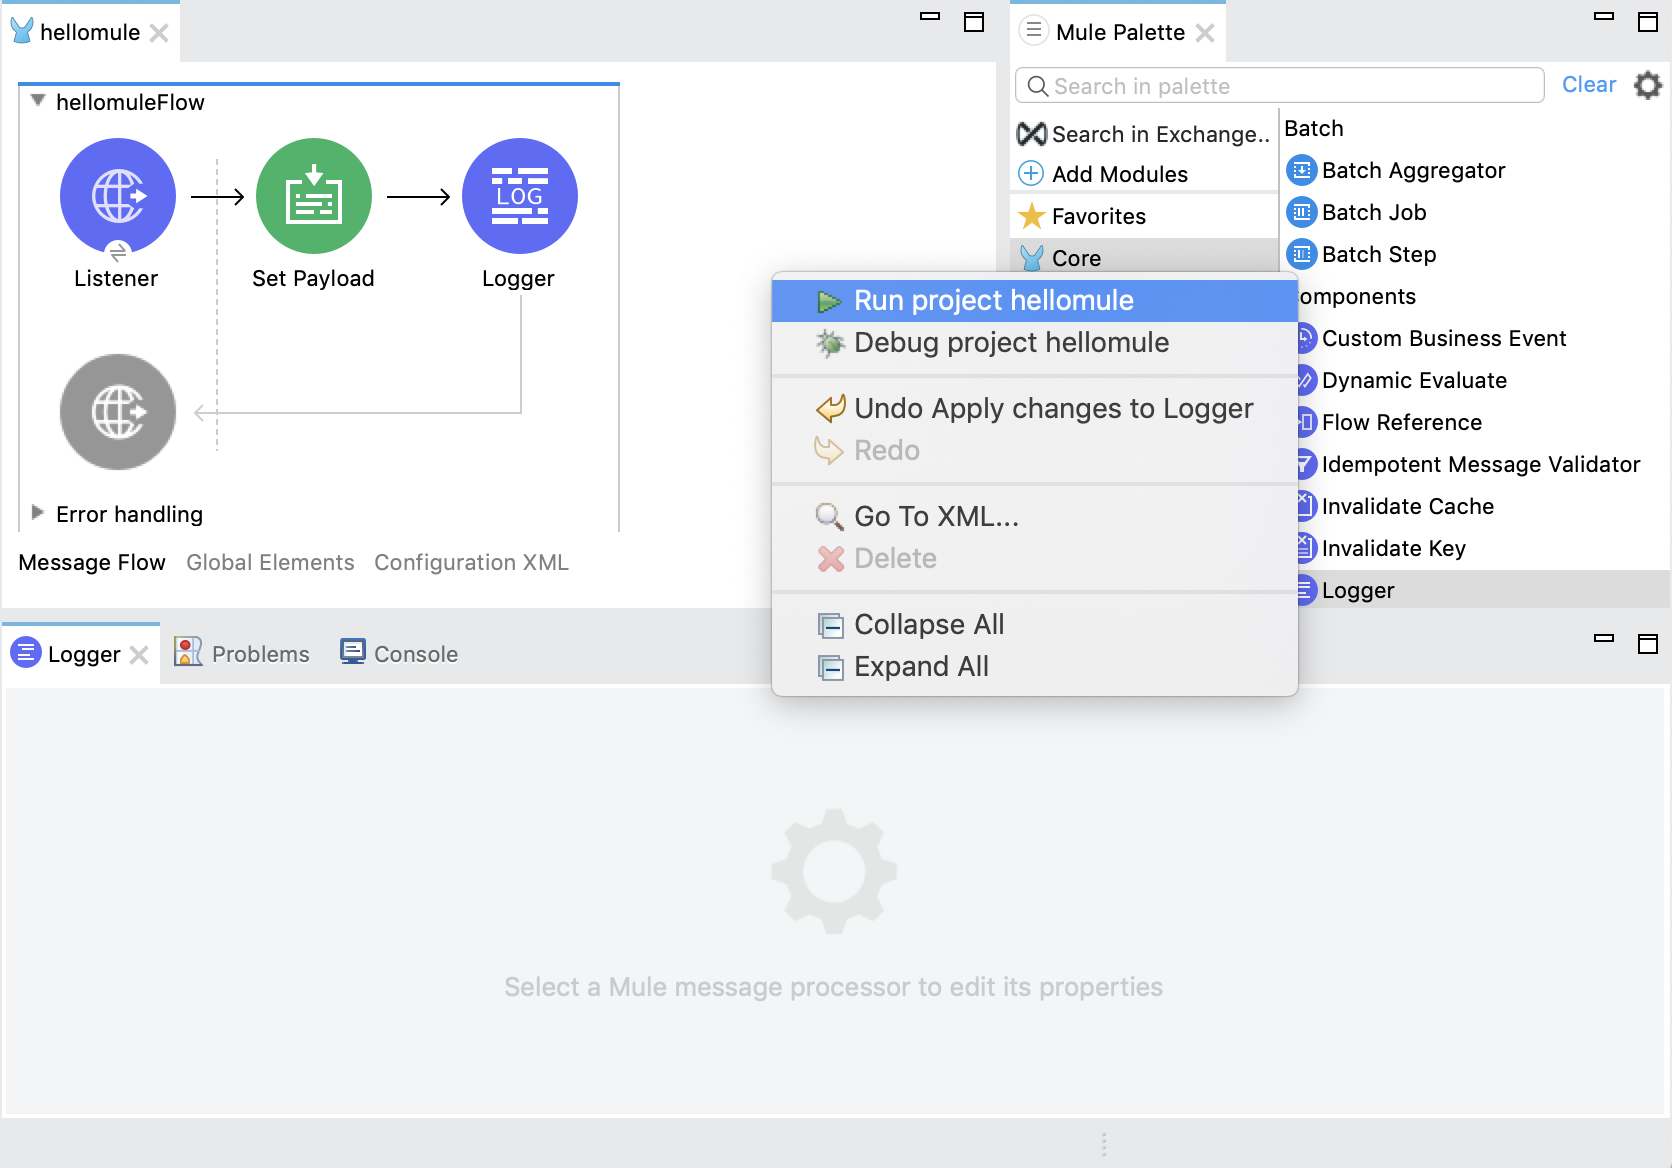
Alternatively, you can click the Run button (
 )
located at the top of Anypoint Studio, and select hellomule from the drop-down menu that
opens.
)
located at the top of Anypoint Studio, and select hellomule from the drop-down menu that
opens.Either action initiates the build process and opens the Anypoint Studio console, where the logs print important information about the two-stage build and deployment process.
You know the project is running if you see a message that ends something like this in the Anypoint Studio console:
**********************************************************
*          - - + DOMAIN + - -   * - - + STATUS + - - *
**********************************************************
* default                       * DEPLOYED           *
**********************************************************

*******************************************************************************
*    - - + APPLICATION + - -    *  - - + DOMAIN + - -    * - - + STATUS + - - *
*******************************************************************************
* hellomule                     * default                * DEPLOYED           *
*******************************************************************************
If you receive a failure notification (
FAILED) in the console instead of theDEPLOYEDnotification, check the error message. If you see a message like the following one, try setting a new HTTP port in your HTTP listener configuration:Could not create server: A server in port(8081) already exists for host(0.0.0.0) or one overlapping it (0.0.0.0).`Then save and rerun your project. Note that you can also try changing the host to
localhostif the failure persists. -
After your application is running, open a browser window, and enter the URL to the listener to trigger the application:

You must use the same host and port as configured in the HTTP listener, for example,
http://0.0.0.0:8081/hellomule. -
Check for the message
Hello Mule!in the browser. -
In Anypoint Studio, notice that the message in the Console tab includes the request path (
/hellomule) at the end of the firstINFOline (org.mule.runtime.core.internal.processor.LoggerMessageProcessor: /hellomule).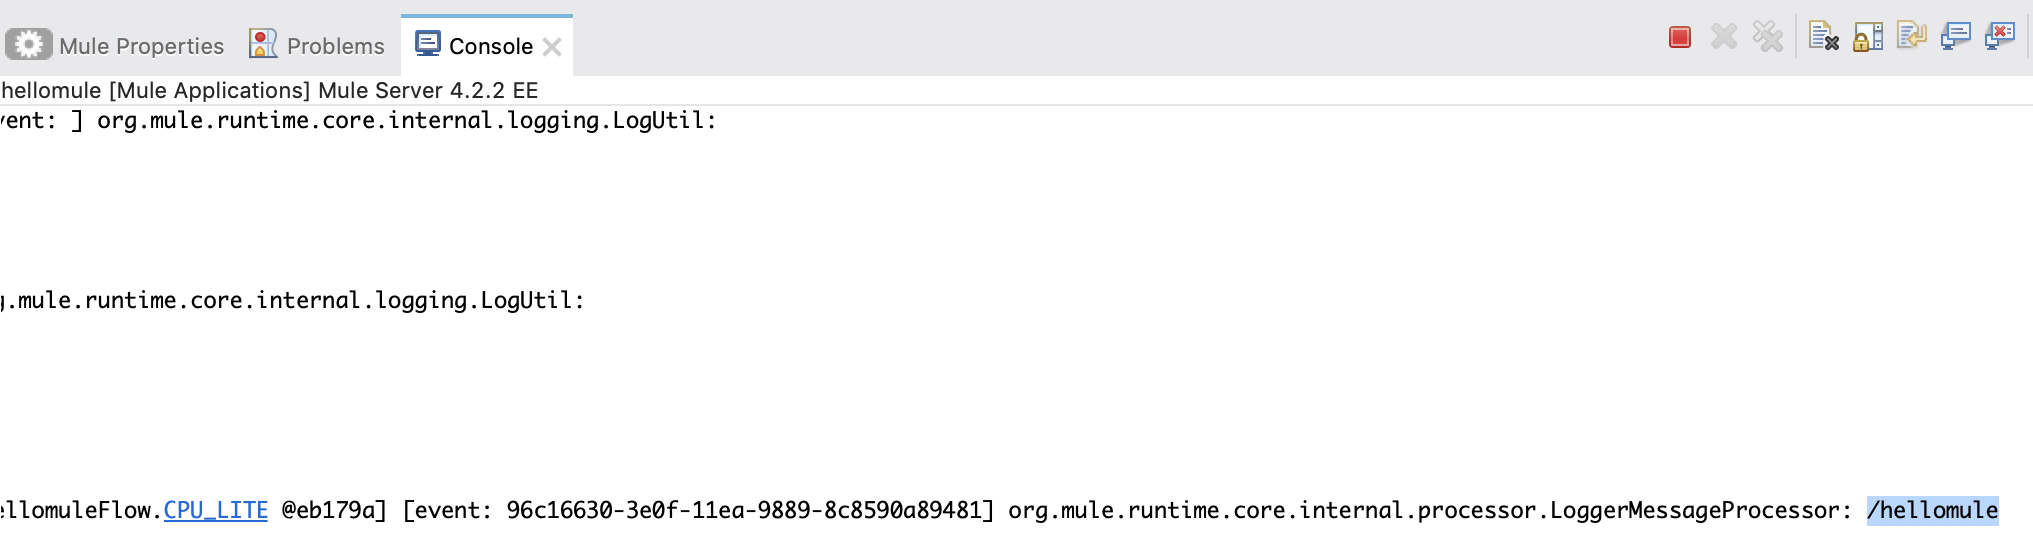
Configuration XML for the Hello Mule Example
The following XML provides the flow and HTTP listener configuration for the
example. To reserve space, the example omits the doc:id attributes, which
are not required.
<http:listener-config name="HTTP_Listener_config"
                      doc:name="HTTP Listener config" >
  <http:listener-connection host="0.0.0.0" port="8081" />
</http:listener-config>
<flow name="hello-muleFlow" >
  <http:listener doc:name="Listener"
                 config-ref="HTTP_Listener_config"
                 path="/hellomule"/>
  <set-payload value="Hello Mule!"
               doc:name="Set Payload"
               mimeType="text/plain"/>
  <logger level="INFO"
          doc:name="Logger"
          message="#[attributes.requestPath]"/>
</flow>
The XML Configuration tab below the canvas provides an edit page for the XML:
