Java Component Reference
The Java component enables the developer to package custom Java code that executes when the component receives a message. The Java component can be used to enhance the functionality and capability of your web-based applications written in Java.
| If all you really want to do with your Java class is to modify the Payload of the message in some way, you’re probably better off using a Java Transformer rather than a Java Component. |
Configuration
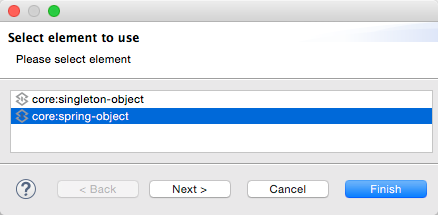
To configure the Java component, selecting a class is the only required entry. The class is simply a collection of properties, attributes, and methods the component applies to all messages. In addition, this component allows you to optionally configure Singleton (an object factory that creates an object instance) and Spring (an object factory used to obtain Spring bean instances) object factories, which are invoked when a message is received. Singleton is simply the mode used to deploy the bean. The singleton object factory does not create a new instance for each request; instead, the instance is shared. On the other hand, the Spring object factory does not create any instances; it simply looks them up from Spring.
Lastly, the Java component allows you to configure interceptors. An interceptor enables the developer to provide additional synchronous that are executed on Mule messages received by the Java component. Use interceptors to act on received messages, to log errors or exceptions, apply some business logic, or invoke additional Java services.
If the application referencing Java expects a response, use a request-response connector to enable the Java component to communicate in a two-way fashion (see below).
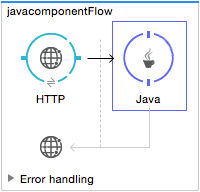
If Java is used to simply pass data to the next processor in the flow, the transaction is referred to as one-way. No response is required from the client.
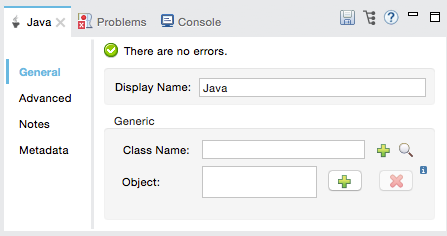
General Tab
The General tab lets you change the display name, and specify a class and object.
To configure the Java component:
-
From the Message Flow canvas, double-click the Java component to open the Properties Editor.
-
Click the green plus symbol to the right of the Class Name field to create a class for the component. Selecting a class is a required setting.
-
In New Java Class, specify the class name in the Name field and click Finish.
The Java class file opens in the text editor. See Basic Hello World Java Component Class for an example program you can copy and paste into the editor.
| Field | Description |
|---|---|
Display Name |
Defaults to the generic component name. Change the Display Name, which must be alpha-numeric, to reflect the transformer’s specific role, that is, |
Class Name |
A class is a collection of properties, attributes, and methods referenced by the component. Use the green plus button to create a class. |
Object |
This parameter lets you define singleton object or a Spring object. When using a singleton object, only one shared instance of a bean is managed and all requests for beans with an ID or IDs matching this bean definition results in this specific bean instance being returned. To configure a singleton object, select an appropriate class that contains the required properties, attributes and methods. Configure the Spring object to define the class that is used to obtain the Spring bean instances. The class attribute tells Spring which class to instantiate. |
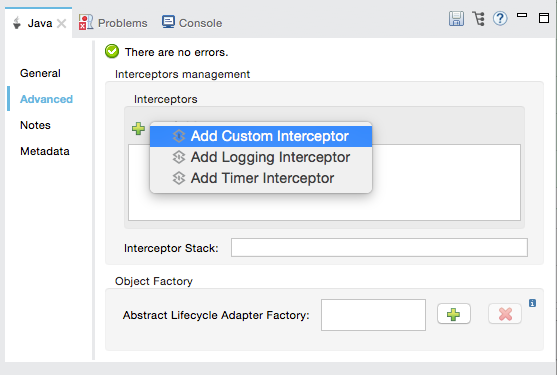
Advanced Tab
The Advanced tab lets you manage interceptors and select the object factory to be used by the component. An interceptor contains the business logic that is applied to the message payload before being sent to the next processor. You can add the following types of interceptors to the Java component:
-
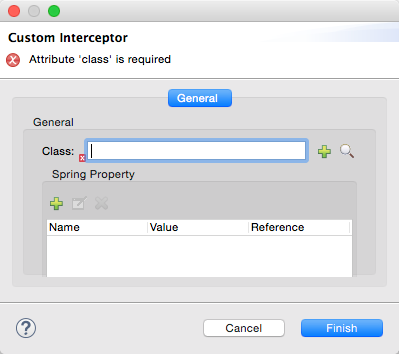
Custom interceptor
-
Logging interceptor
-
Timer interceptor
If necessary, you can add an Abstract Lifecycle Adapter Factory, which enables the object to reference an alternative class when required. When configuring this factory it is required to select a class. In addition, you can use this panel to define the Spring bean property elements.
| Panel | Description |
|---|---|
Interceptors Management |
Interceptors let you provide additional services to the component such as the ability to log transactions and the ability to log the time for each transaction. Use the Add Custom Interceptor to create a custom interceptor that can be referenced by Spring bean objects. The Interceptor Stack enables you to bundle multiple interceptors. Use the Interceptor Stack to apply multiple interceptors on this Java component. The interceptors are applied in the order defined in the stack. |
Object Factory |
A collection of properties, attributes, and classes referenced by the component. The object factory must contain a class. To configure the object factory, select the green plus button and use the browse button to select a class. Configure the generic panel to enter Spring bean element information. |
Custom Lifecycle Adapter Factory
To create a custom lifecycle adapter factory, click the green plus sign to the right of the Advanced tab > Abstract Lifecycle Adapter Factory.
| Field | Description |
|---|---|
Name |
Enter the property name of the Spring bean instance. |
Value |
Enter the value of the Spring bean instance. For example, it could be a string or Boolean. This Spring instance can have a value or the Spring instance can reference another Spring bean. |
Reference |
Enter the name of the Spring bean you want to reference. The value field is not used if you are referencing another Spring bean. |
Basic Hello World Java Component Class
To create a brand new Java Class, follow these steps:
-
In the Package Explorer, right-click your project and select New > Class.
-
Name your class, and make the package the name of your project.
-
You can use the basic class as a skeleton to construct a simple Java Component:
package project_name; import org.mule.api.MuleEventContext; import org.mule.api.MuleMessage; import org.mule.api.lifecycle.Callable; import org.mule.api.transformer.TransformerException; import org.mule.transformer.AbstractMessageTransformer; public class helloWorldComponent implements Callable{ @Override public Object onCall(MuleEventContext eventContext) throws Exception { eventContext.getMessage().setInvocationProperty("myProperty", "Hello World!"); return eventContext.getMessage().getPayload(); } }javaYour class doesn’t necessarily need to extend the
Callableclass.Note that what you set as the return argument becomes the output payload of your transformer. In this case, the outbound payload is set to the inbound payload to avoid transforming it.
-
Drag a new Java Component into your flow, and set the Class Name field to reference your newly created class.
Or in the XML view, add a
componentelement, and reference the Java class in theclassattribute:<component class="javacomponent.helloWorldComponent" doc:name="Java"/>xml
Project XML Code
The complete XML code is:
<?xml version="1.0" encoding="UTF-8"?>
<mule xmlns:http="http://www.mulesoft.org/schema/mule/http" xmlns="http://www.mulesoft.org/schema/mule/core" xmlns:doc="http://www.mulesoft.org/schema/mule/documentation"
xmlns:spring="http://www.springframework.org/schema/beans"
xmlns:xsi="http://www.w3.org/2001/XMLSchema-instance"
xsi:schemaLocation="http://www.springframework.org/schema/beans http://www.springframework.org/schema/beans/spring-beans-current.xsd
http://www.mulesoft.org/schema/mule/core http://www.mulesoft.org/schema/mule/core/current/mule.xsd
http://www.mulesoft.org/schema/mule/http http://www.mulesoft.org/schema/mule/http/current/mule-http.xsd">
<http:listener-config name="HTTP_Listener_Configuration" host="localhost" port="8081" doc:name="HTTP Listener Configuration"/>
<flow name="javacomponentFlow">
<http:listener config-ref="HTTP_Listener_Configuration" path="/" doc:name="HTTP"/>
<component class="javacomponent.helloWorldComponent" doc:name="Java">
<spring-object/>
</component>
</flow>
</mule>xml