Installing Connectors
You can install connectors, uninstall connectors, and work with connector dependencies in both Anypoint Studio and Maven.
Compatibility
-
Mule runtime engine version 3.x
-
Anypoint Studio version 6.x
To Install From Anypoint Exchange
Anypoint Exchange![]() lets you view details on a connector. However to install a connector, you need to first open Anypoint Studio.
lets you view details on a connector. However to install a connector, you need to first open Anypoint Studio.
In Anypoint Studio, click the ![]() Anypoint Exchange icon in the taskbar.
Anypoint Exchange icon in the taskbar.
When Exchange opens, search for the connector to install, click Install, and follow the prompts to install the connector.
To Install From the Studio Help Menu
If a connector or connector version is not available from Anypoint Exchange, you can install the connector using Anypoint Studio.
-
Verify if a connector is already installed by clicking Help > Installation Details and searching for the connector. Click Close.
-
Click Help > Install New Software.
-
Set Work With to
Anypoint Connectors Update Site. -
Expand a category and click the checkbox for the connector you want to install.
-
Click Next, Next, I accept the terms of the license agreement, Finish, and restart Studio when prompted.
-
From a Mule Project in Studio, search for the connector and drag it to the Canvas.
To Uninstall Connectors From Studio
-
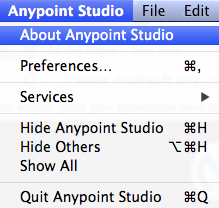
In Anypoint Studio, select About Anypoint Studio.
-
In the About Anypoint Studio window, click Installation Details to display a list of the connectors you have installed on your instance of Anypoint Studio.
-
In the Installed Software tab, select the line item you wish to uninstall, then click Uninstall.
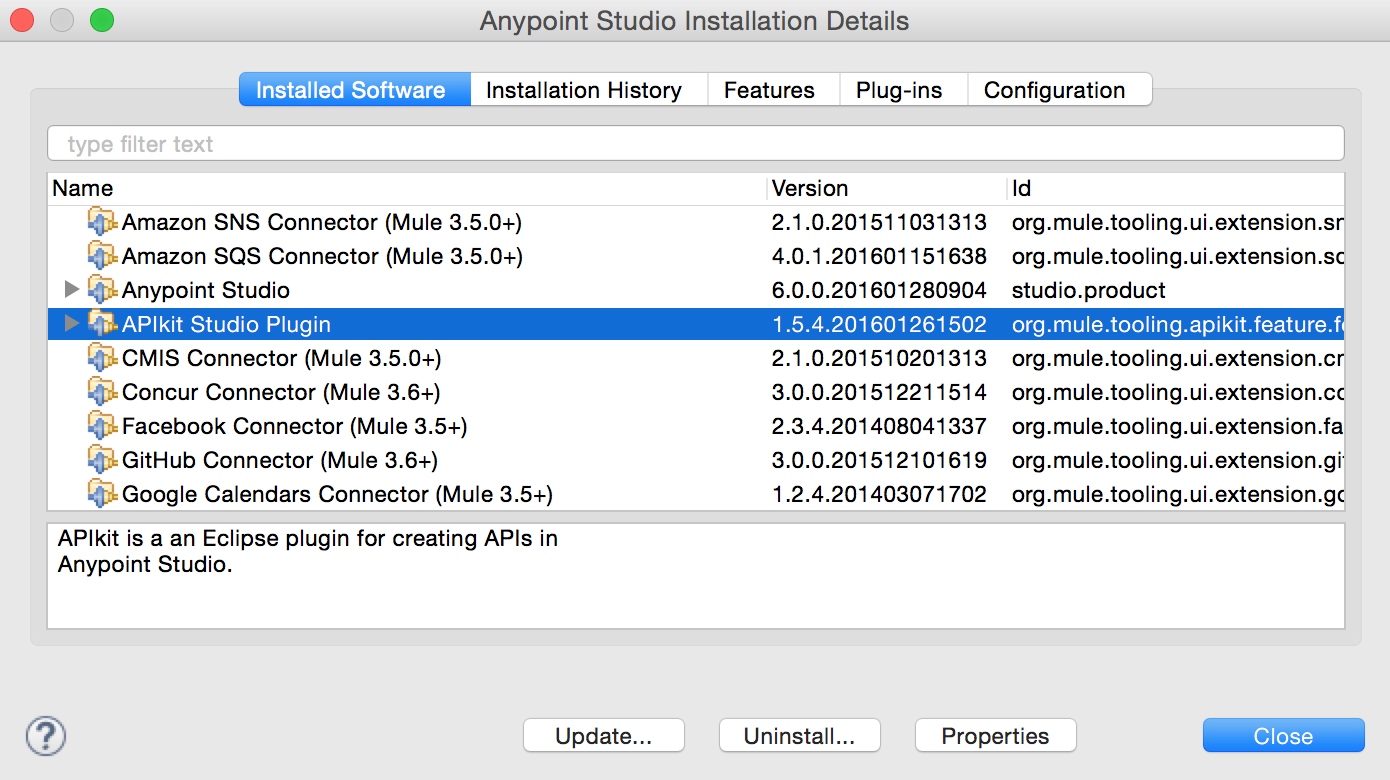
To uninstall more than one item, click to select the first line item, then hold down the Ctrlkey (PC) orcommandkey (Mac) as you click other line items. -
Click Finish to uninstall the item(s) you selected.
To Uninstall Connectors Maven
To uninstall a connector, remove the Maven dependency for that connector from your pom.xml file.
To Add Dependencies From Studio
In an Anypoint Studio project that does not include Maven support, when you add a connector to your flow, Studio automatically adds all of its dependencies (including JAR files) to your project’s classpath. Mule manages each connector’s dependencies as an Eclipse user library. Because Studio adds a connector’s dependencies to your project’s classpath, you can reference connector classes within other projects in your Anypoint Studio instance.
To Manually Add Studio Dependencies
Complete the following procedure to manually add connector dependencies to your project’s classpath in Studio.
-
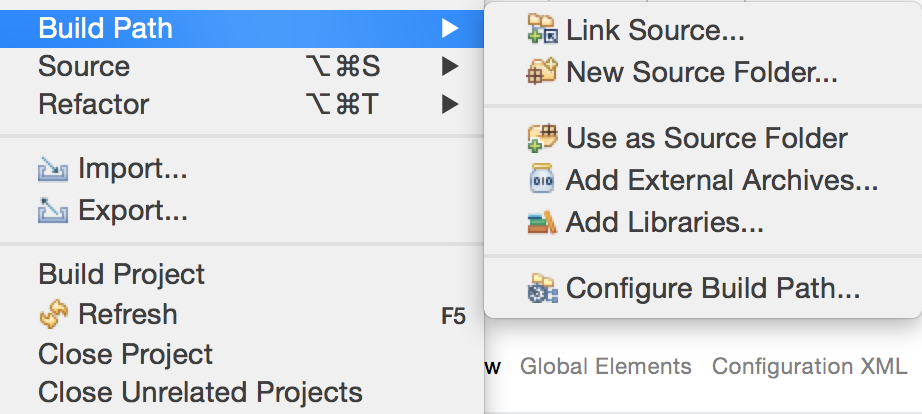
In the Package Explorer pane, right-click the project name, and click Build Path > Add Libraries.
-
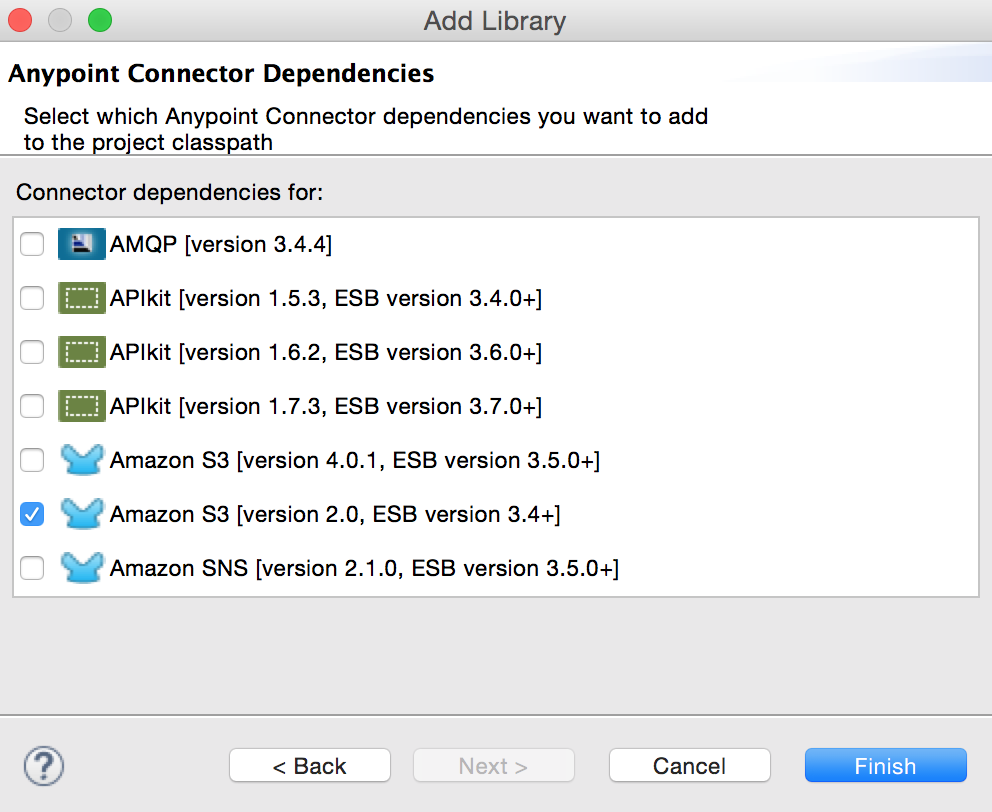
In the Add Libraries wizard, select Anypoint Connector Dependencies, and click Next.

-
Check the boxes associated with the connector dependencies you wish to add to your project’s classpath.
-
Click Finish to add the dependencies.
To Add Dependencies Using Maven
In an Anypoint Studio project that is built with Maven support, when you add a connector to your flow, Studio automatically adds the dependency (and the inclusion element to the maven-mule-plugin, if needed) to your pom file. Then, it refreshes your project dependencies based on the new contents of your pom file, and the connector (and its transitive dependencies) appears referenced in your project’s "Referenced Libraries" section as a set of references to .jar files in your local m2 repository.
To Manually Add Maven Dependencies
If you are installing a connector as a Maven dependency, ensure that you complete the following three steps for each connector:
-
To make any connector module available to a Mavenized Mule application, first add the following repositories to your
pom.xmlfile:<repositories> <repository> <id>mulesoft-releases</id> <name>MuleSoft Repository</name> <url>https://repository.mulesoft.org/releases/</url> <layout>default</layout> </repository> <repository> <id>mulesoft-snapshots</id> <name>MuleSoft Snapshot Repository</name> <url>https://repository.mulesoft.org/snapshots/</url> <layout>default</layout> </repository> </repositories>xml -
Add the module as a dependency to your project, replacing
insert-artifactId-herewith the artifactId of the specific module you are adding and replacing RELEASE with the version of this module.<dependency> <groupId>org.mule.modules</groupId> <artifactId>insert-artifactId-here</artifactId> <version>RELEASE</version> </dependency>xml -
If you plan to use this module inside a Mule application, you need to add it to the packaging process. As such, the final zip file which contains your flows and Java code also contains this module and its dependencies. Add a special inclusion to the configuration of the Mule-Maven plugin for this module, replacing
insert-artifactId-herewith the artifactId of the specific module you are adding.<plugin> <groupId>org.mule.tools</groupId> <artifactId>maven-mule-plugin</artifactId> <extensions>true</extensions> <configuration> <excludeMuleDependencies>false</excludeMuleDependencies> <inclusions> <inclusion> <groupId>org.mule.modules</groupId> <artifactId>insert-artifactId-here</artifactId> </inclusion> </inclusions> </configuration> </plugin>xml
See Also
-
Read more about using Anypoint Connectors.
-
Learn how to build your own Mule extensions with Anypoint Connector DevKit.
-
Learn how to work with multiple versions of connectors.