Working with Multiple Versions of Connectors
Out of the box, Anypoint Studio includes several Anypoint Connectors which are available for use in any applications you build using your instance of Studio. As MuleSoft and the Mule Community releases new connectors – and new versions of connectors – you may wish to take advantage of a newer version of an Anypoint Connector in your instance of Studio. However, rather than bluntly forcing all your applications to use a new version of a connector, you can arrange to download and use multiple versions of the same Anypoint Connector on your instance of Studio.
Follow the detailed steps to install Anypoint Connectors on your instance of Studio, then proceed to the sections below to learn how to use multiple versions of connectors in Studio.
| Note that information on this page applies to operation-based connectors only. All endpoint-based connectors are bundled automatically with Anypoint Studio and are associated with a particular runtime version of Mule. |
Prerequisites
This document assumes basic familiarity with Anypoint Connectors. Further, it assumes you have followed the instructions to install one or more versions of an Anypoint Connector on your instance of Studio, and now wish to use the connectors in your Studio applications.
Selecting a Version of a Connector
After installing a new version of an Anypoint Connector in your instance of Anypoint Studio, your first attempt to use the connector in a new Mule Project elicits a request to select a version of the connector. The steps below outline the procedure for choosing a version of a connector when building a new application.
-
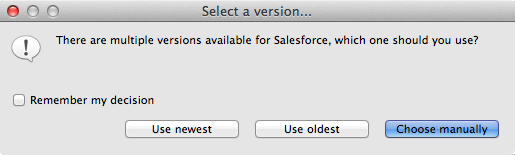
In your new Mule Project in Studio, drag the Anypoint Connector with multiple versions from the palette onto the canvas. Upon dropping the connector onto the canvas, Studio asks you to select the version of the connector you wish to use in your application (see image below).
-
Make a selection to simply use the oldest or newest version of a connector, or select Choose manually to select from a list of available versions. Check Remember my decision if you want Studio to use your selection in all new applications you build in your instance of Studio. If you choose not to check Remember my decision, Studio presents you with the option to select a version of the connector in every new project in which you use it.
-
Studio stores your selection in the
mule-project.xmlfile located in your project’s root directory. See sample content of the file, below.<?xml version="1.0" encoding="UTF-8" standalone="yes"?> <mule-project xmlns="http://www.mulesoft.com/tooling/project" runtimeId=""> <name>demo</name> <description></description> <muleExtension name="Salesforce" qualifier="org.mule.tooling.ui.contribution.sfdc.3.5.0"/> </mule-project>xml
Studio does not support the ability to change the connector version in your project by manually editing the mule-project.xml file. Follow the procedure above to instruct Studio to use a particular version of a connector; use the procedure below to adjust the version after you have made a selection.
|
Changing Your Connector Selection Preferences
If you followed the procedure above to select a specific version of a connector and asked Studio to remember your selection, you can adjust your preferences to have Studio once again present the connector version prompt in any new project.
-
Under the Anypoint Studio (Mac or Linux) or Window (PC) menu, select Preferences.., then click the arrow next to Anypoint Studio to open the node.
-
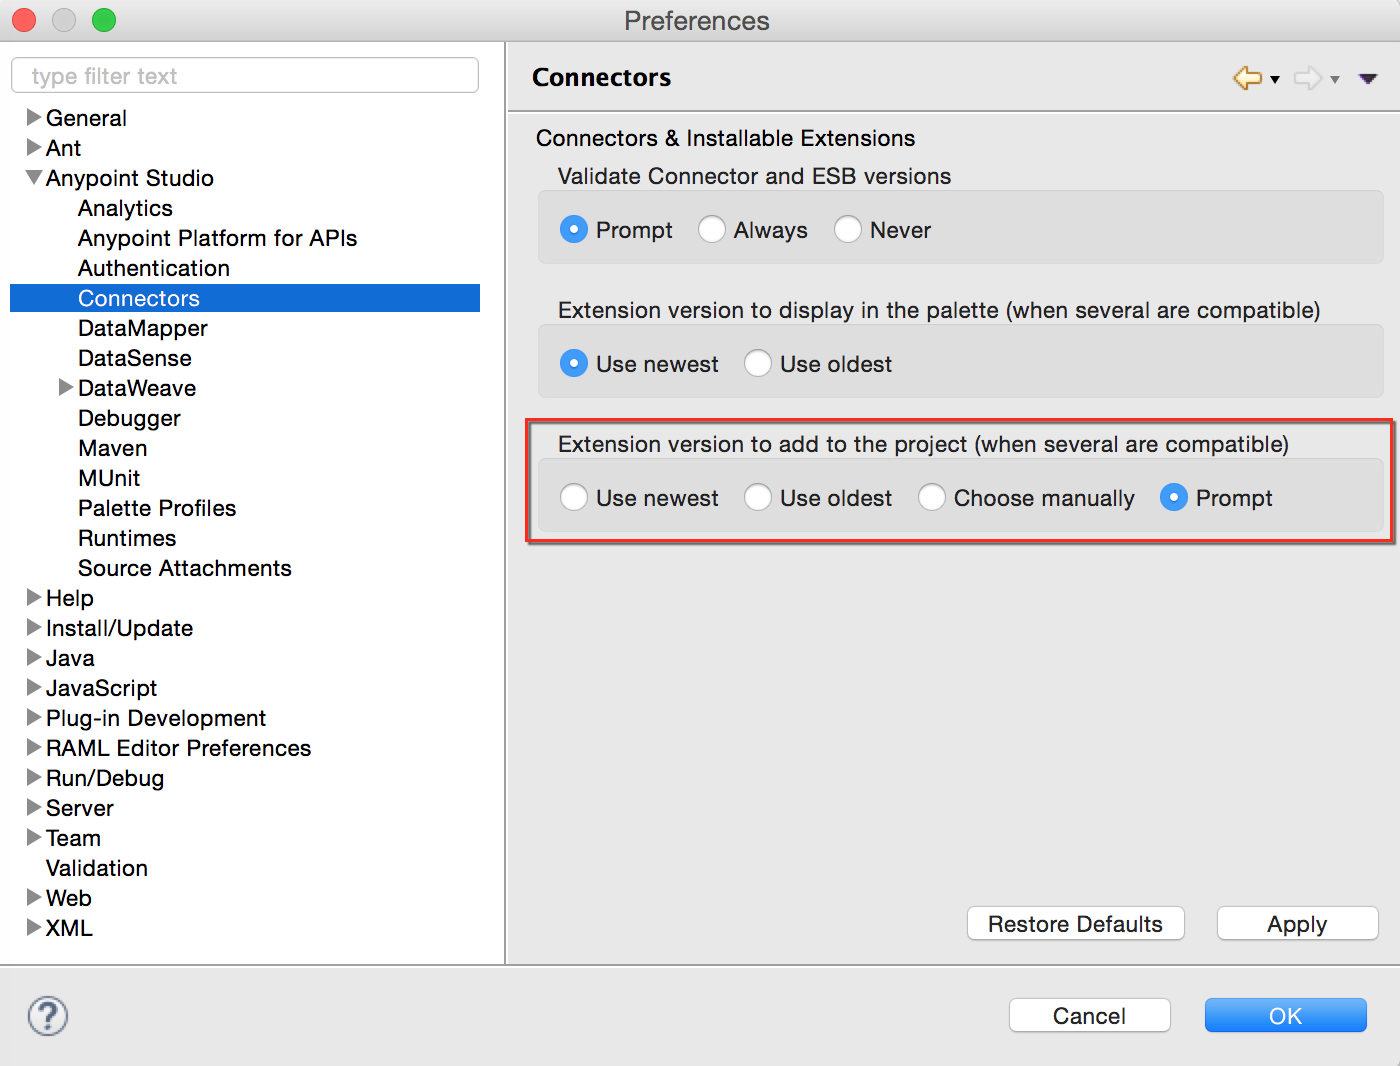
Click Connectors.
-
Under the Extension version to add to the project (when several are compatible) heading, use the radio buttons to select Prompt. Click OK to save your preference.
Changing the Connector Version on an Existing Application
If you are working on an existing application which employs an older version of an Anypoint Connector, you may wish to adjust the application so that it uses the newest version of a connector. Follow the procedure below to adjust the libraries associated with your Mule Project so as to use a new version of a connector. Note that following this procedure changes the version of the connector associated _only _with the project in which you are working, not all projects on your instance of Studio.
-
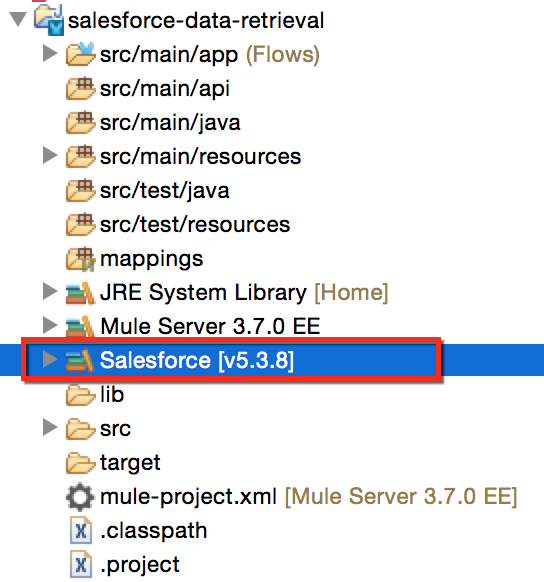
In the root directory of your project, locate the library associated with the unwanted version of the connector (see image below).
-
Right-click the library, then select Build Path > Remove from Build Path.
-
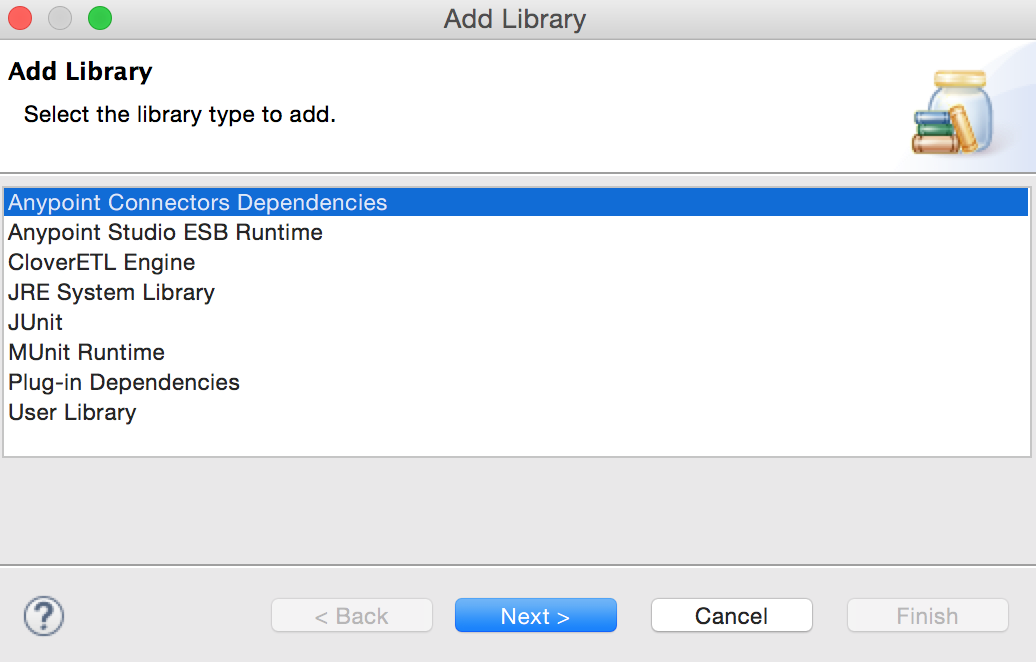
Right-click your project’s name, then select Build Path > Add Libraries.
-
In the Add Libraries wizard, select Anypoint Connector Dependencies, then click Next.
-
Check the boxes associate with the connector dependencies you wish to add to your project’s classpath.
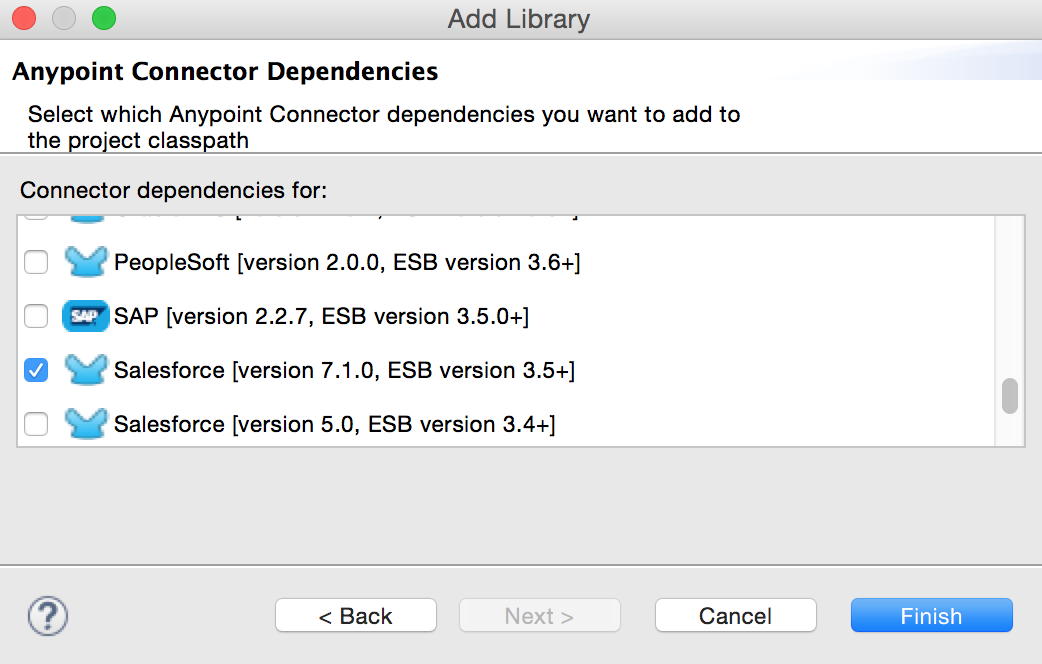
-
Click Finish to add the dependency.
Choosing a Connector Version to Display in the Palette
Even though you many have multiple versions of a connector installed on your instance of Studio, the palette only ever displays one version of the connector. By default, Studio displays the newest version in the palette, but you can adjust your Studio preferences to display the older version.
-
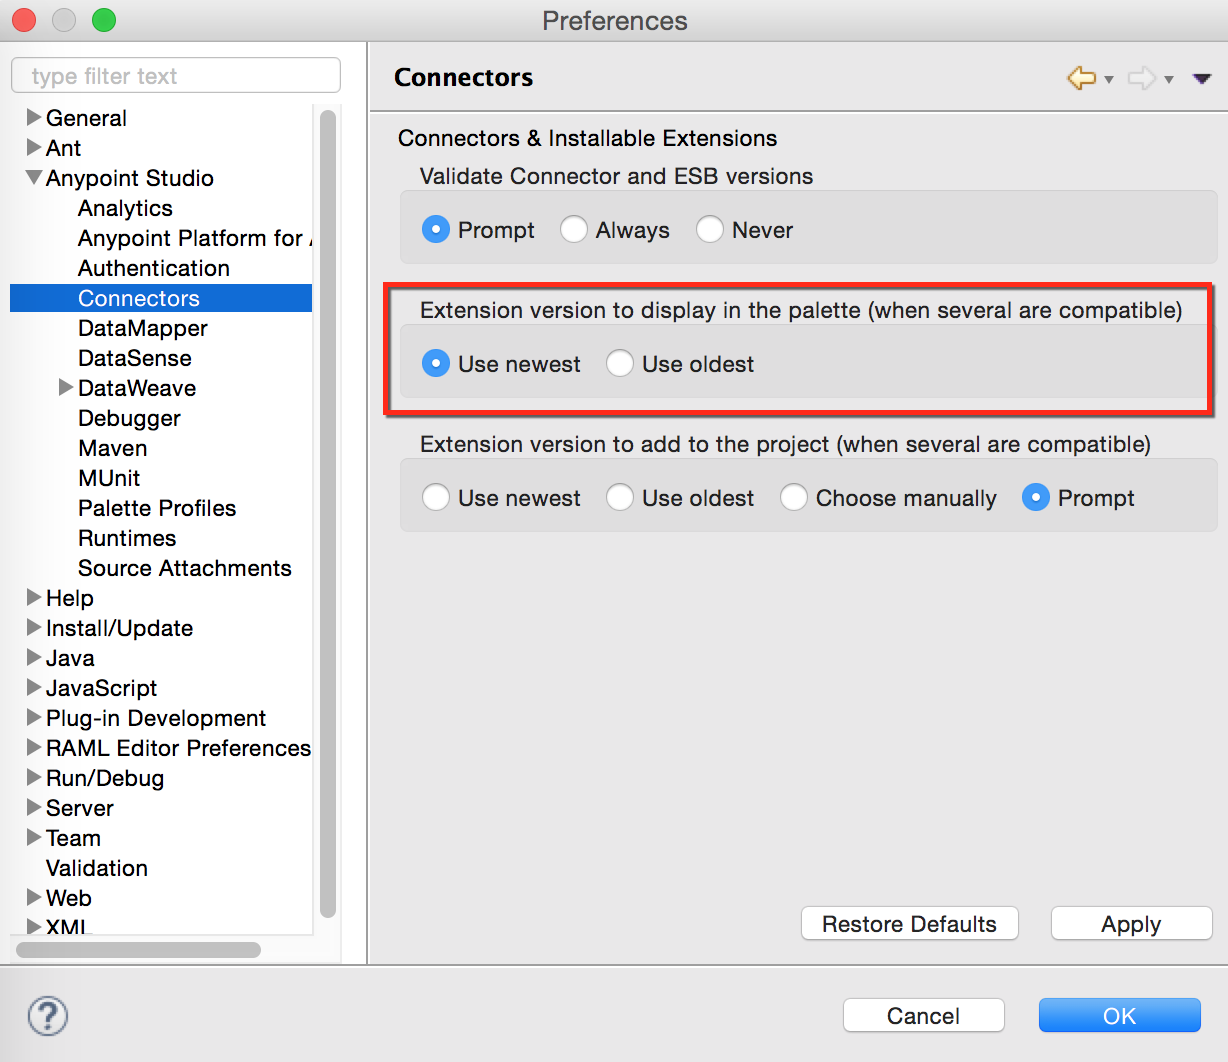
Under the Anypoint Studio (Mac or Linux) or Window (PC) menu, select Preferences.., then click the arrow next to Anypoint Studio to open that node.
-
Click Connectors.
-
Under the Extension version to display in the palette (when several are compatible) heading, use the radio buttons to select Use oldest. Click OK to save.
See Also
-
To learn more about installing connectors, extensions, and plugins in Anypoint Studio, access Installing Connectors.
-
Learn more about Anypoint Connectors.