REST Call
Use the REST Call action step to fetch data directly from a server and to collect the required information in a simple way.
Define the endpoint according to your needs and assign parameters or process variables to the call, which enables you to flexibly address any REST interface. You can use the response in JSON or XML format as a source variable during the remainder of the process run.
REST Call via a Proxy Server
To make REST calls via a proxy server:
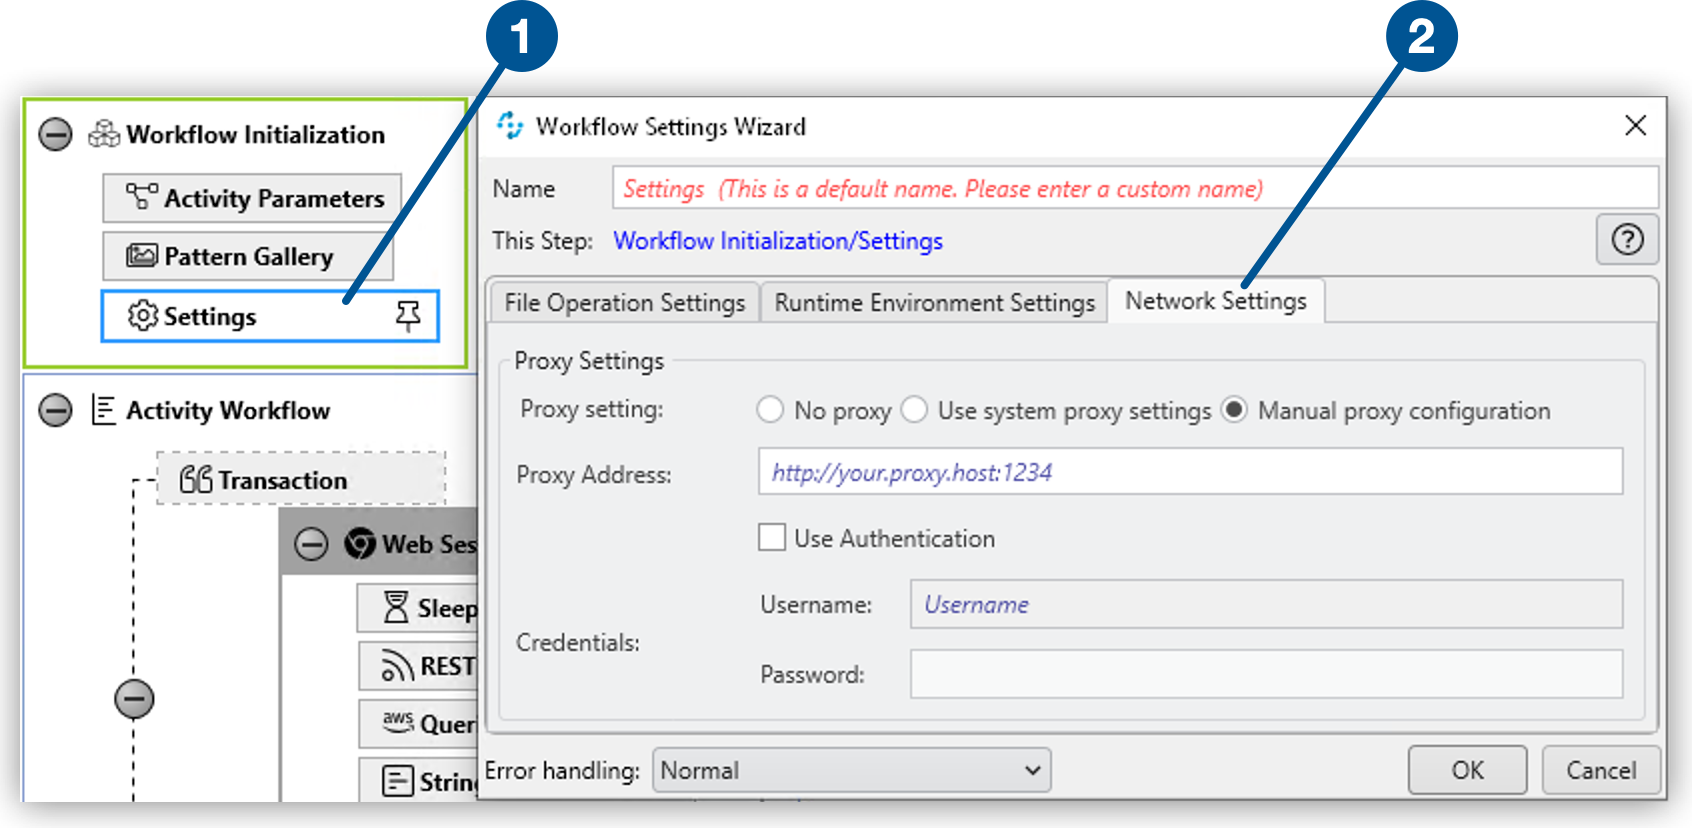
| 1 | From the Workflow Initialization block, open Settings. |
| 2 | In the Network Settings tab, configure your proxy settings. |
The REST Call action step automatically retrieves the necessary information from the network settings.
For more information about the configurable settings, see Workflow Settings Properties.
Properties
-
Authentication Options
-
API Key Authentication Key
The name of the API Key to use for authentication.
-
API Key Authentication Value
The value to use when using API Key authentication.
-
Basic Auth Credentials
The credentials to use when using Basic Authentication.
-
REST Call Authentication Type
The type of authentication header to add to the call. Available values are:
-
NoAuth
-
ApiKey
-
BearerToken
-
BasicAuth
-
-
-
REST Call Settings
-
Base Url
The base URL of the service.
-
Json Path
The JSON path to the property of the response object. For example,
$.access_token. -
Method Type
The method type to use for the REST call. Available values are:
-
GET
-
POST
-
PUT
-
PATCH
-
DELETE
-
HEAD
-
OPTIONS
-
-
Parse Type
Specifies how to parse the REST call result.
You can choose between JsonPath and XPath. Both types enable you to extract the exact information that you require without having to use special scripting, which simplifies further processing because you can access the desired result immediately.
The Json Query action step enables you to read individual values from the JSON object and process the result further.
-
Request body
The request body of the REST call to send.
-
Request Body Type
The request body type of the REST call result. You can choose between Json and Form URL encoded.
-
Url Extension
A path parameter that uniquely identifies the resource.
-
XPath
The Xpath expression to the property of the response object. For example,
/root/access_token/text().
-
Inbound Variables
-
Base Url
The base URL of the service.
-
Url Extension
A path parameter that uniquely identifies the resource.
-
Json Path Expression
The JSON path to the property of the response object. For Example,
$.access_token. -
XPath Expression
The Xpath expression to the property of the response object. For example,
/root/access_token/text().
Outbound Variables
-
IsSuccessful
(boolean) Shows whether the REST Call was successful.
-
ResponseBody
(string) Returns the requested information as a string.
-
FirstItem
(array) The first element of the array is output as a string.
-
Status
(integer) Displays the HTTP status code.
For example,
200is OK, which means the request was processed successfully and the result was transferred in the answer. -
ArrayCount
The number of elements of the returned array.
Wizard
The wizard is split into the Settings and Parameters areas.
Settings

In Settings, you specify:
-
Method Type: The required HTTP method.
-
Base Url: The Host and Base Path.
-
Url Extension: A unique identifier for the resource. You can type in the URL or define it via the pin variable.
-
Parse Type: The method for parsing the result. Available options are JsonPath and XPath.
-
JsonPath Expression: The path to the property of the response object.
Use the JsonPath expression Builder to simplify the process of creating the JsonPath expression.
Parameters
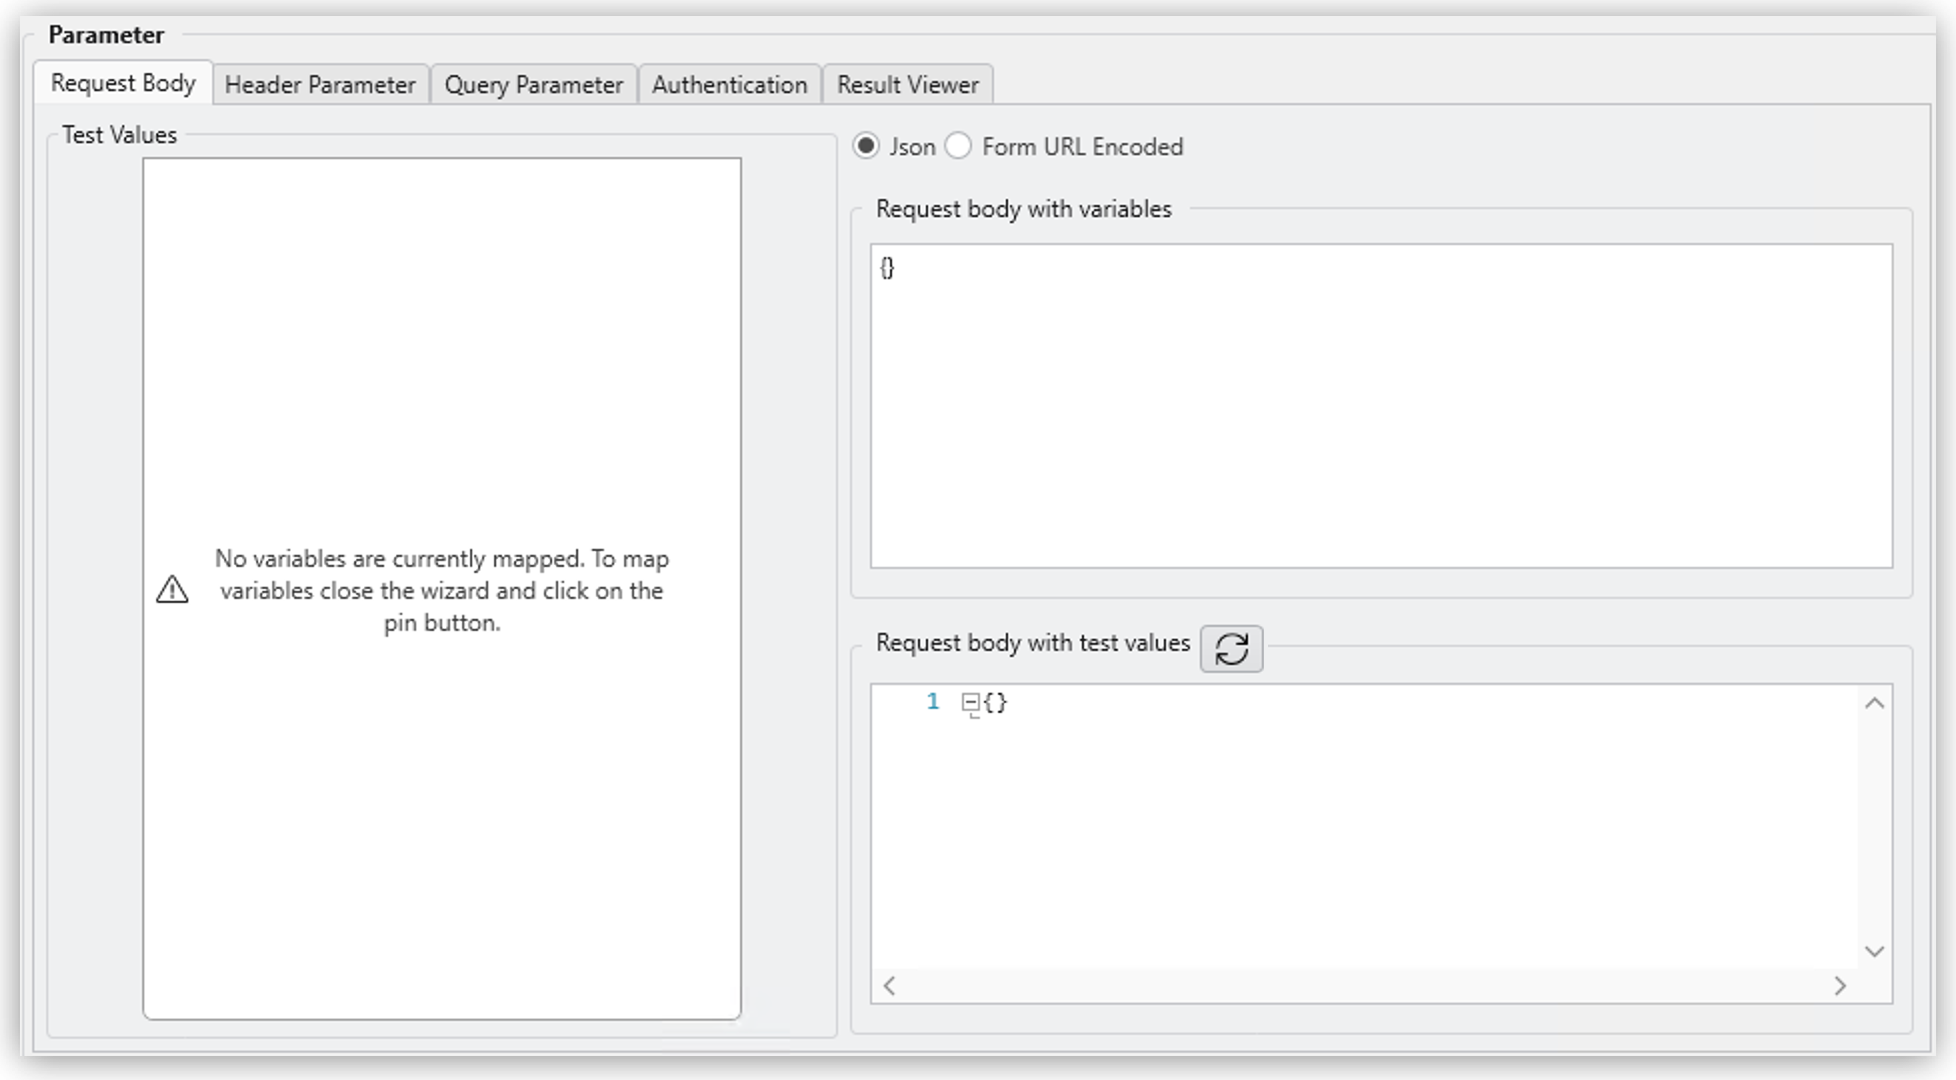
In the Parameters area, you provide the required information to the end point. There are various options for this, you can enter the parameters directly in the URL or you can configure the parameters using the following tabs: Request Body, Header Parameter, Query Parameter, and Authentication.
Request Body
With the Request Body, you send data to the server, including, for example, the form of communication between the server and the client. According to convention, the methods GET, HEAD and DELETE do not require a body (see also the network protocol RFC 7231).
In the Parameters area you can find the mapped variables and their Test Values. The mapping is carried out via the Pin variable.
With the test values, you can check if the REST call runs successfully. To do this, enter all of the data and click Send at the end of the wizard.
The actual values of the mapped variables are not effective until the production run of the Workflow.
To insert the variables with test values into the request body:
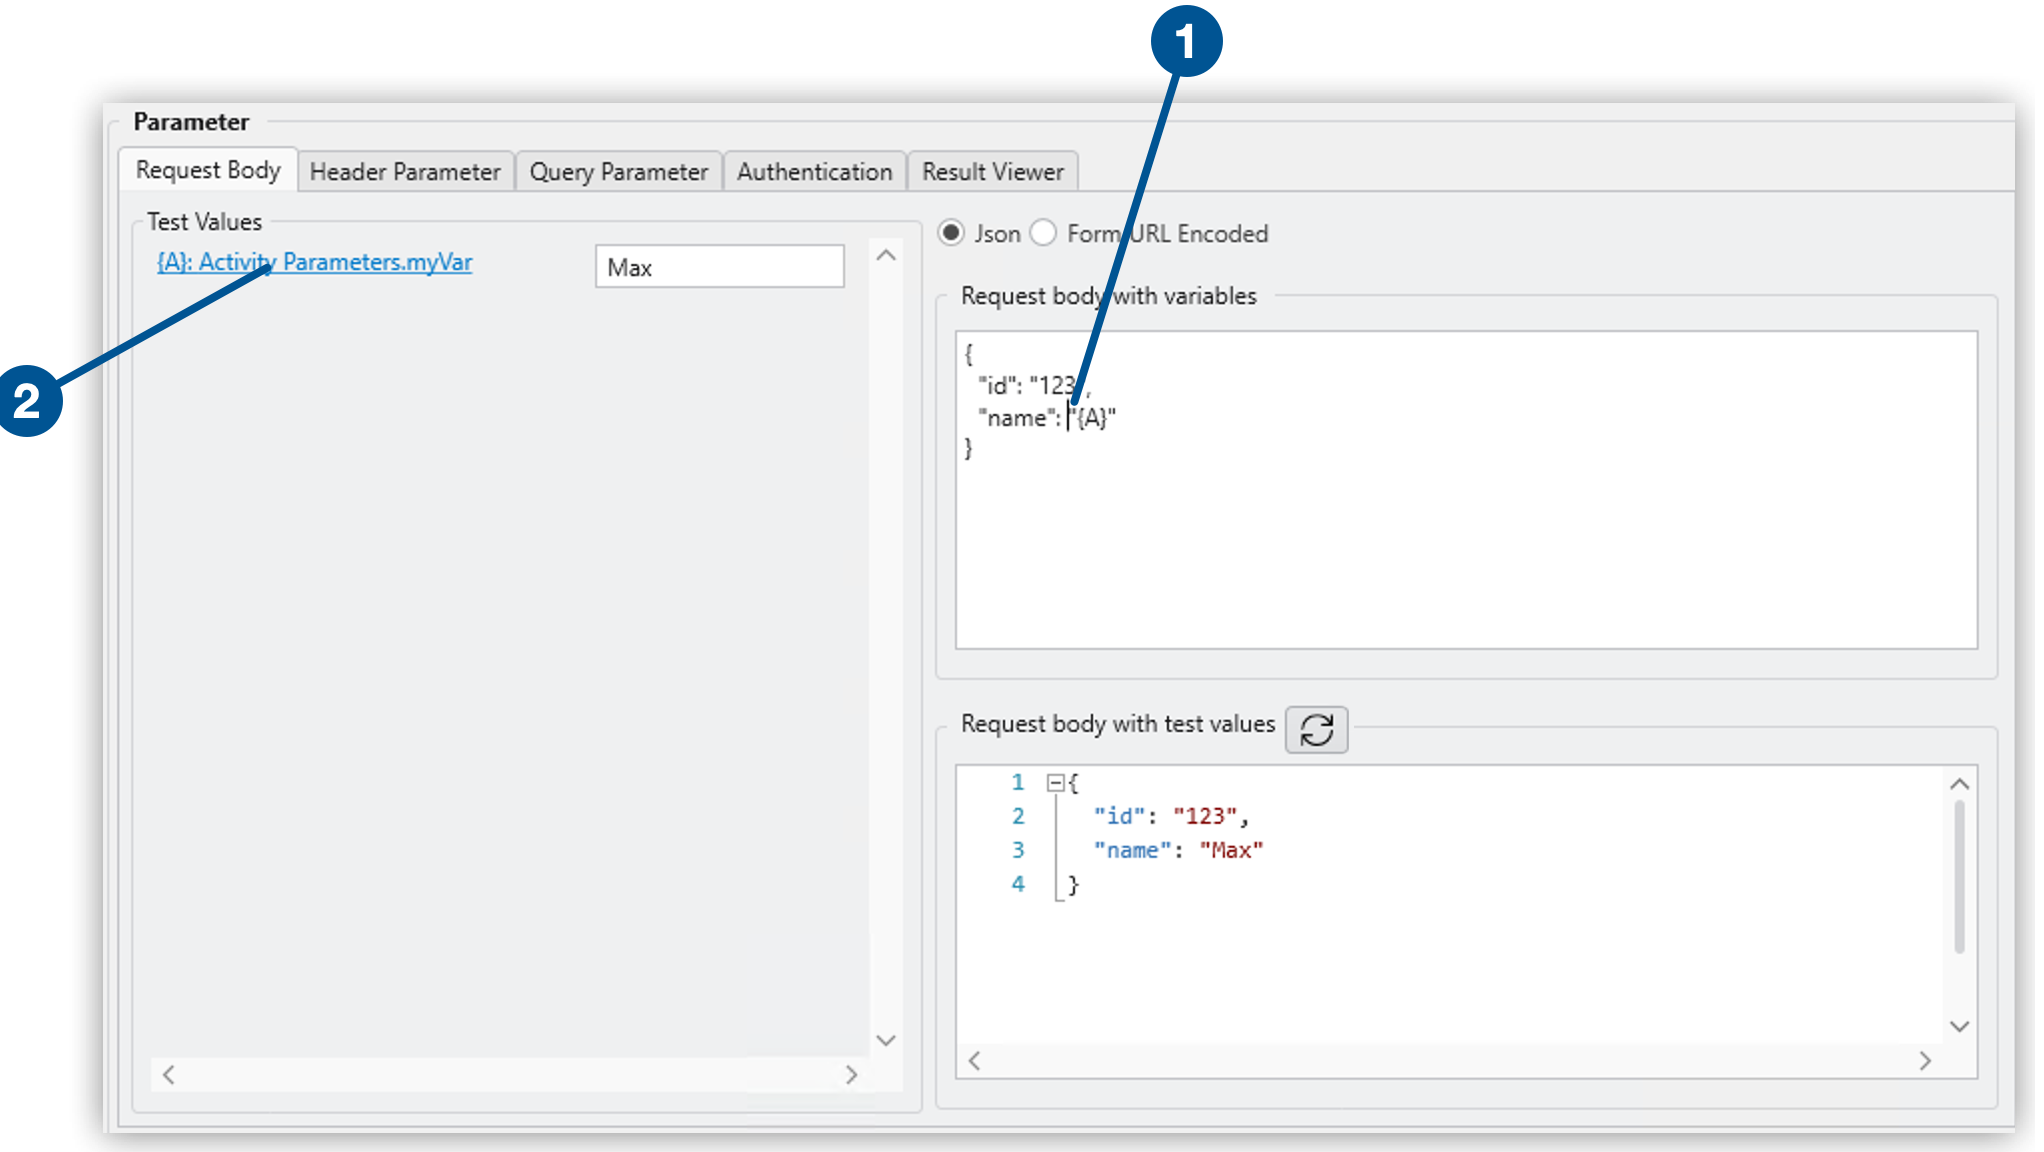
| 1 | In the Request body with variables area, click the position where you want to insert the variable. |
| 2 | In the Test Values section, click on the variable you want to insert. For Example, {A}: Activity Parameters.myVar. |
The Request body with variables section shows the body of the request and the contained variables. The Request body with test values section shows the body with the broken down variables of the JSON object. If you selected JSON, the body is also highlighted for an improved overview.
Select between Json or Form URL Encoded to choose
which type of request and answer is to be accepted by the server and
client. At the same time, the system checks if your entries are
compliant. Depending on the request body type you select, the Content-Type parameter updates automatically in the Header Parameters tab.
Header Parameter
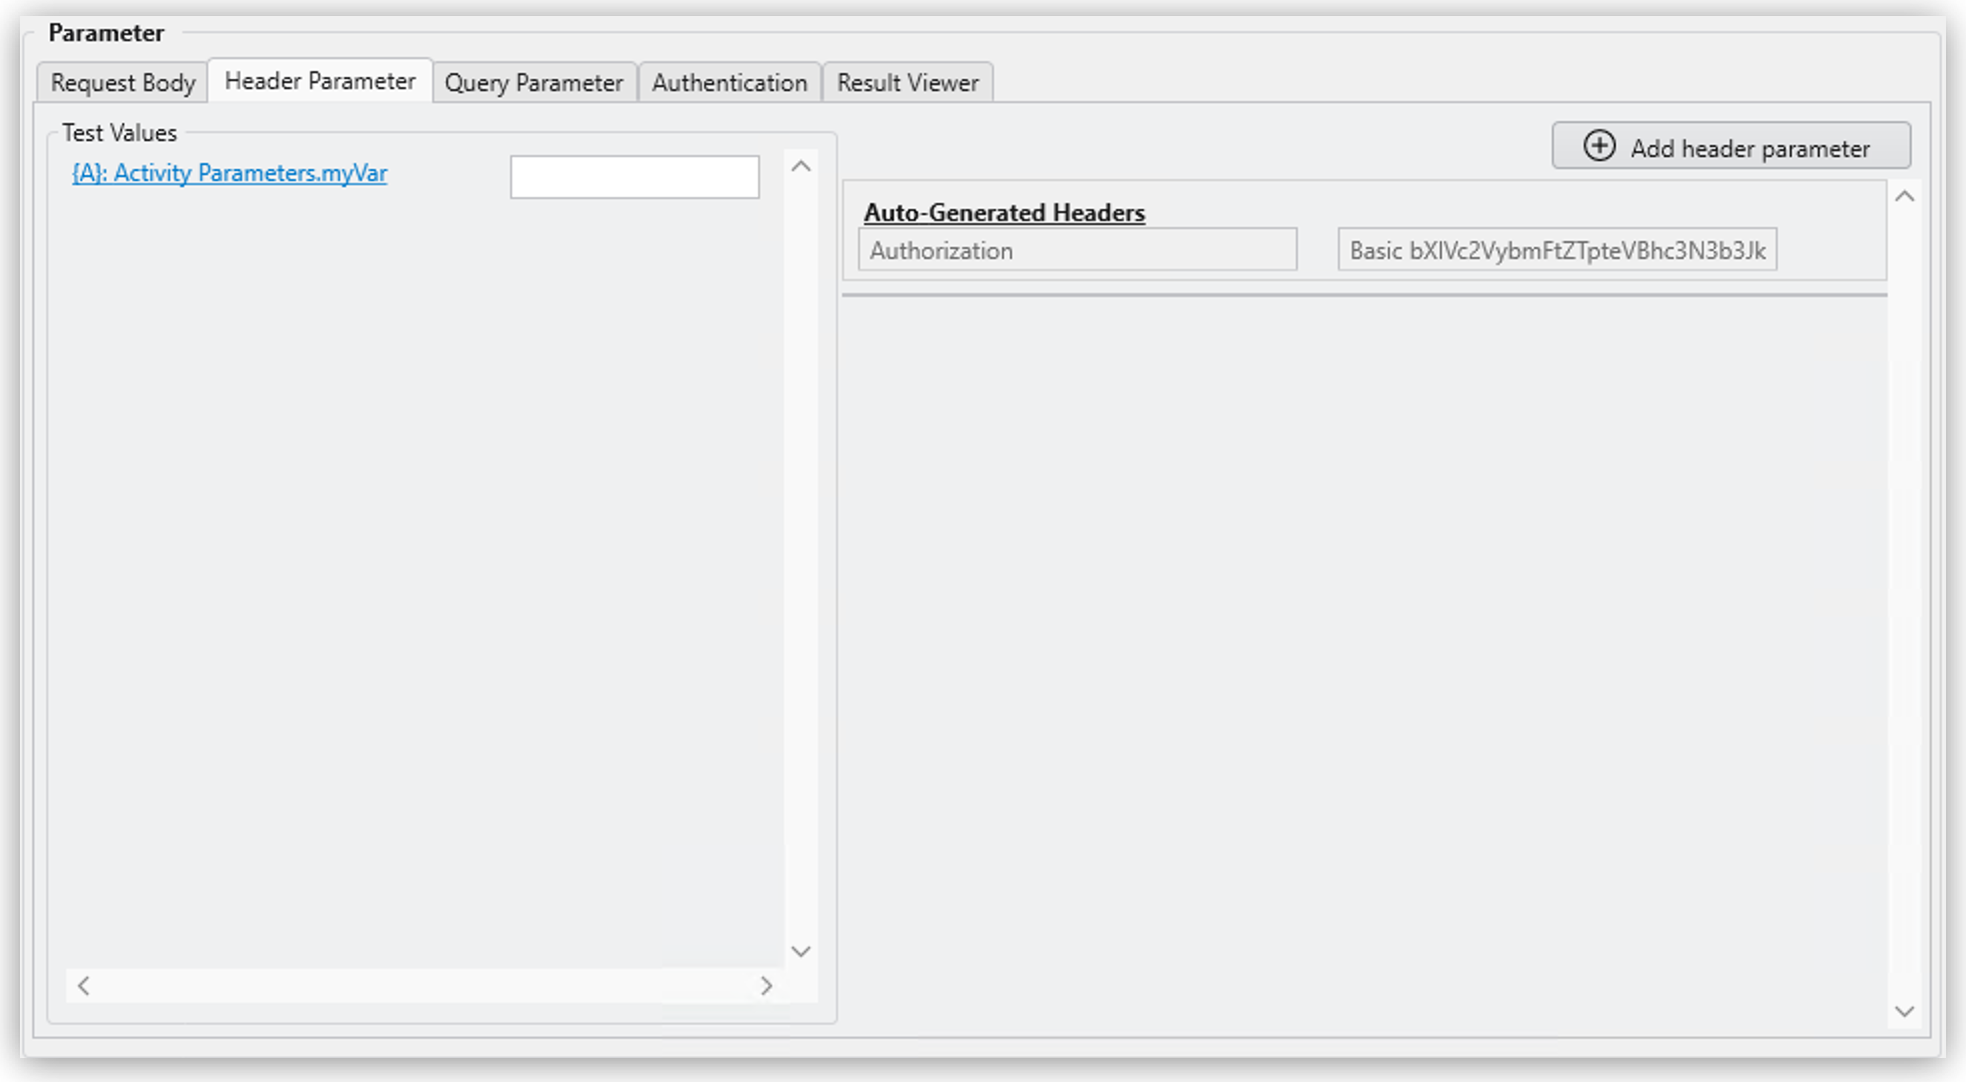
With the Header Parameter, you describe exactly which resource is
collected or which answer format is required. You can add user-defined headers with the x- prefix, for example, x-Customer – Customer ID.
Here, you typically provide the login information for authentication of
a user to a server.
Query Parameter
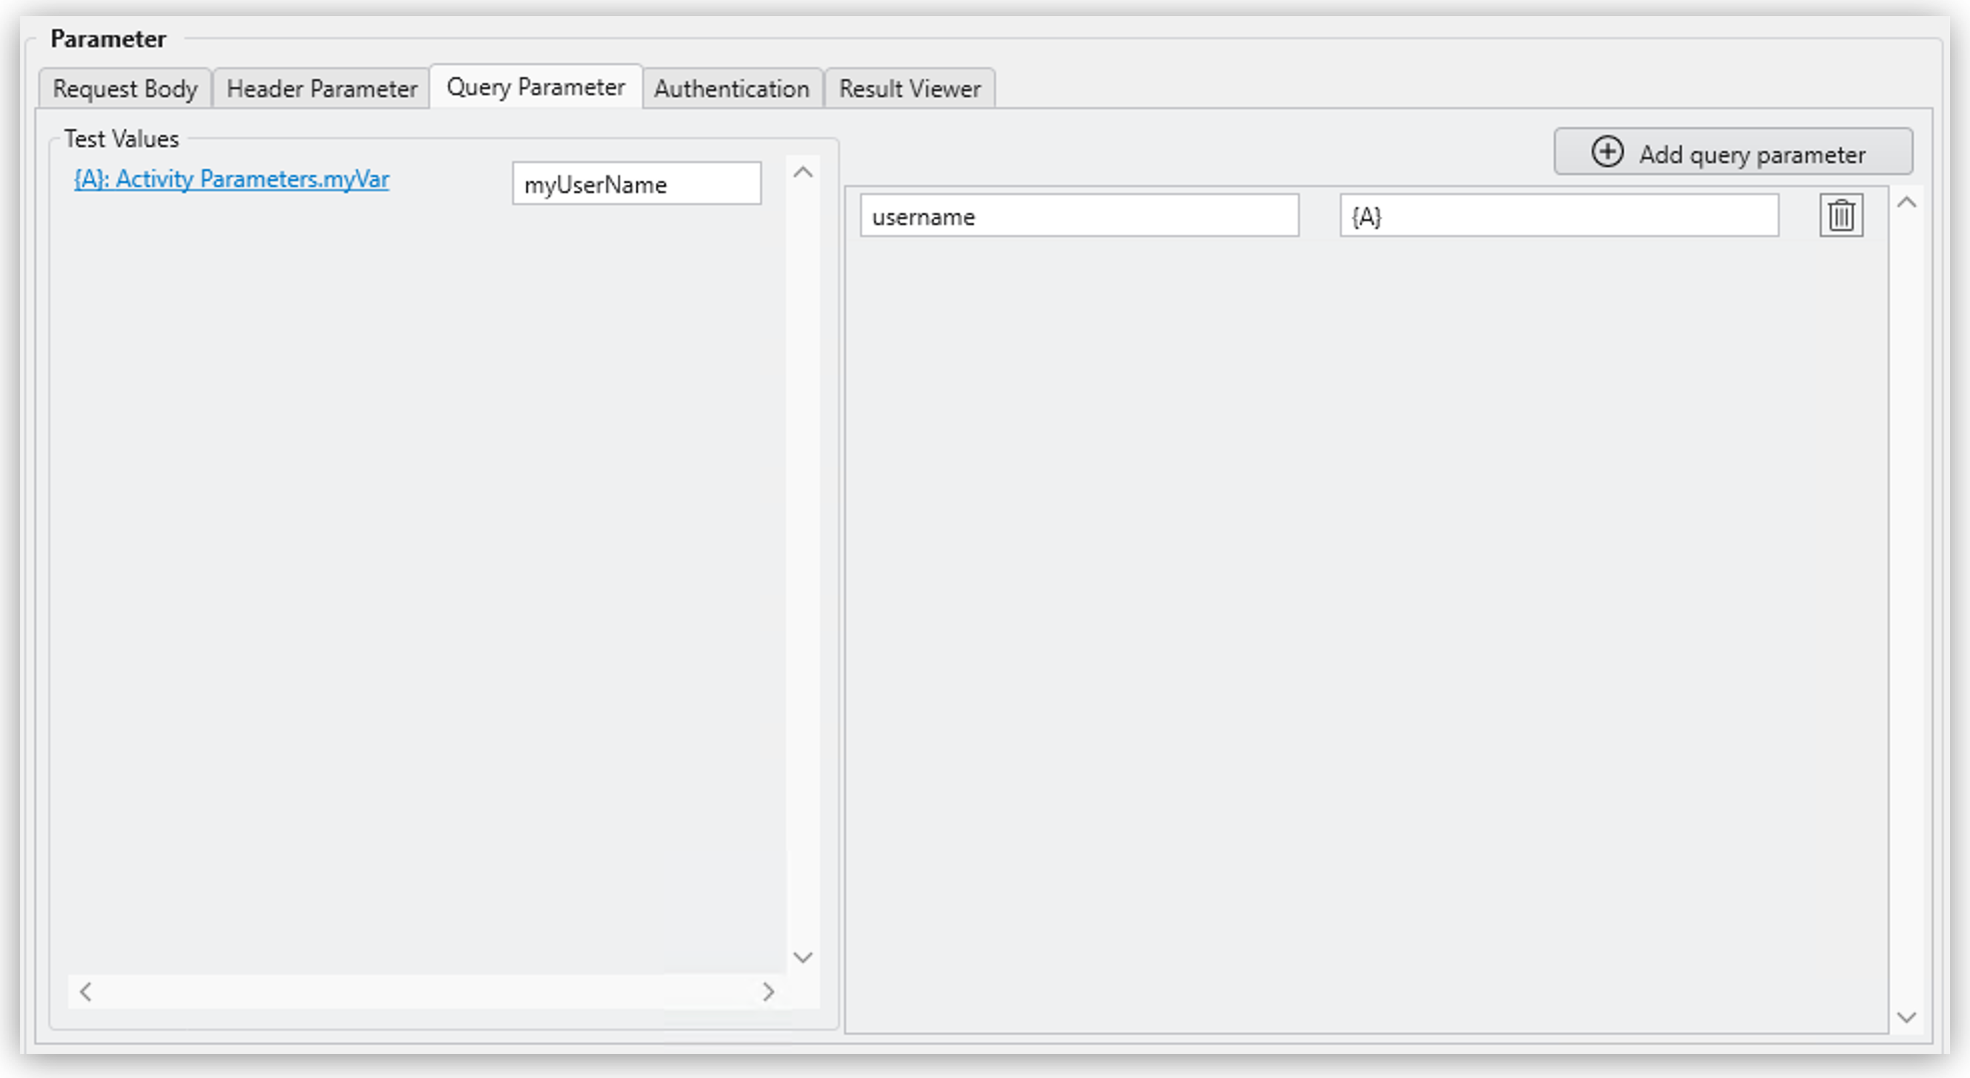
With the Query Parameter, you filter the resource and you can add further information such as login information.


