Using a Connector to Access an OAuth API
Some Mule connectors make use of an OAuth security protocol to manage user identities. Use the authentication that you configure in a connector when your Mule app is sending requests to a service that requires authentication, such as the Github OAuth2 server. In this case, your Mule app is the client. On the other hand, when you want to protect your API or app from receiving requests from unauthorized access, use an API Manager policy.
This document explains how to configure OAuth 2.0 features in a connector.
Using a Connector with OAuth 2.0
To explain how to configure a connector to use OAuth 2.0, this document uses the example of building a Mule flow with an OAuth Salesforce connector.
Acquiring OAuth Tokens
To configure OAuth 2.0 in your connector, you must first acquire a consumer key and a consumer secret from the application to which you intend to connect. This procedure varies from one service provider to another, so look for the documentation provided by the software service provider.
The OAuth provider (in this case, Salesforce) asks that you provide a callback URL. The callback URL is the URL that the OAuth provider calls with the authorization tokens once authorization has been completed. Remember the URL you set here, as it must match the one your application uses.
How to Get Your Consumer Key and Secret for Salesforce
-
After completing the registration, click the link in the confirmation email to set a password, then log in to Salesforce Developer Edition
 .
. -
Configure your Salesforce account to be accessed from a remote application using OAuth. On the Salesforce Developer Edition UI, click the Setup link on the top right of the screen, next to your user name.
-
Look for the Connected Apps section, and click the New button next to it to connect a new app
-
Fill in the form for your application, be sure to enable the checkbox labeled Enable OAuth Settings. Then provide a callback URL and list the permissions that your API should obtain.
-
Click Save, then, on the following page, note the consumer key and consumer secret. You use these values to configure the connector to access Salesforce.
Configuring Your Connector
In your Mule application, create and configure new connector using the following pieces of data:
-
Your consumer key
-
Your consumer secret
-
The OAuth callback URL
If you need to deploy to different environments (for example, production, development) where these parameters need to have different values, see Deploying to Multiple Environments.
Studio Visual Editor
-
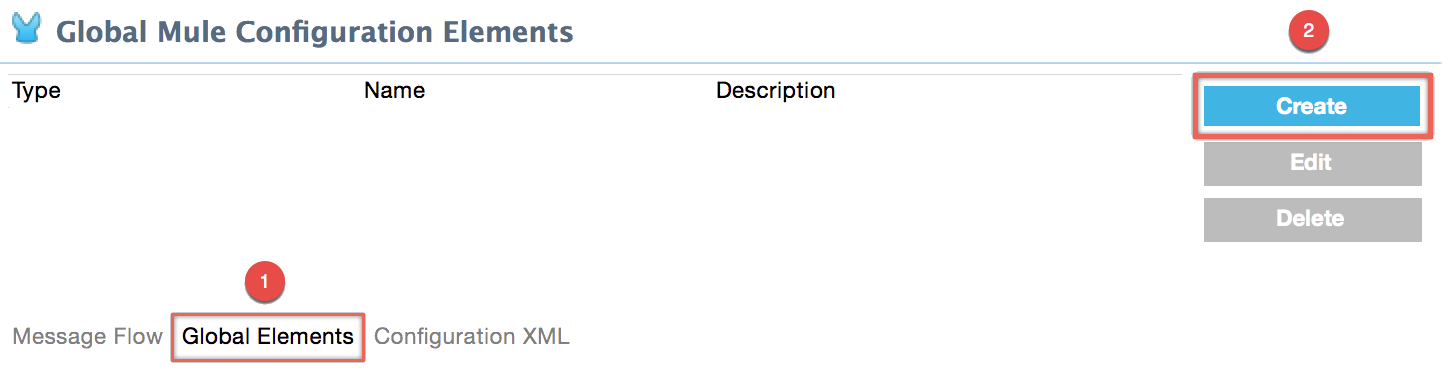
If you haven’t already done so, create a new Mule project, then click the Global Elements tab at the bottom of the canvas.
-
Click Create, then expand the Connector Configurations to show the available connectors.
-
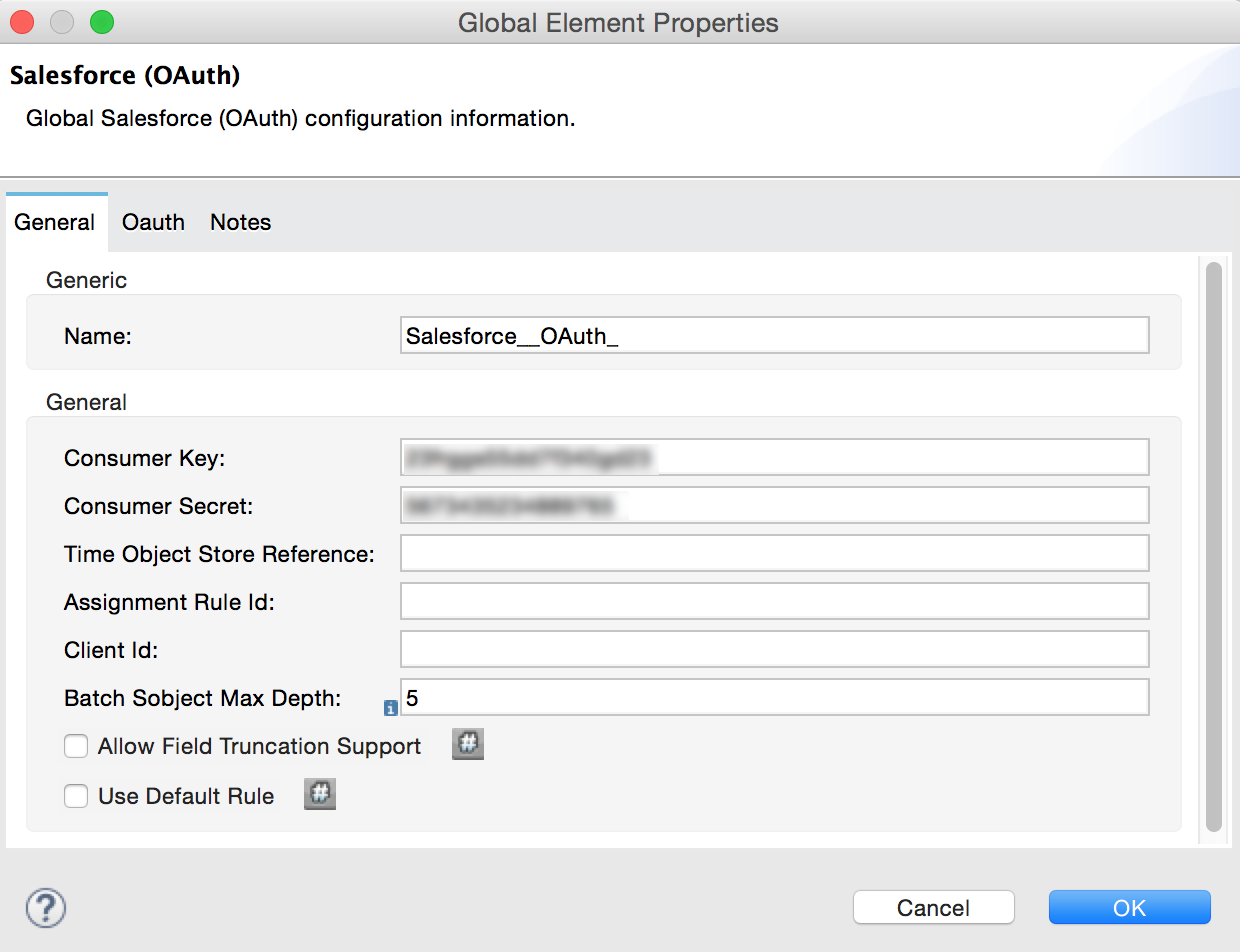
Select the appropriate global type that matches your OAuth-enabled connector. Click OK.
-
In the Global Element Properties panel, enter the Consumer Key and Consumer Secret with the information that the software service provider gave you.
-
On the OAuth tab, enter the callback URL’s Domain , Port , and Path . The example below results in a callback URL of
http://localhost:8081/callback.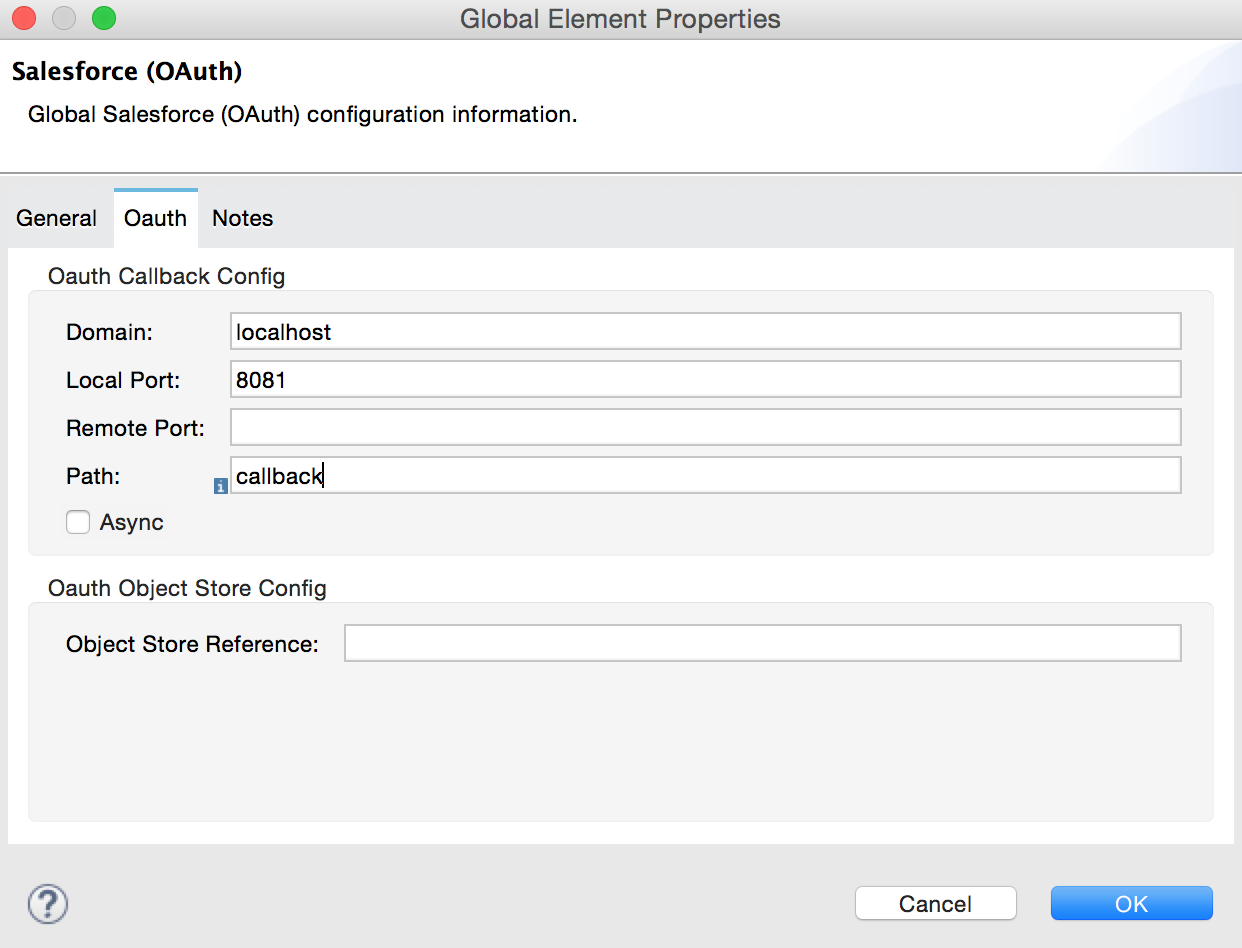
Field |
Description |
Domain |
Should be the domain assigned to the listener at the start of your OAuth callback flow. When in production, this is the domain on which your application is hosted. |
Local Port |
The port on which your authorization flow is hosted. This is the port configured on your HTTP listener, for example, |
Remote Port |
The domain and port of the listener at which your OAuth callback is hosted. |
Path |
The path of the listener at which your OAuth callback is hosted. |
Controlling Flow Processing
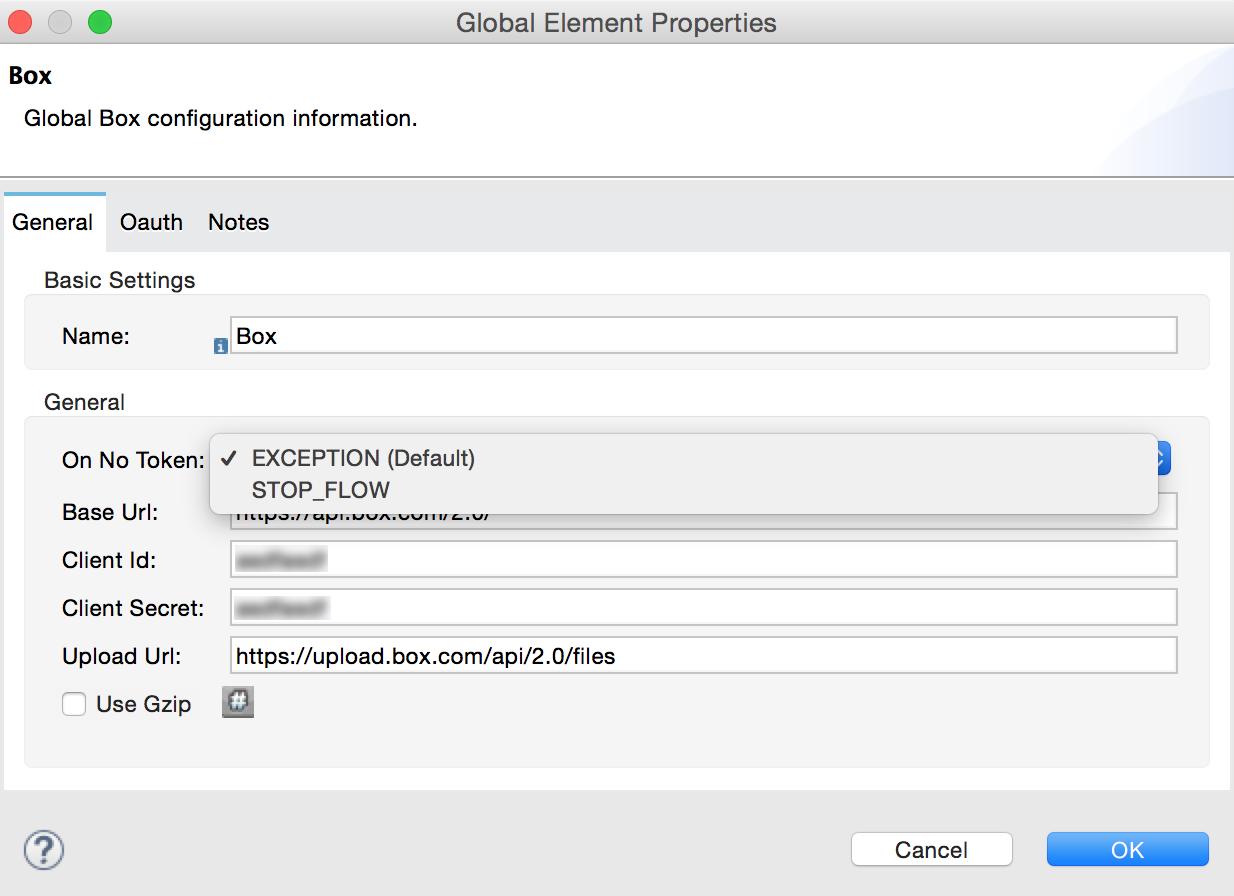
You can define the behavior of a connector for situations when a user with no OAuth token attempts to utilize the service (that is, the user is not yet authenticated via OAuth). Use the On No Token field to select one of the following two options.
STOP_FLOW |
Behaving like a filter, this option kills flow execution . This choice is ideal for keeping log files light as it doesn’t create exceptions before you have had a chance to authorize your connector to access the OAuth provider. |
EXCEPTION |
(Default) Throws an exception advising the user that an OAuth token is required. |
XML Editor or Standalone
-
Configure a global Salesforce (OAuth) element according to the table below.
<sfdc:config-with-oauth name="salesforce" consumerKey="[insert key]" consumerSecret="[insert secret]" doc:name="Salesforce (OAuth)"> </sfdc:config-with-oauth>xmlGlobal Element sfdc:config-with-oauthAttribute Value name
name of the global elementconsumerKey
`consumer key as provided by service provider `
consumerSecret
`consumer secret as provided by service provider `
doc:name
Studio only. Name of the global element.
-
Add a child element to define the Callback URL. The example below results in a callback URL of
http://localhost:8081/callback.
Attribute |
Example Value |
Description |
domain |
|
|
The domain of the listener on your OAuth callback flow. When in production, this is the domain on which your application is hosted. |
localPort |
|
The port you configured on the listener of the authorization flow |
remotePort |
|
The port you configured on the listener of the OAuth callback. |
path |
|
The path of the listener at which your OAuth callback is hosted. |
Controlling Flow Processing
You can configure your connector to define the behavior of a connector when a user with no OAuth token attempts to utilize the service (i.e. the user is not yet authenticated via OAuth). Use the onNoToken attribute to define one of the following two options.
STOP_FLOW |
Behaving like a filter, this option kills flow execution. This choice is ideal for keeping log files light as it doesn’t create exceptions before you have had a chance to authorize your connector to access the OAuth provider. |
EXCEPTION |
(Default) Throws an exception advising the user that an OAuth token is required |
<sfdc:config-with-oauth name="salesforce" consumerKey="[insert key]" consumerSecret="[insert secret]" doc:name="Salesforce (OAuth)" onNoToken="[STOP_FLOW]">
<sfdc:oauth-callback-config domain="localhost" remotePort="8082" path="callback"/>
</sfdc:config-with-oauth>xmlCreating an Authorization Flow
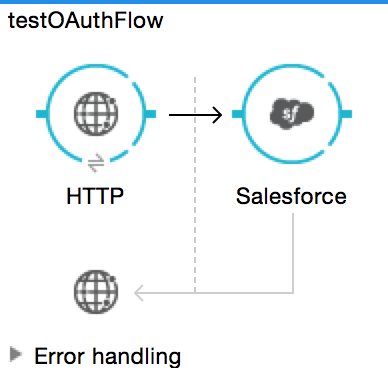
Before an end user application can perform any operations via the service provider’s API, it must obtain authentication to do so. To make authentication possible, use an authorization flow in your Mule application. This authorization flow requests, then acquires authentication tokens from the OAuth provider. It consists of an HTTP listener followed by a Salesforce connector which uses the global Salesforce (OAuth) element you created to perform the authorize operation with Salesforce.
Studio Visual Editor
-
Drag processors onto the canvas to build a Mule flow. See the one below using the HTTP Listener and OAuth enabled Salesforce connector.
-
Create a new connector configuration element for the HTTP connector, set the Host and Port to correspond to the callback URL that you set in your global element. (In the example, the callback URL is
http://localhost:8081/callback.) In this case, also set the Path in the connector tocallback. -
Click the Salesforce connector to open its properties editor, then use the drop-down Connector Configuration to select the global Salesforce connector element you configured for OAuth in the previous section.
-
Configure any additional fields required by the connector. See below for configuration details for this example.
Field Value Connector Configuration
The name of the global element you created for your connector.
Operation
AuthorizeAccess Token URL
(Optional) See below.
Example:https://na1.salesforce.com/services/oauth2/tokenAuthorization URL
(Optional) See below.
Example:https://na1.salesforce.com/services/oauth2/authorizeDisplay
PAGE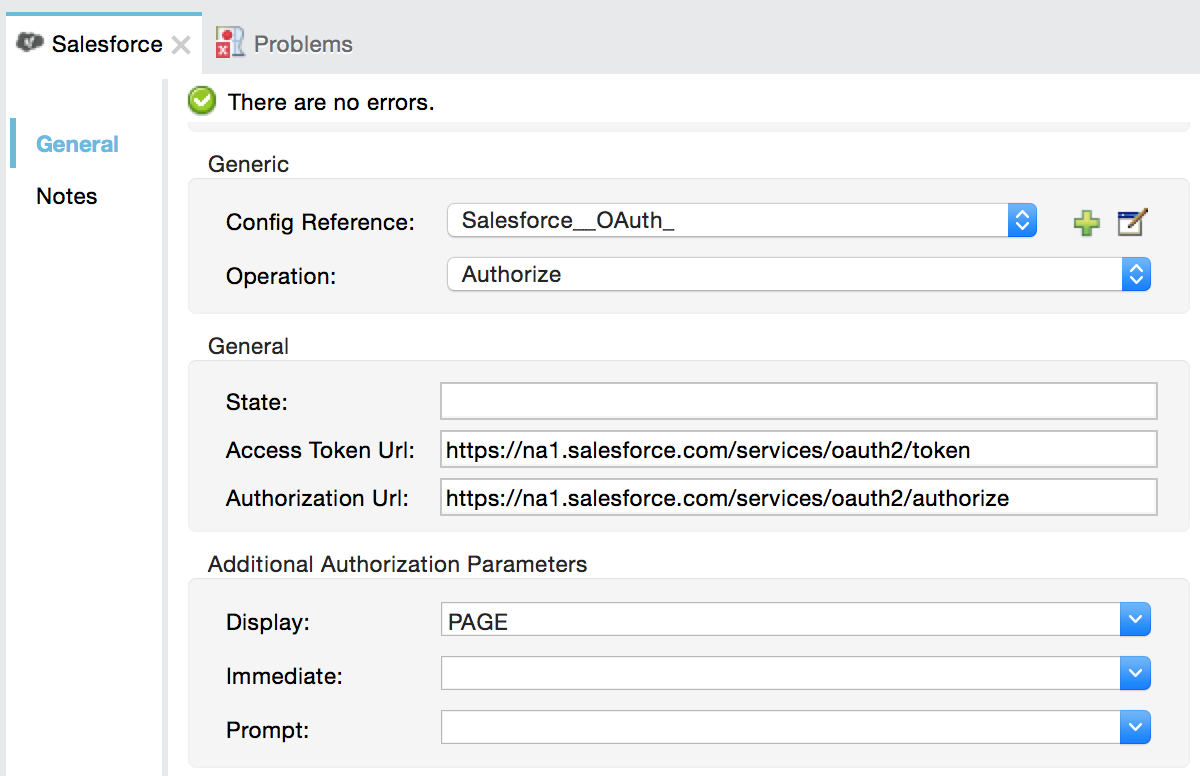
Access Token and Authorization URLs
Some service providers expose unique URLs to acquire access tokens and perform authorization (For example, a service provider many expose one URL for sandbox development, and one URL for production).
| Attribute | Description |
|---|---|
Authorization URL |
(Optional) Defined by the service provider, the URL to which the resource owner is redirected to grant authorization to the connector. |
Access Token URL |
(Optional) Defined by the service provider, the URL to obtain an access token. |
Access Token Id |
(Optional) (Default value: connector configuration name) |
Scopes
Depending on the service provider, you may have the option to define scopes . A scope gives you access to perform a set of particular actions, such as viewing contacts, posting items, changing passwords, etc. The Salesforce connector does not use scopes.
Should a connectors require scope configuration, Studio includes the scopes as configurable fields in the properties editor. If the connector you wish to use makes use of scopes , refer to the connector’s specific documentation![]() to determine which values are valid.
to determine which values are valid.
XML Editor or Standalone
-
Create an authorization flow, starting with an HTTP listener. Set the values of attributes according to the tables below.
Element http:listenerAttribute Value config-ref
HTTP_Listener_Configurationpath
localhost -
Create a global configuration element for the HTTP Listener
Element http:listener-configAttribute Value name
HTTP_Listener_Configurationpath
localhostport *
8081*The port must correspond to the
remotePortattribute in youroauth-callback-config. -
Add a Salesforce connector to the flow. Set the values of attributes according to the tables below.
Element sfdc:authorizeAttribute Value config-ref
The name of the global element you created for your connector.
accessTokenUrl
(Optional) See below. Example:
https://na1.salesforce.com/services/oauth2/tokenauthorizationUrl
(Optional) See below. Example:
https://na1.salesforce.com/services/oauth2/authorizedisplay
PAGE
<http:listener-config name="HTTP_Listener_Configuration" host="localhost" port="8081"/>
<flow name="OAuthTestFlow1" doc:name="OAuthTestFlow1">
<http:listener config-ref="HTTP_Listener_Configuration" path="/" doc:name="HTTP Connector"/>
<sfdc:authorize config-ref="Salesforce__OAuth_" display="PAGE" doc:name="Salesforce" accessTokenUrl="https://na1.salesforce.com/services/oauth2/token" authorizationUrl="https://na1.salesforce.com/services/oauth2/authorize"/>
</flow>xmlAccess Token and Authorization URLs
Some service providers expose unique URLs to acquire access tokens and perform authorization (For example, a service provider many expose one URL for sandbox development, and one URL for production).
| Attribute | Description |
|---|---|
authorizationUrl |
_(Optional) _Defined by the service provider, the URL to which the resource owner is redirected to grant authorization to the connector. |
accessTokenUrl |
(Optional) Defined by the service provider, the URL to obtain an access token. |
accessTokenId |
(Optional) (Default value: connector configuration name.) |
Scopes
Depending on the service provider, you may have the option to define scopes. A scope gives you access to perform a set of particular actions, such as viewing contacts, posting items, changing passwords, etc. The Salesforce connector does not use scopes.
Should a connectors require scope configuration, Studio includes the scopes as configurable fields in the properties editor. If the connector you wish to use makes use of scopes, refer to the connector’s specific documentation![]() to determine which values are valid.
to determine which values are valid.
About the Authorization Flow
An end user initiates the authorization flow above by navigating to the HTTP Listener’s address in a Web browser. When triggered, this flow starts the OAuth dance, directing the user to the service provider’s login page. Mule also creates a callback endpoint so the service provider can direct the user back to the Mule flow once authenticated. The connector extracts information from the callback, sets its own internal state to authorized, then continues flow processing. Further, the connector automatically issues an access token identifier which Mule stores in the ObjectStore.
Mule manages access tokens automatically assigning a default value for the accessTokenId to match the name of the global connector configuration (in this example, the global Salesforce (OAuth) element). Using a default value allows the connector to be authorized for many users. However, because CloudHub’s ObjectStore functionality behaves slightly differently, if you run your project in CloudHub in multitenancy mode, then each access token identifier is unique for each user. Note that on all versions of Mule prior to Mule Studio (October 2013) with CloudHub Mule Runtime (October 2013), you must perform a few extra steps to manage storage of the accessTokenId.
After Authentication
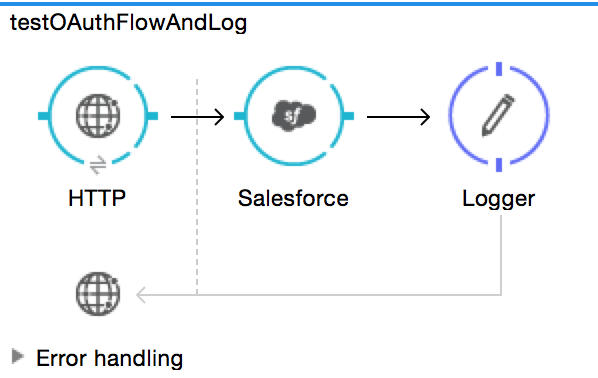
Add a Logger element to your flow after the connector set to the authorization operation. If the connector is not yet authorized, Mule delays execution of the logger until it receives a callback. On the other hand, if the user has already been authorized in a previous request and the connector already has its TokenId, then Mule continues flow execution and the logger executes immediately, rather than waiting for the callback.
Studio Visual Editor
-
Drag a Logger message processor from the palette to the canvas and place it after the Salesforce connector.
-
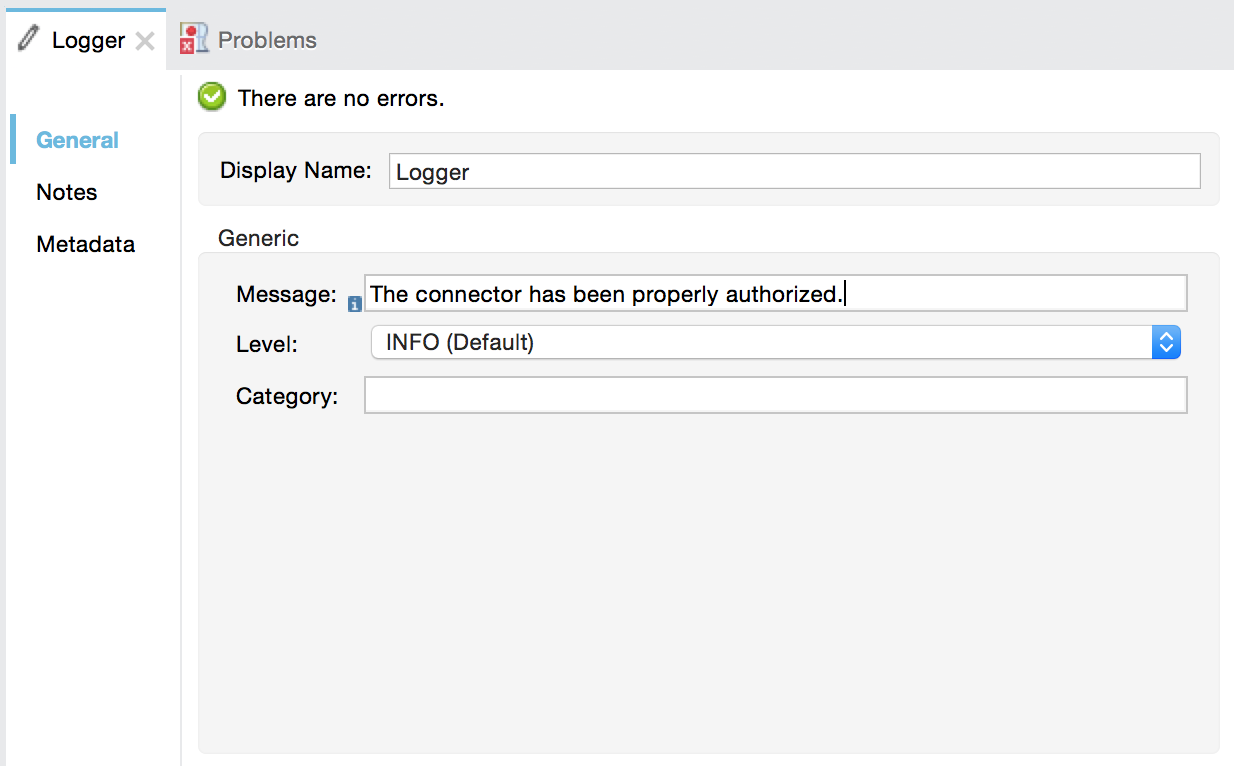
Open the Logger’s properties, then add a message for the Logger to output. For example: "The connector has been properly authorized."
Studio XML Editor or Standalone
-
Add a
loggerelement into your flow, including amessageattribute, the value of which indicates the Logger’s output.
<logger message="The connector has been properly authorized." level="INFO" doc:name="Logger"/>xmlFull Example
<http:listener-config name="HTTP_Listener_Configuration" host="localhost" port="8081"/>
<flow name="OAuthTestFlow1" doc:name="OAuthTestFlow1">
<http:listener config-ref="HTTP_Listener_Configuration" path="/" doc:name="HTTP Connector"/>
<sfdc:authorize config-ref="Salesforce__OAuth_" display="PAGE" accessTokenUrl="https://na1.salesforce.com/services/oauth2/token" authorizationUrl="https://na1.salesforce.com/services/oauth2/authorize"/>
<logger message="The connector has been properly authorized." level="INFO" doc:name="Logger"/>
</flow>xmlManaging OAuth Tokens
Token IDs are stored in an Object Store variable in the Mule environment. Optionally, you can define the name of this variable three different ways:
-
using the connector configuration
name(Default) -
using the expression set as the value of
defaultAccessTokenIdattribute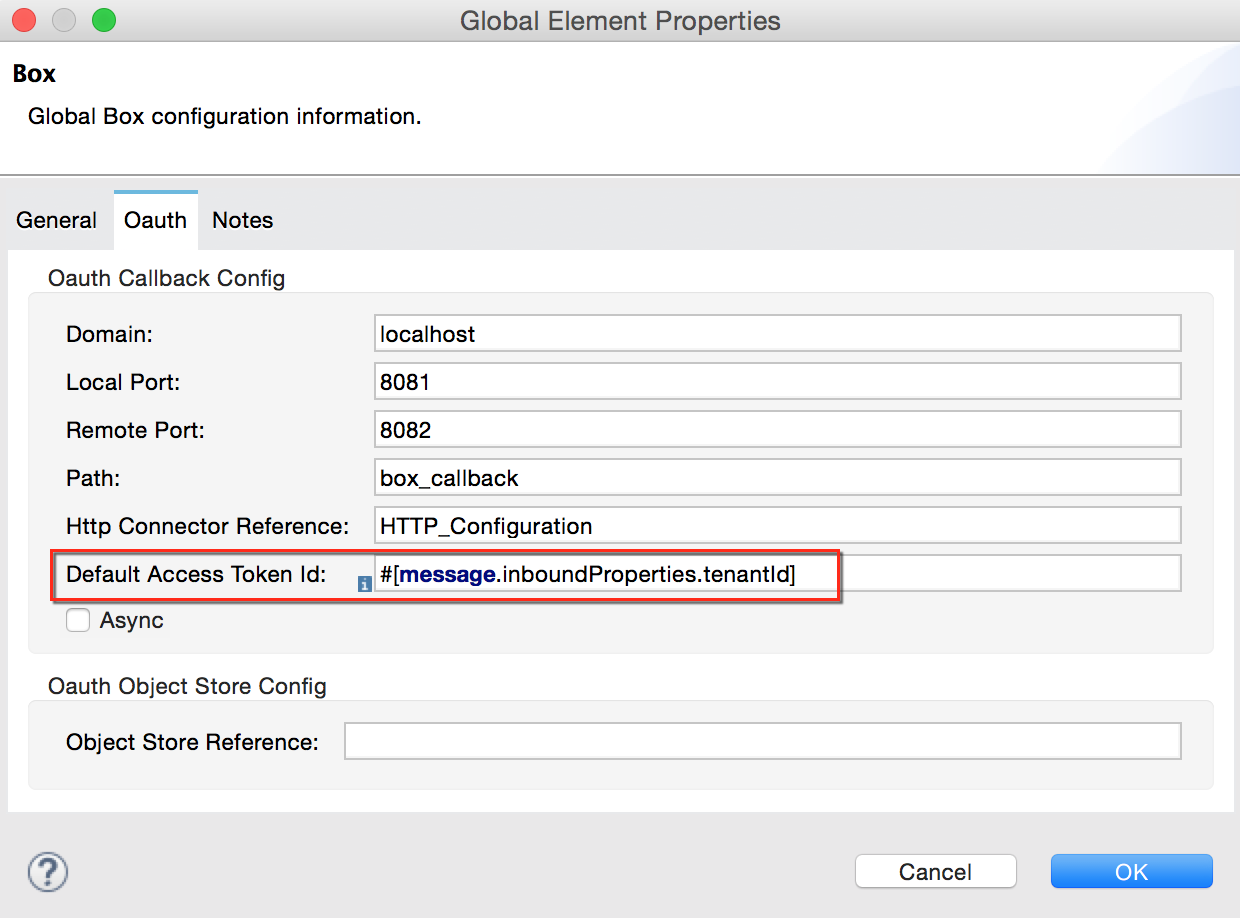
-
using the value of the
accessTokenIdattribute to set an operation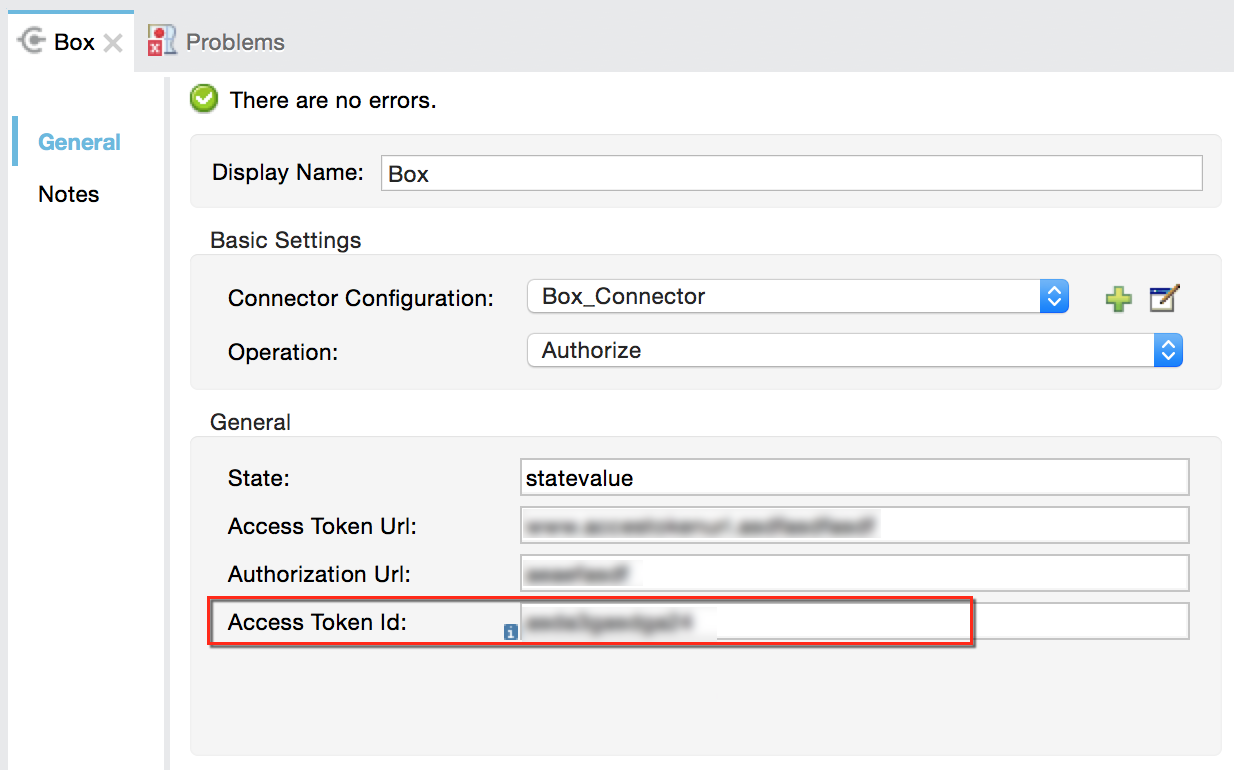
The following list explains each of these behaviors.
-
Mule uses the connector’s configuration name by default. If your configuration looks like the example below, the Object Store variable that keeps track of Token IDs also uses the name Box_Connector. This functionality is available whether running on CloudHub, or in single-tenant mode on premises.
<box:config name="Box_Connector" clientId="123" clientSecret="123" doc:name="Box" > <box:oauth-callback-config domain="localhost" localPort="8081" path="box_callback" remotePort="8082"/> </box:config> <flow name="BoxOauthFlow"> <http:listener config-ref="HTTP_Listener_Configuration" path="/" doc:name="HTTP"/> <box:authorize config-ref="Box_Connector" doc:name="Box" accessTokenId="asda3gasdga24" accessTokenUrl="accesstokenurl" authorizationUrl="authurl" state="statevalue"/> <box:upload-stream config-ref="Box_Connector" filename="file" doc:name="Box"/> </flow>xmlWhen running on-premises implementations, leaving this variable’s name to its default could lead to token overwriting when multiple users access the service. If you have ten users then you cannot store their ten unique Token IDs under the same variable name. In such a case, you must create new variables for each.
However, this issue does not manifest when running in multitenant mode on CloudHub. In CloudHub, each tenant gets its own separate Object Store partition which is completely unaccessible for other tenants. For example, if you have ten customers, those ten tokens are in different partitions of the Object Store and so keys don’t overlap.
-
If you set the
defaultAccessTokenIdparameter in the connector configuration, Mule uses its value. You can set this parameter to an expression to avoid overwriting the Token ID.Studio Visual Editor
XML Editor
<box:config name="Box_Connector" clientId="123" clientSecret="123" doc:name="Box" > <box:oauth-callback-config domain="localhost" localPort="8081" path="box_callback" remotePort="8082" defaultAccessTokenId="#[message.inboundProperties.tenantId]" connector-ref="HTTP_Configuration"/> </box:config> <flow name="flow1"> <box:authorize /> <box:upload-stream /> </flow>xml -
Set an operation in an
accessTokenIdattribute to override everything else for this operation. Keep in mind that this attribute only affects the current operation; other operations for the same connector use the default operation unless otherwise specified.<flow name="flow1"> <box:authorize accessTokenId="#[flowVars.myTenantId]"/> <box:upload-stream accessTokenId="#[flowVars.myTenantId]"/> </flow>xml