Manage Schedulers
You can use Runtime Manager to view and control the Scheduler components within the flows in your deployed applications. Use the Schedulers tab in the navigation menu to enable or disable Scheduler elements, change the frequency, or run the scheduled job immediately, all without changing the running application.
From the Schedulers tab, you can:
-
Enable or disable the Scheduler
-
Change the frequency
-
Specify when to start running the Scheduler
-
Specify the timezone for a cron Scheduler
| You can’t set a timezone for a scheduler running on CloudHub or Government Cloud. |
Runtime Manager lists the name of each Scheduler component as polling://{flow_name}.
Use Cases
Schedule management is useful in the following contexts:
-
You want to change the schedulers in your application at runtime without redeploying.
-
You want to disable a scheduled job while one of the applications you are connecting to is undergoing maintenance.
-
You want runtime visibility into the schedulers in your application.
Considerations and Limitations
When using the Schedulers tab, consider the following:
-
If a scheduled job is not triggered because the application is not running, Runtime Manager triggers the job as soon as the application restarts.
-
The scheduler reads the job configuration every time it runs.
To apply your changes immediately, run your jobs manually after updating the schedule.
View and Manage Application Schedulers in Runtime Manager
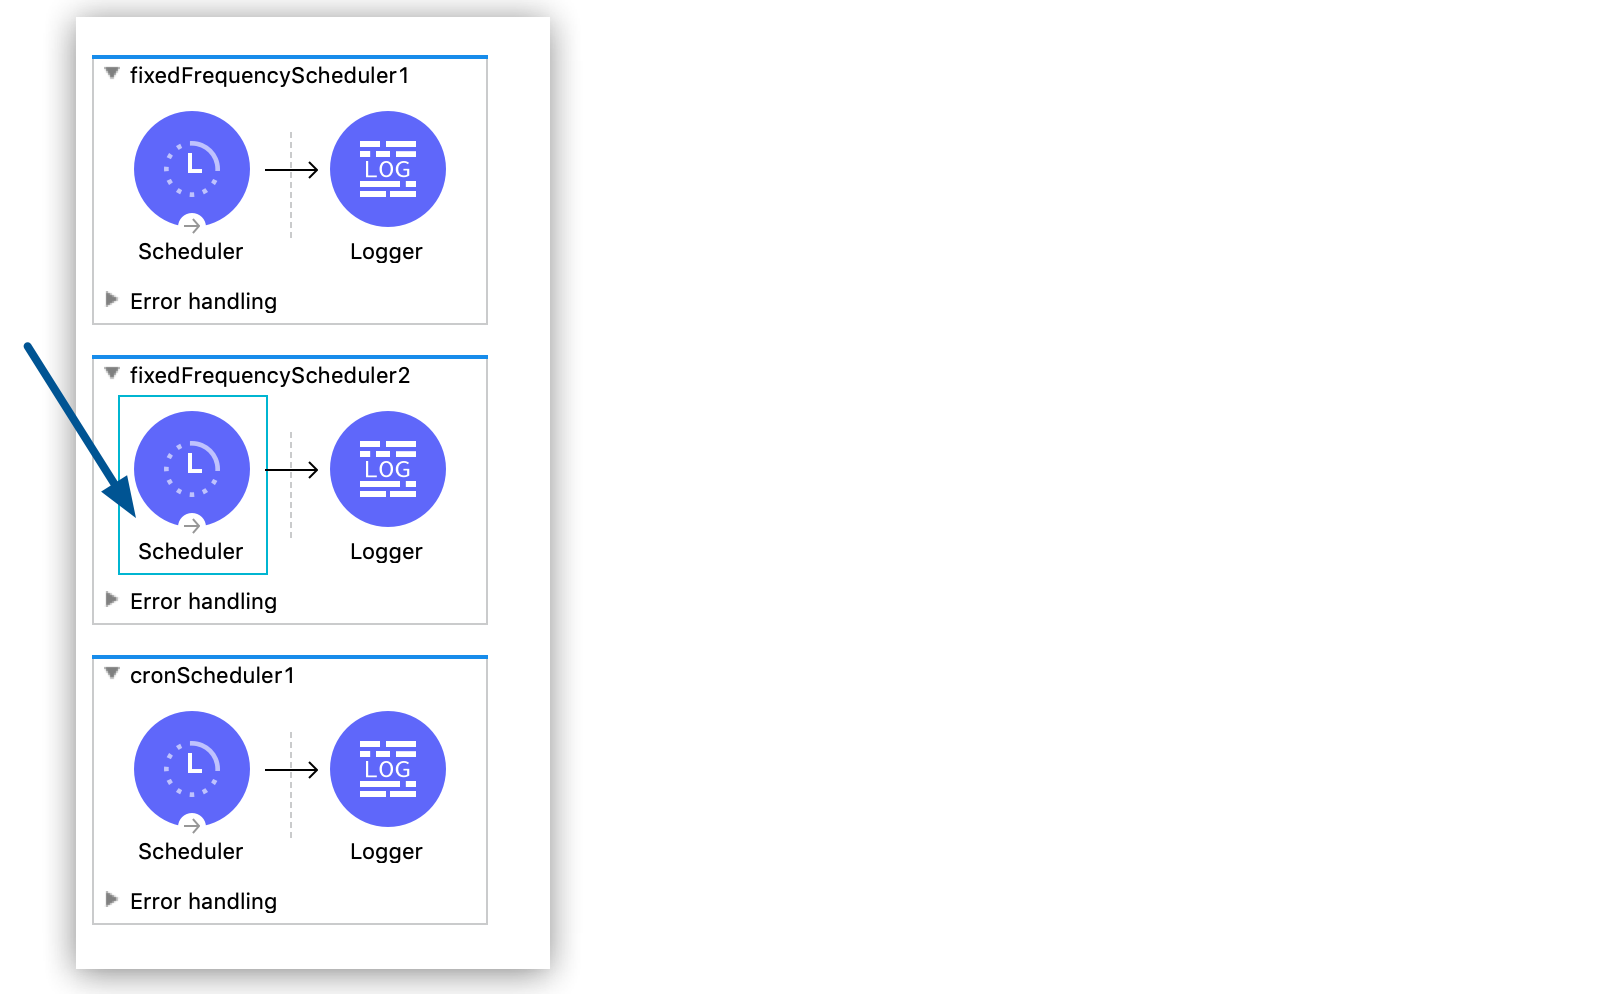
To use the scheduling feature in Runtime Manager, deploy an application that includes one or more Scheduler elements:
After deploying the app, view and manage the Scheduler elements in Runtime Manager:
-
Click Applications in the left pane, click the app name, and then click Schedulers:
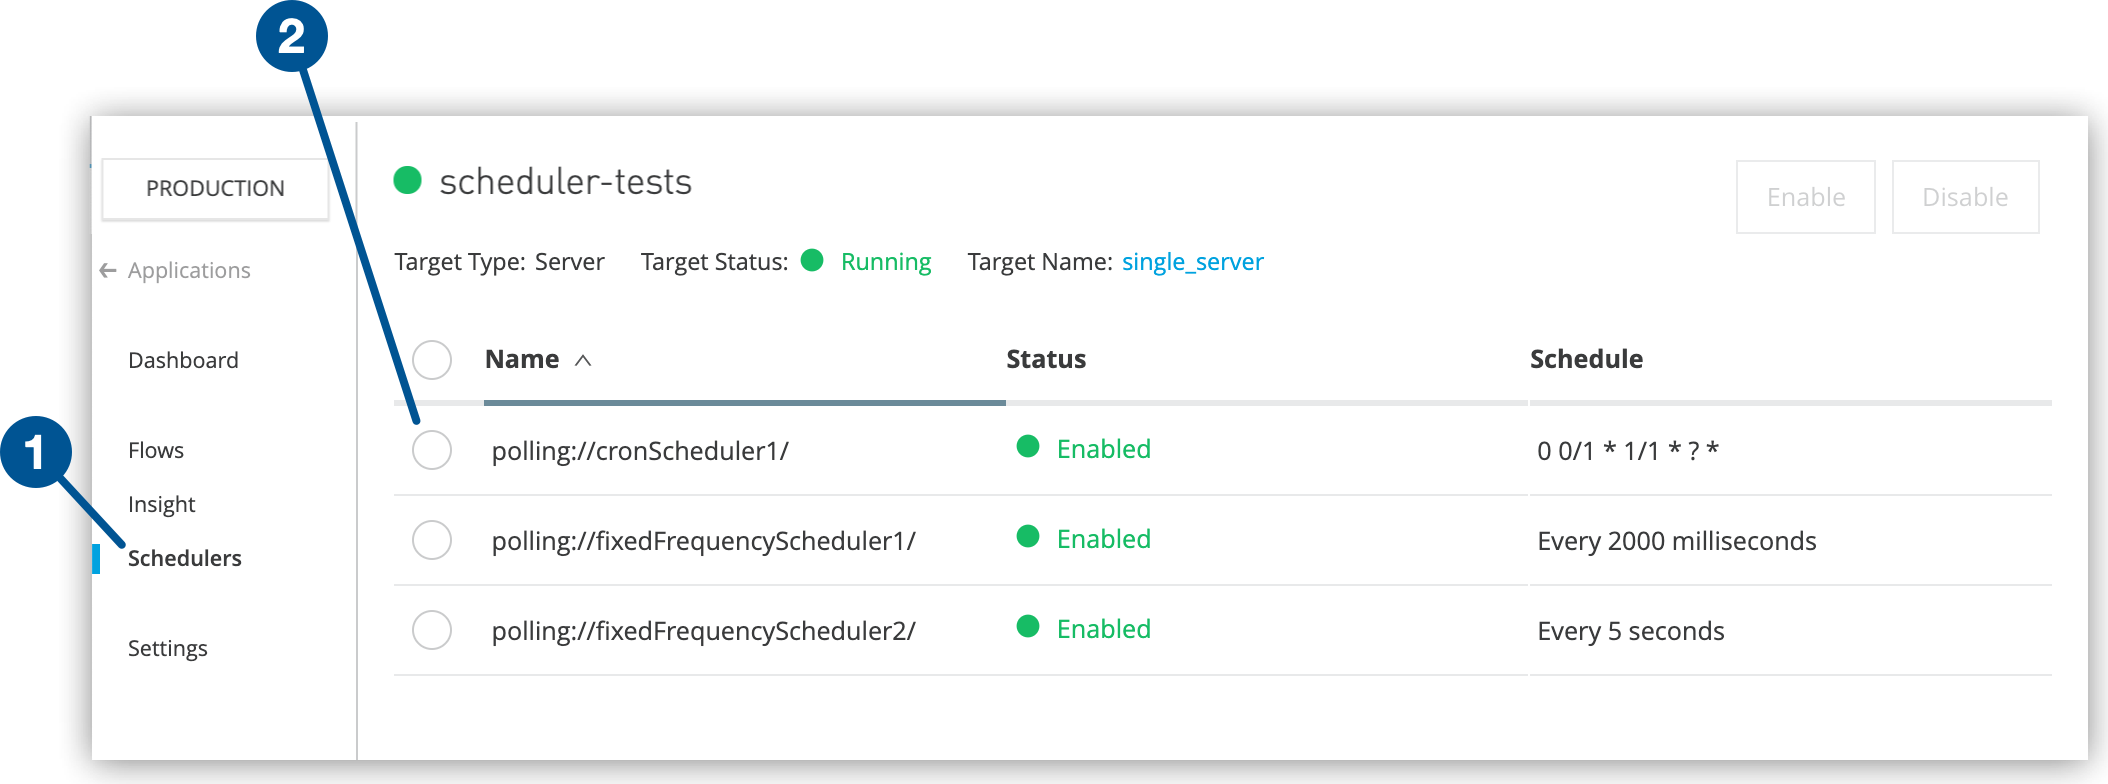 Figure 2. The screenshot shows (1) the Schedulers option and (2) the checkbox on the Schedulers page.
The Name column shows the name of the flow that contains the Scheduler element.
Runtime Manager lists the Scheduler elements in the order that they appear in your application:
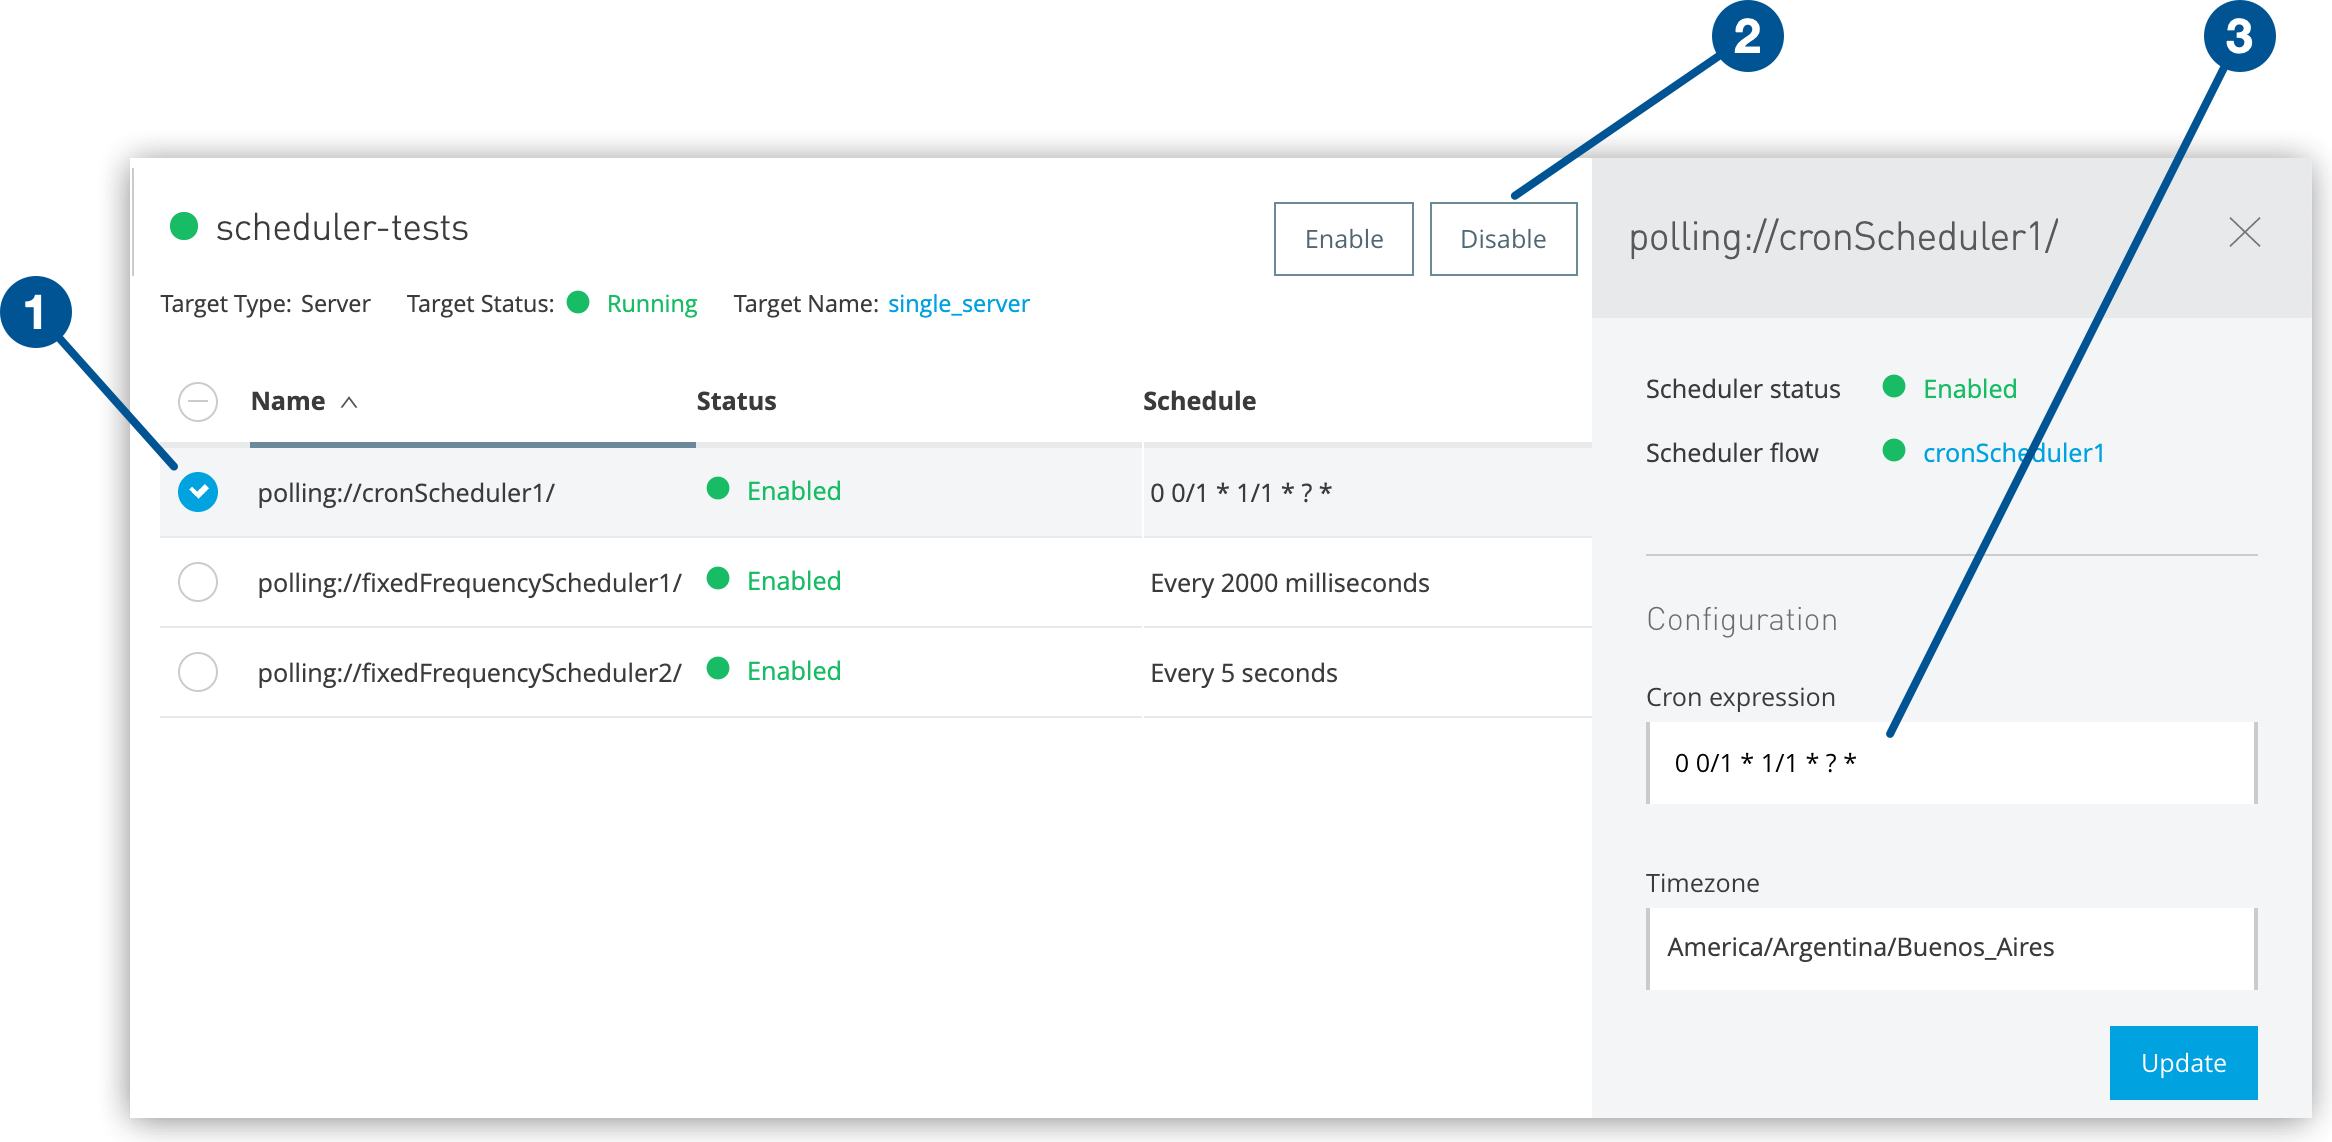 Figure 3. The screenshot shows (1) the checkbox, (2) the Disable button, and (3) the schedule in the details pane.
 -
Enable one or more schedulers by selecting checkboxes and clicking Enable.
-
Update a cron Scheduler by selecting a single checkbox and updating the schedule configuration in the details pane:
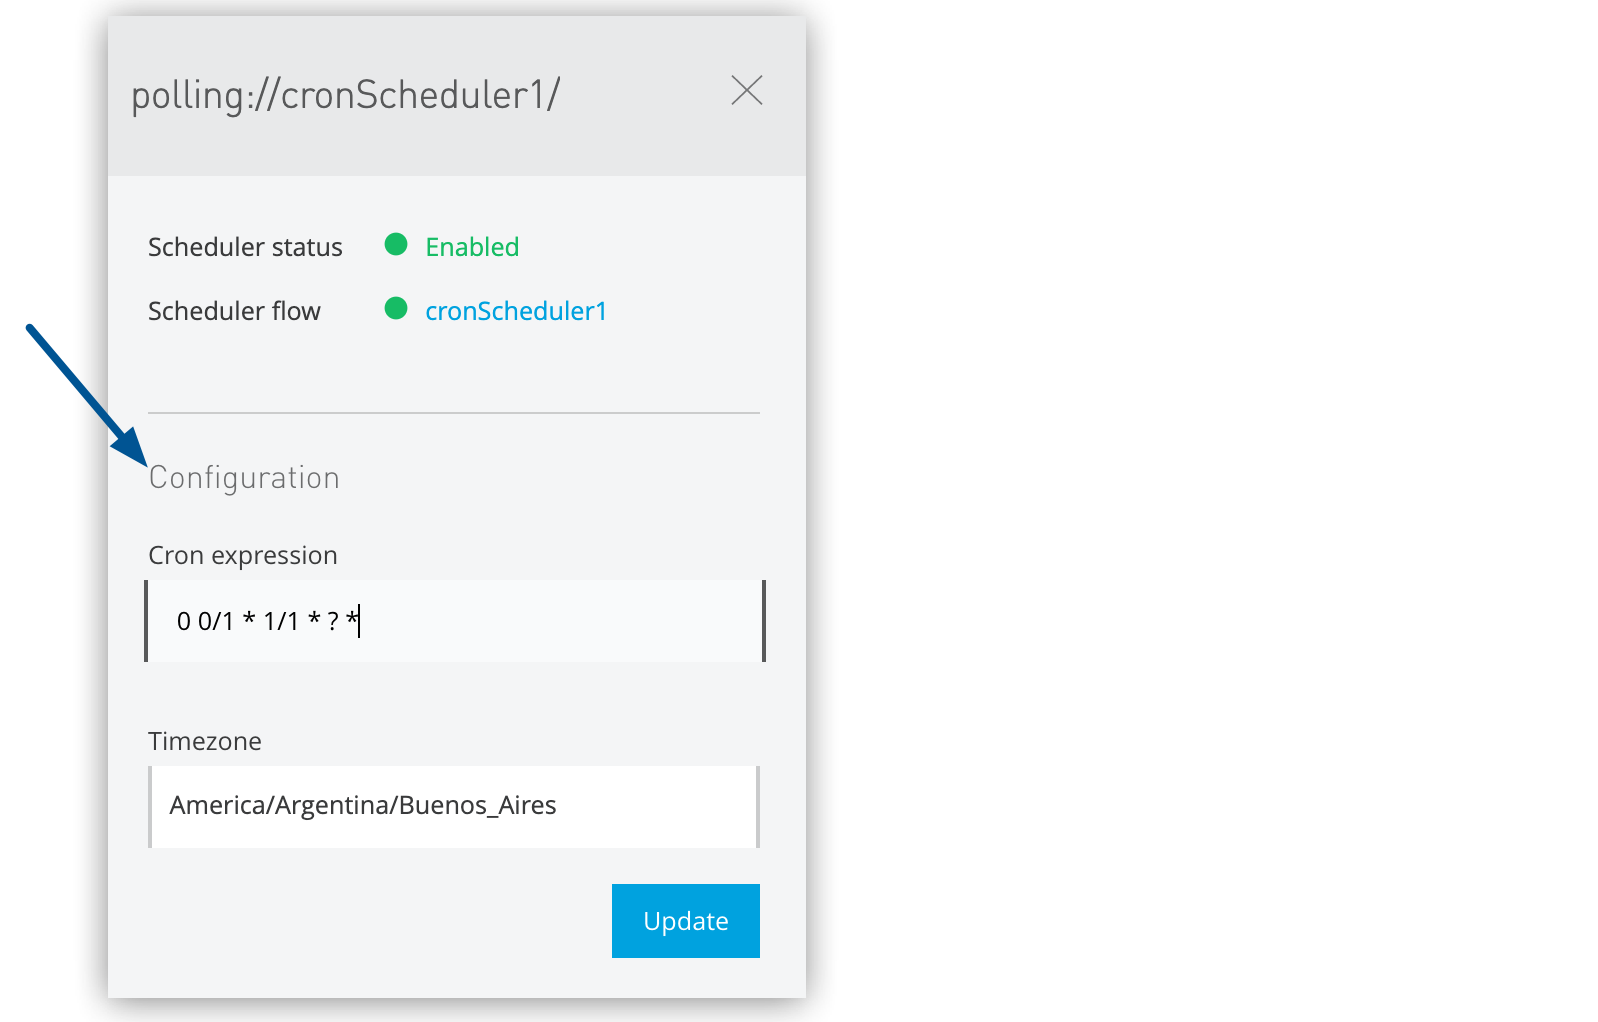 Figure 4. The arrow shows the cron schedule configuration in the details pane.
 -
Update a fixed-frequency Scheduler by selecting a single checkbox and updating the schedule configuration in the details pane:
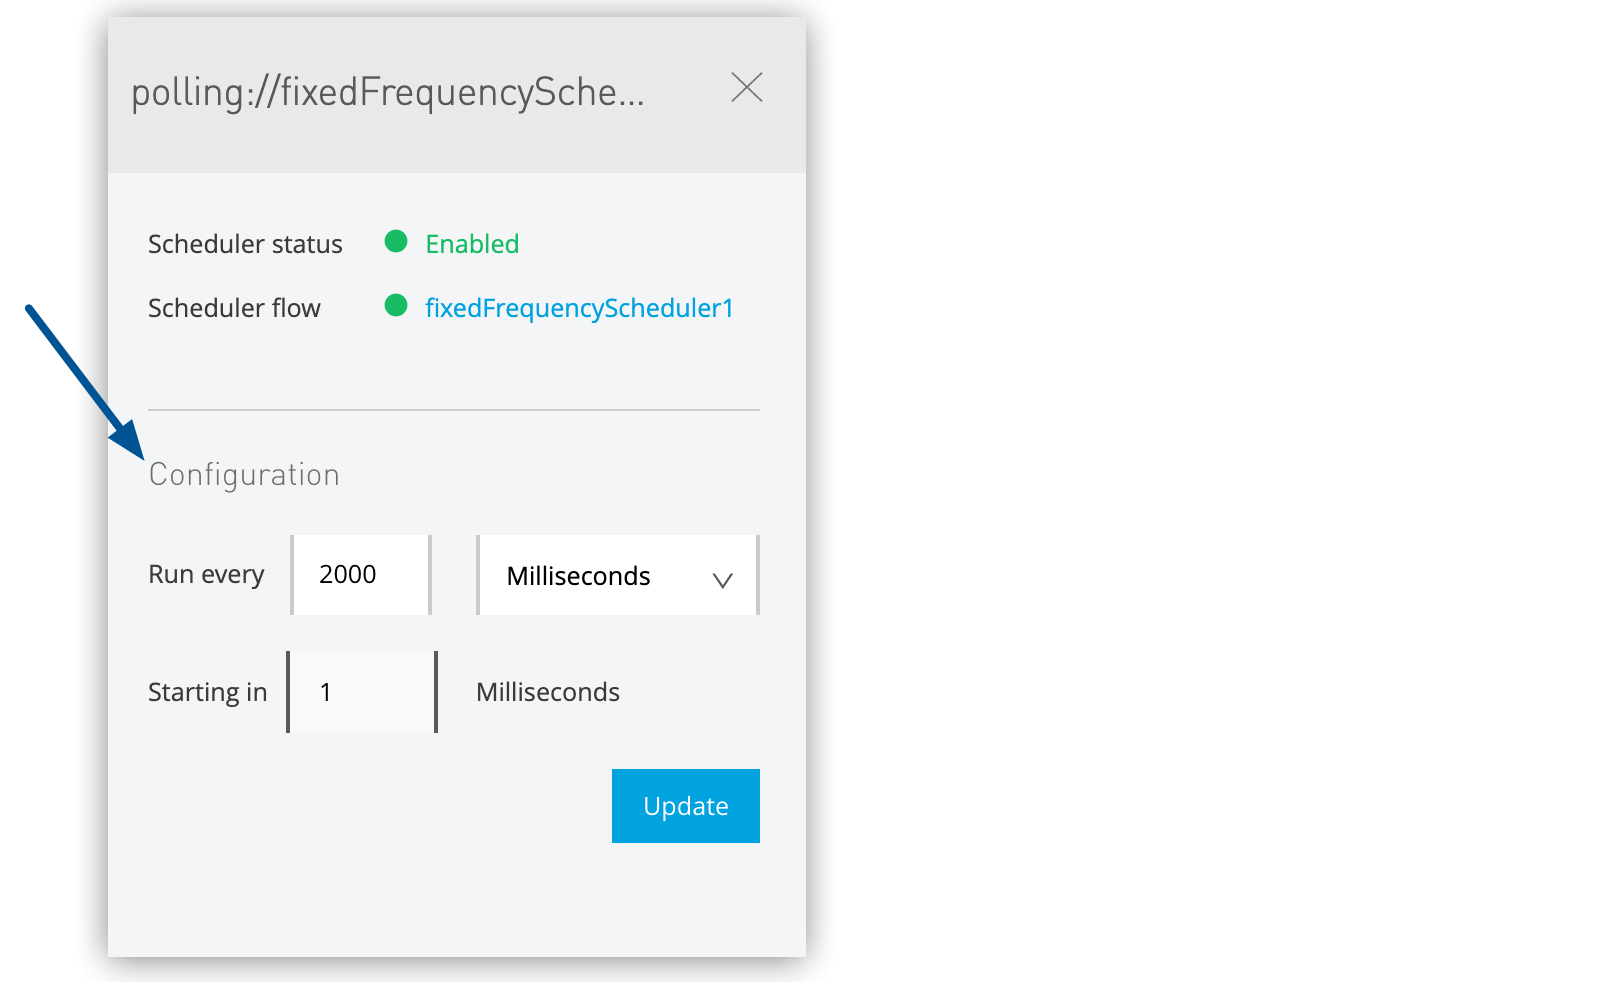 Figure 5. The arrow shows the fixed-frequency schedule configuration in the details pane.
 -
Disable one or more schedulers by selecting checkboxes and clicking Disable.
-
Click Update to save changed settings.