Installing and Configuring RPA Builder
After downloading and installing RPA Builder, configure the connection with RPA Manager and configure the necessary system parameters in your Windows installation to improve the overall performance of your system and improve text recognition features. You can also customize the RPA Builder UI to match your preferences.
Download and Install RPA Builder
-
Download the latest RPA Builder installer from the Home page of RPA Manager.
-
Right-click the installer file and select Run as Administrator.
-
Continue the installation process until it finishes.
-
Ensure you have the required privileges assigned in RPA Manager.
See Assign Privileges to a Users for instructions. If you are in doubt, contact your organization’s RPA administrator.
Connect RPA Builder with RPA Manager
After opening RPA Builder for the first time, configure the connection with RPA Manager:
-
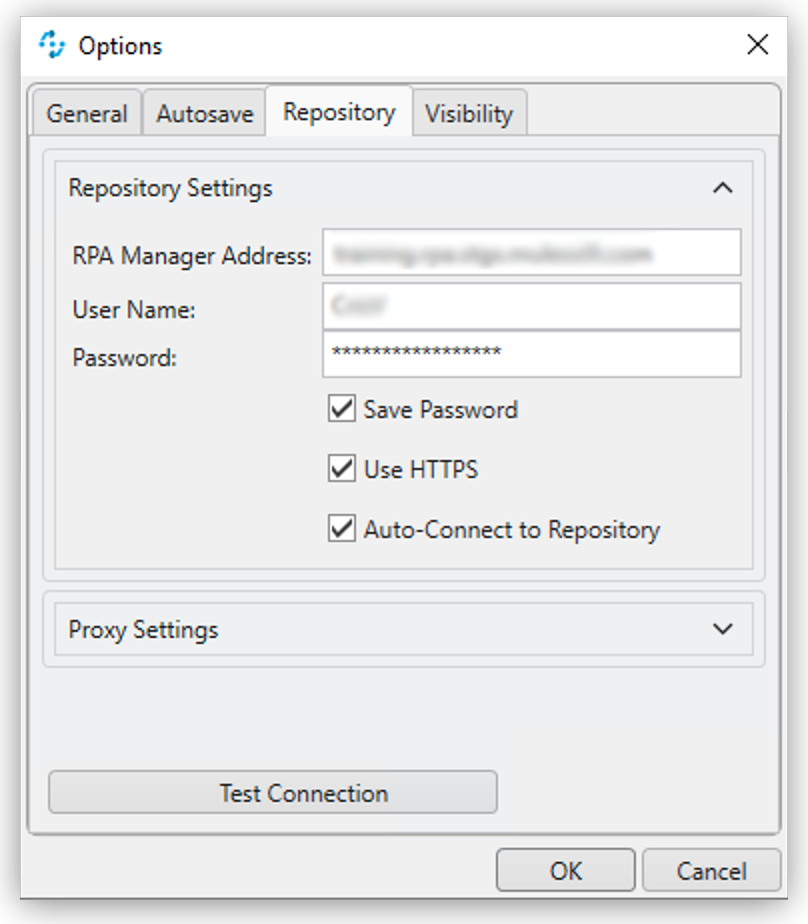
In the top menu bar, select Options > Repository.
-
Configure the required values:
-
RPA Manager Address
The URL of the RPA Manager instance RPA Builder connects to. Do not specify the protocol (
https://) as part of this value. -
User Name
The RPA Manager user name that RPA Builder uses to log in.
-
Password
The RPA Manager password that RPA Builder uses to log in.
-
Proxy Settings
Configure your proxy settings if you access the internet through a proxy.
-
-
Click Test Connection and confirm that the login succeeds.
If the login attempt fails, verify the provided details and try again.
-
Click OK.